Yum Peaceful Cooking: 2009

Wednesday, December 30, 2009

Vanilla Latte Butter Cream Frosting


Hell...thats one long-ass name for a frosting. Let's just call it Out Of This World Good!

When all was said and done and every cupcake was frosted, I had some leftover. It was not uncommon to see me perched in front of the computer with my make-shift icing bag in hand as I sucked it out of the bag.

Seriously....that good!!

My sister told me about the recipe and recited it to me over the phone. If my ever failing horrible memory serves me correctly, I believe she got the recipe from her Southern Living magazine.

I need a subscription to that baby!

I think the only change I did was to use 2 tablespoons of instant coffee because the recipe called for 1 tablespoon of instant espresso. My grocery store didn't have it....so I bought instant coffee instead.

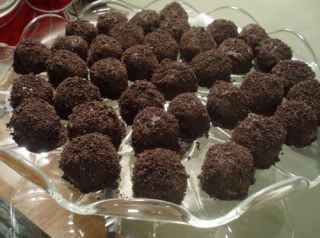
And what did I do with this incredible frosting? I used it to ice cupcakes for the holiday party at work. I made German Chocolate cupcakes with 2 heaping teaspoons of instant coffee added to the water that the box mix called for.


I knoooow...I used a box mix!! The horror of it all!!

But in my defense...

1. Box mixes taste really good
2. I was pressed for time
3. I was being lazy
4. It's what I chose to do...so there!

So...I mixed up the cake mix. The coffee addition was more of a flavor enhancement then an additional flavor. I decided to make mini cupcakes. Easy pickings at a party. 2 bites and your done. Grab one on your way past the dessert table and before you sit down at your table, it's gone. And know has to know you ate one. Guilt free.

I bought those mini muffin pans with the liners. I already have the pans but I couldn't find the liners at the store. They only came as a "kit".... aluminum muffin pan and liners. But you know what? Bed, Bath and Beyond sells them.

Found that out after the fact.

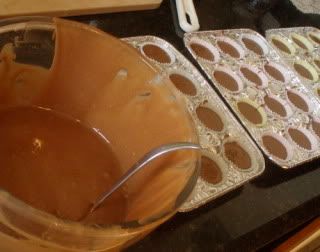
Anyways....I had enough liners to make 3 dozen cupcakes. Cool. I got out my little mini ladle and started filling them up


And filling and filling and trying not to drip and make a mess. Once they were all full, I couldn't believe how much cake batter I still had left!


There was actually enough to make 9 full sized cupcakes (that I left at home, much to the girls delight)!

I baked the little mini's for about 17 minutes....in a hot oven (whatever the box said to do...I forget). I did the toothpick test every minute after the first 13 minutes. I did not want dry cupcakes.


(I think just about every cupcake has a toothpick hole in it for all the testing I did)

After those little boogers cooled, I started with the icing:


1/2 cup Softened Butter
3 tsp. Vanilla Extract
1/8 tsp. salt
1 lb. powdered sugar
3 - 5 tablespoons milk
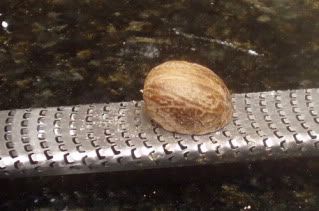
2 tablespoons instant coffee

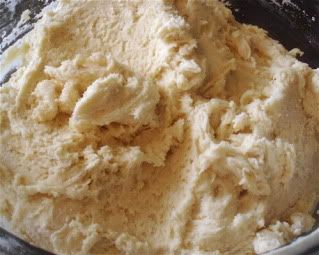
Beat together your butter, vanilla, coffee and salt until nice and creamy


Can you smell the coffee?

Gradually add the sugar and milk, alternating between the two....1/3 of the sugar,


1 tablespoon of milk, 2nd third of the sugar, 1 tablespoon of milk...etc.


Do not add more than 3 tablespoons of the milk until everything is incorporated. If the icing is too thick, then add a little more milk until you get your desired thickness. I personally did not need to add any additional milk


I don't have an icing bag. I got out a zip lock baggy...trimmed the corner off a little and stuck an icing tip in there...filled the bag with icing and piped away.

btw....this is the first time I've ever piped icing onto a cupcake. I did have a few casualties that needed to be cleaned up and re-done. But all in all it was pretty fun.


Look how cute!

I should tell you that the coffee aroma from this icing is enough to make your mouth water. Besides cream cheese frosting....this is the most incredible icing I've ever had. Hands down!

Oh...if I hadn't made the cupcakes for a work function, I would've added kahlua to the german chocolate cake mix instead of coffee.

Would be worth another round in my opinion.

ya, I know.....just an excuse to make more icing.

I want to take a moment to thank you all for your visits and comments. It means the world to me. There is just something so special about good food and wonderful people that our blogging world brings together. I have learned so much from you all this past year and look forward to more; learning, cooking, eating, sharing and enjoying.


I wish you all a most wonderful, safe, and prosperous year to come.


Happy New Year! 

Monday, December 28, 2009

Shabby Chic Oreo Truffles


I have to say...Oreo's are one of my most favorite cookie. My preference is those double stuff ones....dipped in whole fat milk.

Yes, whole fat. And yes, it makes a different.

Why? Because for some scientific reason, the cookie soaks up that milk perfectly. Low fat and no fat....just doesn't do it.

Kinda like how melted margarine is not good on popcorn. You gotta use the real stuff. Have you ever noticed that? Margarine makes the popcorn shrivel. Sorta reminds me of how cold water.....errr...well, never mind.

Anyways....I kinda like these truffles. Its a nice way to dress up a a cookie. Make them more adult and fancy. And if you really wanna dress 'em up, say....for New Years...how cool would these babies look in melted white chocolate (which isn't really chocolate, but you know what I mean)...with the crumbs sprinkled over. They'd fit in perfectly with your Black Tie Affair, don't you think?

And speaking of black and white....funny how I decided to make this first picture...the ingredient picture, black and white. You see....the color and lighting just didn't work. No matter how much I messed with settings....it just looked like crap.

So I decided to screw the color and make it simple.


(from now on, if you see a black and white photo on my blog, it's either cuz the pic sucked or I'm being "artsy"...HAHAHA ya riiiight)

btw...I got this recipe from the ----->HERE<------ but I'm sure you've seen it many a time all over the place.

1 pkg. Oreo Cookies (I'm sure you can use any brand of chocolate sandwich cookies)
8 oz. cream cheese, at room temperature
16 oz semi-sweet chocolate, melted (don't melt it in the beginning....wait until you're ready to use it)


Put all those lovely cookies into your food processor and grind away until you have a bunch of crumbs.


Combine 3 cups of the crumbs with the cream cheese. I found that its easier if you mix in 1 cup first, and get it all incorporated then add the rest


Once it's all mixed up (and it looks like a big wad of black chocolate stuff), form into 1" balls and place them onto a cookie sheet that has been lined with wax paper or parchment paper.


At this point, I put them into the fridge. It helps to have them firm before dipping them into melted chocolate, which you are going to be preparing now.

Once the chocolate is melted (follow the instructions on the chocolate package or whatever method you normally use). One at a time, dip the balls into the chocolate


Roll it around to get the ball all coated and then fish it out with a fork


Let the excess chocolate drip and scrape the bottom of the fork on the edge of the bowl to remove as much as you can


The goal is to have as small of a "foot" as possible on the wax paper. The "foot" is the chocolate that has slid off the truffle before it has fully cooled and puddled around the ball. Big feet are ugly, are they not? Ya ya I know...you men have a different theory about foot size but that does not apply to truffles, so hush.

Place the truffles back onto your wax / parchment lined cookie sheet


Sad part is...this is when it's really obvious at how good (or bad) you are at making nicely shaped balls.

Ok, now you still have some cookie crumbs left, right?


Take them and sprinkle (or in my case, dump them) all over the balls


Place the whole tray back into the fridge for at least 1 hour before serving


I made these for the Holiday Party at work. I was kinda nervous cuz these truffles are super sweet and really rich. I made a little over 3 dozen truffles and not one was left on the dessert table by the end of the evening.

Oh, and you will have some leftover melted chocolate. Don't throw it away....you know what you can do with it?

(besides that!)

Place it in a tightly covered container and store it at room temperature until you decide.


Thursday, December 24, 2009

Eggnog Kringla


Kringla? "What's a Kringla?" you ask. It's a cookie. I don't know a whole lot about it other than it's in the shape of a pretzel, its a tradition in Norway and they're really really good!

Last year during the holidays we had a "challenge" over at BakeSpace.com. It wasn't a difficult challenge...just a fun one. We had to bake a family traditional holiday cookie. Well, mom is not and has never been a baker. I don't remember having a traditional cookie during the holidays. I really wanted to participate in the challenge...but how?

I ended up choosing one of the many nationalities that I am and searching for a cookie that was a tradition for that nationality. I came across Eggnog Kringla. hmmm...interesting. Has eggnog in it, and nutmeg. That's pretty festive. Sounds like a fun one to try. If you want to see the original recipe (which I did not change at all, you can click --->HERE<---


So, I just wanted to get this post in before Christmas. Not that anyone will have the time or energy left at this point to make yet another batch of cookies (and this recipe makes a shit load of cookies!!). But they are festive. They have a wonderful eggnog / nutmeg flavor thats not over powering. They aren't too sweet. They're soft and airy and are great with a nice cup of coffee or tea.


4 cups of all purpose flour
1 tsp. baking powder
1/2 tsp. baking soda
1/2 tsp. ground nutmeg (fresh if you can...its just so nice)
3/4 cup butter (room temperature)
1 1/2 cups sugar
1 egg (room temperature)
1 cup of eggnog (unspiked...although that wouldn't be such a bad thing now that I think of it LOL)
Powdered sugar and ground nutmeg for garnishing

In a large bowl combine the flour, baking powder, baking soda and nutmeg. Set that aside. In another large bowl, beat the butter for about 30 seconds, or until creamy. Add the sugar and continue beating until fluffy. Add the egg and beat until well mixed.

Get the bowl with the flour mixture, and your eggnog. (noooo....don't mix 'em yet). Alternately add eggnog and flour to your butter mixture, while beating.


This but my pour little mixer to the test. This is a very sticky dough...and that pour little thing was working it's butt off. But look what you get


It almost looks like a bunch of vanilla ice cream

Cover the dough with plastic wrap so that no air can get to it and chill for at least 4 hours....over night is best. The dough will still be sticky but not nearly as bad as it is at this point.

In my case....2 days later I pulled out the dough....divided it in half. Put the half that I wasn't going to be working with back into the fridge until I was ready for it. (once this stuff starts warming up, it gets so sticky that you just might start getting a little irritated. or maybe thats cuz it was 10:30pm during the week and I was just a weeeeee bit exhausted)

Preheat the oven to 350'

Lightly flour your surface. Scoop a small amount of dough out....the size of a small meatball maybe? The recipe said 1 tablespoon but honestly, I couldn't see myself digging the dough out of the tablespoon each time. Roll it into a ball


Then roll that ball into an 8" rope.....


I found that if I had too much flour on the counter, my dough slipped and slid everywhere. But no flour and it for sure stuck. I started using a combo of sugar and flour....gave it a little traction I think.

Now....carefully place the rope on an un-greased cookie sheet. Or one lined with parchment paper for easy clean-up. Then you're going to make it into a loop....crossing its arms to create a pretzel shape


The original recipe said to bake them for about 6 - 8 minutes, or until the edges are lightly browned. I found that it took about 8 or 9 minutes....depending on the thickness of the ropes.


You should smell these babies! The nutmeg really shines in this recipe

Cool on a wire rack and while the cookies are still warm, dust with powdered sugar


And run your nutmeg over a zester to sprinkle on top


When they're all done....(makes a good 4 - 6 dozen cookies)....get out your Santa plate cuz I'm sure he'll want a few of these too


I now have a traditional Christmas cookie that I will gladly make each year, they are that good!

Tuesday, December 22, 2009

Pumpkin Cheesecake


Do you like pumpkin pie?

Do you like cheesecake?

Now I'm reminded of that ooold silly Reeses Peanut Butter Cup comercial

Man #1: "Hey! You got your peanut butter in my chocolate"
Man #2: "YOU got your chocolate in my peanut butter"

Well, just goes to show ya.....somethings are not only worth combining, but are a must. Especially when the result is creamy, rich and so mouth watering yummy.


Ok, I have to confess...I'm not a huge pumpkin pie fan. (have I told you that before?) Anyway.....not that it tastes yucky or anything but it just doesn't "wow" me. Cheesecake, I love! So this was a no-brainer for me. You get the total pumpkin flavor with the added richness and texture of cheesecake.

NOTE: Please make this 1 day in advance to allow the cake to set. Otherwise it'll just taste like plain ole pumpkin pie. (not that that's a bad thing.....but what's the point, right?)

I got the recipe 10 or 15 years ago from a family member who lives up in Sacramento. I think she got the recipe from the newspaper? (Sometimes newspapers have such good recipes)

Before I get started....I want to know....since when do they put tire treads on the back side of the graham crackers?


Never mind....what ever. When it comes to crumbs....they all end up looking the same. At least in my eyes. But since it's officially winter (after all, yesterday was the first day of winter)...do you think crumbs are anything like snowflakes? I mean.....if you put them under a microscope, will they all look different the way snowflakes do?

(Don't mind me....I'm in desperate need of coffee. My coffee maker broke on Sunday)

ok....lets work on the crust first. I'm using graham crackers. I've used gingersnaps before but I was seriously afraid for my food processor blades.....those gingersnaps are so hard and it's so loud! I just never could bring myself to go though that again. It tasted good.....but not as fantastic as I thought it would.


Preheat the oven to 350' F.


Sooo.....combine:

1 1/2 cups graham cracker crumbs
1/3 cup sugar
1/3 cup butter, melted


Once it's all evenly coated and moistened from the butter, press into a 9" spring form pan, along the bottom and up the sides a couple of inches.


I use a the bottom of a glass to help out in this area.....it's so much easier.

Now stick it in the oven for about 7 - 8 minutes. Set it aside


For the filling:

2 8oz packs of cream cheese, softened
1 1/4 cups sugar
2 tsp pumpkin pie spice
1/2 tsp salt
4 large eggs, room temp
1 1/4 cup pumpkin puree

Preheat oven 325' F

In a large mixing bowl, combine the cream cheese, sugar, pumpkin pie spice and salt. Beat until creamy. While beating, add 1 egg at a time....


(don't over beat)

Last but not least, beat in the pumpkin and pour into your prepared crust


Now pay attention here....You are going to need a dish...maybe a casserole dish to place on a rack under the pie. In that dish, you will pour 2 cups of water. This will help prevent your cheesecake from cracking.

Soo....place your cheesecake in the over...place your casserole dish with 2 cups of water on a rack underneath.

Here it gets vague.....bake for 1 to 1 1/2 hours, until done.

(this sounds like something my grandmother would tell me)

Mine took 1 hr 15 mins. I don't like the "clean knife" trick for cheesecakes. You end up with a miniature of the San Andreas Fault. So I kinda jiggled it a bit....and when it stops resembling jell-o, I figured it's pretty close to being done.

This time we only had 1 small minor crack along the edge....which quickly disappeared when everything cooled


I hope that if you get a chance to make this, that you like it as much as I do.

Btw...I would've decked it out with some pretty dollops of cool whip, except when ever I have that stuff around, my daughter eats it all. Every time the refrigerator door opens, I hear that tale-tale muffled hissing sound of the cool whip being sprayed into her mouth.

Gee...I wonder where she learned that from?

Saturday, December 19, 2009

They're Blondies, Baby!


Nope...not a single speck of chocolate in these non-brownies. I wonder how the first ever Blondie came to be.

Was it a brunette who ran out of chocolate and decided to go with it anyway?

Or was a blonde who simply forgot to add the chocolate?

Whatever happened, however it happened, boy am I glad. As much as I love chocolate, these things are soooo darned good!

This batch that I recently made was a special request for a very pregnant co-worker. How could I not fulfill such a craving? And also, per her request, I am blogging about them so that she can make some more while she is on her maternity leave (effective immediately). I sure am gonna miss her while she's gone. Especially since I have the privilege of doing her job until she gets back (lord, help me!!).

Clare....this is for you and your baby! (btw, did you ever decide on a name?)

Oh ya....and where did I get this awesome recipe? From BakeSpace's very own version of Alton B., Culinary Alchemist. You gotta love it when you have a cooking bud with the mind of a scientist. He just knows what goes together and why and how.....and comes up with some amazing stuff. His version of Blondies has the optional addition of Heath Toffee Chips, which I have never added. I think it would take it over the top. But thats just my opinion. If you're an "over the top" kind of person...go for it.


What you'll need is:

3/4 cup unsalted butter (don't worry, I've used regular butter before and it's just fine)
1 1/2 cups light brown sugar
1/2 cup dark brow sugar (if you don't have both kinds of brown sugar, just use what you have. (not white sugar though) I've done it and once again, it's just fine)
2 large eggs
1 large egg yolk
1 1/2 tsp vanilla extract
2 tsp baking powder
1 1/4 cups all purpose flour
1 tsp salt
1 cup chopped pecans

Preheat your oven to 350'

Get out a 13x9 casserole dish and line it with parchment paper. Yes, go out and purchase parchment paper (I'm talking to you Clare!!). It will make your life so much easier. Trust me.


In a sauce pan, melt your butter. Then add all of the brown sugar.


Stir it all together and keep stirring, over a medium heat, until everything is all melted and smooth. This will take a couple of minutes and it will start to resemble caramel


You might be tempted to dip your finger in there cuz it looks so good. But don't. It's really hot! (been there, done that).

Take the pan off the burner. If your counter is slippery, set the pan on a towel so it won't slide.

In a small bowl, whisk together the eggs, the egg yolk, and vanilla


Now....I couldn't take a picture of this next step because if I paused in my stirring, my egg mixture would've tuned into scrambled eggs. No one wants scrambled eggs in their blondies. Right? What you're gonna do is, add a small amount of the eggs to the melted brown sugar (which is still hot!), while quickly whisking it in before it "cooks" thus keeping it from scrambling. Then add another small amount, while whisking and then adding more and whisking all the while, until all the egg mixture is whisked into the brown sugar.


Is your arm tired yet? Bummer cuz you have a little more stirring to go. Not much. We're almost done so don't worry.

Now combine your flour, baking powder and salt in a small bowl. Stir the flour into your brown sugar mixture


Then you're going to stir in the pecans


Once it's all mixed together, pour it into your parchment paper lined dish


Spread it around as best you can so that it's all even


Bake for about 35-40 minutes. I tend to go more towards the 40 minute mark. Don't stress over it. It's not going to burn or anything. Oh, but if you're using a dark pan, you'll want to add an additional 5 minutes to the baking time. (don't ask me why, I'm not the scientist)

Once it's done, remove from the oven and set the pan on a cooling rack. Give it time to cool and set before you attempt to remove it or start cutting it into squares.


But look....when that's all done, it's soooo easy to remove it from the pan! Just life the edges of the parchment paper and it comes out....easy peasy


Peel the paper away and start slicing.


Now tell me you wouldn't want one of those! (or 2 or 5).

Clare....don't go crazy on these things. I don't want your dr. all pissed off at me! LOL