Yum Peaceful Cooking: April 2012

Sunday, April 29, 2012

Ancho Cream Corn


Thinking back to when I use to cook from the books on my shelf, ideas from phone conversations with family members, and jotted down recipes as they were recited....verses now.... the internet, the blogs, the social media cooking websites and all the people I've "met" and learned from. It's pretty cool. My little cooking world has expanded. I've learned so much over the years. Not only about techniques but about flavors. What goes together, what doesn't, and what does but you'd think shouldn't. I've been exposed to so many new ingredients that I would never have touched or knew what on earth to do with if it weren't for our fun little food world on the net.

And yes....ancho chile is one of them. I'm in love with the ancho chile. Which happens to be the dried version of a poblano (my other love). The addition of either of these forms of chile add such depth to Mexican dishes (or Tex-Mex in this case). It transforms a dish from (lets see...how do I say this without insulting anyone) Americanized taco bell kind of Mexican food to authentic mom and pop hole in the wall Mexican food.

Which brings me to this Ancho Cream Corn. One of many fantastic recipes found in Lisa Fain's cookbook, The Homesick Texan. I love cream corn. I love corn casserole. I love grilled corn. Corn is good. Ancho Cream Corn is better! The ancho chile addition....WOW!! It adds a wonderful smokey flavor that I just can't get enough of. It's not hot...so you other wimps out there (I say "other" because when it comes to heat...I'm a total wimp!) don't have anything to worry about. The ancho flavor just mixes itself into the cream and makes you go "mmmmmm" with every bite as you're digging your spoon in for another.

While this dish only takes a mere 15 minutes to cook....there is some prep work to be done. Not hard work. But rehydrating a dried chile takes some time....about 30 minutes.....soooo, keep this in mind when planning your cooking time line.

Ancho Cream Corn
Printable Version

1 dried ancho chile, stem and seeds removed
4 tablespoons unsalted butter
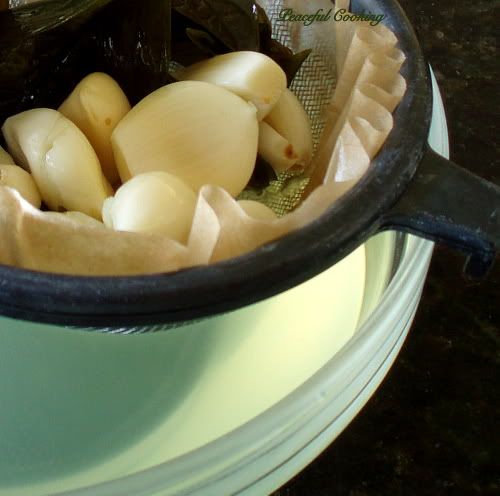
2 cloves garlic, minced (I used 3 cuz I love garlic)
5 cups of corn, fresh or frozen (It took 7 ears of shucked fresh corn for me to get 5 cups)
1 cup heavy cream
4 oz cream cheese
1/4 tsp cumin
1/8 tsp cayenne pepper
1 tablespoon lime juice (about 1 - 2 limes, depending on how juicy they are)
Salt and Pepper to taste
Cotija cheese, crumbled, to garnish (I used queso fresco ranchero cheese)

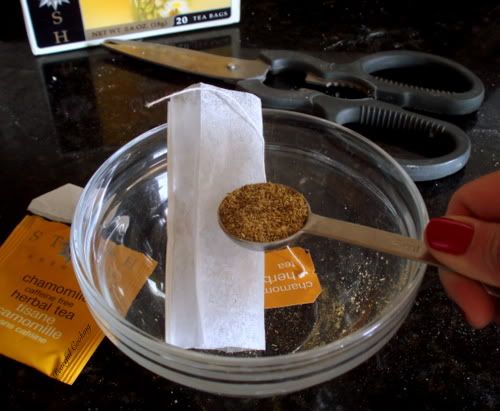
In a hot skillet, no oil....toast the ancho chile for about 10 seconds. Add enough water to cover the chili and bring to a boil. Turn the heat off and let "soak" for about 30 minutes. By this time, the chili should be soft. Rinse the chili and dice. Set aside. (toss the soaking water out)

While the chile is soaking, if you're using fresh corn, this would be a good time to shuck it and cut all those kernels off the cob.

In a large skillet, melt the butter over medium-low heat. Add the garlic and saute for about 1 minute. Add the corn, heavy cream, cream cheese, cumin, cayenne and diced ancho chile. Cook for 15 minutes, stirring occasionally. Add the lime juice and salt and pepper to taste. Garnish with cheese.

And there you have it. a delicious side dish that's easy and quick (after the prep work). You can bet that this dish will be seen this summer on my bbq menu.

Thursday, April 19, 2012

Garlic Basil Infused Vodka


This is a different kind of dirty martini. 

It's the kind you might want to drink on Vampire's Hell Day....a.k.a. National Garlic Day.

(did she say garlic?) Ooooh, yes I did! This martini is perfect for such a day as this. But only if you love garlic (I don't use the term "love" loosely here...you have to really really looooove garlic) and you're not a vampire. And you're not serving this on a first date. And when you drink this martini, I hope every one with you is also drinking it. Otherwise...you might find that you've been abandoned.

Thanks to Heather over at Girlichef.com I was well informed of the fast  approaching National Garlic Day. In time to participate in her garlicy round-up.

National Garlic Day 2012 Button 

 I had just enough time to do a little...infusing. Let's just say, my vodka is healthier than yours. It has to be, right? I mean...a whole bulb of garlic went into this baby. With all the health benefits of garlic, how could my vodka not be healthier?

I'm not going to go into all the health benefits and history of garlic. Let's just get down to business here. 

btw...I found this recipe on About.com 

Garlic Basil Infused Vodka

1 bulb of garlic (bulb...not clove)
2 large sprigs of fresh basil
750 ml premium vodka
32 oz jar with a lid

Separate the cloves of garlic and remove all the skins. Combine the garlic, basil and vodka in the jar. 


Cover and store in a dark place, at room temperature, for 4 days.

On the forth day...it will look something like this......


Not as pretty as the first day....but man, does it smell good!!

Strain it though a coffee filter


Store in a pretty little jar the same way you'd store your regular vodka


I just love that cloudy olivey green shade it has. And the aroma.....YUM!!  The garlic flavor is very strong....which is a good thing in my book. The basil notes are just plain delightful. I think I want to add some to my next batch of marinara sauce. Actually, I have lots of plans for this vampire repelling alcohol. 

P.S. When you strain the garlic and basil from your vodka, save all that garlic. There's still flavor there. I put mine in a little jar....placed them in the fridge and will be using them whenever I think of it. They don't taste like vodka. More like a milder garlic.  I dunno...smell em, taste em...judge for yourself. I just hate the idea of tossing those little nuggets of goodness.

Let's start off with something rather common...a martini. I'll post about my other plans in the feature.

Vampire's Hell Martini

1.5 oz Garlic Basil Infused Vodka
.25 oz Dry Vermouth
Lemon Zest to garnish 
Olive to garnish


Shake or stir the vodka and vermouth with ice. Strain into a martini glass. Garnish with lemon zest and an olive if desired. 


Cheers and good riddance to all those blood sucking vampires out there. Unless you  happen to be a friend of mine. If that's the case, just....don't tell me. And by all means...today, don't bite me.

Saturday, April 14, 2012

Pork Tenderloin Parmesan


Simple, easy, quick and delicious. Perfect for the weekdays. Now I'm not saying this is done in 5 minutes...but it's done in less than 30.

45 if you get distracted a lot.

Pork Tenderloin Parmesan
Printable Version

12 oz pork tenderloin
2 large egg whites
1/4 cup dried bread crumbs (I like to use the Italian style bread crumbs)
1/4 cup grated Parmesan cheese
salt and pepper
3 TB flour
2 TB olive oil (or more if needed)
Lemon wedges
Parsley or cilantro to garnish

Note: the recipe says 1/4 cup of the bread crumbs and Parmesan cheese. I always need more. Just adjust the amount  (in 50/50 measurements) to what works for you.

Slice the tenderloin into 12 equal pieces. Place them between plastic wrap and pound them down thin...about 1/8" thick. If you don't have a mallet....use a heavy skillet.


One thing you will notice is that pork tenderloin pounds down a lot quick and easier than chicken.

Set up your station with 3 bowls.

In the first bowl, combine the salt, pepper and flour
In the second bowl, combine the egg whites with 1 tablespoon of water
In the third bowl, combine the bread crumbs and Parmesan cheese

With each piece of pounded meat, dredge in the flour, dip into the egg white mixture then coat with the bread crumb mixture.

In a large skillet, heat up 1 tablespoon of olive oil. Working in batches, saute the breaded "medallions" for about a minute per side.


Ok, so I'm not that picky and didn't get all OCD about the shapes of my "medallions". Which is why I ended up with that cute little heart.  <3

Repeat the cooking process, adding more olive oil as needed until all of your tenderloins are cooked.

Serve with the lemon wedges (for drizzling) and the garnishes of your choice.


This is a Martha Stewart recipe from one of her Everyday Food mini magazines that I found years ago. These little nuggets of pork are one of my favorite ways to prepare pork tenderloin.

Saturday, April 7, 2012

Chamomile Cupcakes with Honey Frosting


Last month...or maybe it was the month before when I was reviewing Joy Wilson's new cookbook, Joy the Baker, these delightful little mini cakes...aka cupcakes were one of the optional assignment recipes. I didn't have the chance to do them at the time but the thought of chamomile cupcakes just wouldn't let me go.

And boy....am I glad. I made them. Ate one. Loved it. Went back for more the next day....and they were gone. I didn't even have a chance to share them at work.

Yes, they are THAT good. They're earthy and sweet but not your typical cupcake sweet. Oh, and for the frosting...instead of using honey, I used agave syrup.

They taste like cupcakes for grown ups. Perfect for afternoon tea (does anyone really do that?)....a baby shower, wedding shower....any get together would be a great excuse to whip up a batch.

Mini Chamomile Cakes with Honey Frosting
Printable Version

Cake:
1/4 cup butter
1 cup all purpose flour
3/4 cup sugar
1 teaspoon baking powder
1/2 teaspoon baking soda
Pinch of salt
3 tablespoons dried chamomile from tea bags *
1/2 cup milk
1 teaspoon vanilla extract

Frosting:
2 cups powdered sugar, sifted
1 tablespoon honey
6 tablespoons heavy cream
pinch of salt

Preheat the oven to 325' (I had issues with this temperature. 350' seems to work better for me)
Line 12 muffin tins with cupcake liners

* Note: For the chamomile...you will need 9 teabags. Each teabag holds 1 teaspoon of tea. 3 teaspoons = 1 tablespoon


In a mixing bowl, (carefully) beat together the butter, flour, sugar, baking powder, baking soda, salt and chamomile. The mixture will be course and crumbly.

Whisk together the milk, egg and vanilla extract. Add half of the milk mixture to the crumbly mixture and beat until incorporated. Add the remaining milk and continue beating for one minute.

Evenly divide the batter between the 12 lined muffin tins. Bake for about 17 - 20 minutes or until a toothpick thats been inserted into the middle comes out clean.

Allow to cool completely before frosting.


While those babies are cooling, make the frosting by whisking together the powdered sugar, honey, cream and salt until smooth.

Once the cakes are cooled, generously spread that icing on. If desired and if you have any teabags left......sprinkle a little in the centers to garnish.


These are so good, I think they belong with the Easter menu.