Yum Peaceful Cooking: Rubs
Showing posts with label Rubs. Show all posts

Friday, November 19, 2010

Toasted Spice Rub and Pomegranate Molasses and Cupcake Camp L.A,

The beginning.....

I promised I'd give you the recipes from my Pom Wonderful Dinner Party.

And I am. And I will.

Just not all at once. Not only would it be just way too much, but I'm super busy this week. Soooo...you're going to get the recipes in bite-sized pieces.

Are you curious as to why I'm so busy this week? Well, even if you're not I'm going to tell you! I'm one of the amateur bakers for an awesome event this Saturday and you're all  invited!


Cupcake Camp L.A. is a charity event to celebrate the 4th birthday of Bakespace.com

If you're in town...please come by. For details click here----->>> Cupcake Camp L.A.

Here are a few other sites to read about this wonderfully sweet event:

LAist
LA Decostified
Culturemob
Marketwire
Events L.A.
Hollywood Chamber

Aaaaaand the list goes on....but check this out! The City of Los Angeles has created a proclamation celebrating Cupcake Camp L.A. It really is cute....you should read it---> Proclamation

Anyways....I'm in the middle of baking 100 cupcakes. And decorating them. And taking them to Cupcake Camp L.A. where they will be shared with those who attend, along with cupcakes from other amateur and professional bakers. It's open to the public, for a small fee (all proceeds go to selected charities) If you're around...come check it out and enjoy some good cupcakes, lots of fun and great people. Ya, I know...it's suppose to rain. I say...that's all the more reason you should come! What more do you need to brighten up a rainy day?!

Soo....now that you know what I've been up to this week...let me share some basic "starter" recipes that I used for my real recipes for the Pom Wonderful Dinner Party.

First, I have a Pomegranate Molasses. This was used in 3 of my recipes and would be great in several others. I didn't make it up or anything....I just did a search and found it on Foodnetwork.com. It's not difficult....just a little time consuming. You have to stay on top of it. The first time I made it...I burnt it. I almost didn't "bother" to try again....but am so glad I did.... it really is worth it.


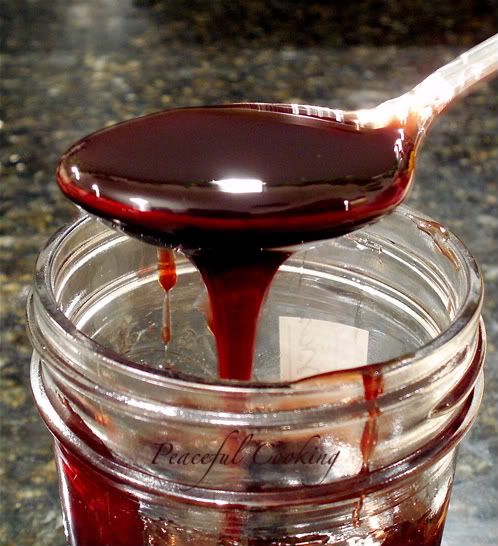
Alton Brown's Pomegranate Molasses

4 cups pomegranate juice
1/2 cup sugar
1 tablespoon fresh lemon juice

Place all ingredients into a saucepan, over medium heat. Cook, stirring occasionally until the sugar has dissolved. Reduce the heat to low and continue cooking and stirring occasionally until the mixture has reduced down to about 1 cup. Be careful toward the end....with the sugars that condensed, it can burn easily. You want the mixture to be the consistency of syrup...it will thicken further as it cools. Remove from heat and allow to cool for about 1/2 hour. Place into a glass jar and let it cool completely. Cover and store in the fridge for up to 6 months.

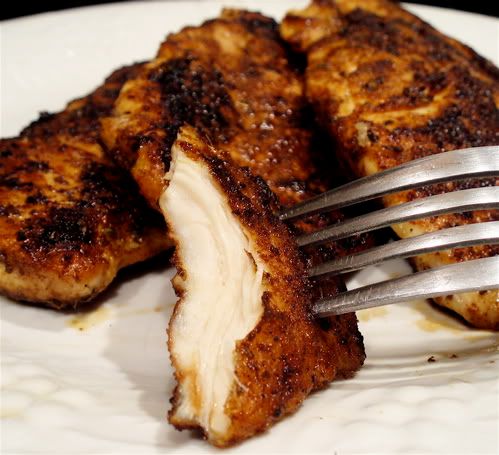
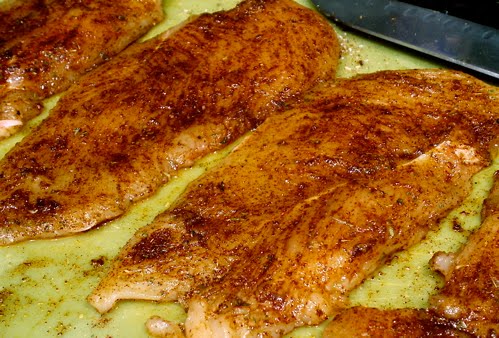
This other recipe is for a rub. I made it quite a while ago but have only used it in soups. Its wonderfully flavorful with lots of depth. Again.... I found this recipe at Foodnetwork.com. It's a Michael Chiarello recipe.


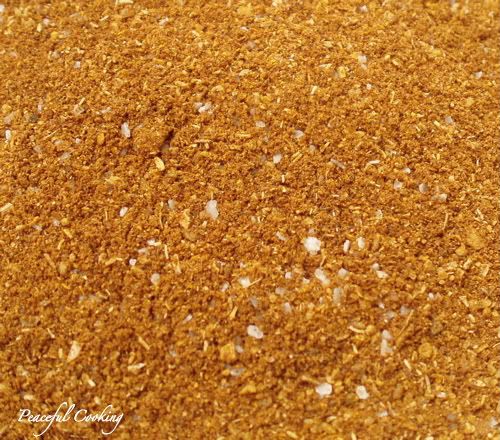
Michael Chiarello's Toasted Spice Rub

1/4 cup fennel seed
1 tablespoon coriander seed
1 tablespoon peppercorn
1 1/2 teaspoons red pepper flakes
1/4 cup California chili powder
2 tablespoons kosher salt
2 tablespoons ground cinnamon

In a small, heavy pan, toast the fennel seeds, coriander seeds, and peppercorns over a medium heat until the fennel seeds are lightly browned. Quickly turn on the exhaust fan and add the red pepper flakes....tossing continuously for a few seconds while the fan is on. Pour the hot spices onto a plate to cool.

I have a coffee grinder specifically for spices. Put the cooled spices into a grinder or blender (if using a blender, go ahead and add the remaining ingredients). Grind until everything is evenly ground. Place in a jar, add remaining ingredients and mix. Keep in a cool, dry place.

And there you have two of the starter recipes that were part of a few of my dishes. Of course these can be done way ahead time. They both add great flavor that you won't want to miss.

Stay tuned for more Pom Wonderful recipes and I hope to see you at Cupcake Camp L.A.

Saturday, October 9, 2010

HBin5 Same Dough, 2 Different Breads


Look at the results of this dough when made into 2 different types of bread. This was even from the same batch of dough.

I think this is one of my favorites from the Healthy Bread in Five Minutes A Day cookbook. It's a simple whole wheat brioche dough with fabulous results. Flavor, crumb...ease of working with....it's just wonderful. I don't know if you can tell in the picture above, the one of the right....I actually achieved what is called a "custard crumb"...its where the surface of the larger holes are shiny and is the result of a perfectly baked high-moisture dough. (wooooo hooooo)

I've learned a few things this week that I will share with you during this post. One is that an instant read thermometer is fantastic and worth every penny. I found one at Target for under $20. It's the kind that has the long cord and the thermometer display and timer sit on the outside of the oven.

Do yourself a favor...if you don't have one, get yourself one.

Breads that do not contain egg in the dough are done when the inside temperature is 205 - 210' F
Breads that contain egg in the dough are done when the inside temperature is 185' F

I also have discovered that I absolutely love what whey does for dough. I love the texture and the flavor that it enhances. I love that I'm using something that would otherwise be tossed out. I'm going to make more cheese just so I can have more whey. (It freezes nicely.)

I'm a little (a week) late on my post for the 20th HBin5 Bread Braid. But Michelle from BigBlackDogs.net (our fearless leader) is sweet enough to let us post when we can, participate when we can and go at our own pace. Btw....we have a whole 'nother year of bread baking ahead of us. It's never too late jump in and join us. We've had several new members join us lately, which is always exciting.

Photobucket

For this Whole Wheat Brioche dough I made some changes to accommodate my personal taste. And because I altered the recipe, I can share it with you :). The original recipe can be found in the Healthy Bread in Five Minutes A Day cookbook  on page 275

This recipe is for a whole batch, which is stored in your refrigerator for up to 5 days and used as desired. For the full instructions, tips and techniques on how to work the no-knead dough visit the authors Jeff Hertzberg, M.D., and Zoe Francois at their website Artisan Bread In Five

2 cups white whole wheat flour
5 cups all purpose flour, unbleached
1 1/2 tablespoons yeast
1 tablespoon salt
1/4 cup vital wheat gluten
2 1/4 cups lukewarm whey (or water)
3/4 cup melted unsalted butter or other oil that does not have a flavor
3/4 cup honey
3 1/2 tsp barley malt syrup
5 lg eggs

In a very large container, whisk together the dry ingredients. In a medium bowl combine the remaining ingredients.

Using a spoon, mix the wet ingredients into the dry ingredients. Do no knead.

Cover with a loose lid and let sit on the counter for 2 hours


That's a LOT of dough. Just to give you an idea...that container there holds 23 cups.

With this batch I made Honey Caramel Sticky Nut Buns and two loaves of Spicy Paprika Challah loaves.

Honey Caramel Sticky Nut Buns
1 1/2 pounds of prepared dough
1/2 cup honey
1/2 brown sugar
1/2 tsp salt
1/2 tsp cinnamon
1/4 tsp nutmeg
1/2 cup unsalted butter, softened
1/2 teaspoon orange zest (optional)
1 cup chopped pecans (or walnuts)
1 cup raisins (craisins would be nice too)

Combine the honey, brown sugar, salt, cinnamon, nutmeg, butter and orange zest until creamy. Scoop and spread half of the mixture in the bottom of a cake pan. If you have something a little bigger, go for it. It gets real "squishy" in that pan.

Work the dough into a ball quickly, then roll into a rectangle about 1/4" - 1/8" thick. Spread the remaining honey mixture over the dough then sprinkle with the nuts and raisins. Roll it up starting on one of the short ends and seal the seam by pinching it, as best as you can. Cut into 8 equal segments.


Arrange the segments in the prepared cake pan. Loosely cover with plastic wrap and allow to rest for an hour.

30 minutes before baking time, preheat the oven to 350'F. Once the rest time is over, bake for 30 minutes or until golden brown. Run a knife along the edge of the pan to loosen the bread, place a large plate over the top and quickly, carefully flip it over (you don't want the hot glaze to drip on you). Lift the pan off and well....

This is when I discovered something. They looked nice and golden brown on top, but the bottom was really light in color. And once I removed a few of the buns, I knew something wasn't right. The dough had become runny. It wasn't thoroughly cooked.


And this is also when I discovered how forgiving this dough is. I scooped it all up and placed it back in the dish, upside down so that what was the bottom became the top, and stuck them back into the oven for another 15 - 20 minutes.

They weren't as pretty, but they came out beautifully....nice and sticky on the outside and fluffy on the inside and perfectly cooked through

Whew....that was a close call cuz seriously I did not want to toss these babies out.

I'm so glad I didn't.

With the remaining dough, I went off the beaten path. I wasn't in the "mood" for the other two assignments for this braid, so I braided my bread instead. I made a challah. I started thinking about all the stuff that the book recommends for topping various breads with but I don't have a lot of whole seed spices that appealed to me as a bread topper. I also knew that my family wouldn't want sesame seeds.

That's when my mind wandered into the ground spice arena and I remembered the various rubs that I've made for steaks and chicken. Why do rubs only have to go on meat?

No....they don't. (que evil laugh) muuaaaah haaa haaa ha (cough cough)

So I put together a great rub that I found in one of my Everyday Food mini magazines

Spicy Paprika Rub
4 teaspoons paprika
2 teaspoons coarse salt
1 teaspoon ground ginger
1 teaspoon ground cinnamon
1/2 teaspoon cayenne pepper
1/2 teaspoon ground allspice

Combine and store in an airtight container.

I braided my challah, let it rise, and just before popping it into the oven I spritzed the dough with some olive oil. I bought some olive oil the other day in a spray can. I don't know why I never thought of it before but its so much better than brushing it on. I sometimes mess up the top of my bread using the brush. Then I sprinkled the rub over the dough


I baked it for 30 minutes in a 350'F oven. And then I learned some more stuff.....


Look at that awful crack down the middle of my braid!!! This happens to me a lot. I've gotten various suggestions on what causes it but I finally did some research on the subject.

It's from not allowing the dough to rise long enough before placing it in the oven. The result is a quick oven spring in the hot oven, without the dough "giving" to the growth, thus causing it to crack instead. It doesn't affect the flavor of the bread, it just doesn't look pretty. Therefore it's only a serious problem for professional bakers.

I also discovered that my oven cooks 20' too cool.

I did make this bread again. It was THAT good! My daughter compared the bread (minus the rub) to Kings Hawaiian Bread with its texture and sweetness. The rub was an excellent complement to the bread with its hint of spice, both hot and sweet at the same time.

What rub recipes do you have that would add great flavor to bread?

If you'd like to see what the other members did with their dough, head on over to Big Black Dog 20th HBin5 Bread Braid

Saturday, August 28, 2010

Chile Rub-a-dub dub


A long day, poor planning, laziness....whatever the case may be, a rub could be the answer you're needing. When you don't have time to plan a meal or marinate your meat....rub it in instead. There are so many varieties out there. I'm sure you have your favorite or will find one in no time.

One of the rubs we enjoy was inspired by a recipe I got out of the Everyday Food magazine, the July / August issue back in 2004. I only added two additional ingredients....garlic powder and onion powder. I don't understand how garlic was left out of this recipe to begin with. We're talking about GARLIC here people! Most everything (and I say most because I haven't wrapped my head around garlic as a dessert ingredient yet) is better with garlic. What was Martha thinking? As I look at several other rub recipes in the little magazine...none of them contain garlic.

I don't get it.

Anyways...this recipe is simple. Doesn't make a huge amount, so you don't have to worry about having to cook with it everyday for the next several months before the spices deteriorate. I think you can get about 2 - 4 uses out of, depending on how much you use. Me? I like to use a lot of it. And you probably have all of the ingredients in your spice rack. Can't get much better then that, can it? Of course if you want to stock up, double or triple the recipe.

Chili Rub
makes about 11 teaspoons
Printable Version

1 tablespoon plus 1 teaspoon chili powder
2 teaspoons ground cumin
2 teaspoons brown sugar
1 teaspoon dried oregano
1 teaspoon coarse salt
1 teaspoon garlic powder
1/4 teaspoon onion powder

Combine all the ingredients and mix well. Store in an airtight container for up to six months.


Feel free to adjust the spices to suit your taste. I might even add a bit more garlic next time.

Anyway....I drizzle a tiny bit of olive oil on my chicken breast. Then I massage the rub in before cooking (you can also rub it in hours before hand).


I've found that if I don't add a bit of oil before hand (to chicken breast....thighs and beef have been no problem)....the rub tends to stay on the dry side during cooking. Just for a starting point....Martha says to use about 1 teaspoon of rub for every 3/4 lb of meat.


I like that nice caramelization that happens. Especially with the brown sugar that's in this recipe. I had butterflied these breasts before adding the rub...and they cooked wonderfully, quickly, evenly and were so flavorful! Served with a quick side of rice (made in a rice cooker of course while I was messing with the chicken) and a few veggies and / or salad, and you have a satisfying dinner that you put together in no time. For us working moms and moms of kids in school.....you gotta love a meal like this.