Yum Peaceful Cooking: January 2012

Sunday, January 29, 2012

Drunken Cows Milk


Two weeks ago, my friend Jodie from Pairings (I told you about this upcoming webseries last weekend) sent me a message with a link titled How to Make Milk That'll get you Hammered. Apparently she knows me well...saying that I needed to try it (of course I do!). I was so intrigued that I started the process that very day.

The ingredients are simple enough. The only thing I needed to purchase was some vodka (and a pretty little bottle to store the finished product in. Which I have to say, I found at a local thrift shop for under $2.00)


Drunken Cows Milk
Printable Version

2 cups vodka
2 cups whole milk
2 cups sugar
2 oranges, cut into chunks
1 lemon, cut into chunks

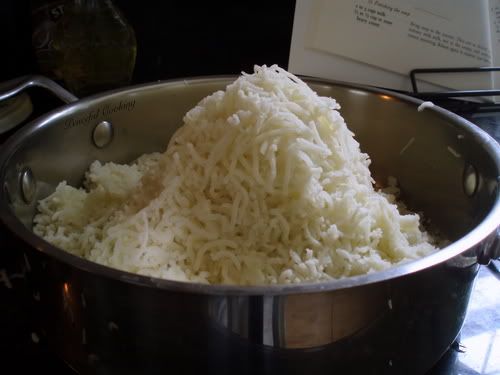
Combine all of the ingredients in a large jar (1/2 gallon)


My jar was just shy of 1/2 gallon but it all fit in there. Barely

Screw on the lid....

 
and keep in a cool dark cupboard for 10 days. Every day, take the bottle out and give it a good shake or stir. Return to it's place of hibernation.

The first day....it looked like this:


Aint that peerty. Ya...a little scary. But science projects in the kitchen are always fun.

After that...it mostly looked like this:


I'd just shake it up and put it back. Although I have to admit there were a couple of days that I forgot about it. And when the 10 days was up, I just didn't have the time to strain it. During the week....it's just too late to mess with so I waited until the 14th day (mostly out of convenience...partly cuz I figured that I missed a day or two of the shaking up process, that it would be a good thing.)

Yesterday morning, I got out the strainers and bowls and got busy.


Let's take a look inside and see what was created:


Hmmm....for some reason, I expected to see something a lot more offensive. Milk chunks maybe? Guess all that vodka kept the milk and citrus under control. I don't see any curds. Ok...lets continue

I strained it through a colander with large wholes first...to catch the big stuff without blocking everything up


I then put it through a mesh colander


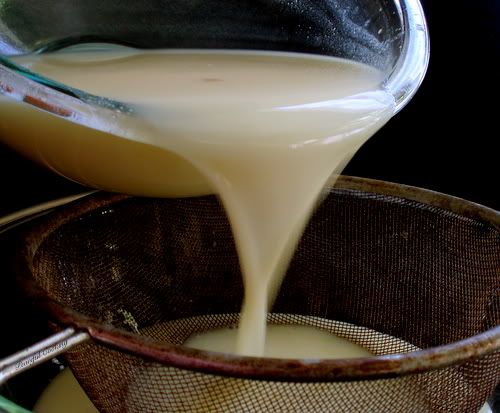
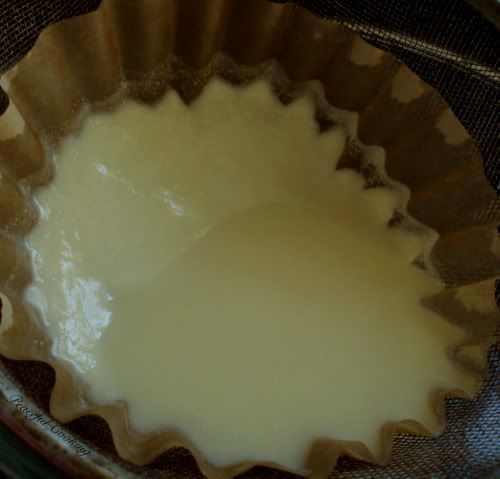
Hard to believe that this creamy stuff becomes clear yellow as shown at the top, right? You'll see. Btw...at this point, if you are totally into creamsicles....this is your drink. It's totally fine to drink as is. I personally have never been a fan of creamsicles. The combination of ice cream and popsicles never appealed to me. So I kept going...and strained it even further by lining my mesh strainer with a coffee filter. (I think my mesh strainer needs to be replaced, don't you? Kinda frustrating cuz it's not that old)


This is where it got time consuming. All those milk solids kinda clog up the filter and you get this slow stream that quickly becomes a slow drip. But check it out....its CLEAR!!


As the dripping became painfully slow, I found myself changing the filters often


I don't even know how many I went through....6 or more? Once those solids clung to the filter...there was no way the liquid was escaping.

Eventually, I ended up with 3 cups (plus a shot) of clear yellow Drunken Cows Milk.


Even with the milk solids gone, there's a hint if creaminess. It's very sweet. Almost syrupy but not quite. It has nice light citrusy flavor. Did I mention how smooth it is going down? Ya...smooth as silk. It can be stored at room temperature for up to 6 months. However, I think I'll be keeping mine in the fridge. I find that it's best when it's chilled.

There are variations of this drink. Things that can be altered. The sugar can be reduced. You can add vanilla. You can also leave out the citrus all together. Or use 2 oz of grated 70% bittersweet chocolate and 1/2 lemon (no oranges)....which I believe I will be trying next (did someone say Malt Balls?).

Thank you Jodie for turning me on to this!! You need to come by and give it a try :)

One more thing....there's a fun little recipe contest over at Pairings....

"The winner of the recipe contest will have their recipe added to the script of an episode of Pairings. Have your recipe prepared by the characters in the show! We will also list your winning recipe on the Pairings website with your name and include it in our Pairings digital cookbook for season 1 and you'll receive a free copy."

Entry deadline: 2/25/2012

For details, it's Entry #6: Recipe Contest : http://www.kickstarter.com/projects/834231336/pairings-the-series/posts

Wednesday, January 25, 2012

Potage Celestine (Celery Soup with Potatoes, Leeks, and Rice)


You know when there's that kitchen gadget that seems pretty darned cool but you're not sure if you're going to use it that often? I mean...you've gone all this time without it. Do you really need it?! But for some reason you still want it. And you'll find a way to need it. And use it.

Hence....the potato ricer.

It's been on my list of "kitchen wants" for a while now but I wasn't sure if I really needed it. I've heard that it aids in making fantastic mashed potatoes. However, I'm a bit of a purist in some ways. All my life I've had potatoes mashed the old fashioned way. I felt a bit of a surge of pride when I mashed up a bowl of creamy potatoes by hand (however tiring it was....and on more than a few occasions, felt as if my arm was going to fall off).

Well, the other day when I asked my peeps on facebook what they were having for dinner....someone piped up with "Potato Soup!" I love potato soup and haven't had it in a while. I thought how handy a potato ricer would be for that and next thing I knew I was out and buying a one. That very day!


Next day...I find myself in my kitchen with Julia Child making Potage Celestine from Mastering the Art of French Cooking Volume Two. The ingredients are basic. The results are clean, fresh and more flavorful that I ever expected.

 (ok, there are a few more ingredients than shown in the picture, but these are the main ones)

Potage Celestine (Celery Soup with Potatoes, Leeks, and Rice)
Printable Version
6 servings

2 medium leeks, white parts, sliced and cleaned
3 cups sliced celery stalks
1/4 tsp salt
3 TB butter
4 cups chicken stock (I used 2 cups of chicken stock and 2 cups of collard greens stock)
1/3 cup white rice (uncooked)
3 or 4 baking potatoes, peeled and chopped
2 cups of water
1/2 tsp salt
2 cups milk
1/8 tsp sugar
Salt and White Pepper to taste
4-6 TB soft butter
3 TB minced fresh chervil, tarragon or parsley (I used chives) and more to garnish if desired
Croutons to garnish if desired

In a large (3 quart) saucepan, melt 3 TB of butter over a medium low heat. Add the leeks and celery, cover and cook until tender but not browned. This should take about 10 minutes. Add the stock and bring to a boil. Stir in the rice and simmer for about 25 minutes, uncovered.

In another large saucepan or pot, (at least 3 quarts but larger would be better), boil the potatoes with 2 cups of water and 1/2 tsp of salt. Once the potatoes are tender, drain the water into the pan with the celery and leeks.

With a handy dandy potato ricer, puree the potatoes back into their cooking pot.


Add the milk and whip with a wire wisk until smooth (takes seconds).


If you don't have a potato ricer....it's ok. No one will hold it against you. I swear. Just put the potatoes and 1 cup of the milk into a blender and puree away. Pour back into the pot and beat in the remaining milk. See? No worries.

We're almost done.

Add the celery and leeks into the whipped potato pot and if you have an immersion blender, puree it all together


No immersion blender either? Put it back into your blender, in batches and puree it all.

Beat in the sugar and season with salt and white pepper to taste.

As is....it tastes amazing!

Now, for a little added amazingness.....check this out...

In a small bowl, mash 4 - 6 TB of softened butter and 3 TB of your choice of a fresh herb together.


Divide the butter / herb mixture between the serving bowls, blend the servings of hot soup into the bowls with the butter / herb mixture, top with croutons and maybe a little extra minced herbs and serve.


For the croutons, I used some sourdough bread, cut into little 1/4" or so cubes, dried in a warm oven (325' F) for about 15 minutes. Then sauteed them in clarified butter until golden brown.

The results of this soup? Amazing! Simple flavors blended together to make a deliciously clean soup. I do believe this is now one of my favorite soups. Ever!


Sunday, January 22, 2012

Sourdough Sandwich Bread


It's one thing to make great artisan type breads, baguettes, rolls, etc. I love them all. But the Frugal Franny in me (or maybe it's the Little House on the Prairie character in me.... and no, I refuse to be Nelly although Nelly was pretty hysterical as a stand-up comedian but that's a story for a different time) I have this desire to make sandwich bread. Loaves that look like the kind of bread I grew up on...only I made them. Something you wouldn't think twice about when grabbing a slice for toast in the morning.

In my hunt for soft sandwich sourdough bread, I found myself in a website called The Fresh Loaf. I poked around a bit and discovered a forum where I could introduce myself and ask questions.

So I did.

And I got a response that very day!

Ford and Amolitor were so kind in answering my questions. Ford even shared his recipe, and allowed me to share it with you. You can check out how the forum thread went --->Hello from Los Angeles<--- there's a lot of great information there regarding when a starter has reached its peak.

Just a quick FYI....

For a starter that  is at 100% hydration, you measure the starter, flour and water by weight with a 1:1:1 ratio.

For a starter that is at 166% hydration, you measure the starter, flour and water by volume with a 1:1:1 ratio.

White Sourdough Sandwich Bread
makes 3 loaves of bread

Printable Version

3 - 5" x 8" loaf pans
2 3/4 cups sourdough starter at 100% hydration
3 3/4 scalded milk, cooled to below 115' F
10 1/4 cups bread flour
1 1/2 TB salt
1/4 cup melted butter plus more to brush the dough
Butter or shortening to grease pans

We're going to start off by making a poolish by combining your starter with milk and half of the flour, in a large bowl.

I just love that thick, bubbly starter.

Set aside for 1 hour.


Once that hour is up, add in 1/4 cup melted butter, salt and as much of the remaining flour as you can while still mixing with a spoon. Then turn it out onto a well floured surface and knead in more of that flour until you have a soft, non-sticky dough.

Oil a large bowl, place the dough inside


 Cover with plastic wrap and allow it to double in size.

Prepare your loaf pans by brushing the insides with melted butter. Turn the dough out onto a floured surface


Divide into 3 equal parts and shape into loaves. Place them into your prepared loaf pans. Brush the tops with melted butter, cover with plastic wrap


Allow to rise for about 2 hours, or until the tops are above the rim of the pans (picture above is prior to rise).

Preheat your oven to 450' F. Place a large pan on the bottom rack in the oven and careful pour in a cup or two of boiling water.

If you'd like, slash the center of each loaf with a sharp knife, down the center (I forgot to do that...no big deal). Also, this next stage I didn't do which is to mist the tops of the loaves with water. (I don't have a water mister in my kitchen...silly me).  Then spray them a few more times, every 2 minutes during the first 15 minutes of baking.

Place them on a rack that is positioned in the center of the oven. After the first 15 minutes, turn the oven temp down to 350' F and bake for 40 more minutes or until the inside temperature of the bread is 190-195' F.

Carefully take the bread out of the pans and allow to cool on a rack.


Ok....I just discovered another step that I totally missed in this whole process. As soon as you place the bread on the cooling rack, before it cools.....brush all the sides with melted butter. Cover with a damp paper towel and plastic wrap. THEN allow to cool. Hmm...I'm going to have to make more of these beautiful loaves of bread and see how that works out. I am very happy with how they turned out as is..but the addition of the butter brushing and steam cooling would probably make them even more soft.

I waited (as needed) until they had cooled completely before slicing. I use my electric knife to do this and it works wonderfully.


I then froze 2 of the loaves for later use, which works out very well.

This bread is wonderful! It makes fantastic sandwiches


It's soft yet holds together (unlike that store bought stuff)....and has that lovely sourdough tang.


Wednesday, January 18, 2012

Pom Wonderful and Hot Sex


See those luscious little red nuggets on top of my ice cream? Those are called Pom Poms. Pom Wonderful has these cups of fresh arils that they call Pom Poms and they sent me two of them back in December. I was suppose to write about them before the New Year but with the holidays and 3 birthdays all within 3 weeks....something had to give. Then, my girls chowed on the Pom Poms and I had nothing left. Off to the store to purchase more, I went.

 
And to purchase some Pom Wonderful pomegranate juice. I had big plans for the stuff.

I do apologize to Pom Wonderful for being late.

So, which would you like first...Hot Sex or ice cream?

That's what I thought...let's start off with Hot Sex. But we must make sure we're prepared.

With grenadine.

Really? Yes....really. You can't have Hot Sex without grenadine. You'll thank me afterward,

I promise.

Grenadine:
Equal amounts of pomegranate juice and sugar. Pour into a saucepan. Bring to a boil while stirring. Reduce heat and simmer for 10 - 15 minutes, stirring frequently. Allow to cool. Store in a cute little bottle in the refrigerator. Or whatever you happen to have on hand.


That's it. See? Simple. Prep work for Hot Sex isn't as much work as you'd think...and the results are way better. Seriously...once you've tried this...you'll never go back.

Nooooow...let's get down to business.

Hot Sex
2 1/2 oz orange liqueur
4 oz orange juice
Dash of grenadine

Mix well, server on the rocks, garnished with a....cherry (of course)


And there you have a delicious little cocktail, known as Hot Sex. Cherry and all.  I found this recipe at DrinkMixer. They suggest triplesec. I personally don't like triplesec and used Citron. Cointreau would also work beautifully. This is a delicious little drink full of sunshine and promises...that will wipe you out if you're not careful. Enjoy it in a leisurely fashion. Unless of course your goal is to end up under the table instead on top. (did I really say that?!)

Now that we're done with that. Or maybe we're in between....drinks....lets enjoy a little ice cream. Which also requires some prep work. That's not so quick but an amazing addition to your pantry. Pomegranate Molasses. Amazingly sweet and tart all in one bite. It's used in middle eastern cooking. I personally like it for dessert. You can find the recipe on a post I did about a year ago ----->Pomegranate Molasses<------ You'll end up with something like this


Get out your ice cream and your Pom Poms


Drizzle the molasses over your ice cream


And top with a handful of Pom Poms


The molasses mixed with that vanilla ice cream is fantastic. Add the Pom Poms and you get that texture added in there....pure delight. Almost as good as Hot Sex...

Now...If you'll take a minute to watch a little video. Some friends of mine, Ed and Jodie whom I met last year in a class we all took together, are producing a web series called Pairings:

"The show centers around a group of friends who are foodies. Alan Wallace is a food geek who is awkward with women. His family and friends convince him that cooking is sexy and that he shouldn't hide it from the women he dates. Along the way he discovers that the way to woman's heart is through her stomach."


Take a quick peek at the video and get to know Ed and Jodie a little. They need some help getting the production going. You might also enjoy their food blog, 5ivedollarfeasts.com which is about eating like royalty, on a budget. Who doesn't want that?! Great recipes...fantastic photos. These two really know what they're doing.

Good luck Ed and Jodie! I can't wait to watch Pairings!


Saturday, January 14, 2012

Collard Greens


Collard greens. Some people love 'em. Some people hate 'em. I fall under both categories. Or maybe you should say I've visited both sides.

Thinking back...I don't remember ever eating collard greens during my gazillion trips to the south. I'm sure my grandmother made them. I don't remember seeing them. Or even hearing about them. I'm wondering if I took one look at them and figured it was a plate of spinach and quickly moved on. (what do kids know, right?)

Believe it or not....this western gal, who's soul roots are firmly planted in Alabama, did not even taste a collard green until about 2 yrs ago. I walked into a BBQ.... place....(I can't call it a restaurant or diner. Or even a whole in the wall...). I ordered a BBQ chicken sandwich, fried okra and since I had my choice of another side...I noticed collard greens on the menu and thought...'heck, if this place has fried okra on the menu, they gotta know what they're doing'. Well, they tasted like fish. And being allergic to fish, I kinda panicked for a second there and did a very unlady like thing. I spit them right back out of my mouth. Seriously....plah...plah......PLAH! I don't even know what the dish actually tasted like....but I knew that wasn't right. Btw I never went back to that BBQ....place. The sandwich was dry and the fried okra was all wrong. It's not there anymore anyway. I assumed it had closed down but I heard a rumor that it had relocated. Someone should mention to them that Subway and Flooky's Deli competition isn't what killed their traffic.

Collard greens....Take 2: I decided my next venture with the greens would have to be from a trusted source. And should most likely occur in the south where people know what they're doing. And they do it with pride. Well....let's see. My sister Jenifer swore that she could get a can of collards from the store that were pretty good. (We didn't have time to make them...or hadn't planned on making them...I can't remember but things are crazy at her house and if anyone is home for more than 2 hrs at at ime during the day, it's a miracle). So she took me on a tour of the local Walmart (that she so lovingly calls Wally World). Have you ever seen those funny pictures or videos of Walmart shoppers? I think a lot of those were taken at this particular store. I never thought I could say "I saw a woman sit on the bacon" and mean it literally. Anyway....I watched the cart while Jenifer ran around the store like a mad woman (cuz she doesn't know how to be anything but a mad woman) and I kept changing my location (with the cart) and hiding from her (had to make it interesting)....well...bottom line. She grabbed the wrong can. Collard greens failed again.

Collard greens.....Take 3: I had just about given up and resigned to the fact that I was going to be one of those people who hated collards. But then my mom intervened. She swore that my cousin's husband, Chad had the best recipe ever. She said it was fabulous...made with wine, etc! Fast forward about 4 months.... Mom kept forgetting or couldn't find the recipe. I was starting to get anxious. I wanted to try them out for my New Years Day dinner. Silly me...I should've just asked my cousin right up front cuz she sent it to me the very next day....(Thank you Rachie!)...just in time for my big dinner plans. You see...I had never had the full on Southern Good Luck meal for New Years. I always do the black-eyed peas thing....but the greens. I'd never made the greens. I needed the greens!


That's a lot of greens...and they are a bit time consuming in the beginning...but once its done...you sit back and wait. Or make your other dishes for the meal.

Chad's Collard Greens
Printable Version

4 - 6 bunches of collard greens
1 onion, diced
2 ham hocks
1 TB cooking oil
6 cups of water (more if needed)
1 cup dry white wine
2 TB hot sauce (or to taste)
1 TB soy sauce
1/2 cup sugar

Wash and cut the collards. Now what that really means is.... you need to remove the central stem. Fold back the leaf (which will sorta snap a bit), exposing the stem...then gently tear the leaf away and toss the stem.


I then washed the leaves (although if your collards are coming straight from the garden, you may want to wash them before removing the stem. I guess it just depends on when you want to deal with the dirt).

I then took a few leaves together and rolled them up like a cigar....sliced into 1" bits then rotated the knife and cut straight down the middle of my slices


This gave me some decent sized pieces, quickly.  This filled up a very large bowl, which I set aside.


Time to get your ham hocks out


In a large stockpot, heat the oil and add the ham hocks...sauteing a bit to release some of the flavor. Carefully add the water. Then add in your wine, hot sauce and soy sauce


Hey....see that little bottle of hot sauce with the wooden cap? Does it look familiar? I don't know about you...but it seems that I've just about grown up with that stuff. Cholula Hot Sauce has been around for over 20 yrs and now it has new flavors! Chipotle, Chili Garlic and Chili Lime. I think my favorite, besides Original...is the Chili Garlic.


Anyways...back to the collards...bring the water mixture to a boil. Once boiling, add the greens and the onions,


At first, your pot is going to be really full but within a minute or so the greens will reduce down to a manageable size


Reduce the heat and simmer for about 1 1/2 to 2 hours or until tender. When there's about 30 minutes left in the cooking time, add the sugar.

Drain out the water (see note below), sprinkle with salt and pepper to taste, and serve.


Let's just say....Third Times a Charm! They were really good...especially with that plate of food. My favorite way to eat them is with a little slaw and black-eyed peas in the same bite.

NOTE: DON'T pour that collard green liquid down the sink when you drain it out. Save it. Give it a taste and tell me that won't make the best ever stock for soup! Not to mention that during that long cooking process, we've probably released all the wonderful nutrients into that water.