Yum Peaceful Cooking: July 2011

Saturday, July 30, 2011

Double Nut Godiva Iced Coffee


You know that old commercial...."Sometimes you feel like a nut, sometimes you don't". Well...even though this drink is called "Double Nut" ...one is a nut and one's not.

Let's start at the beginning. Not so long ago...in the rather recent past, through the Foodbuzz Tastemaker program I received 2 bags of Godiva coffee.


Chocolate Truffle and Hazelnut Creme. My mission? To create an iced coffee beverage. Being in a nutty mood, I chose to play with the nuts first. I made a nice big pot of Hazelnut Creme coffee....drank a wonderful cupful and enjoyed it immensely. It was rich without being too sharp or bitter. Flavorful without tasting overly much or imitation. I love hazelnuts but I refuse to add flavored cremes to my coffee because it doesn't taste 'right' to me. This coffee blend has the perfect combination.

Right then and there I knew this was the coffee I'd use for my iced coffee beverage. And being the lush alcohol connoisseur  that I am, of course this iced coffee is for adult consumption only.

And that's where the second....non-nut, comes into play.....Coconut Rum.

Double Nut Godiva Iced Coffee
makes 2 servings

6 oz cold, strong Godive Hazelnut Creme Coffee
6 oz Coconut Rum
4 oz creme, half n half or milk
1 tray of ice cubes
Whipped Cream and Chocolate Syrup to garnish

Combine the coffee, rum, milk and ice cubes in a blender. Blend until smooth. Pour into an 8oz chilled glass. Top with whipped cream and chocolate syrup.

This is a wonderful little drink to enjoy after a hot day as you sit in the backyard enjoying the sunset and cooling breeze. Once you get to the bottom of the glass....who knows, maybe you'll even be relaxed enough to act like the hidden child within...and slurp up that last little bit with a straw and make that extremely annoying sound that's only funny when you're a kid or when you're 'fuzzy' enough to think so.

Tuesday, July 26, 2011

Pesto Biscuits


Let me just start off by saying....it's not the pesto on the biscuit that makes this a Pesto Biscuit. It's whats inside. I mean...that would just be 'pesto on a biscuit'. And why would I blog about that, right?

For the first time in my life I have a little herb garden. It's so nice and smells wonderful. I have mint, rosemary (actually, I've had the rosemary for years...it's rather large and grows, in an unruly fashion in my front yard), cilantro, chives, dill, lavender and sage. Oh....and basil! Sooo....for the first time in my life, I get to make pesto from my own homegrown basil. I like that. I like the idea of making stuff from scratch....with my own hands. Like they did in the old days (when I was a kid, I wanted to live like The Little House on the Prairie).  I even take this "thrill" to other areas of my life.....other hobbies. When I use to tole paint...I got a scroll saw and cut my own wood pieces. When I crocheted, I had this wild idea of having my own sheep and finding a spinning wheel so I could spin my own yarn (that idea never came to fruition...sheep smell). When I had pet birds, I decided I wanted to see baby birds and bred them (I once had 80 birds until my dogs worked the aviary cage door open and released them all into the wild.....Fly, Be FREE! That was a costly mishap). If I could have chickens, I would. If I had a larger backyard, I'd have fruit trees everywhere. You get the idea...

Anyways...here I sit, in my little city house growing my little city herb garden and joyfully making fresh pesto. If you're interested in my recipe ----> click here <----  I had so much basil over the weekend that I was able to make 3 batches. One for a friend, one for the freezer and one for the fridge. From the looks of things, I'll probably have enough to make another batch any day now.

In the midst of soaking my basil leaves and making sure they were all clean.... Btw....basil from the garden requires a bit more attention than the store bought stuff. I mean....you're bound to come across at least one free-loader


This is proof that there are wild things living in the backyards of city homes. But, I'm sorry to say....this was his last appearance. I'm not the kind of person who's going to re-release him into the wild. I'm sure there are enough of them out there already. When they're outside, I leave them alone (unless its a black widow).....when they're in the house (even if I inadvertently brought one in) their number's up. Funny how I assumed it's a "he". Hmmmm....best leave that one alone.

Sooo....I had a few extra, clean, basil leaves and decided that I wanted them in a biscuit. Since I had pesto on the brain, I went ahead and added pine nuts and Parmesan cheese as well. Thinking back....I should've added garlic. I wonder why I didn't think of that then? I mean...that's a no brainer. Garlic goes in everything! Hmmm....maybe spidey threw my game off. It certainly couldn't have been the cocktail I was experimenting with. (If you want to see how that turned out....visit Cocktail Puppy and check out my Seven More Sins.)

Well, here's my garlicless recipe....if you like garlic, I recommend adding some...according to taste.

Pesto Biscuits
Printable Version

1/3 cup toasted pine nuts (toasting them a bit gives them more flavor)
2 cups all purpose flour (plus more for dusting)
2 teaspoons baking powder
1/4 teaspoon baking soda
1 teaspoon salt
1 tablespoon fresh basil
6 tablespoons cold butter cut into small pieces
1 cup grated Parmesan cheese
1/2 cup milk
1/2 cup sour cream

Preheat the oven to 425'.

Chop up the pine nuts.
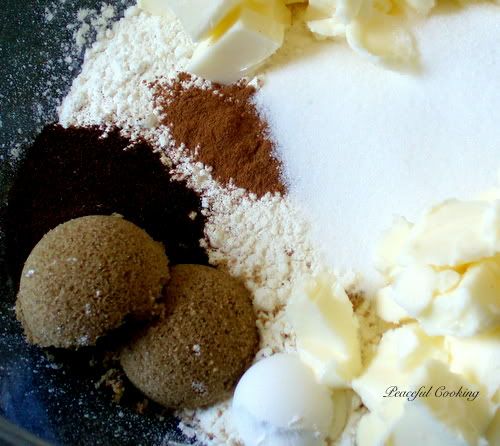
In a medium sized bowl, whisk together the flour, baking soda, salt, pine nuts and basil


Doesn't that look so fresh and tasty? And it's not even made into anything yet!

Using a pastry blender, fork or fingers....work the cold butter into the flour mixture until you have small pea sized pieces.

Add the cheese...stir with a wooden spoon. Add the milk and sour cream and mix until just combined.

Dust your work surface with a bit of flour. Turn out the dough and knead 3 - 5 times just to get the stuff to come together. (hint: over kneaded biscuits = tough biscuits, ie: paper weights).

Roll out the dough to 1/2" thick. Cut the biscuits with a 2" round cutter. Place on an ungreased cookie sheet.

Bake until golden brown for about 12 - 15 minutes.

The result? A tasty little morsel that's mildly flavored and the perfect side for most any dish. I guess that means that biscuits aren't just for breakfast. These babies are for dinner!

Wednesday, July 20, 2011

Tate's Chocolate Jumbles


It seems I've been on a Tate's Bake Shop kick lately. But lemme just tell ya....the recipes in that cookbook are so danged good. I mean....as I'm looking at this book, opened next to me, I see a recipe called Simple Lemon Wafers. How wonderful does that sound?!

Ok, back to the cookies. I did change up the recipe a bit. Hmmm...now that I look at it, more than I thought. I omitted the nuts cuz one of my darling daughters (and some days that term is used more loosely than others....more like in a rather sarcastic tone) does not like nuts. I'm not a huge huge fan of white chocolate so I used regular semi-sweet chocolate chips. Also...I had enjoyed the Cappuccino Shorbread that I made recently and I was still on a high from those....sooooo I added espresso powder to these beauties. But the basic foundation of the cookie remains the same. The structure was not altered. The cookies are still cakey and absolutely fabulous. If you want to eat something sweet that makes your taste buds sing like an angel and all your senses and awareness of space and time are focused on the flavors dancing on your tongue....then these are the cookies for you.

Chocolate Jumbles (in an altered state)
Printable Version
makes about 18 jumbo cookies

2 1/2 cups all purpose flour
1/2 cup cocoa powder
4 tsp espresso powder
1 TB baking powder
1/2 tsp salt
1 cup butter, at room temperature
1 1/2 cups firmly packed brown sugar (light or dark...doesn't matter)
2 large eggs
1 1/2 tsp vanilla extract
2 cups chocolate chips
1 cup chopped nuts (optional)

Preheat your oven to 350' F Grease 2 cookie sheets or cover with parchment paper

In a large bowl combine flour, cocoa powder, espresso powder, baking powder and salt.

In a another large bowl, cream together the butter and sugars. Add the eggs and vanilla and mix together. Gradually add in the flour mixture and mix until just combined.

Fold in the chocolate chips and nuts (if using).

If you have an ice cream scoop....this is the perfect time to use it. Fill a cup with some warm water...dip the scoop in the cup and scoop out a blog of cookie dough (about 2 tablespoons worth is what we're going for) and drop unto the cookie sheet. Press each dough wad down with your fingertips....gently, to sorta flatten them out a little.

Bake for about 20 minutes. You don't want to over bake them. If they're a bit soft when they first come out of the oven....that's normal.

Allow to cool for about 5 minutes on the cookie sheet. Remove and allow the cookies to continue to cool on a wire rack.

That's it. The end. Now all you have to do is enjoy and try to prevent yourself from eating several before the day is done. If you want to save yourself....take most of them to work and share with your co-workers.

Saturday, July 9, 2011

Cappuccino Shortbread


Ooey gooey chocolatey deliciousness.  Rich and wonderfully satisfying. Did I mention how easy it is to make?

I found this recipe in Tate's Bake Shop Cookbook. Kathleen described them as "...thin and crisp....". Mine didn't turn out that way. Probably because I didn't use the recommended 9x9 square pan. I don't have a 9x9 square pan. I have one that's 8x8 and that's what I used but didn't adjust the cooking time at all....which I imagine resulted in the thicker, more chewy version. Whatever the case may be.....it just doesn't matter. They're good. 

The recipe calls for instant espresso powder. My local market just recently started stocking it. The minute I saw it on the shelf, I grabbed one. I don't make espresso. Well, I did once....but I use it for baking when called for. But my favorite application is adding it to my morning coffee for that little  extra somethin' somethin'. If you don't have any, or can't find it....you can use instant coffee. The flavor will be a bit mild. Maybe increase the amount a little? I don't think it would hurt anything.

Cappuccino Shortbread

1/2 cup plus 2 TB room temperature butter
1 1/4 cups flour
2 tsp instant espresso powder
2 TB firmly packed dark brown sugar 
1 tsp cornstarch
1/2 cup confectioners / powdered sugar 
1/2 tsp vanilla extract
1/4 tsp cinnamon
1/2 cup chopped semisweet chocolate (I used chocolate chips)

Hmm....as I type this...and take a closer look at my photo, I realize that I did not use confectioners sugar. I used just plain old granulated sugar. How silly of me. O'well. No harm done. They're good.

Preheat the oven to 325' F

In a medium mixing bowl, combine everything except for the chocolate chips. 

I know that the only liquid ingredient is vanilla extract. No, that is not an error. Forge ahead....all will be well. Trust me.


See? It may be crumbly.....but it's combined. Just the way it's suppose to be. 


Now get that pile of chopped chocolate and mix it in.

Don't worry about greasing the pan. Put (no point in saying "pour" cuz that's not gonna happen) the mixture into your pan....pat down evenly


Bake for about 30 minutes or until brown on the edges.


Ya....the edges weren't brown....I could've baked it a few more minutes. Hm. Whatever....they're good. 

Ok...as soon as you remove the pan from the oven, cut the shortbread into squares (whatever size you want....just keep in mind that it's rich and sweet so you don't need big squares). Allow to cool in the pan before removing.


When ready....grab yourself a square and enjoy with a cup of coffee, tea or even an ice cold glass of milk.

If you haven't already notice by all the things that I did differently, this here is a pretty forgiving recipe. Now I want to make it right....so its thin and crispy. Only I kinda wanna sprinkle the top with some coconut before going into the oven.