Yum Peaceful Cooking: February 2010

Sunday, February 28, 2010

Cheeseburger Meatloaf Sandwich


Seems like an awful lot of work for a cheeseburger doesn't it? But it wasn't intended to be a cheeseburger. And technically it's not. It's a meatloaf sandwich the day after I made a meatloaf. Only the meatloaf was more like a cheeseburger. It's called Cheeseburger Meatloaf. I got the recipe from my sister. Who got it from a friend who probably got it from a magazine.

Anyways, I'm not a huge meatloaf fan. Meatloaf is ok I guess. It's just doesn't do much for me. I can't even consider it comfort food.

And then there's the meatloaf sandwich......

Have you seen peoples eyes light up when thats mentioned? I'm beginning to wonder if people make meatloaf just so they can have a sandwich the next day.

But...what makes THIS particular meatloaf (for some reason my fingers keep typing "meatloaD" and I have to delete and fix. Is there a message in that habitual type-o?). Where was I? Oh...ya, what makes this particular sandwich special is that the bread is from the HBin5 Bread Braid...


HBin5 is an online bread club thats baking its way through the Healthy Bread in Five Minutes a Day cookbook. If you'd like to find out more info on how this works, visit Michelle's blog (she's our fearless leader) over at Big Black Dog

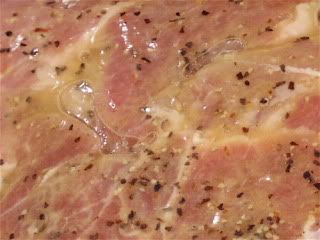
On to the meatloaf. I used ground turkey. My sister used ground beef


1 lb ground meat (beef...turkey...)
1 onion, diced
1 cup shredded cheddar cheese
1 cup cracker crumbs
1/2 cup sour cream
2 tablespoons worchestershire sauce
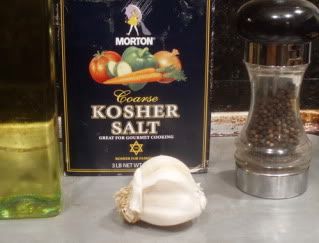
Salt, Pepper and Garlic Powder to taste or just use a seasoning salt

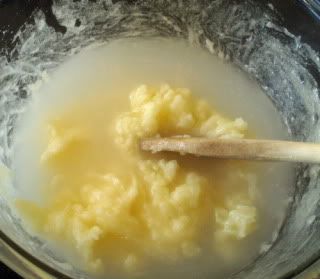
Mix it all together and form it into a loaf in a grease loaf pan


Bake in a preheated 375' oven for about an hour, or until done. During the last 15 minutes, pour some ketchup over the top. Oh and there will most likely be some fat floating around the edges there....ya, go ahead and carefully pour as much of that fat out as you can before you add the ketchup.


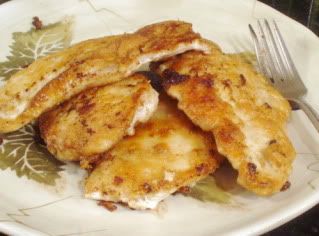
After that last remaining 15 minutes, you end up with a...well.....a loaf of meat.


Hmm...it looks pretty good though. But, no matter how you slice it


It's still Meatloaf. But I have to say it was tasty. You could taste the cheese flavor in there...and it was moist. What else are you suppose to say about meatloaf?

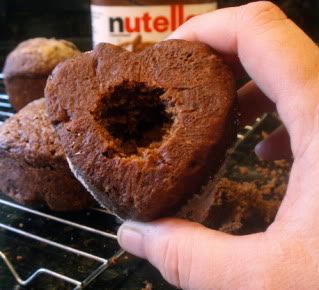
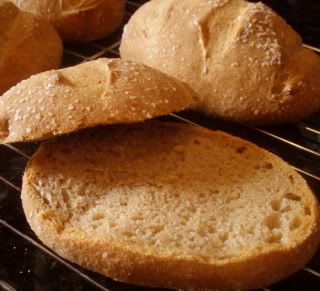
So.....the next day I made the dough for Whole Wheat Bread with Olive Oil. I didn't want a whole loaf of it though...so I grabbed a handful of dough and divided it into 4 equal parts and baked little mini loaves


Once they cooled, I decided they were the perfect size and shape for meatloaf sammies


So I dressed it up....melted more cheese on the meatloaf slice....added some avocado and had a very nice, very flavorful, very good for you (well, except for the mayo) Cheeseburger Meatloaf Sandwich


Printable Version: Cheeseburger Meatloaf


Friday, February 26, 2010

Sir Sportsalot COOKS!


Are you as amazed as I am?

Let me tell ya...when I was informed that Sir Sportsalot wanted to make dinner...I didn't argue. I wanted to. Not because he was going to cook, but because I had a plan. I was planning on making a recipe that I'd been wanting to cook for months. I was planning on making Julia Child's Boeuf Bourguignon!!!

But, I bit my tongue. Hard. And put my plans on hold. When one is presented with a miracle, one shuts up and accepts it.

This announcement was made in the middle of a Costco shopping trip. (I had lots of witnesses so he couldn't back down). We had bought lots of meat and of course we stalled in the baking section where they have all sorts of seasonings....and tossed a few new ones into our cart.

After all was said and done (and paid for....holy crap! Why do I spend twice as much when he goes with me?) Sir Sportsalot decided he wanted to cook the pork top sirloin steaks (a.k.a. really thick pork chops) with our new lemon pepper seasoning.

Oh....btw...I've been informed that he will resume his bbq'ing status in March. hmmm

I made a few suggestions (presented them as questions....cuz then it's his choice and not mine and we all know that our men like to "think" it's their choice, right?)

Well, lets just say, he cooked (while I presented the background "tips") and we enjoyed the outcome.

The marinade was very simple:


1 tablespoon Lemon & Pepper Seasoning Salt
Juice from 1/2 lemon
about 1 or 2 tablespoons of olive oil

Combine in a zip lock baggy and add 2 pork steaks


Allow to marinade for at least 30 minutes, in your fridge. More time would be better but 30 minutes was all the time we had

Preheat your oven to 375'

Coat an oven safe skillet with more olive oil and sear both sides of the "steak" (discard the marinade)... pour 1 cup chicken broth into the skillet and plop into the oven to finish cooking....time will depend on how thick your meat is...about 15 minutes maybe? Best bet is to use a meat thermometer if you're in doubt, until the meat has an inside temperature of about 170'

Meanwhile he steamed some asparagus and sauteed some mushrooms and onions. The meat was sliced and doused in the broth before serving.


mmmmmm....it was so delish. The meat was tender...the veggies were full of their own flavors...and you know what? It was wonderful to not have to cook but still have some small amount of input (read guidance) on what was done and how it was done.

Btw...I did have to plate the food for your viewing pleasure. I think it would've been too much to ask to have Sir Sportsalot do all that. Maybe someday....but for now....cooking the meal is just fine with me.

Oh and I did make the Boeuf Bourguignon a week later, and will post about that wonderful dish very soon.

Printable Version: Lemon Pepper Pork

Wednesday, February 24, 2010

Flying Chicken


Why did the chicken cross fly across the road? Cuz she was in a hurry of course.

This recipe came to me as I cooked it. I got home late from work and had nooooo idea what I was going to do with the 2 chicken breasts I had defrosted in the fridge (this is a common occurrence).  As I pulled the chicken out, I thought I was going to make a simple creamy garlicy herby sauce (again. and I was not thrilled with the idea) but as I started the process, and began looking through my fridge...it evolved into something completely different.

And new.

The results were...well....yummy. I've been informed that I need to make more "pantry" meals. Probably one of the best compliments I've received in a long time.

So here I sit....writing down this recipe before I forgot what the hell I did...but I couldn't think of a name. My daughter gave me some strange (only a teenager could understand) names. I suggested Chicken on the Fly and she thought that was gross.

LOL...guess she's not all too familiar with the saying "on the fly"...thus it became Flying Chicken.

I don't have pictures of the process. I didn't know I'd be adding it to my blog, but here I am....and here we go....(keep in mind that the seasoning ingredients are approximate. Use it as a guide and do with it as you wish)

2 chicken breast halves, cut into 1 inch chunks
Salt and pepper to taste
Olive Oil
6 crimini mushrooms, sliced
2 garlic cloves, minced
1/2 tsp onion powder
1/4 tsp paprika
1/4 tsp poultry seasoning
2 tsp parsley flakes
1 tsp Old Bay Seasoning
1 14.5 oz can diced tomatoes
1/3 can of milk
Shredded mozzarella cheese to garnish

Season the chicken with salt and pepper and saute in olive oil until brown, remove from pan and set aside.
Add mushrooms to the pan with a bit more olive oil if needed and saute until just barely tender. Remove from pan and set aside
Add garlic and the rest of the seasonings and saute briefly...about a minute.
Pour the tomatoes and milk into the pan and stir to combine.
With an immersion blender, puree the tomato mixture. Because my pan was so wide, I had to remove the mixture to a tall, narrow container to puree properly without making a huge mess. Once pureed, return to the pan along with the chicken and mushrooms. If needed, add more salt and pepper to taste.
Heat and simmer for approximately 10 minutes.
Serve over pasta.

Poof....dinner is served.

It's creamy yet not too rich. I didn't want anything "Italian". No reason...just not in the mood, so I stayed away from the Italian seasoning that was calling to me from the spice cupboard. There's a slight after "bite" to it. Probably from the paprika....but it's just enough to catch your attention. Fast, easy and satisfying. The perfect working mom's weekday dinner.

Printable Version: Flying Chicken

Monday, February 22, 2010

1 Potato, 2 Potato, 3 Potato, Crash!


Raise your hand if you've at least heard of these awesome babies....Crash Hot Potatoes

One....two...three...four....ya, quit a lot of you. Which doesn't surprise me since they are sooooo good! The first time I heard about them was a little over a year ago in one of the discussion forums over at BakeSpace. BobtheDude (actually, Bob is one of his cat's name...thats just the screen name he uses in BakeSpace) from CookingStuff was talking about them and how "wicked good" they are. He had heard about them from The Pioneer Woman / Cooking

Well...with that kind of review, I knew they were a must try!

And you know? I was not disappointed. In. The. Least! They are amazingly good... flexible in flavors and just way too much fun to make and eat.

I'm sure there are lots of posts about these potato wonders....but I have a fun, simple twist at the end...so stay tuned. I don't think you'll be sorry you did.

Get several potatoes....try and use ones that are about the same size


I usually use those yummy little red potatoes but this time I had some nice yukon golds that I found on sale.

Boil them in salted water until they are fork tender....how long? shoot, I didn't pay attention. Just keep an eye on them. But don't over do it. You don't want mush

Get out some goodies....olive oil, salt, pepper, garlic


Maybe even some bacon bits and onions


What ever you wanna see on your tater

Line them up on a well oiled cookie sheet


Then get out your potato masher or you can use the bottom of a glass and crash them taters


Oh ya....make a mess. A controlled mess cuz you wanna keep them as individual servings...but in a messy way

Now get out those goodies and season your crashed potatoes. Oil or butter, salt and pepper....etc


Btw...now is not the time to add sour cream. Cheese maybe but I didn't do that this time

Put them in a very hot 450' oven for about 20 or so minutes....until you have crispy edges and the taters are golden grown


And you end up with the loveliest, most tasty mess that just promises to satisfy any potato carb craving you could possibly have.

And when you make them I HIGHLY (I cannot stress "highly" enough) recommend that you make extra (and maybe hide them so they don't disappear) cuz you know what?

These Crash Hot Potatoes are awesome for breakfast

Reheated

With a scrambled egg tossed on top


Now thats a breakfast I really look forward to.

Although I have to apologize for the horrible color in this picture....I had the camera on the wrong setting.

That'll teach me to take pictures before my morning coffee.

Printable Version (as seen in BobtheDude's BakeSpace Kitchen): Crash Hot Potatoes

Saturday, February 20, 2010

Nigella's Chocolate Fudge Cake


Mmmmmm....chocolate

And strawberries.

One of my most favorite flavor combos.

Earlier this month is was my oldest daughters 20th birthday.

Holy CRAP! 20?! When did that happen?!!!

20! The first time I said 20, I almost choked. 16, 17, 18, even 19 sounded O.K. I mean, the kids are getting older but it still had that "teen" on the end. 20 is a reality check for me.....my baby isn't a teenager anymore.

breathe deeply.......inhale, exhale....repeat as necessary

Whew...(deep breath) Ok...so, I asked her what kind of cake she wanted.  She hemmed and hawed and finally sent me a text message informing me that she wanted a Chocolate Fudge Cake.

I searched.

I found.

Nigella's recipe for Chocolate Fudge Cake

I didn't change her recipe. But once I started putting it together, I decided to add....sliced strawberries in between the layers.

I'll give you the recipe here just for convenience sake and I have kept the pictures to a minimum,....but let me tell ya, the cake was moist and good and all but I wish it had been more chocolatey. But that's just me.

The icing on the other hand.....HOLY MOLY!!! It. Was. To. Diiiiiiiie for!

Cake:
2 2/3 cups all purpose flour
3/4 cup plus 1 tablespoon granulated sugar
1/3 cup light brown sugar
1/4 cup cocoa powder
2 tsp baking powder
1 tsp baking soda
1/2 tsp salt
3 eggs
1/2 cup plus 2 tablespoons sour cream (no wonder its so moist)
1 tablespoon vanilla extract (finally! someone who's not afraid to use some vanilla!)
3/4 cup unsalted butter, melted and cooled
1/2 cup corn oil
1 1/3 cup chilled water

Fudge Icing:
6 oz bittersweet chocolate (if you can find it, use a minimum 70% cocoa...I could only find 62%)
1 cup plus 2 tablespoons unsalted butter, softened
1 3/4 cups powdered sugar, sifted
1 tablespoon vanilla extract

My addition:
2 pints of strawberries, sliced in half

Preheat your oven to 350'. Butter and line the bottom (with parchment paper) of 2 8" cake pans.

Just to warn ya....you're gonna need a few bowls

In one large bowl, combine the flour, sugars, cocoa, baking powder, baking soda and salt. Set aside

In another bowl, whisk together the eggs, sour cream and vanilla.

In another bowl....with a hand mixer (or stand mixer) beat together the melted butter and corn oil until just blended then beat in the water.....


Hmmm.....the butter re-hardened and didn't mix with the water. Even a wooden spoon didn't help. Well....we'll just have to forge on and hope it doesn't matter, right?

Ok, now you're suppose to add all the dry ingredients all at once and mix together on a low setting....add the egg mixture, and mix some more until its all blended together.

Pour your batter into the prepared cake pans


Looks like the hardened butter issue wasn't an issue after all.

Bake for 45-50 minutes or until the toothpick tester comes out clean. Cool the cakes in their little pans, on a cooling rack for 15 minutes before removing


And once again, I'm dealing with the San Andreas fault....but we'll pretend it's not there but making that the bottom or something.

Anyways, allow the cakes to cool completely before even thinking about icing them.

But you can at least make the icing. mmmmmmm.....icing!

Melt the chocolate, either using a double boiler (or bowl over a small sauce pan) or in the microwave...which ever works best for you.

In a separate bowl, cream the butter until its....well....creamy. Add the powdered sugar and beat some more...and now it's fluffy, right? Add the vanilla and chocolate and mix together until it's all nice and smooth and oooooh so sinful looking


Spread some icing on the bottom layer part of the cake....and top it with some strawberries


These were some frozen strawberries that I had...I figured they'd be a little sweeter than the ones at the store right now since it's not quiet strawberry season yet.

And well...now its time to add the second layer and ice away. If you have some chocolate leftover then shave some off using a potato peeler, and sprinkle on top


And you'll find yourself in the presence of a cake worthy of your oldest child's 20th Birthday.

Printable version: Nigella's Chocolate Fudge Cake

Thursday, February 18, 2010

Chicken Piccata


I remember the first time I had Chicken Piccata. Sir Sportsalot and I had gone out to dinner at a nice local steak house. I had never heard of the dish and didn't even know what the heck a caper was. I even asked the waitress what it was to make sure it wasn't fish. (I'm allergic to fish...all fish).

Well, come on now....doesn't "caper" sound like it could be the name of a fish? Like cod, snapper, scallop....those are all really weird names too, ya know...

Anyways...once I had been assured that there was nothing in this dish that was a fish....and that it was delish....I decided I'd give it a try. (sorry, couldn't resist the rhyme)

Now for me, that's a huge thing. I mean, when I go out for dinner, I'm a little picky. Once I find something I like, I pretty much stick to that. I have my favorites at each restaurant we go to. I hate trying new stuff and being disappointed. There's nothing worse than going out to dinner and not enjoying your meal.

Am I alone here? Are my expectations too high?

Anyways...bottom line is...I absolutely LOVED IT!!!

Sad part is....this was a special dish for a special occasion. I hate when that happens. This particular restaurant puts out a special menu for New Years (as many places do) and Chicken Piccata isn't on their regular menu.

I've seen it on the menus at other places but there's always something different...

I don't want different. I want it how I like it.

Thank you very much!

And so I make it myself.

The family loves it. Friends love it.

I love it.

It really is a simple dish.....packed with lots of flavor.


2 chicken breasts, halved (butterfly style) and pounded down to about 1/4 " 
1/2 flour
Salt and Pepper to taste
1/4 tsp paprika (I forgot it this time)
2 tablespoons butter
2 tablespoons olive oil
1 cup chicken broth
1/4 cup fresh lemon juice
1 - 2 tablespoons capers
lemon slices to garnish

Tip: When flattening your breasts, put them inside a zip lock baggy to avoid splattering all over everything.

In a shallow bowl, combine the flour, salt, pepper and paprika and dredge your chicken through it


Heat the butter and olive oil in a skillet. Saute the chicken in batches if needed, until browned (and cooked through) and set aside


Drain off all but 2 tablespoons of fat from the skillet. Stir in the chicken broth, scraping to loosen all those tasty browned bits that are stuck on the bottom (a.k.a. deglazing the skillet)


Add the lemon juice and return the chicken to the skillet. Heat until the sauce reduces by about 1/2. Add capers and lemon slices


And serve over pasta. Some places serve it over rice or potatoes. I've never tried it that way so I can't vouch for it...I personally like the pasta. And the tangy sauce that gets poured all over the place. I love the flavor the capers have....almost like horseradish, but not.

Yep....this is one of my all time favorite meals.

What's yours?

Printable: Chicken Piccata

Tuesday, February 16, 2010

Whole Wheat Chocolate Goodies


I was really looking forward to this HBin5 assignment.


Chocolate? How could I not?

But I started hearing through other members about its lack of being "sweet". You see, the rest of our assignment was to make Chocolate Espresso Whole Wheat Bread and Chocolate Tangerine Bars from the Healthy Bread in 5 Minutes a Day.

Something chocolate thats not sweet? ooooh noooo.....we can't let that happen!

So let me tell you what I did to make these....


Chocolate Espresso Whole Wheat Muffins filled with Nutella Frosting.

Now you're talking!

They were still "wheaty" but good. Moist and tasty. Not too sweet (as if thats even a possibility) but enough to where you feel like you're having a treat.

I started off by following the recipe in the book (can't tell ya how that works or I'll have to.....well, you know how the saying goes)...


Yes....They were in the shape of the Valentine icon


Did I mention that I sprinkled the top with quit a bit of white sugar? I needed sweet!

Earlier in the day I had made a simple icing which consisted of

1 cup plus 2 tablespoons of butter
1 3/4 cups of powdered sugar
1 tablespoon vanilla extract

(you're see a chocolate version of this icing in a later post)

Cream the butter, add the sugar and mix until smooth...then mix in the vanilla.

The icing was for some cupcakes my daughter was making for her boyfriend so I borrowed about 1/3 cup and mixed it with 1/3 cup of Nutella. Filled up a zip-lock baggy with an icing tip fitted over a trimmed corner


From the bottom of each muffin, I then hallowed out the centers and filled it in


I then took the "core" of the muffin and trimmed it a bit and used that to plug up the hole


Good stuff....let me tell you!

I did find the dough a bit on the wet side. It was a little harder to work with...but it seemed to rise well. I just have to keep in mind that my kitchen is cooler in the winter (even though I'm in SoCal) and my counter tops are always cool...so I have to let the dough rise longer.

Now....with the same chocolate espresso dough, per the instructions, I added chopped bittersweet chocolate, craisins and tangerine zest


Have you ever tasted a craisin?


I had tasted a specific name brand kind from the grocery store several months ago and wasn't very impressed. I couldn't figure out what all the hype was about....but I figured to each his own, right?

I got this batch of craisins from a health food store.....scooped them out of a bin and got as many as I wanted.

WOW!!! Huge....I mean HUGE difference in flavor. They were wonderful. Tasty little morsels that burst all sorts of contrasting flavor in your mouth....sweet, tart, tangy, dry, moist, sour.....YUM!

Ok, now I'm excited about these "tangerine bars". But I wasn't feeling it. I mean...the "bars" part. We're still dealing with whole wheat here and as much as these would probably resemble brownies, I knew my taste buds would be disappointed. No matter how much I knew intellectually that they'd be "wheat" my taste buds just wouldn't be able to wrap themselves around the wheat.

Once again...I needed SWEET!!!

I don't know how I came up with this....but it totally worked and was totally awesome....

Biscotti!

Chocolate, Espresso, Tangerine, Craisin Biscotti

I formed this oblong rectangle-ish free form, super wet, super sticky loaf and let it bake for about 25 minutes (that was after it rose, not so much, for about 2 hours). I allowed the dough to cool a bit before slicing


I then popped them back into the oven (about 325' F) for 12 minutes on each side. Once they were cool I filled a drinking glass with some melted semi-sweet chocolate chips (added a tablespoon of crisco to make it more melty) and started dipping


Let me just say.....total success. Sweet, tart....and ooooh so chocolatey.

I think there's one small end left. I'll be fighting off the pack tomorrow morning so I can have that last morsel with my cup of coffee.

Please head on over to Michelle's at Big Black Dog so see everyone elses incredible versions of this months goodies