Yum Peaceful Cooking: February 2013

Monday, February 25, 2013

Thai Kitchen Zing Rolls


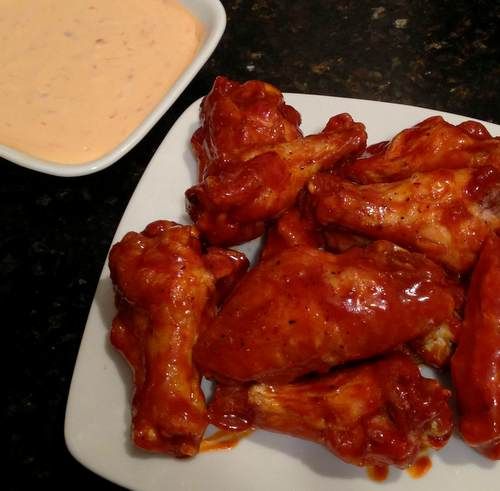
I decided to try another recipe from Thai Kitchen and Simply Asian. I posted one recipe for Spicy Kung Pao Chicken Wings with Sweet Chili Dip which I loved.

I then decided to try the Zing Rolls. Which happen to be Vegan. Not that I'm into vegan but one of my daughters is.

The ingredients were simple and easily acquired. Except for the Rice Paper Wraps. I looked at various local markets. No luck. Then I remembered an excellent Asian market a few miles away and decided to head out one Saturday morning. After searching several isles, including the refrigerated isle and freezer (I was thinking they'd be with the won ton wraps and such)...I finally tracked down a store employee and was directed to a dry goods isle.

All this to find a simple, tortilla like package of white disks. For 98 cents. For 100 wraps. I think I spent more in gas getting there.


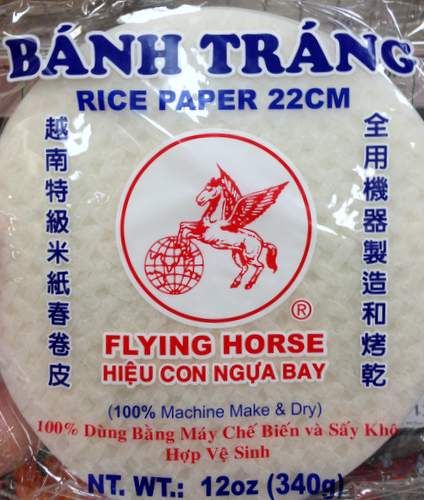
You see...I am not, in the least, familiar with rice paper wraps. They're pretty cool little things. No cooking required. Just a little softening in warm water. Not only is this dish vegan, but other than cooking the rice noodles, it's raw. And I don't know about your area but raw, vegan food is HUGE around here.

And my daughter has jumped on that wagon. Big time.

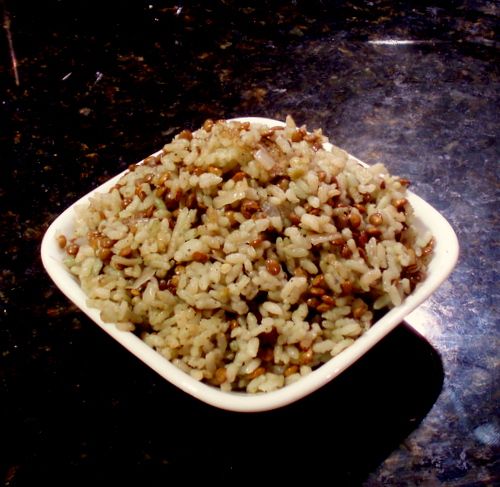
Now, let me talk a little about these rice noodles. Red rice noodles to be exact. Yes, they have that reddish thing going on. Yes they are made of rice. I ended up spending a lot of time separating the noodles once cooked. I think if you use lots of water and spend some time stirring, it will save you time in the long run.


Also....once cooked, they have this pinkish hue thing happening. Sort of a fleshy color. When you put the spring roll together....don't be shocked or surprised if it resembles a...um...particular part of the male anatomy.

Just know....these spring rolls taste wonderful! The vegetable combination is fantastic. It's like having the perfect salad (minus the lettuce)...all rolled up tightly, in a little roll...easily enhanced with your favorite dip.


Zing Rolls

1/2 box Thai Kitchen Red Rice Noodles
12 round rice paper wrappers (8 1/2 inch)
2 large red bell peppers, thinly sliced
2 large cucumbers, peeled, seeded and cut into thin strips
3/4 cup shredded carrots
2 medium avocados, peeled, seeded and thinly sliced
2 TB chopped fresh cilantro
1/4 cup chopped peanuts
Thai Kitchen Sweet Red Chili Sauce for dipping

Bring a large pot of water to a boil. Remove from heat. Add rice noodles, stirring to separate noodles. (I suggest that you stir longer than you think you have to so they don't stick together). Let stand 8 to 10 minutes or until noodles are tender but firm. Drain well. Place in a large bowl of  cold water. Separate noodles fully. Set aside.

Fill a 9" pie plate with warm water. For each spring roll, dip 1 rice paper wrap in water to wet completely. Place on your work surface. Blot dry with a paper towel.

Place 1/3 cup of rice noodles in bottom third of the rice paper.


Layer with 4 bell pepper strips, 8 cucumber strips, 1 TB carrot, 2 avocado slices, 1/2 tsp cilantro and 1 tsp peanuts.


Fold in sides,


then gently roll tightly to enclose filling.


Place spring roll on a platter. Cover with a damp paper towel and plastic wrap. Repeat with remaining rice paper wrappers and filling ingredients to make 12 spring rolls.

Refrigerate for at least 30 minutes or up to 2 hours. Serve with dipping sauce.


I used the Sweet Red Chili Sauce.

Sunday, February 17, 2013

Kung Wow - Spicy Kung Pao Chicken Wings with Sweet Chili Dip


Happy New Year! 

The Chinese New Year celebrations are in full swing and ringing in the year of the Snake.

The year of the Snake. What does that mean? Well, it means we're going to be focused and disciplined, concentrating on details as we achieve what we've set out to create.

Sounds like we're going to be busy this year. And maybe some quick and easy dishes would be appealing.

And maybe....juuuuuust maybe....Thai Kitchen and Simply Asia can come to the rescue. (if you're familiar with their products...you KNOW they can)


I really love Asian foods. But with my allergy to fish, I have to be careful. The use of fish sauces can pose a problem for me. Therefore, I usually make my own where I can control the ingredients...which is extremely time consuming. It's definitely a labor of love.

Thank God for Thai Kitchen and Simply Asia. A quick look at the ingredients list...and poof...a great dish is soon in the making. Whether it's to help ring in the New Year...or any other time of the year when we have that craving that only Asian food can appease.

Which brings me to this dish...Kung Wow (recipe provided by Thai Kitchen and Simply Asia). Quick and easy...and delicious. Even though it says spicy. Don't be afraid. It's not very spicy in the least. After a few bites, the heat builds up to a point of notice...but not to the point of any state of being uncomfortable.

The recipe calls for grilled chicken wing pieces that are turned frequently and brushed with Simply Asia Spicy Kung Pao Stir-Fry Sauce. Simple as that.

I didn't grill my chicken. I deep fried it, buffalo wing style.

Kung Wow
1 pouch Simply Asia Spicy Kung Pao Stir-Fry Sauce
2 lbs chicken wing parts
Sweet Chili Dip (recipe to follow)

Heat 5" of vegetable oil in a deep pan, to 375° F (you do not want the oil anywhere near the rim as the oil rises and bubbles when you put the chicken in).

Dab the chicken wing parts with paper towel to dry. Sprinkle with salt and pepper.

Working in batches, carefully place a few wings in the hot oil and fry for 10 - 12 minutes. Remove to a cooling wrack while you fry the remaining chicken.

Once the chicken is done, place into a bowl. Pour the Simply Asia Spicy Kung Pao Stir-Fry Sauce over the chicken


Toss to coat......


And poof...it's done!

If you're not into deep frying, by all means...grill, bake...boil...whatever your pleasure may be.

While the chicken is frying, put together the sauce:

Sweet Chili Dip
1/4 cup mayonnaise
1/4 cup sour cream
1/4 cup Thai Kitchen Sweet Red Chili Sauce

Combine, cover and refrigerate until ready to use.

Now, I just noticed something. The original recipe from Thai Kitchen called for 1 tsp of lime juice. I missed it. Not to mention that I didn't have any fresh limes on hand anyway, so it's a moot point. I did double the amount of Thai Kitchen Sweet Red Chili Sauce. Well...my daughter did. She was trying to get more heat involved. Anyway....the sauce is very good. A little sweet...a tiny bit of heat. The perfect compliment to the wings.


I do have a few more recipes of theirs to try tonight. Let's just say...the celebration continues. I'll be getting back to you about them.

In the mean time....since I never post fish or shellfish recipes, here's a little treat direct from Thai Kitchen. Click on the picture and scroll to find recipe.


For more ideas and recipes, check these out:

For entertaining, why not try a Satay Partay - a delicious chicken dish featuring Thai Kitchen's Coconut Milk, Premium Fish Sauce, Red Curry Paste, Lemongrass and Peanut Satay Sauce.

Or, add a little zing to traditional party favorites with Thai Kitchen dipping sauces. Our Spicy Thai Mango dipping sauce puts a fruity twist on traditional spring rolls in this Zing Rolls recipe featuring Thai Kitchen's Red Rice Noodles.
Whether entertaining a crowd or an everyday dinner with the family, Simply Asia Stir-Fry Sauces are the perfect way to create Real Asia, Real Fast at home. Try our mild, flavorful General Tsao Stir-Fry Sauce in Restaurant Style General Tsao Chicken or General Tsao's Meatballs. Fans of ginger will enjoy the flavor our Ginger Teriyaki Stir-Fry Sauce brings to these Ginger Teriyaki Lettuce Wraps. Looking for a little more heat? Serve up these "Kung Wow" chicken wings with our Thai Kitchen Kung Pao Stir-Fry Sauce.


Check out Thai Kitchen and explore their amazing Asian cuisine ingredients!


This sponsorship is brought to you by Foodie Blogroll who we have partnered with for this promotion.

Sunday, February 10, 2013

Bamboo Rice with Green Lentils


It's Easy Being Green!

With that statement, what do you think of first?

Recycle, reuse, anti-plastic, reusable grocery bags, less paper usage, less waste, electric vs gas, organic, no gmo...etc. etc.

Yes, all those and more are a huge part of Being Green, are very important, and just make sense.

But I'm not here to go into all that with you. I'm just here to have a little fun with the help of Marx Foods  by bring the green to the table.

Bamboo Rice
Green Eston Lentils
Whole Cardamon


Bamboo rice? Yes...rice that has been infused with bamboo juice. How beautiful is that! The green lentils in place of pilaf. The whole cardamom was toasted then ground into a fine powder, and used to flavor the dish.


I have a coffee grinder that I use only for spices. Works wonderfully.

Bamboo Rice with Green Lentils

3/4 cup bamboo rice
1/4 cup green lentils
2 cardamom pods, toasted and ground
1/4 cup diced white onion
1 tsp olive oil
1/4 tsp salt
2 1/4 cups water

In a hot skillet, toss together the diced onion and olive oil and saute over medium heat until translucent. Stir in the ground cardamom.

Combine rice, lentils, onions, salt and water cook in a rice cooker. When done, toss and fluff the rice and serve.

Oh how I love my rice cooker. The fact that I don't have to worry about it. It cooks the rice. Keeps it warm. No thoughts, no worries. I'm free to attend to the rest of the meal preparations.

Which happened to be wontons and veggies


The rice is a lot of fun. I love the color. The lentils add texture. If you want a softer texture, either soak the lentils first or add a little more water when cooking. The cardamom flavor really exploded. Puts the bottled powder to shame in that regard. I never realized how intense freshly ground spices are.

Thank you Marx Foods for including me in your It's Easy Being Green challenge.

I almost forgot to mention, they gave me a few other green ingredients to play with: Mint Herb Crystals and Dill Pollen. Even though I didn't use them for my green dish, I will be playing with those in the near future.

One more thing...if you missed my previous post...

Tate's Bake Shop Linzer Heart Cookies and a Giveaway


 I am giving away a Tate's Bake Shop cookbook and cookies. Check it out and enter to win. I chose a winner one Wednesday 02/13/2013. Good luck!

Saturday, February 9, 2013

Tate's Bake Shop Linzer Heart Cookies and a Giveaway


Today I have a special treat for you.

And a surprise.

Your treat is this recipe direct for Tate's Bake Shop:

TATE'S BAKE SHOP LINZER HEART COOKIES
These decorative cookies make beautiful and tasty gifts. 
An important tip: be sure to chop the nuts and chocolate very fine in a food processor (pulse to chop so the friction doesn’t warm them), or the dough will be too rough-textured to roll out smoothly.


You need a graduated set of heart-shaped cookie cutters to make these.
Yield: 20 sandwich cookies
2 cups unbleached all-purpose flour 
1 cup cornstarch 
¼ teaspoon salt 
¾ pound (3 sticks) salted butter, at room temperature
1 cup confectioners’ sugar
1 large egg, at room temperature
1 teaspoon pure vanilla extract 
2 cups toasted, skinned and very finely chopped hazelnuts
6 ounces bittersweet chocolate, very finely chopped 
-plus-
½ cup seedless raspberry jam 
½ cup confectioners’ sugar for sifting

1. Sift the flour, cornstarch, and salt into a medium bowl. In a large bowl, beat the butter and confectioners’ sugar with an electric mixer set on high speed until combined, about 1 minute. Beat in the egg and vanilla, scraping down the sides of the bowl as needed. With the mixer on low speed, mix in the flour mixture, just until combined. Mix in the hazelnuts and chocolate.

2. Gather up the dough and shape it into a flat disk. Wrap in plastic wrap and refrigerate until chilled, at least 2 hours. (The dough can be refrigerated for up to 1 day. Let stand at room temperature for 10 minutes to soften slightly before rolling.)

3. Line 2 large rimmed baking sheets with parchment paper or silicone baking mats. On a lightly floured work surface, roll out the dough to a round about ¼-inch thick. Use a 3 ½-inch heart-shaped cookie cutter to cut out the cookies as close as possible to avoid excess scraps. Arrange the hearts about 1 inch apart on the prepared baking sheets. Gather up the dough scraps and gently knead together, and cut out more cookies. If the dough becomes too soft to roll out, refrigerate until chilled. You should have 40 cookies. Refrigerate for 30 minutes to 1 hour.

4. Position the oven racks in the top third and center of the oven and preheat the oven to 325°F.

5. Use a 1-inch heart-shaped cookie cutter to cut out the centers of 20 cookies.


These will be the cookie tops. (You can bake the mini hearts to nibble on later! Don’t throw away or re-roll.) Bake, switching the position of the baking sheets from top to bottom and front to back halfway through baking, until the cookies begin to brown, 20 to 25 minutes. Sift some of the ½ cup of confectioners’ sugar over the hot cut-out cookies Let cool completely on the baking sheets.


6. Spread the jam on the cookie bottoms, leaving an 1/8-inch border around the edges. Add the tops, sugared sides up, and press together gently. Just before serving, sift the remaining confectioners’ sugar over the cookies.


Ok...I have a tip for you here. This is the 3rd or 4th time I've made Linzer cookies. Each and every time, I struggle with the dough. It's not just this recipe. I think it's Linzer cookie dough in general. It's very firm and crumbly and then it warms up quickly and becomes sticky. Next thing you know, you're tossing more flour on the counter, on the rolling pin, on the dough. You're grabbing a spatula to help remove the cookies from the floured surface. That spatula gets tossed in the sink and you're digging through your drawer looking for a thinner spatula. Ah...the bench scraper! Ya that works. 

You know what else works...wonderfully? 

Parchment paper. Grease the counter top or other flat surface to keep the parchment paper from moving. Lay the parchment parer on the greased surface. Roll our your dough and cut out your shapes. Lifting the edge of the paper up, carefully peel the cookie off. 

BINGO!! 

Also, use any shaped cookie cutter you want. And use your favorite flavor of jam.

Now...For your surprise. 

Actually, it's two surprises. Or maybe three. Depending on how you break it down.

First....Tate's Bake Shop is having a special sale, 50% off, on their Cookie Cube Tower & Baking for Friends


Second, I have a discount code for you. This code will give you 20% off their other products: BLOG213
Use this code at checkout. 

Third..(and I think this is the best one).....

G I V E A W A Y ! 

Yes...you can own the Cookie Cube Tower and Baking for Friends for free!! 
"A sweet treat at a sweet price for those special Valentines on your list! Designed to delight the cookie lover and baker both, we've paired Baking for Friends, the latest baking book from Tate's Bake Shop's own Kathleen King, with our elegant Valentine's Day Cube Tower with three, 3.5 oz packages of Tate's Bake Shop's crispy chocolate chip cookies all dressed up in red! Each cube contains approximately 6-7 cookies."

All you have to do is leave a comment telling me what flavor of jam you'd use in the middle of your cookies.
(PLEASE give me your email address if you are not a blogger so I have a way of contacting you should you win. Otherwise the prize will go to someone I can contact)

If you want extra entries,

Share on Facebook, leave a comment stating that you did 
Share on Twitter, leave a comment stating that you did
Pin on Pinterest, leave a comment stating that you did

(each comment will be worth ONE entry).

I will announce the winner on Wednesday, 2/13/2013