Yum Peaceful Cooking: snacks
Showing posts with label snacks. Show all posts

Wednesday, February 12, 2014

I Heart Chocolate with Van's Foods Snacks


It's almost Valentine's Day and everywhere you look, there's chocolates and candies. Which are cute and tasty but not what my girls would want to eat. I needed to come up with an alternative plan (something other than the cute little socks covered in hearts that I got them).

Chocolate is always good...especially dark chocolate. Good quality chocolate. Ok, wait...let me back up a minute.

Van's Natural Foods recently sent me some boxes of new snacks they've recently launched.... PB&J Sandwich Bars. Gluten-free PB&J Sandwich Bars to be exact. They're goal? To help us stick to that 'I'm going to eat healthier this year' resolution. They couldn't have come at a better time, cuz to be honest, it won't be long before summer is here (and you know what that means). If you fell off the wagon...get back on. It's ok. We won't tell.


So, I got these boxes of PB&J Sandwich Bars...two flavors: blueberry and strawberry. They were really good. So good that my daughters ate them all before I could do anything with them. They tasted like little peanut butter and jelly sandwiches. And they didn't have that intense weird sweetness that you find in other snack bars.

No product to play with meant a trip to the market to hunt them down. These babies are so new that my local markets don't have them yet. You can bet that when I see them...I will buy them! Meanwhile, I purchased another snack bar that they make...Peanut Butter and Chocolate Chewy Granola. Also gluten-free with only 11 grams of sugar (cane sugar is the only added sugar in this product). Perfect for my Valentine plans.

I Heart Chocolate

Grab a bag of good dark chocolate and a tablespoon of shortening or coconut oil.


Place the bowl over a double boiler or a sauce pan with boiling water, off the heat. Stir until melted.


You don't have to add the oil, but it does make the chocolate smoother and shiny.

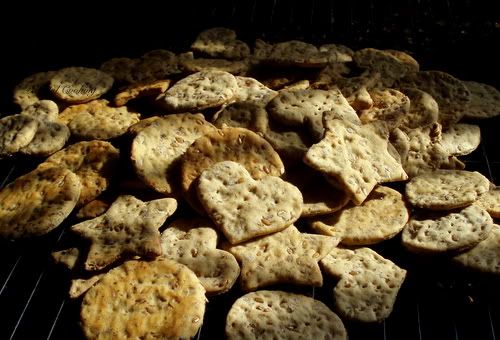
Take a few snack bars and cut them into 1 inch squares.


Place one on a fork


 And dunk. (Kinda makes me want to be one of those squares)


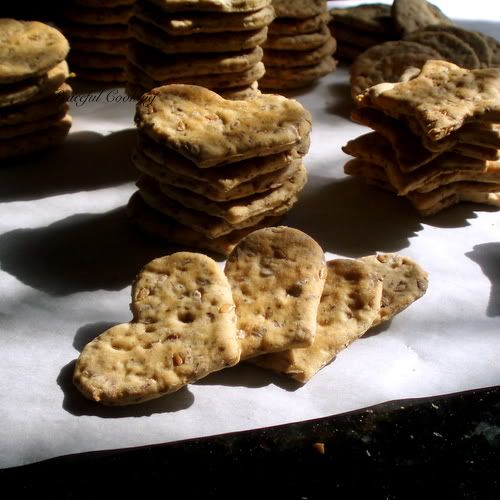
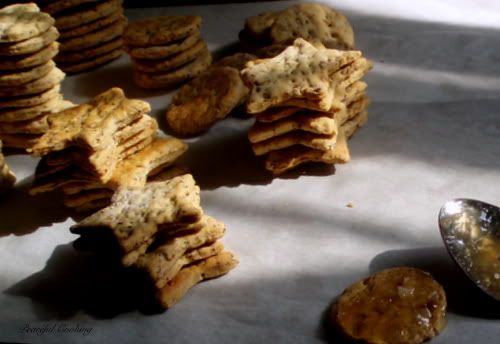
Place on a wire rack. If you have some cute little hearts, stick them on before the chocolate hardens.


Once they've hardened some (they won't get super hard cuz of the oil) give them to your true love, knowing that you're not loading them up with junk. A true gesture of love.


Before I let you go...I want to remind you that I'm having a Giveaway that will be ending on Monday, February 17th,2014. Hurry on over to ENTER for your chance to win 1 pound of Ceylon Cinnamon and get my recipe for Milk & Honey Cinnamon Raisin Bread

Aaaaand, one more thing. Keep an eye out. I will be posting again about Vans Healthy Foods and it will include another GIVEAWAY! I can't tell you what I'll be giving away yet...cuz it's a secret. 

Meanwhile, have a Happy Valentine's Day. If you can't be with the one you love, love the one you're with. Even if its yourself. (Sorry....I know...that song will now be stuck in your head. I know this cuz it's stuck in mine too).  

I was not compensated for this post, however Van's Natural Foods supplied me with samples and coupons for their products. All opinions are my own.

Thursday, February 23, 2012

Flaxseed and Cracked Pepper Crackers


When I agreed to participate in the Joy the Baker Cookbook Spotlight and Cook-Off sponsored by Hyperion and hosted at girlichef, we were given a a selection of recipes to try out, 2 choices per week with the option to make one or both choices. I figured I'd only do one recipe each week. I didn't want to stress myself out by trying to overachieve.  For the first week, we had the choices of Chocolate Fudge Brownies with Chocolate Buttercream Frosting and Flaxseed and Cracked Pepper Cracker (say that 5 times fast). I was planning on only making one of them...and of course I went with the brownies (that's a no brainer). After seeing everyone's cracker post...I couldn't resist. I HAD to give them a try. And let me tell you....I am so happy I did. They are easy to make and taste great! You have the earthiness of the whole wheat flour, the nuttiness of the flaxseed and the slightest heat from the cracked pepper. And you can make them any shape you choose!

 (time to get out your cookie cutters and have a little fun)

One side note....if you choose to purchase the Joy the Baker Cookbook (and I highly recommend that you do) you might notice that cracked pepper is not on the list of ingredients. A mild oversight somewhere along the line. It has been determined, and confirmed by Joy, that 1/2 tsp is what should be there. (it's now there, in my copy of the book, written in my handwriting).

One more side note: Flaxseed meal. It's a bit pricey. I happened to already have some on hand from some bread I made a while back (apparently it keeps very well in a very cold fridge). But I did see it at one of my local health food stores, sold in a bin. Which is great...a buck something a pound and I'd only have to purchase as much as I needed. Hopefully you have something near you that does the same. I was able to purchase the golden flaxseed in the same manner.


Flaxseed and Cracked Pepper Crackers
Printable Version

1/4 cup golden flaxseed
1/3 ground flaxseed meal
1 cup whole wheat flour
1/2 cup all purpose flour
1/2 tsp baking soda
3/4 tsp salt
1/2 tsp cracked pepper
2 TB unsalted butter, cut into cubes and chilled
1/2 cup buttermilk

Preheat the oven to 350' F. Line 2 cookie sheets with parchment paper.

In a medium sized whisk together the flaxseed, flaxseed meal, whole wheat flour (I used white whole wheat), all purpose flour, baking soda, salt and cracked pepper.

Add the butter and work it into the flour mixture, quickly, using the tips of your fingers.

Make a well in the center and add the buttermilk. With a fork, work everything together until all of the flour mixture has been incorporated with the buttermilk, making sure every bit of the flour is moistened. You will have a shaggy dough but no worries....it'll come together very nicely in a minute.

Turn the dough out onto a lightly floured surface and knead the dough about 10 times to bring everything together. Wrap in plastic wrap and chill in the fridge for about 10 minutes.

Once chilled, cut the dough in half (place one half, wrapped in plastic) back into the fridge. With the remaining half, roll out until it's about 1/8 of an inch thick. Which basically means...as much as you possibly can. You don't want the dough to be thick otherwise your crackers will have more of a biscuit texture than a nice crisp cracker.

Cut the crackers into 1 1/2" rounds, or use a pizza cutter to make squares...or use your favorite small cookie cutter. If the crackers are much bigger than 1 1/2", you will need to increase the cooking time accordingly.

Place on a cookie sheet and prick each one a few times with a fork


Bake for 15 to 18 minutes or until just golden brown around the edges. Allow to cool before storing them in an airtight container.

Store at room temperature for up to 4 days.

And there you have a whole crud load of delicious, healthy crackers that you've made yourself!


Serve with your favorite cracker topping....cheese, savory spread such as Garlic Jelly


But to be honest with you....I preferred them as is....plain and simple, straight out of the handy dandy zip lock baggy on my desk....waiting to be snacked on throughout the day. Or as a nice little side while enjoying my Merlot night cap.

However you decide to eat these tasty little morsels....make sure you share with a friend and here the awe in their voice as they say..."You made these?!"

(I'm sad to say that I just popped the last cracker in my mouth. Gee darn...I might have to make some more)