Yum Peaceful Cooking

Wednesday, April 13, 2011

Sourdough Bread from Starter to Finish

Tangy, soft, chewy.....sourdough bread is wonderful. For as long as I can remember (almost) I've been eating sourdough bread. Of course the best kind is San Fransisco Sourdough. I mean...honestly! That stuff totally rocks! Now I know I will never be able to make a loaf that can even be seen in the same room as that yumminess but that's not going to (and didn't) stop me from making some good ole homemade sourdough.

Starter and all.

If you "like" my Peaceful Cooking fan page on Facebook, then you may have seen my daily posts of my starter adventure. For those of you who didn't see it, or who do not have a Facebook account, no worries...I'm going to give you a semi quick (because there is nothing quick about sourdough) version of how to make a sourdough starter and a loaf of bread. I'm going to share with you what I know (which isn't much) about the process. If you want more details and specifics (and I mean....scientific type specifics) then I highly highly recommend a wonderful series of e-books called Discovering Sourdough by Teresa L. Hosier Greenway. You can purchase the e-books (for a modest price...and I highly recommend each book. Soooo worth every penny) from http://www.northwestsourdough.com/discovering/

And without further ado....lets get to it!

Keep in mind that this is a process. It's not labor intensive. It's time intensive. It's a "labor" of love and worth every single minute and day. 

Sourdough Starter


Day 1
1/4 cup bread flour
1/4 cup rye flour (or whole wheat...I used rye cuz I had some)
1/2 cup pineapple juice (or apple juice...I used pineapple juice)

In a very clean, non-metallic 32 - 48 oz container with a lid, mix thoroughly. Cover lightly and let set at room temperature.

Day 2
Stir. Cover lightly and let set at room temperature

(pretty complicated, eh?)

Day 3
Stir, pour 1/2 of your starter out and add
1/4 cup bread flour
1/4 cup rye flour (or wheat)
1/2 cup pineapple juice (or apple juice)

Stir will (a whisk works great! Incorporates a lot of air which is a good thing), cover lightly and let set at room temperature

Day 4
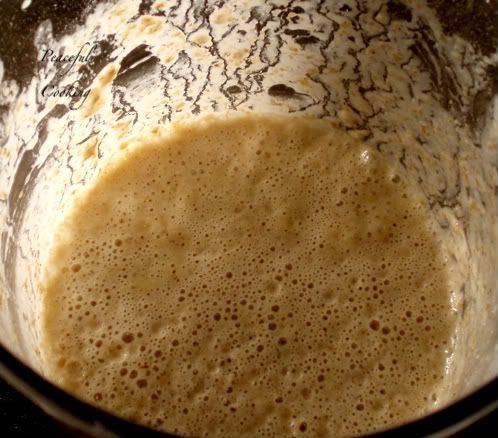

Stir, pour out half of your starter and add
1/4 cup bread flour
1/4 cup rye flour (or wheat)
1/2 cup pineapple juice (or apple juice)
Stir, cover and let set at room temperature

Day 5
Stir, pour out half of your starter and add
1/2 cup filtered water (do not use tap water)
1/4 cup plus 2 tablespoons bread flour or unbleached white flour
2 tablespoons rye flour (or wheat)
Stir, cover lightly and let set at room temperature

At this point, we're done with the pineapple juice and are weaning the starter off the rye / wheat flour. You may notice a layer of liquid at the top....that is called a hooch. Stir it in...don't pour it off. If the hooch is in the middle of the starter or at the bottom...somethings wrong. You'll probably want to start over. If you see mold....somethings wrong. If your starter turns pink or orange....somethings wrong. As long as you use clean utensils, filtered water and fresh flour....you should be good. If you want more details or explanations, I suggest getting the e-books or visit the authors website. You can email me too but keep in mind that I am by no means an expert. This was the first time I had ever attempted this whole "science project" in my kitchen. I will do my best to answer any questions you might have, though.

Days 6 - 14 (yes...it takes 14 days for a starter to be ready for bread making)
Stir, pour out half of your starter and add
1/2 cup unbleached flour or bread flour
1/2 filtered water
Stir, cover lightly and let set at room temperature.

You will be doing the same thing for the remainder of this process. You may notice some odd smells coming from your starter....it's normal. Sometimes it probably won't smell too good at all. But by the time you get to the 14th day, it should smell tangy and yeasty...in a good way. Below are a few pictures at various stages....

Day 8:

You can see my hooch (that doesn't sound right does it?!) in the pic on the left as well as in the middle. These were taken before I stirred and "fed" my starter. The picture on the right is after the "feeding".

Day 9:

This was taken before the feeding.

Day 12:
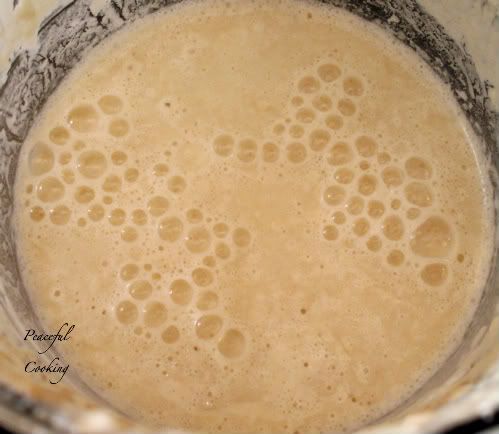
Taken after the feeding

Day 14:


Before the feeding....

After the feeding....


I did my feedings in the morning. No particular reason. On the 14th day, I fed my starter as usual. That night I poured out some of my starter so that I had about 1 cup left and added
1 cup unbleached flour
1 cup filtered water

When I woke up, this is what I had.....

Me and my starter were ready to bake (I hoped). If I'm not mistaken, that is what is called a "vigorous starter".

I was nervous....not confident or secure in anything that I had going on here. Not even sure if I knew what I had and if it was what I thought hoped it was. Even with all the information I had read (some of it I didn't and still do not understand)....I felt like I was in way over my head. But I decided I'd go for it. Besides, it was Sunday morning and if I didn't do it then...I'd have to wait another whole week.

Sourdough Bread (this takes several hours.....start early in the morning)

1 cup vigorous starter
1 cup tepid water
2 teaspoons oil
4 cups bread flour
2 teaspoons salt

In a mixing bowl, combine the starter, water, oil and flour. Stir until well incorporated.
Allow the dough to rest for 20 minutes.
Sprinkle in the salt, stir for a couple of minutes (I used my hands).


Cover with cotton towel and allow to set at room temperature for 5 hours.
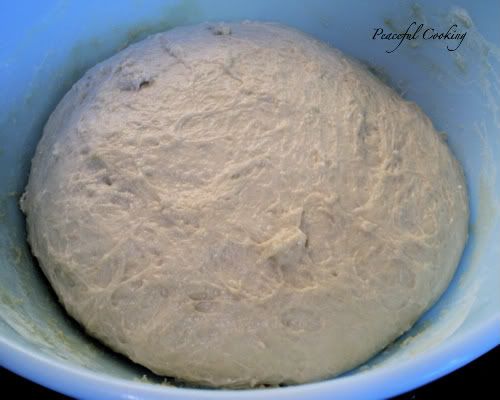

After the 5 hours is up, stir the dough and turn out onto a lightly floured surface.
Fold the edges to the middle, sprinkle a little flour on the dough and continue to fold in the edges, rotating until you have the dough in a ball. (Sourdough doesn't not need to kneaded heavily).
Turn the loaf over so that the "seam" is facing down. Allow to rest for 10 minutes.

Cup the sides with your hands and jiggle it back and forth a couple of times as your rotate it in a circle. This will give the loaf a little "lift" and make it more of a dome shape.


Prepare an oven proof bowl or baking dish by greasing it will and sprinkling it with cornmeal. Sprinkle the top of the loaf with more cornmeal, cover and allow to rise for 2 hours.
1/2 hour before the 2 hours is up, preheat your oven to 450'F.
When the 2 hours is up, take a sharp knife and slash the top a couple of times about 1/4".
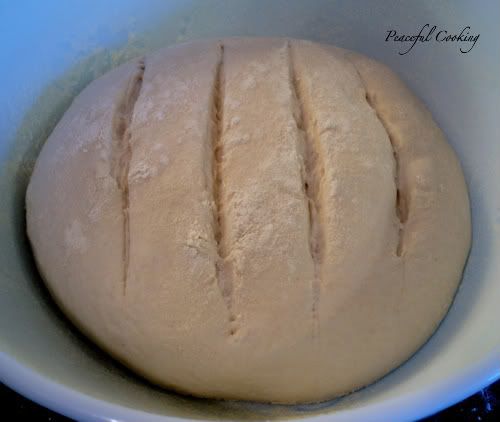

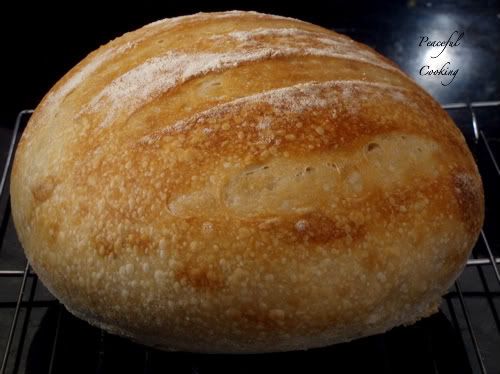
Here's a little trick I learned from the author here.....part of what makes a good sourdough loaf is humidity in the oven. So...I have a baking stone. If you don't have one, use a baking sheet. This is placed in the oven on a low rack. I got a deep, large roasting pan and a small ramekin dish. I placed my loaf on the baking stone with the ramekin next to it. I then covered them both with the bottom portion of the roasting pan....keeping it completely on the baking stone so that it sealing everything inside....steam and all.

I let the bread bake under the roasting pan for 20 minutes. Then I carefully removed the pan and ramekin, turned the heat down to 425'F and continued to bake for another 10 - 15 minutes. You're suppose to turn the loaf once so that it browns evenly but I forgot.

I then removed the loaf from the oven, careful removed it from the bowl and placed it back in the oven so that the bottom and side could get brown (since they were being shielded by the bowl). This took another 10 minutes. Your bread is done when the inside temperature has reached 200- 210'F. Remove from the oven and allow to cool before slicing. I know...it's hard but you really don't want soggy bread...especially after all the work you've put into it!!!

I mean....when you slice into this baby....isn't this what you want to see?


I can't wait for the weekend to come back around so I can make another loaf!

Sunday, April 10, 2011

Sourdough Belgian Waffles


Would you like to know a little secret? Never in my life have I ever made waffles.

Until This morning.

For some reason they intimidated me. Something about that waffle iron made me think it wanted to screw with me. Make my waffles stick. Burn me. Laugh at me as I wrestled the waffles out of the grids.

I just looked like an evil little appliance.

Until I started wishing I could have Belgian waffles at home.

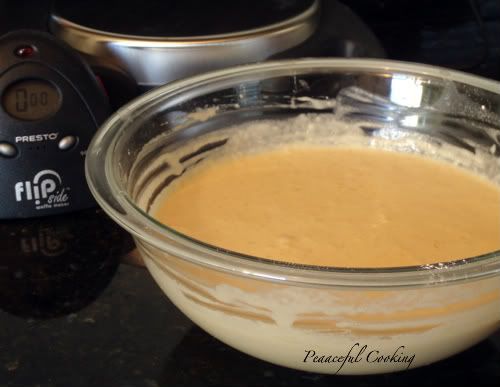
Then one lovely, fine day...I won a gift certificate for CSNStores.com from Michelle's blog....Bigblackdogs.net and ordered myself a super nice Presto Flip Side Belgian Waffle Maker. This thing rocks! Btw, if you've never been to Big Black Dogs, you're really missing out. Great recipes. Fantastic photos and just an all around super nice lady. I really have learned a lot from Michelle.

Actually.....Michelle was instrumental in my decision to dive into the world of sourdough. Michelle hosts HBin5 and it was one of the HBin5 members (Mary J) who offered to share an e-book about sourdough starters and bread. If anyone is interested in the Northwest Sourdough e-book, You can purchase the e-books (for a modest price...and I highly recommend each book. Soooo worth every penny) from http://www.northwestsourdough.com/discovering/

I began my sourdough started a little over two weeks ago (March 26th to be exact). I shared my daily experiences on my facebook fan page (if you wanna take a peak....Peaceful Cooking on Facebook)

Today, my starter looked like this


I have a loaf of sourdough bread rising on the counter at this very moment. I'll be giving more details about my starter and how my first loaf turns out later on this week. In the mean time, I had enough starter to not only make the bread and keep the starter going....but I had enough to make a stack of Sourdough Waffles.

Sourdough Waffles (adapted from Northwest Sourdough)
Printable Version
makes 4 Belgian waffles

1 cup sourdough starter (166% hydration recommended)
1/2 cup water
1/2 cup milk
2 large eggs, beaten
1 tablespoon barley malt syrup
1/4 cup melted butter, cooled slightly (or 1/4 cup neutrally flavored oil)
1 1/3 cup all purpose flour
1 teaspoon salt
1/2 teaspoon baking soda
2 teaspoons baking powder

In a large bowl, combine the sourdough starter, water, milk, eggs, malt syrup and butter. In a small bowl, combine your dry ingredients: flour, salt, baking soda and baking powder. Add the dry ingredients to the wet ingredients.


 If the batter is too thick, add a little water, keeping in mind that the batter needs to be on the thin side (so I'm told....I'm not the expert here by any means. Remember....this is my first time ever making these things).

Heat your waffle iron and do whatever it is you're suppose to do with whichever waffle iron you happen have. If you have heat settings on yours (mine doesn't)....set it on high.

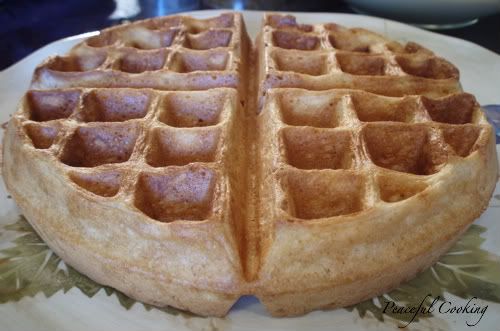
My waffle iron doesn't have settings. What it does have is a nifty little timer. It took about 4 minutes (or until the steam subsided) and poof....I was removing my waffle with ease. No fuss...no muss. And what a beautiful, fat little waffle it was....


 I did it! I had conquered my fear of the evil waffle appliance!

And....I made something from my sourdough starter!!

Aaaaand....it was easy. As a matter of fact, as I was standing there waiting to remove my next waffle...I was thinking to myself...'This is so much easier than pancakes!'

So what was I afraid of?

Ooooh ya....this...


The melt down. The overload. The mess.  Oh well...it's bound to happen. And it's really not all that bad. Way worth the results. And still much easier than pancakes. Seriously...if that's the only mess I end up with....that's nothing compared to all the drips and drizzles across the counter and stove when I make pancakes.

Now that I have a stack of these beauties, what would you put on them?


 Sure...I could totally go for the strawberries and whipped cream.

But I happen to have a thing for peanut butter and maple syrup.....

Monday, April 4, 2011

Strawberry Banana Bundt


Have you ever adapted a recipe from somewhere, albeit a cookbook, hand me down, internet, magazine....made your adjustments and then lost the recipe?

Ya...that's real fun!

I searched for almost 2 hours through the history on my computer....checked photo dates to make sure I was looking at the right history date....I googled what I thought I may have googled when I first thought of this recipe.

No where.

I started looking through magazines and cookbooks.

Fail.

Then one morning as I was cleaning up my kitchen and removed the bread cookbook from the stand, I found some papers behind the book. TA DA!!!! There it was! Plain as day. Printed. I had found my recipe with my notes of what I had altered!!!

Whew!

Although I feel awful because I have NO idea where I found the recipe, originally. Or even when I printed it out. Kudos are due to someone out there......somewhere. Someone out there went to some trouble to type up this recipe and share it. And I have no idea who.

Well....let's just give kudos to everyone one of you! (that way I've covered all my bases)

You know this has got to be good. If it hadn't turned out so delicious, I wouldn't have spent so much time looking for the lost recipe. It's a cross between a quick bread and a cake. It's not as light as cake but it's not as dense as quick bread. The original recipe called it a pound cake but I don't think it belongs in that category either.

Strawberry Banana Bundt
Printable Version

1 cup softened butter
1 1/2 cups sugar
4 eggs
1/2 cup mashed, overly ripe (aka brown) bananas
1/2 cup mashed strawberries
2 1/2 cups flour
1 1/2 teaspoons baking powder
1/4 teaspoons salt
1/4 teaspoon ground nutmeg
1 teaspoon vanilla
1/2 cup buttermilk
2 teaspoons lemon zest

Preheat the oven to 350' F. Grease a 12 cup bundt pan.

Cream the butter in a large bowl with your electric mixer. Gradually add the sugar, beating at low speed. Once the sugar has been fully incorporated, increase the speed to high and beat until pale and fluffy.

Add the eggs one at time, beating well and scraping down the bowl after each egg. Once all the eggs have been added, continue beating until smooth and even more pale.

Beat in the strawberries and bananas.

Sift together the flour and baking powder and nutmeg. Combine the buttermilk and vanilla. Turn the electric mixer down to low. Alternating between the flour and the buttermilk, add 1/3 flour, then 1/3 buttermilk until all the flour and buttermilk are fully incorporated.

Stir in the lemon zest.

Pour the batter into the prepared bundt pan. Bake for 80 minutes or until a toothpick inserted, comes out clean.

Allow to cool on a rack for 20 minutes. Remove from pan and allow to continue to cool completely.

While your bundt is cooling, make your favorite glaze to pour over the top. I chose a chocolate glaze.


There's something extremely satisfying about a strawberry, banana, chocolate combo.

If you want to really take this baby over the top....get out some frozen strawberries.

Yes!!! I said frozen strawberries. There is a time and place for them. Like...now. When you want all those yummy juices to be soaked up by something sweet....pound cake, angel food cake, shortbread. This is the perfect time and place for frozen strawberries.

And....wait for it.....

Wait for it.....

WAIT for IT..................


Whipped Cream!


Now you're talkin' MY language!!

This is my entry for this weeks Hearth and Soul Hop-Volume 42!


Saturday, April 2, 2011

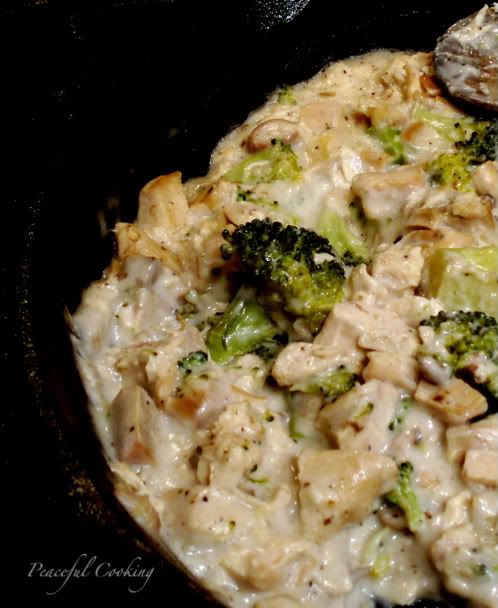
Chicken and Broccoli Alfredo Wannabe


You've been working all day. You have the kids to deal with....homework....practices. The dogs barking, the cat's walking figure eights around your ankles and someone is blowing up your cellphone with texts. And your version of Sir Sportsalot is asking if his favorite shirt is clean.

In the middle of all this....you have dinner to think about. You don't have a lot of time or energy but you'd still like to make a home cooked dinner for your family (because no matter what....a home cooked meal is better for you than any fast food drive-thru. Say no to the urge). You need something quick and easy.

Before you get started, put your phone on 'silence'....put the dog outside and feed the cat. Tell Sir Sportsalot that his shirt is in the dryer (even if it's not. It'll hush him up for a while) Then pour yourself a glass a whine. Oopps...I mean wine (there will be no whine before it's time). Take a deep breathe....close your eyes and relax those shoulders.

This recipe calls for very basic ingredients. This isn't a fabulous, knock your socks off recipe. It's just good. It's satisfying and it's quick. Adjust the seasonings to your own taste. If you or little Johnny don't like broccoli...use a different veggie.

The recipe as written calls for boneless, skinless chicken breast cut into 1 1/2 inch chunks. If you want to really speed things up...use chicken that's already been cooked. 


Chicken & Broccoli Alfredo (adapted from a soup can like the one in the picture)
Printable Version

8 oz of linguine (or what ever pasta you have in the pantry)
1 cup fresh or frozen broccoli flowerets (or your favorite veggie)
2 tablespoons butter
1 lb boneless, skinless chicken breast, cut into bite sized chunks (quicker if it's pre-cooked)
1 can cream of mushroom soup
1/2 cup milk
1/2 cup grated Parmesan cheese (or more!!)
2 - 3 cloves of garlic, minced
Pepper to taste

Prepare the linguine according to the package directions. During the last 4 minutes of cooking, add the broccoli to the boiling water. If you'd rather not....then just steam the broccoli while you prepare the sauce. Drain the linguine and broccoli and set aside.

(take a sip of wine and continue to breath and relax)

Heat the butter in a large skillet over medium-high heat. Add the chicken and cook until browned (or heated through if using pre-cooked chicken), stirring often.

(don't forget to sip your wine in between stirs)

Add the garlic and stir for about a 30 seconds or a minute....you just don't want it to burn and get bitter in taste.

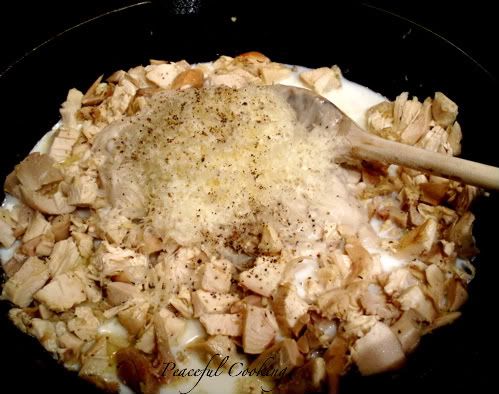
Stir in the soup, milk, cheese and black pepper...


Add in the linguine and broccoli. Heat, stirring (and sipping wine) occasionally, until hot and bubbly.


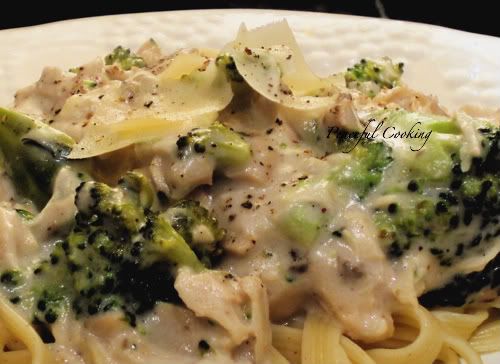
Guess what?! Dinner is ready. You survived. Garnish each serving with a little more Parmesan cheese and ring that dinner bell!


Fast forward an undetermined amount of time and the kids are in bed. The dishes may (or may not) be done. The dog's asleep, the cat's outside hunting for god knows what....and Sir Sportsalot has forgotten about his favorite shirt. (the phone can wait until tomorrow).

You need a treat. A little side trip to paradise maybe? Even if it's just a mental trip...a daydream. Right? So let's put a little, slight reality to that daydream. Let's treat ourselves to a tropical cocktail.

Who's ready for a Loco Loco Mocha Mocha?


I don't know if I've mentioned it before....but there's this really cool little blog out there called Cocktail Puppy. It was founded by Natashya from Living in the Kitchen with Puppies. One fine day, I received and email from Natashya, asking if I'd like to be part of Cocktail Puppy. Which meant I could write about alcohol and be part of a really fun blog. How could I possibly say no to that?!!

I've posted a few recipes....this one's my most recent. It's delish...its tropical...and it's just what the doctor ordered when winter is taking a bit too long and your days are crazy and you are in desperate need of a mental vacation. For this (and many many more fab recipes) click HERE 

Chill....and Cheers!

Thursday, March 24, 2011

TOH Saucy Garlic Chicken


 I'm so excited that it's almost April. 

What does that mean? Why? What's so special about April? 

Well....it's not really the month itself that matters (although it's one of my sisters birthday in April...so I'd have to say it's special for that reason. Actually...with my family, every month is special if you're going to take into account everyones birthdays)...but what I'm excited about is that I should be getting the next issue of Taste of Home soon. Yes....I love that magazine. 

Although I have a feeling it won't be doing much for my waistline. 

Oy

This is the second recipe I've tried from my first TOH issue...and it was delicious! Not to mention easy and with ingredients that are easily obtained if you don't already have them. What really caught my attention was the garlic. I love garlic! And this recipe contains a ton of garlic....which probably cinched it for me.
I only made on little adjustment.....they suggested parsley as a garnish. One of my girls doesn't like parsley so I substituted fresh basil. Lemme just say....even if my daughter decided to all of a sudden like parsley, I'd still use the basil for this dish.

Saucy Garlic Chicken

4 whole garlic bulbs
2 tablespoons olive oil, divided
9 oz fresh baby spinach
3/4 teaspoon salt, divided
1/2 teaspoon ground pepper
4 - 6 boneless, skinless chicken breasts
6 tablespoons butter, cubed
6 tablespoons all purpose flour
3 cups milk
2 1/2 cups Parmesan cheese
1/8 teaspoon nutmeg
Cooked pasta
Chopped tomatoes and basil to garnish (the garnish totally makes the meal...trust me)

Preheat oven to 425'

Leaving the garlic bulbs whole, remove the outer "paper", cut off the tops and drizzle 1 tablespoon of olive oil over them. Wrap them up separately in tin foil. Bake for about 30 - 35 minutes or until soft. Allow to cool for about 15 minutes.

While the garlic is roasting, get out your 13 x 9 casserole dish and spray it with non-stick cooking spray or grease it. Pour the spinach leaves in, sprinkle with 1/4 teaspoon of salt and pepper. Set aside.

Heat up the remaining tablespoon of olive oil in a large skillet. Brown the chicken on both sides and arrange over the spinach.

Melt the butter in a large sauce pan over low heat. Stir in the flour. Cook and stir for about a minute (this will help get rid of the "flour" flavor). Gradually stir in the milk and bring to a boil. Cook and stir for about 1 - 2 minutes or until the sauce thickens. Stir in 2 cups of cheese, the nutmeg and the remaining salt and pepper. Remove from heat.

Get out your blender and squeeze the roasted garlic into the blender. Pour in the sauce and process until smooth. Pour the sauce over the chicken and spinach.

Cover and bake for 30 - 35 minutes or maybe a bit longer. You want the chicken to be done...which means that a meat thermometer will read 160'. Uncover....sprinkle with remaining cheese (yaaaaaa baby!!!) and bake for another 5 minutes.

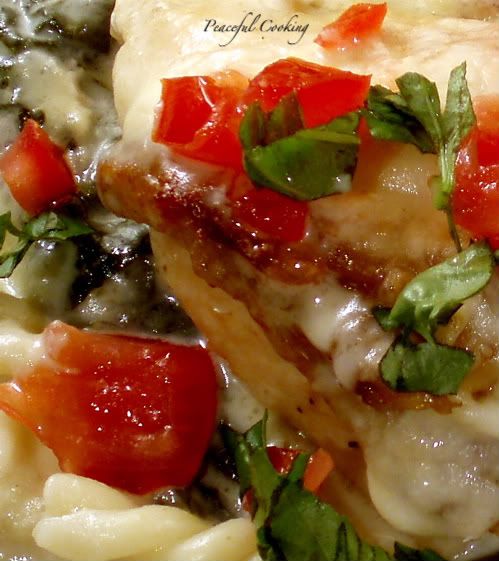
Serve over hot pasta and garnish with chopped tomatoes and basil


I love the color! I love the garlic (no brainer).....but let me just tell ya....the garnish added more than just making it look all pretty and all....it added a freshness and flavor that took this dish from something average to something wow!

Speaking of tomatoes.....I've been playing around in a little class. And well, our last assignment was to take a picture of a vegetable. Didn't matter if it was cooked or raw. After some serious thought and incredible input from some friends, I decided to go with tomatoes.

Ya, I know...they're not a vegetable but we use them like a vegetable, right? How many desserts include tomatoes? Get my point? Anyways....this is what I decided to do


 Life isn't always a bowl full of cherries.

Monday, March 14, 2011

Strawberry Bread with Lemon Honey Butter


Guess what?!

Strawberry season (at least in SoCal) is officially upon me us! Do you know what that means? It means that I have access to my most favoritest fruit ever.....FRESH STRAWBERRIES!!!

Just last week a buddy of mine who happens to have a strawberry field in the family, brought me a flat of some big fat juicy ones....


Just so ya know....those aren't even the big ones (the big ones were consumed waaaaaay before they even made it home)
Well....with a whole flat of strawberries...you bet your patootie that I have some serious strawberry plans. 

Hey...did you know that there's such a  thing as strawberry bread? As in....quick bread? You know, like banana bread. I had Nooooooo idea. All these years of having a sensuous, titillating, prominently organic (I'm not a fan of anything strawberry "flavored") love affair with these tarty sweet fleshy fruits....and I had never in my life heard of strawberry bread. I feel....betrayed in a sense. Why the secret? What's the big deal? It's only bread...it's not like a whole cake...or ice cream.....or anything of that magnitude. I thought I knew my strawberry! What else haven't I been told? Oh no, I don't think so. A strawberry margarita isn't gonna make up for it this time, my little berry babe (although it won't hurt).

But thats ok, don't worry....I'm a forgiving person. Especially after experiencing this lovely "new" quick bread (ooooh, if only I knew then....the things I know now...the places I could've gone with this. Believe me it won't stop here).


Oops...forgot to include the buttermilk in that picture....(which by the way is my alteration. 
The original recipe I was working with had oil)

Strawberry Quick Bread (adapted from King Arthur Flour Cookbook)

1/2 cup chopped pecans
1 1/2 cups (6 1/4 oz) all purpose flour
1 cup (7 oz) sugar
1/2 tsp baking soda
14 tsp salt
1/4 tsp nutmeg
1 TB lemon zest
2 large eggs
1 1/4 cups (10 oz) mashed strawberries
1/4 cup buttermilk

Preheat your oven to 350' F
Grease and flour 9x5 loaf pan

One thing before I continue. Not long ago I decided to invest in a digital food scale.


This thing is sooo worth it's weight in gold. I can add an ingredient to a bowl....hit a button and it takes the measurement back to zero and then I get to weigh the next ingredient.

LOVE IT!!

Ok....Here's how it works....

In a medium bowl, combine the flour, sugar, baking soda, salt nutmeg, and nuts.

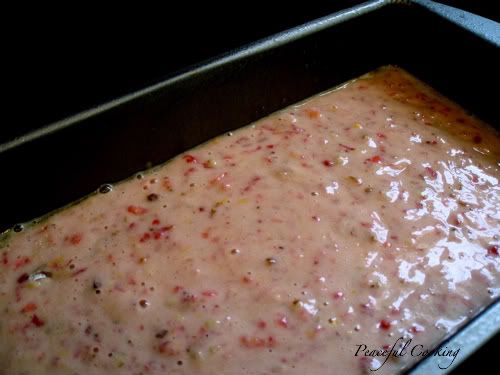
In another bowl, whisk together the egg, lemon zest, strawberries, and buttermilk. Pour into dry ingredients and stir until just combined.

Pour into prepared loaf pan.


Bake for 55 - 60 minutes or until toothpick

Allow to cool in the pan for 15 minutes. Remove from pan and allow to cool completely.


It's ready to eat! I have to say...it's dense...but how many quick breads out there aren't? Although I might see what I can do about it a bit. If you wrap it up in plastic wrap and let it chill in the fridge overnight, the flavors come out more...and it's easier to cut.

So...after smelling and tasting my sweet little strawberry bread..I knew it needed something special. I love butter just as much as (and probably more than) the next guy. But we're talking about strawberries here people. And they deserve something gentle and sweet and something a bit coaxing....

Lemon Honey Butter!!! 
1/2 cup softened butter
2 tablespoons honey
1 tsp lemon zest

Combine and roll up in plastic wrap. Refrigerate until firm


Sweet harmony makes for a happy pallet....and I love to see my strawberries sing.

This is my entry this week for Hearth and Soul

hearthandsoulhop

Saturday, March 12, 2011

Confetti Fiesta Bread


I have a lot of recipes that I've collected over the years with the greatest intentions of trying them out. I have these recipes in all forms....cookbooks, magazines, internet tagged, scraps of paper, notebooks, folders....etc etc etc.....etcccccetera.

I've hardly made a dent in my intentions. 

So why on earth would I subscribe to yet another source of even more recipes?

Because my name is Danielle, and I'm a recipe-holic. Without shame. Without guilt. There's even a hint of pride in that statement. And a whole lot of joy. I imagine that's why most of us do what we do....it's why we're here......right?

So you'll totally understand why I did what I did. I subscribed to Taste of Home. For the first time ever.  I recently received my very first issue.....the February & March 2011 issue. As I thumbed through it, I was captivated by this braided bread recipe....loaded...I mean seriously loaded with "fiesta" type ingredients...you know the kind, bell peppers, jalapenos, cheese....the list goes on. We're talking bread. We're talking mexican-ish.....we're talking.....directly to ME. The editor might as well have written this recipe and article specifically to me. It should've read...'Danielle, we know that you will enjoy this bread. Not only because of the fabulous flavors, the hint of heat.....the amazing aroma, but we know you will have enormous fun making it.'

And they would've been right.

Then and there I knew I had to bake this bread. Immediately, if not sooner.

I came home with my arms full of grocery bags, some of which included a few ingredients I didn't  have on hand....canned corn, buttermilk and fresh bell peppers. Is I began to put the groceries away, Sir Sportsalot informed me that he had turned the water off. He had chosen that particular afternoon to repair the leaky faucet in the shower. The very same afternoon I had planned to bake Confetti Fiesta Bread.

Are you serious?! And you know when they say it's only gonna take an few minutes....it translates into a few hours.

Over 3 hours to be closer to exact. No water. (not even for the toilet) for over 3 hours. This had turned into an different kind of adventure.

Let's back up for a minute....I came home from the grocery store around 2:00. I wanted (and when I 'want'...it can be very difficult to detour me) this bread for dinner that night. It was getting on the late side and if was going to have the dinner I'd planned, I needed to get started on this bread. NOW. Which meant I needed to get creative.

I need to let the Laura Ingalls in me come out. Yes, I was that determined!

Thank God for bottled water. We keep lots of it on hand (L.A. water is not fit for drinking). I filled a big ole pot up with bottled water....rinsed the veggies and then used it to wash my hands as needed.

And so my little adventure began.....

Confetti Fiesta Braids
makes 2 loaves
Printable Version

5 1/2 - 6 1/2 cups of all purpose flour
1 cup cornmeal
4 1/2 tsps active dry yeast (2 pks or 1 tablespoons plus 1 1/2 teaspoons)
1 tablespoon sugar
2 teaspoons salt
1 cup buttermilk
1/2 cup butter, cubed
1/2 cup finely chopped onions
2 eggs, lightly beaten
1 1/2 cups (6 oz) shredded cheddar cheese
1 - 8 1/4 oz can cream style corn
1/2 cup finely chopped bell pepper (I used orange and red)
1/4 cup chopped jalapeno peppers (I used 1 - 4 oz can of diced jalapenos)
1/4 cup butter, melted

Combine 4 cups of the all purpose flour, cornmeal, yeast, sugar and salt in a large bowl.

In a small saucepan, heat the buttermilk, 1/2 cup of cubed butter and chopped onion to about 120' F (if it goes over 130' F, let it cool down before proceeding to the next step....you do not want to kill the yeast). Add to the dry ingredients. Stir in the eggs until well combined.

Add the cheese, corn and peppers, stirring until combined. Add enough of the remaining all purpose flour until you have a stiff dough.

Flour your surface and turn the dough onto it. Knead until smooth and elastic....which should take about 8 minutes.

Place your dough in a very large greased bowl. Turn the dough to grease all sides. Cover with plastic wrap or a dusted towel and let rise for about an hour, or until doubled in size

I think I should have used a larger bowl

Punch the dough down and turn onto a lightly floured surface. Divide in half, placing one half back into the bowl while you work on your first loaf.

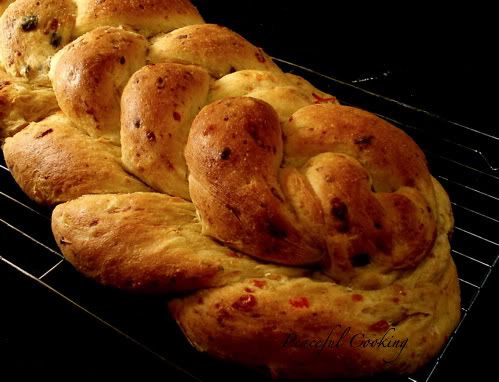
Taking the half of dough that you're working on, cut off 1/3 of it and set that aside. With the larger 2/3 section, divide that into thirds and form the thirds into long ropes.....about 16" in length. Braid the ropes together.

When I braid bread, I start in the middle and braid to the end. I turn the dough around and over and braid the other side. (if you don't turn it over, the braid will not be uniform...the over and under pattern will be messed up.). Or....just make sure you braid backwards....instead of taking the right and left sides and placing them over each other, you will place them under each other. I hope that makes sense. If not, there are tons of demo videos out there.

Place on a lightly greased baking sheet and pinch the ends together then tuck them under.

Now take the smaller 1/3 of dough, divide it into thirds and make smaller ropes of about 10" in length and braid them as you braided the larger ropes.

Take the smaller braided bread....turn it over (I found it was easiest to just cradle it in my hand and up my arm a bit)....brush the bottom with water and place it in the middle of the larger loaf.


Cover and let rise for about 45 minutes or until doubled.

Now do it all again with the other half of the dough that you had set aside.....


About 30 minutes before the estimated time your bread will be ready to bake, preheat your oven to 350' F.

You can test your bread to see if it's ready to bake by poking it with 2 fingers. If it bounces back instantly....you'll want to let it rise a bit more. If it doesn't bounce back all that quickly....it's ready to go into the oven. Bake for 25-35 minutes or until golden brown. Brush with melted butter and allow to cool on a wire rack before eating.

If you time the final rise right, your second loaf will be ready to go into the oven just as your first loaf is coming out.


I love the texture that the cornmeal added to this bread. I love the little hint of heat that the jalapenos added. I love the aroma of all those peppers. This is an all around wonderful and fun loaf of bread to make and eat. You'll enjoy it by itself with a bit of butter smeared all over your slice. Or...you can have some fun with it like I did. Slice it, toast the slices in the oven and top the slices with your favorite fajita makings for a fun fiesta style bruschetta.