Yum Peaceful Cooking

Saturday, October 9, 2010

HBin5 Same Dough, 2 Different Breads


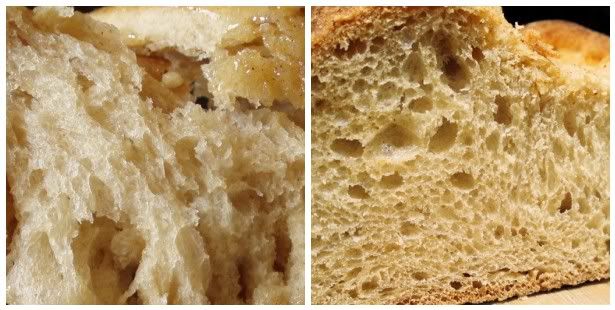
Look at the results of this dough when made into 2 different types of bread. This was even from the same batch of dough.

I think this is one of my favorites from the Healthy Bread in Five Minutes A Day cookbook. It's a simple whole wheat brioche dough with fabulous results. Flavor, crumb...ease of working with....it's just wonderful. I don't know if you can tell in the picture above, the one of the right....I actually achieved what is called a "custard crumb"...its where the surface of the larger holes are shiny and is the result of a perfectly baked high-moisture dough. (wooooo hooooo)

I've learned a few things this week that I will share with you during this post. One is that an instant read thermometer is fantastic and worth every penny. I found one at Target for under $20. It's the kind that has the long cord and the thermometer display and timer sit on the outside of the oven.

Do yourself a favor...if you don't have one, get yourself one.

Breads that do not contain egg in the dough are done when the inside temperature is 205 - 210' F
Breads that contain egg in the dough are done when the inside temperature is 185' F

I also have discovered that I absolutely love what whey does for dough. I love the texture and the flavor that it enhances. I love that I'm using something that would otherwise be tossed out. I'm going to make more cheese just so I can have more whey. (It freezes nicely.)

I'm a little (a week) late on my post for the 20th HBin5 Bread Braid. But Michelle from BigBlackDogs.net (our fearless leader) is sweet enough to let us post when we can, participate when we can and go at our own pace. Btw....we have a whole 'nother year of bread baking ahead of us. It's never too late jump in and join us. We've had several new members join us lately, which is always exciting.

Photobucket

For this Whole Wheat Brioche dough I made some changes to accommodate my personal taste. And because I altered the recipe, I can share it with you :). The original recipe can be found in the Healthy Bread in Five Minutes A Day cookbook  on page 275

This recipe is for a whole batch, which is stored in your refrigerator for up to 5 days and used as desired. For the full instructions, tips and techniques on how to work the no-knead dough visit the authors Jeff Hertzberg, M.D., and Zoe Francois at their website Artisan Bread In Five

2 cups white whole wheat flour
5 cups all purpose flour, unbleached
1 1/2 tablespoons yeast
1 tablespoon salt
1/4 cup vital wheat gluten
2 1/4 cups lukewarm whey (or water)
3/4 cup melted unsalted butter or other oil that does not have a flavor
3/4 cup honey
3 1/2 tsp barley malt syrup
5 lg eggs

In a very large container, whisk together the dry ingredients. In a medium bowl combine the remaining ingredients.

Using a spoon, mix the wet ingredients into the dry ingredients. Do no knead.

Cover with a loose lid and let sit on the counter for 2 hours


That's a LOT of dough. Just to give you an idea...that container there holds 23 cups.

With this batch I made Honey Caramel Sticky Nut Buns and two loaves of Spicy Paprika Challah loaves.

Honey Caramel Sticky Nut Buns
1 1/2 pounds of prepared dough
1/2 cup honey
1/2 brown sugar
1/2 tsp salt
1/2 tsp cinnamon
1/4 tsp nutmeg
1/2 cup unsalted butter, softened
1/2 teaspoon orange zest (optional)
1 cup chopped pecans (or walnuts)
1 cup raisins (craisins would be nice too)

Combine the honey, brown sugar, salt, cinnamon, nutmeg, butter and orange zest until creamy. Scoop and spread half of the mixture in the bottom of a cake pan. If you have something a little bigger, go for it. It gets real "squishy" in that pan.

Work the dough into a ball quickly, then roll into a rectangle about 1/4" - 1/8" thick. Spread the remaining honey mixture over the dough then sprinkle with the nuts and raisins. Roll it up starting on one of the short ends and seal the seam by pinching it, as best as you can. Cut into 8 equal segments.
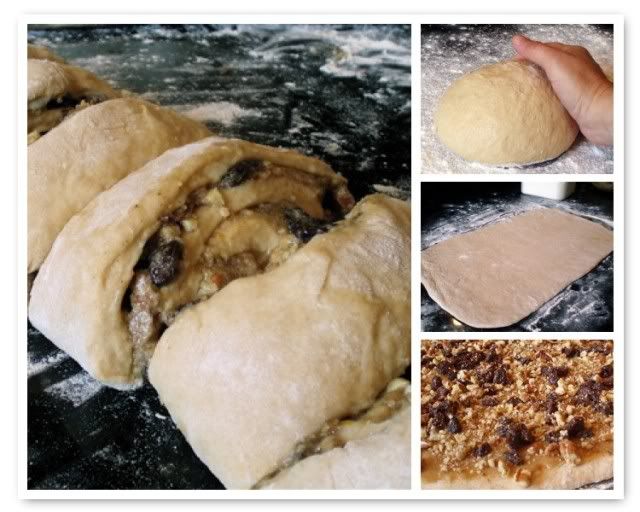

Arrange the segments in the prepared cake pan. Loosely cover with plastic wrap and allow to rest for an hour.

30 minutes before baking time, preheat the oven to 350'F. Once the rest time is over, bake for 30 minutes or until golden brown. Run a knife along the edge of the pan to loosen the bread, place a large plate over the top and quickly, carefully flip it over (you don't want the hot glaze to drip on you). Lift the pan off and well....

This is when I discovered something. They looked nice and golden brown on top, but the bottom was really light in color. And once I removed a few of the buns, I knew something wasn't right. The dough had become runny. It wasn't thoroughly cooked.


And this is also when I discovered how forgiving this dough is. I scooped it all up and placed it back in the dish, upside down so that what was the bottom became the top, and stuck them back into the oven for another 15 - 20 minutes.

They weren't as pretty, but they came out beautifully....nice and sticky on the outside and fluffy on the inside and perfectly cooked through

Whew....that was a close call cuz seriously I did not want to toss these babies out.

I'm so glad I didn't.

With the remaining dough, I went off the beaten path. I wasn't in the "mood" for the other two assignments for this braid, so I braided my bread instead. I made a challah. I started thinking about all the stuff that the book recommends for topping various breads with but I don't have a lot of whole seed spices that appealed to me as a bread topper. I also knew that my family wouldn't want sesame seeds.

That's when my mind wandered into the ground spice arena and I remembered the various rubs that I've made for steaks and chicken. Why do rubs only have to go on meat?

No....they don't. (que evil laugh) muuaaaah haaa haaa ha (cough cough)

So I put together a great rub that I found in one of my Everyday Food mini magazines

Spicy Paprika Rub
4 teaspoons paprika
2 teaspoons coarse salt
1 teaspoon ground ginger
1 teaspoon ground cinnamon
1/2 teaspoon cayenne pepper
1/2 teaspoon ground allspice

Combine and store in an airtight container.

I braided my challah, let it rise, and just before popping it into the oven I spritzed the dough with some olive oil. I bought some olive oil the other day in a spray can. I don't know why I never thought of it before but its so much better than brushing it on. I sometimes mess up the top of my bread using the brush. Then I sprinkled the rub over the dough


I baked it for 30 minutes in a 350'F oven. And then I learned some more stuff.....


Look at that awful crack down the middle of my braid!!! This happens to me a lot. I've gotten various suggestions on what causes it but I finally did some research on the subject.

It's from not allowing the dough to rise long enough before placing it in the oven. The result is a quick oven spring in the hot oven, without the dough "giving" to the growth, thus causing it to crack instead. It doesn't affect the flavor of the bread, it just doesn't look pretty. Therefore it's only a serious problem for professional bakers.

I also discovered that my oven cooks 20' too cool.

I did make this bread again. It was THAT good! My daughter compared the bread (minus the rub) to Kings Hawaiian Bread with its texture and sweetness. The rub was an excellent complement to the bread with its hint of spice, both hot and sweet at the same time.

What rub recipes do you have that would add great flavor to bread?

If you'd like to see what the other members did with their dough, head on over to Big Black Dog 20th HBin5 Bread Braid

Monday, October 4, 2010

Rich, Creamy Chicken and Noodle Soup


A simple soup with complex flavors. There's more to this soup than meets the eye...and plenty that'll please the pallet.

The other day King Arthur Flour posted a recipe for Shaker Chicken and Noodle Soup on FaceBook that really caught my eye. I knew immediately that it was just what I was craving for dinner.

And boy, was I right!

However, after reviewing their recipe it was obvious that I wouldn't leave well enough alone.

I rarely do. Sometimes for the good...and sometimes for the worse. Thank God, this time it was for the good!

If you're wanting a quick soup, that tastes wonderful....you've come to the right place. The only ingredient that might not be a staple in your pantry (errr... liquor cabinet) would be dry vermouth. You don't have to use it....you can substitute it with more chicken stock. However....highly I recommend you get yourself some because it really does add a lot to the flavor of this soup.

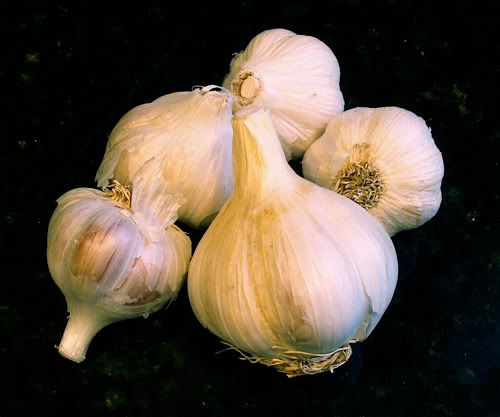
Oooohhh, one more thing before we get to the recipe....have you ever had the pleasure of using fresh garlic? As in...not purchased from the supermarket? Man, oh man....if you haven't, you should try and get your hands of a few bulbs (or more) cuz there's nothing like it. If you're a garlic lover (like me)...you don't know what garlic is until you've had it direct from the grower. A fellow blogger and all around really neat gal named Michelle over at BigBlackDogs.net sent me some of the garlic that she grew...what an eye opener that was. I could go on and on about how wonderful it is...but I don't think any of us have enough time. But let me say this...I am seriously considering growing my own.

Thank you Michelle!!! Your garlic is out of this world awesome!!!


Creamy Chicken and Noodle Soup
Inspired by King Arthur Flour Shaker Chicken and Noodle Soup
My Printable Version

6 1/2 cups chicken stock
2 tablespoons dry vermouth (or chicken broth)
2 tablespoons butter
1/2 cup heavy cream
1 tablespoon olive oil
1/2 large onion, diced
2 carrots, peeled and sliced
1 celery stick, sliced
4 mushrooms, sliced
2 - 3 cloves of garlic
2 cups egg noodles (uncooked)
1/4 cup all purpose flour
1 cup chicken broth (or water)
1 cup diced chicken, cooked
Salt and Pepper to taste

In a small saucepan, stir combine 1/2 cup of the chicken stock, vermouth and butter. Bring to a boil and reduce the liquid to about 1/4 cup. Stir in the heavy cream, remove from heat and set aside.

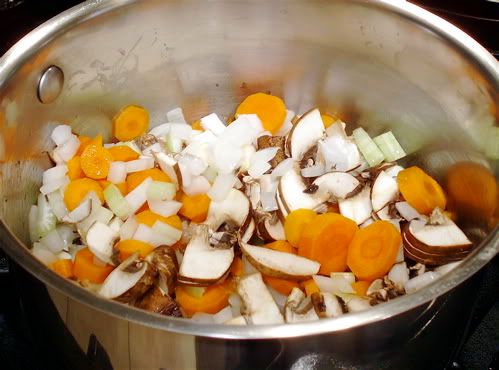
In a large saucepan, heat olive oil and add the onion, carrots, celery and mushrooms. Saute until just tender. add the garlic and saute for an addition minute.


Add 6 cups of chicken stock and bring to a boil.

The stock that I used contributed greatly to my soups deep rich color. I had made it from some chicken and bones leftover from a roasted chicken. Use what ever chicken stock you have on hand.

Reduce the heat and let simmer until the vegetables are tender. Carefully puree with a stick blender or pour into a blender and puree....being careful not to over fill your blender (you don't want a soup explosion...that would really ruin your night and dinner plans).

Where was I.....Oh....ok, everything is all pureed, happy (and back in the pan if you used a blender) and waiting for the next step...

Return to a boil and then add the noodles. Cook until tender...about 7 - 8 minutes.

Mix the flour and additional broth, stock, water...(I used broth cuz I ran out of stock) until smooth and stir into the noodle mixture.

If you find that it's a little too thick...add more broth / stock.

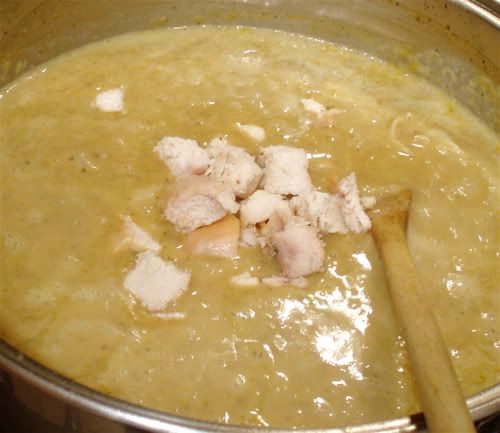
Allow the soup to boil for a minute or two and then stir in the creamy vermouth mixture and chicken.


Season with salt and pepper to taste and enjoy a loving bowl on soup....perfect for cold days, rainy days, snowy days...or just days where you need that extra comfort that only comes from "comfort food".

This is my entry this week for the Hearth 'N Soul Blog Hop

H‘nSgirlichef


Hop on over to see what the other's did on their blogs. It'll be so worth it!

I'm also going to share this with Deb over at KahakaiKitchen.blogspot.com for next Sunday's Souper Sundays where she showcases all sorts of yummy Soups, Sandwiches and Salads every Sunday.

Saturday, October 2, 2010

I Heart Mini Pineapple Focaccia Taste of Yellow 2010


This is my entry for the annual Taste of Yellow LiveSTRONG Event that is hosted by Barbara over at Winos and Foodies (I just love the name of that blog!!!). You should take a moment to visit. Her story is incredible!

This is the second time I've participated in Taste of Yellow but Winos and Foodies have been doing this since 2007. The purpose is to raise awareness. This year we are required to add a heart in some way. It'll be fun to see everyones creativity. It's not too late if you'd like to join in alos. She'll be excepting entries all this week.

We've all been touched in some shape or form by cancer, either personally or through a family member or friend...or all of the above. There are a lot of incredible survival stories out there. And a lot of stories with very sad endings. I've experienced them both.

Wouldn't it be wonderful if our children or grandchildren could live in a cancer-free world.

Hopefully through organizations like The Lance Armstrong Foundation, that day will come. Until then, we keep supporting, searching and Living Strong.

For my show of support this year, I have once again chosen pineapple as my yellow food. I didn't mean to. I could've gone with eggs, yellow squash, lemons....etc. But pineapple seems to jump out at me. Until this morning I had planned on making an Upside Down Pineapple Cake with the little maraschino cherries cut into the shape of a heart. Then I remembered the L.A. Times Food Section had an article this week about sweet focaccia, which reminded me about the Apple Streusel Focaccia that I made not that long ago (and the grape focaccia that I still need to share with you all). Well, the newspaper article had little mini personal sized focaccias  and well...one thing led to another in my head....and here we are with little Mini Pineapple Focaccia breads.

For my dough, I used the master recipe from Artisan Bread in Five Minutes a Day. I did alter it slightly, and since they published their recipe on their blog, I will share my version with you.

Please refer to the Artisan Bread in Five Minutes a Day link above for techniques on working with this dough.

6 1/2 cups unbleached all purpose flour (bleached flour doesn't rise as well)
1 1/2 tablespoons yeast (1/2 a tablespoon = 1 1/2 teaspoons)
1 1/2 tablespoons kosher salt
3 cups lukewarm whey (the original recipe calls for water)
3 teaspoons barley malt syrup (not called for in the original recipe)

In a large container, whisk together the flour, yeast and salt. In a medium sized bowl, mix together the whey and barley malt syrup. Add the whey mixture to the flour mixture and stir with a spoon but do not knead. Cover loosely and let sit at room temperature for 2 hours. Transfer to your fridge where you can store it for up to a week. (if you use water instead of whey, you can store it for up to 2 weeks). I let this stay in the fridge over night....it's easier to work with and not so "wet".

Dust the surface of the dough in the container with some flour and remove a good handful size (about the size of a grapefruit). Quickly shape it into a ball by pulling the sides down and under, until you have a smooth ball. This should only take a few seconds. For the full description of this technique, please refer to the Artisan Bread in Five Minutes a Day website link above.

Divide the dough into 4 equal sections and form them into balls. Place them on a grease baking sheet


With greased fingers, flatten each ball into a round, a bit larger than a pineapple ring, and with your fingers, poke dimples into the dough


Allow to rest for about 20 - 30 minutes and preheat the oven to 450 degrees

Mini Pineapple Focaccia

12 oz dough (about the size of a grapefruit)
4 pineapple rings
4 maraschino cherries
Olive Oil
4 teaspoons sugar

Pineapple Brown Sugar Glaze

1/2 cup melted butter
3/4 cup brown sugar
1/4 cup pineapple juice

While the mini focaccias were resting, I searched for marachini cherries in the jar that were not squished and torn and stuff. Man, those things get all messed up in that jar....I had to really search. But I finally did find a few that would suffice. I cut the cherries in half and started slicing and snipping away


Once the dough was done resting (it had risen a bit but with this dough, often the rise comes in the oven while baking, which is called an oven spring) I dimpled the dough again (cuz they didn't all stay dimpled), drizzled them with a small amount of olive oil and then centered a pineapple ring and cherry on each focaccia


Then I sprinkled white sugar on them, about 1 teaspoon per focaccia, being careful not to get too much on the pan. That would make the focaccia really stick to the pan


Bake in a preheated 450'F oven for about 20  minutes or until the edges are nice and golden brown


Now...while the focaccia was in the oven, I melted the butter in a small sauce pan over low heat. I stirred in the brown sugar and pineapple juice and heated until the sugar had dissolved, stirring frequently. The resulting glaze (or maybe you can call it a syrup?) is then drizzled over the top of the little mini, personal sized focaccia once they're removed from the oven.


If you like pineapple...you will love this! You can control how sweet it is by how much glaze you pour over yours....as you can see...I really like it sweet.


My heart goes out to all who have been affected by cancer. 

Thursday, September 30, 2010

WOW! Pineapple Zucchini Bread


I really feel silly. I mean.... borderline knucklehead material. Have you ever gotten an idea about how something would be, only to be completely wrong? (ya, it doesn't happen very often and we really shouldn't admit it.....so we'll just keep this on the down-low).

I remember the first time I heard about zucchini bread (years and years ago)...and I wasn't a huge fan of zucchini at the time and the idea of a bread made with the stuff just sounded, I dunno. Wrong!

Well, guess who was wrong in the end? (ssshhhh....no answers please, remember we're keeping this all hush-hush).

My beeps over in BakeSpace.com were talking about zucchini bread so I asked them if it tastes like zucchini. I was assured that it didn't. After some contemplation I asked for a recipe. My bud, Karen shared hers with me.....so I printed it out and set it on my desk.

Btw...I just have to say that this is not the first recipe I've gotten from Karen...and every one of them have been wonderful!! The link to the printable version below will take you to Karen's BakeSpace Kitchen where you can browse at your leisure (just click on her "screen name" and roam through her kitchen).

The recipe eventually found it's way to my kitchen counter and taunted me daily. I finally broke down and faced my unfounded fear and made it!

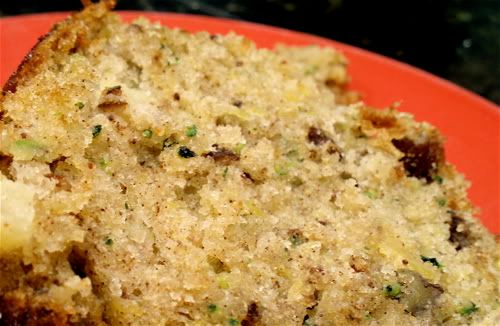
Guess what?! It doesn't taste like zucchini!!! It kinda reminds me of carrot cake...or a less dense banana bread (without the banana flavor)...i dunno....it's just really good! And moist! and Wonderfully yummy. And I bet it's really good for you too.

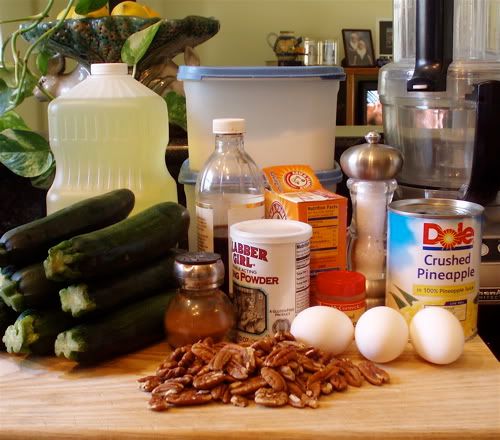
(just so you know....the number of zucchini in the picture is way overboard. You'll only need about 2 or 3 medium sized zucchinis)

Pineapple Zucchini Bread
Printable Version

3 eggs
1 cup vegetable oil
2 cups sugar
2 teaspoons vanilla
2 cups shredded zucchini (if you happen to shred more than you need....no worries, just make zucchini fritters for dinner or something)
1 20oz can crushed pineapple, well drained
3/4 teaspoon nutmeg
1 cup chopped walnuts (or pecans like I did)
3 cups all purpose flour
1 teaspoon baking soda
1 teaspoon baking powder
1 1/2 teaspoons cinnamon

Preheat oven to 350'F, thoroughly grease a 5x9 loaf pan or a bundt pan

Whisk together the eggs, oil, sugar and vanilla, in a good sized bowl

Stir in the remaining ingredients


Blend well

(mmmm...not so pretty yet, but it's promising. I mean....even banana bread never looks pretty at this stage, does it?)

Pour into your well greased loaf of bundt pan


Bake for 1 hour or until an inserted toothpick comes out clean.


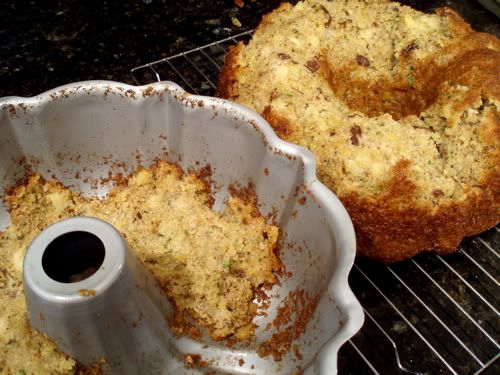
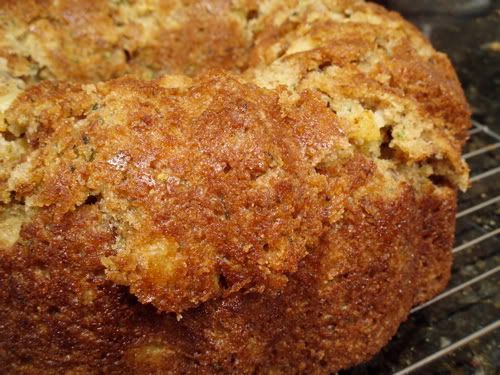
Now doesn't that look incredible? Ya, I was pretty happy with it when I took it out of the oven. But I wasn't sure when to remove it from the pan. I turned it upside....and it didn't budge. I know I used LOTS of cooking spray and the pan is a nonstick jobber....so I let it sit for a while. Well, not too long of a while cuz I really wanted to give it a try...maybe 5 minutes? 10 minutes? I'm not sure. But I turned it upside down again and did a little shake and I felt a little budge...and out it came......sorta


Did I take it out too soon?

What do you think I did next?

What any good, respectable baker would do, of course....carefully picked out the pieces that were left behind and fitted them back into place....


and ended up with a loaf of zucchini bread with a really bad toupee.  

But it tasted fabulous! 

Thank you Karen!! As usual, you ROCK!

Monday, September 27, 2010

Okra Fritters


Folks....fried okra has just been taken to a whole new level.

And WOW!! I mean....serioulsy good stuff you guys. If you like fried okra, you're going to love this. If you hate the time it takes to make fried okra...you're REALLY going to love this!!

I found the recipe in Everyday Food...and I think all my years of subscribing to this little magazine is worth every penny I've spent, just for this one recipe.

Can you tell how thrilled I am here? Well, just in case you're a little dense.....lemme just say...

This shit is good!!!


Okra Fritters
Printable Version

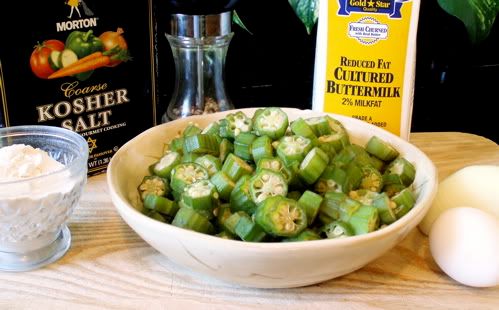
2 cups vegetable oil
1/2 cup all purpose flour
1/2 tsp salt plus more for seasoning after cookied
 1/4 tsp pepper
2 cups sliced okra
1/2 cup onion, diced into small pieces
1 large egg
1/4 cup buttermilk

Heat up the oil in a large skillet with a heavy bottom (cast iron is best) over medium heat.

In a medium sized bowl, combine the flour, 1/2 tsp salt and 1/4 tsp pepper.

Add in the okra and onion and toss until evenly coated.


Whisk together the egg and buttermilk in a small bowl then add it to the okra mixture. Stir together until well combined.


Working in batches, scoop 2 tablespoons fritter batter into the oil. Gently smash the mounds with the back of your spatula.


Fry until golden brown, turning once. The instructions said it would take about 4 minutes per side. That wasn't the case for me but maybe my oil was hotter than it should've been?

Drain on a paper towel and season with salt.

Serve warm and enjoy


This is my entry into Hearth and Soul this week.

H‘nSgirlichef

For those of you who don't know, fried okra speaks to my soul in a very deep way. As in deep south. I was introduced to fried okra, as a small child, by my grandmother during my many visits to Alabama and I have loved it ever since. When I'm missing my family more than usual....I reach for the southern dishes to comfort my soul. And this is an awesome twist for an old favorite that speaks as clearly as the original.

Sunday, September 26, 2010

Sailing the Seas of Cheese...


I battened down the hatches...let out the mainsail and ran with the wind. 

Look out fromage...she's coming about!

I've tackled a new realm....an unknown. Set forth on a dream and followed the setting sun.


Ya, so I have no idea what I'm talking about really. But I do know that I've always wanted to try cheese. Well, not always but ever since I heard how easy it is. But check out that album ...errr...cd cover above... A big ole sea of cheese (and other weird things floating about). The band, Primus is really weird (a lot more weirder than I am....I swear!) and I can only tolerate a song or two of theirs. Sir Sportsalot is a huge fan though. But the title of this cd has always intrigued me. Sailing The Seas of Cheese. Where would such a sea exist? The moon perhaps? When I was a kid, I always heard that the moon was made of cheese. Which I thought was weird and unappetizing. But not as dumb as the "man on the moon". I'm sorry, but when I look at the moon, I don't see a face. I see cheese. Swiss cheese! 

hmm...sooo....where are all the cows on the moon?

Apparently they're all here on earth providing us with the milk needed to make cheese. And if we all get moving, we too can have a sea of cheese, right? 

A while back I saw that Heather over at Girlichef is into making cheeses. And I've been checking things out, taking it all in. Just waiting for the right time. The right kind of cheese, the right mood.....and most of all, the right frame of mind.  How does one know when there mind is in cheese mode? For starters, one begins to think of songs and cartoons that have to do with cheese (I know there's a cartoon out there, where some mice try to build a ladder or something, trying to reach the moon for endless supplies of cheese). Then one notices that during trips to various grocery stores, one finds one's self looking for cheese making ingredients....like rennet. And then one finds one's self spending a little more time than usual in the deli, admiring the various cheeses. (ok, I'm done talking about one's self in such a strange manner)

Now when it comes to cheese, I prefer the more mild versions. And I stay away....far far away....from the kinds that stink. Especially the kinds that smell like feet. Sorry folks....can't do it. I just can not get past the odor. 

I do not plan on playing with mold. I'll leave that up to the experts. I'm just having fun with the soft stuff. The super fresh stuff. 

When I saw Heather's recipe for Queso Blanco....and that the ingredients were pantry staples....I knew I had found my starting point and that it was time to set sail in the seas of cheese....

Queso Blanco

1 gallon whole milk (not ultra pasteurized) 
1/4 cup apple cider vinegar
2 or 3 tsp salt or to taste

That's it. Can you believe it? Are you excited? Oh come on.....this is cheese!! And you can make it all by yourself! That's exciting stuff, I tell ya. 

You will need some basic equipment as well (I'm sure you have most, if not all of this on hand as well)

Large heavy bottomed pot
Thermometer
Large slotted spoon
Cheesecloth
Sieve
Large Bowl

Pour your milk into a large heavy bottomed pot.  Slowly heat to 180'F over a low heat, stirring frequently so that a skin doesn't develop and the bottom doesn't burn. Be prepared though....this is going to take a while. Like...an hour or so?


But it will get there. If the temperature stabilizes and has not reached the 180' mark...turn up the heat a tiny bit. 

Remove from heat and stir in the vinegar. Let it sit for about 15 minutes to allow the curds and whey to separate. (Little Miss Muffet has nothing on us you guys!) Check out those beautiful curds! 


Fold the cheesecloth into 4 layers and place it into a sieve. Place the sieve over a very large bowl or another large pot and spoon your curds into the cheesecloth lined sieve.


What you will be left with is a big pot of whey. I used it in my bread dough, instead of water. I also cooked some rice with it....very good stuff. It gave the rice a hint of sweet. Which would be wonderful with sweet and sour chicken, dontcha think?

I put all this whey in ziplock baggies and put it in the fridge. I read somewhere that you treat it like milk as far as it's "shelf life".


As for those lovely, beautiful curds....the whole point of this voyage, I might add, fold the cheesecloth over the top of the curds to cover. Place a small plate on top and then weigh the whole thing down with something heavy (that's my marble mortar, upside down on top of it all) to help press out the remaining whey.  This whole contraption should then be placed over a small bowl and then moved to the refrigerator where it will just hang out for about 5 - 7 hours. 


Save the whey. From what I've heard, if you're wanting to make ricotta cheese...you'll need whey. Remove everything from the sieve.


Unwrap the ball of now smashed curds. Admire your fresh ball of Queso Blanco...with the sexy cheesecloth marks 


Now is when you use the salt to flavor your cheese. I just mixed it all up and then pressed my cheese into a container with a lid for easy storage. I used some of the cheese in a tomato sauce based casserole. It's not the melty kind...just so you know.  I think it would be great in lasagna...or any dish that requires a soft cheese. 

I also scooped up a cup of cheese and placed it in my mini food processor along with a teaspoon of Italian seasoning and a teaspoon of garlic powder and whipped it up into a fine smooth, incredibly tasty spread.


You just can't beat the fresh flavor. You get about a pound of cheese for the price of a gallon of milk. Not to mention all the whey that you now have to play with. 

Now that you see how easy it is, are you ready to come aboard and sail the seas of cheese?


Wednesday, September 22, 2010

Peach Upside-Down Rum Cake


This may not come as a surprise to you, but the Food Section is my favorite section of the L.A. Times. Now, I'm not much of a newspaper person. I have a thing....against grey fingertips. It even bugs me when I buy a new paperback book and my fingertips get smudges on them.

But that's not really important, is it? What's important are the recipes in the Food Section...and the articles about food trends and cultural cuisines, etc etc. A while back there was an article (followed by a few recipes of course) on upside-down cakes. Until now, I've only been familiar with the legendary Pineapple Upside-Down Cake that probably adorned every dinning room table at some point in the 70's, with the cute little maraschino cherries in the center of each pineapple rings (that is if us the kids didn't pluck them out before being presented). I had no idea or even stretched my culinary imagination in the direction of using other fruits in place of pineapple. Well, thats exactly what a writer for the Times did....(man...I wish I had thought of this.)

***Breaking News***
I'm only sharing this with you because I'm pretty sure most of you...if not all of you can relate...

Timer's only work when you turn them on. NOT when you set them for 20 minutes only to turn them off after said 20 minutes and then decide that the food in the oven isn't quite ready and needs another few minutes but you fail to turn the timer back on. I mean...why bother, right? It's only a few minutes. Ya, right....25 minutes later you smell something that almost smells good...but you can't figure out why because dinner has already been cooked and served. Then the light goes on and you remember...

OMG!!! I have BREAD IN THE OVEN!

And now my little white loaf of artisan bread looks suspiciously like pumpernickel.

And is really super crunchy on the outside.

sigh

Dessert....lets get back to this lovely dessert. And quick. Because I think technically, peach season is over but there seems to be an abundance of them in the markets still...and at good prices too.

Peach Upside-Down Rum Cake
Printable Version


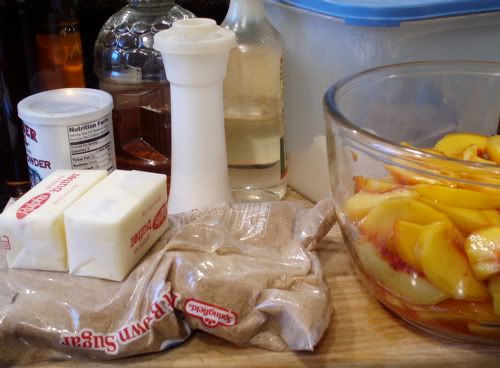
2 lbs of peeled peaches
3 tablespoons fresh lemon juice
9 tablespoons butter at room temperature, divided
1/2 cup brown sugar
1/4 cup honey
1 3/4 cups flour
2 teaspoons baking powder
1/4 teaspoons salt
1 cup sugar
2 large eggs
1 teaspoon almond extract
3/4 cup dark rum

To begin with, lets make it easy to peel them peaches by blanching 'em first. Get out a big pot of water and heat it to a boil on the stove. While you're waiting for that, get a big bowl out and fill it with water and ice cubes. Once the water boils, put the peaches in the boiling water for 40 - 60 seconds, depending on how ripe they are (the less ripe, the longer the boil). Remove the peaches and immediately put them in the ice water to stop the heat from cooking them further. This is called blanching.


Drain and dry the peaches. Make a criss-cross cut on the bottom of the peach and peel the skin off with your fingers or a pairing knife....the skin at this point should peel away nice and easy.


Cut the peaches into 1/2" slices and place them in a medium sized bowl. Drizzle with the lemon juice and set aside.


Preheat your oven to 350' F.

In a large 10" oven proof skillet (cast iron is recommended) melt 3 tablespoons of butter over medium heat. Add the brown sugar and stir until smooth then stir in the honey.


Lower the heat and add the peaches. Stir until the peaches are a little soft and glossy. This should take about 2 minutes. Remove from heat.


Spread the peaches around so that you have an even layer up to the sides of the pan.

In a medium sized bowl sift together your flour, baking powder and salt. Set aside.

In a large bowl, using an electric mixer, cream together the remaining 6 tablespoons of butter and the white sugar until fluffy. Add the eggs one at time, mixing in between. Then add the honey and beat until well combined.

Working in batches, alternately add the flour mixture and the rum to the butter mixture, starting with the flour mixture, stirring in between until just combined. Continue back and forth between the flour mixture and the rum until all of the ingredients are incorporated.

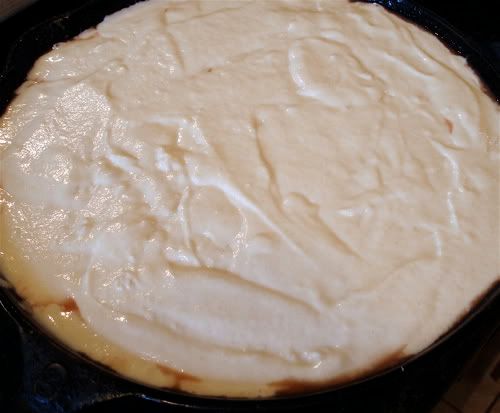
Carefully spoon the batter onto the peaches in the skillet. Gently smooth it out as close to the sides of the pan as you can.


No need to get too OCD on this....it will rise and spread and all will be well in the end.

Bake in the 350'F preheated oven for 45 minutes or until a knife inserted in the center comes out nice and clean.


Allow to cool in the skillet for about 10 minutes. Then....place a large plate, upside down over the skillet and veeeeeeeeeeeeeerrrrry carefully flip the pan over.

Serve at room temperature


This was so fun to make and easy, aside from the messy peeling and slicing of the peaches. I don't think canned peaches would work as nicely as they might get a little on the mushy side. If you're not a rum fan, (and there is a nice strong rum flavor in the cake) then replace it with milk or even buttermilk. The cake isn't overly sweet and tastes incredible with a big ole scoop of vanilla ice cream.