Yum Peaceful Cooking

Friday, October 5, 2012

Lengua Entomatada (Beef Tongue with Tomato) and Giveaway!


Yes, you heard right. Beef Tongue. It's in there. It's good. I swear.

And you're talking to someone who went waaaaaaaaaay beyond hercomfort zone on this one.

Before we go there, let me say a few things here. And I think you'll wanna hear them.

First off, for the past 3 weeks, I've been participating in the Muy Bueno Cookbook Spotlight & Cook-Off sponsored by Hippocrene and hosted at girlichef  


This cookbook is truly Muy Bueno. Here's a list of the recipes I've cooked during these wonderful three weeks:


You can go to girlichef's site and see what everyone else made. After all, I'm not the only one reviewing it.

When the Muy Bueno Cookbook arrived, of course I instantly started browsing through the recipes. The first thing I thought was....wow, I've either made or eaten a lot of these recipes! Do you know why that is? No, not because I have a lot of Mexican friends. No, not because I live in Southern California where every other corner has a little Mexican joint or restaurant. (although those reasons do have a lot to do with it) but....the recipes in Muy Bueno are for authentic, Mexican home cooked meals.Ones we all know and love and wish we could make. They have been passed down from generation to generation to generation. The 3 women that make up Muy Bueno the cookbook and blog are a family team...a mother (Vangie) and her 2 daughters (Veronica and Yvette). All of whom have been greatly inspired by the grandmother, Jesusita. When you open this cookbook, you feel a sort of reverence. You can sense how important heritage is and how food really brings this family together.

Muy Bueno Cookbook has just about every Mexican dish you can think of (and more) and provides easy to follow directions, beautiful photographs and a touching story or memory that makes it all the more special. With all the cooking I do, and a lot of it is Mexican (because this white girl and her family loves Mexican food), this is the first true Mexican cookbook I've owned. And I cannot tell you how thrilled I am with it.

You have a chance to be thrilled to own your own copy of Muy Bueno Cookbook as well.

I'm giving a copy of Muy Bueno Cookbook away! 

I'll give you the details after we talk about beef tongue.

Beef tongue. I've seen it. I've ignored it with a shiver.
I never ever thought that my kitchen would see one of these on its counter.

Silly me asked one of my daughters to pick out a recipe from Muy Bueno for me to cook. A special recipe  just for this giveway.

Jacquie decides on beef tongue. "Mom, [with a grin on her face] this is really out of your comfort zone, isn't it?!"

"Um, ya. really?"

Jacquie: "Beef tongue is really good! I swear! I've had it before. You'll like it".

"Ya? [long pause] Ok. I guess."

So...I took the challenge. Off to the market I go. The butcher offered a 3 plus lb tongue. I opted for the much smaller 2.5 lb thing. And started my adventure the following morning. Way before anyone else in the house was awake.
I knew this baby needed to be in the crockpot before it was seen by the local population (ie: family, especially Sir Sportsalot).


Funny thing. I posted the above photo on Facebook and you should read the reactions! "WTH?!"
"OMG!! No Way!!!", "Gross that looks like a large finger", "I hope it looks better cooked", "I'll be there for dinner. So good!"

When I asked if anyone had eaten cow tongue, I received extreme responses from both ends of the spectrum: "Yes, very good sliced very thin...", "Makes yummy tacos!", "....it was like it was tasting me - while I was tasting it. ::shudder::", "Eating that will be like French kissing a cow! No thanks!!"

Well....I guess I had to just find out for myself.

Lengua Entomatada (Beef Tongue with Tomato)
Printable Version

2.5 - 3 lbs of beef tongue
3 cups water
1 small onion, quartered
5 cloves garlic
2 tsp sea salt
1 - 14.5 can peeled or diced tomatoes
1 TB olive oil
1/3 cup chopped white onion
1 TB all purpose flour
1/4 tsp black pepper
1/2 tsp garlic powder

Place the beef tongue, water, small quartered onion, and sea salt in a crock pot. Cook on low heat for 6 to 8 hours, until tender.

Once it's done, remove the tongue from the crockpot. Strain the stock and set it aside or refrigerate it if you have time so you can easily skim the fat.

While the tongue is still warm but not too hot to touch, peel off the outer layer of skin.
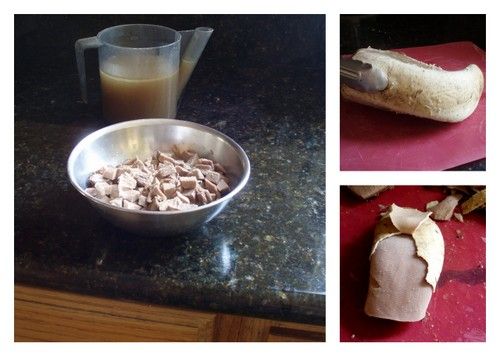
Under that skin, there was another layer....that was......nubbly. It kinda bugged me in a way that food shouldn't bug you....so I trimmed that off too.

Dice the tongue into 1/2" cubes and set aside.

In a food processor or blender, puree the tomatoes. Set aside

In a large skillet, over medium heat, heat up the oil. Add the diced onion and saute until translucent (about 2 minutes). Add the flour and stir for another 2 minutes. Add in the pureed tomatoes and let come to a boil.

Add the cubed tongue, 1/2 cup of the beef tongue stock, black pepper and garlic powder. Reduce the heat and simmer until the sauce thickens, about 5 minutes or so. You want the sauce to be thick, not runny.

Especially if you're going to do something fun with it....like....fill gorditas.


Well, let me tell you something.

YUM! Really. Honestly....beef tongue is good. As I diced it up, I picked up a cube and slowly brought it to my mouth. Paused....contemplated my action....nostrils were flared in anticipation of...I dunno...thinking it would taste like liver? (I'm not a liver fan). I then popped the cube into my mouth...tentatively chewed in slow motion...stopped. Waited for the negative, involuntary reflex. Nothing. Thought about it. Realized that it is indeed, very tasty. Tender. Not liver or organ like at all. Good beef flavor. Not stringy like roasts. Not fatty like ground beef. And best of all...it no longer resembled a tongue!!

I did it! I made it! I ate it! I loved it!

Now, if you want the recipe for the gorditas that I spooned the lenqua into, you'll either have to wait until I post it, search the various websites....

OR

Win yourself a copy of Muy Bueno Cookbook.  

Rules:

  • Entries must be made by Monday October 8th (Happy Columbus Day) 12:00 PM, pacific standard time.
  • Must be 18 or older to win
  • Must reside in the continental U.S. to win 
  • Must post comment on this blog (no facebook, twitter or email entries will be accepted)


Lots of ways to enter:

  • Post a comment. (If you are posting anonymously, please include your email address.) If you do not wish to enter the contest, but would like to post a comment, just say you're opting out. 
  • Follow me on Twitter (post a comment saying you are)
  • Tweet about the giveaway (post a comment saying you did)
  • Follow me on Facebook (post a comment saying you are)
  • Post this giveaway on your Facebook page (post a comment saying you did)
  • Follow me on Pinterest (post a comment saying you are)
  • Pin this page (post a comment saying you did)
  • StumbleUpon this age (post a comment saying you did)
That's 8 ways to enter. Good luck!!

Saturday, September 29, 2012

Vanilla Fig and Pear Freezer Jam


What do you do when someone give's you a few pounds of figs? You make jam.

Freezer jam to be more exact. And it's a lot easier than you'd think. Start off with clean, sterile jars, fresh fruit, pectin and sugar.

Maybe a spice if wanna get fancy.

And you're ready to go.

This recipe was adapted from The Family Foodie, Vanilla Fig Freezer Jam

Vanilla Fit and Pear Freezer Jam
Printable Version

6 cups figs, quartered
2 cups bosc pears
4 cups granulated sugar
juice from 1 lemon
1 box Sure Jell Fruit Pectin
1/2 tsp vanilla

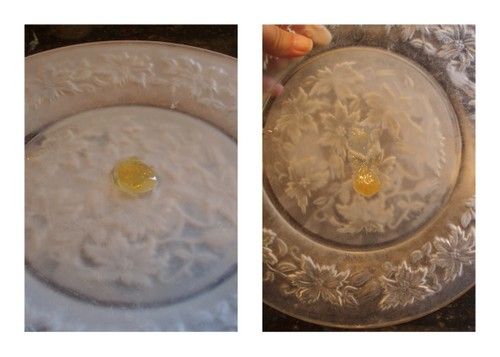
First things first (and this is a new thing for me). Place a small plate in the freezer. later on you'll use this to test the consistency of your jam.


Stem the figs and cut them into quarters. Peel and core the pears and dice them.

In a large pot, combine the figs, pears and sugar. Let sit for about 1/2 an hour (not over any heat). Once everything starts to look liquidy, add the lemon juice, Sure Jell and vanilla.


Put the pot over a low heat and bring to a boil. Reduce to simmer and continue bubbling. At this point, if you'd like a less chunky jam, use a potato masher to crush the fruit up a bit.

Continue to simmer until the jam has become very thick. You can check the doneness of your jam by placing a spoonful in the center of your frozen plate. Let is sit for a minute then tip the plate. If the jam runs slowly or stays put, its done. If your jam races to the edge of your plate, then its not quite ready and you need to simmer it some more.

If you're using plastic freezer "jars"...then allow the jam to cool a bit before filling the jars. I used glass jars and filled them right away. I did not seal the jars until the mixture had cooled. Once cooled, place the jars in the freezer.


Don't forget to put one jar in the fridge so you can enjoy it immediately.


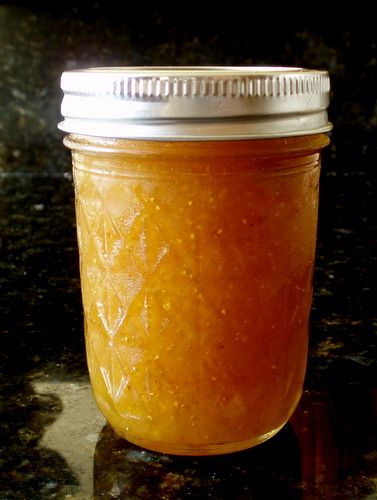
Its sweet, figgy and mildly pear-ish with a nice little hint of vanilla. It made about 7 - 12 oz jars and I'm really looking forward to making some sort of danish or pastry with it.

Thats if I don't eat it all with my morning toast.

Wednesday, September 26, 2012

Capirotada - Mexican Bread Pudding


Last week in reviewing the Muy Bueno Cookbook we had the option of making Mushroom, Jalapeno, and Cilantro Salsa and/or Capirotada (Mexican Bread Pudding). I had planned on doing both and posting both, last week. I only got to do the salsa. I had purchased all of the ingredients for Capirotada, and was ready to make it when I discovered it's not something you can just "whip up". Not that it's labor intensive but there is some time (prep and rest) needed. I had to wait until the following weekend to make it.

If you're not familiar with Mexican Bread Pudding, let me start off by saying it's not a custardy bread putting. There are no eggs or cream in the recipe. The bread soaks in this wonderfully amazing syrup thats made with piloncillo,. cinnamon, cloves and water. Piloncillo is sorta, kinda like brown sugar. I found mine at the Mexican market. It's sold in cones and is very hard. Have you ever come across those brown sugar 'stones' before and they don't break apart? Its hard (if not more so) than that. The other difference....flavor. Piloncillo definitely has a much stronger maple flavor to it. If you can't find piloncillo then go with dark brown sugar, but hopefully, you'll be able to find it. It's wonderful.

Now, the difference between Capirotada and your standard bread pudding doesn't end with the custard and flavor. Capirotada has a very deep religious meaning and is typically eaten during Lent. The list of ingredients are very symbolic: Bread represents the Body of Christ, the syrup is his blood, the cloves stand for the nails on the cross, the cinnamon represent the wooden cross and the cheese is the Holy Shroud.

This dish is meant to be eaten warm and heats up nicely even a day or two after it has been made.

Capirotada
Printable Version

4 bolillo rolls (or French rolls)
4 TB butter
4 1/2 cups water
12 ounces piloncillo (or 1 1/2 cups dark brown sugar, packed)
4 cinnamon sticks
6 whole cloves
1 cup raisins
3 cups shredded Longhorn Cheddar or Colby cheese

Preheat oven to 350' F


Slice the bread rolls into 1/2" slices. Butter both sides. Place on a baking sheet and bake for about 3 minutes per side or until lightly golden and dry. You might have to do this in stages. Set aside to cool.


In a large saucepan, combine water, piloncillo, cinnamon and cloves. Bring to a boil, reduce heat and simmer for about 20 minutes. This is what we're calling you're syrup. Remove from heat and let steep for 2 hours. Pour through a strainer and discard the cinnamon and cloves.

Spray an 8x10 baking dish with cooking spray. Layer the ingredients in this order: 1/3 of the toasted bread, 1/3 of the raisins, 1/3 of the cheese. Pour 1 1/2 cups of your syrup over everything. Let set for 15 minutes. Repeat two more times.


Once everything has set for its last 15 minutes, spray a piece of aluminum foil with cooking spray and cover your pudding.

Bake at 350' for 40 minutes. Remove the foil and continue baking for another 10 - 15 minutes. Serve warm.


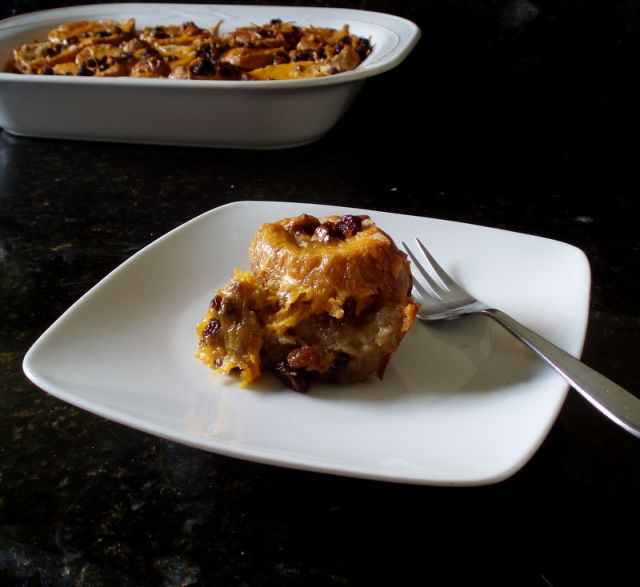
This was soooo good! I love maple and brown sugar. I love bread. I love cheese. And all this works together so very well. The bottom layers of bread are soaked in syrup...YUM. The top layer is adds a great texture...the raisins, well you can't have bread pudding (of any kind) without those. I think this would be a wonderful dish for Christmas. 

I'm participating in the Muy Bueno Cookbook Spotlight & Cook-Off sponsored by Hippocrene and hosted at girlichef 

Sunday, September 23, 2012

Prickly Pear Margarita


As I was thumbing through the recipes and reading the stories in Muy Bueno, I just happened to notice that 'Drinks' had a pretty thick chapter (A huge plus in my book) and when I saw this vibrant fuchsia margarita...I knew it was meant to be. I mean...look at that color! AND its a margarita. How perfect is that?!

The Muy Bueno Cookbook is a complication of old-world northern Mexican recipes that span 3 generations. The stories and memories that are shared are touching and heart felt. They bring the recipes to life as the importance of family and tradition are expressed. The team that make up Muy Bueno include Evangilina and her daughters, Yvette and Veronica.  The three of them pay an incredible tribute to the grandmother in such a way that makes you wish you could've spent time in her kitchen, in her presence. Learning the old-world ways. But since that's not going to happen...lucky for us, Muy Bueno can bring those ways to your kitchen.

This week I have chosen a recipe to review based on my love of margaritas and my intrigue of making such a beautiful drink. In the cookbook, this drink was dedicated to the Grandma (Jesusita) because of her love of her tunas (prickly pears) and color de rosa (the color pink). I'd like to raise my glass and propose a toast.
'Here's to holding tradition and family values close to your heart. Honor those that came before us and guide those who come behind us.'

Prickly Pear Margarita
Printable Version

4 prickly pears, peeled and sliced
1/4 cup water
3 1/2 cups crushed ice
3 oz fresh squeezed lime juice
3 oz frozen limeade
6 oz silver tequila
4 1/2 oz triple sec (I used Citronge)
3 TB simple syrup
lime wedges and coarse salt to garnish


Until yesterday, I had NO idea that the insides of these prickly pears are pink. Brilliant dark pink. My neighbor, Ruth grows them. Not because she eats the fruit (or the cactus "paddles") but because she likes cactus plants in general.

When I cut into the prickly pear...I was instantly reminded of beets.


But was happy to discover, they don't stain like beats (only a little). The fruit is almost slimy inside...and squishy. It reminds me of kiwi. Now the flavor...I don't even know how or what to compare that to. It's mild, slightly sweet...almost berry-ish. I drank a whole margarita just trying to pinpoint the flavor.  I finally gave up and accepted the fact that it is it's own fruit with it's own highly enjoyable flavor. And proceeded to pour myself a 2nd glass.

Once you have your prickly pears peeled and sliced, put them in your blender along with the 1/4 cup of water....and blend.

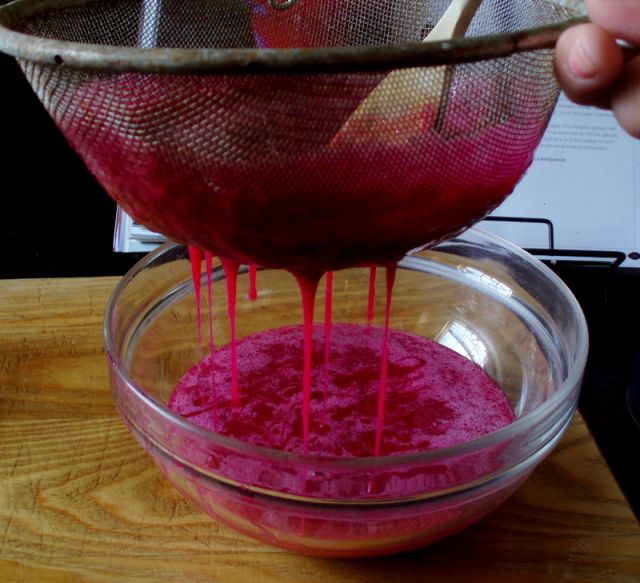
Strain into a bowl. You don't really want to "drink" the little seeds that are found inside


You might need to get a spoon and help smoosh the fruit through the strainer. The only thing you want to leave behind are the seeds.

Place crushed ice in the blender. Add the prickly pear puree, lime juice, limeade, tequila, triple sec and simple syrup. Cover and pulse ingredients.

Garnish the rim of your glass with salt. Pour in the margarita. Add a lime wedge and serve


If the color itself doesn't make you fall in love with this drink...then the flavor will. It's not too sweet. It's not tart. It goes down smoothly. I can't describe the flavor. If you've eaten prickly pears, then you know what I'm talking about. If you haven't....then you'll have to find out for yourself. Don't let the fact that you can barely taste the alcohol fool you. It's there. You'll know soon enough.

This post is part of the Muy Bueno Cookbook Spotlight & Cook-Off sponsored by Hippocrene and hosted at girlichef 

Thursday, September 20, 2012

Mushroom, Jalapeno, and Cilantro Salsa


There are a lot of different kinds of salsas running around out there. There's red tomato, tomatillo, strawberry, mango...etc etc. But have you tried Mushroom, Jalapeno, and Cilantro Salsa?

Let me start off by telling you a little secret. Sometimes I get stuck on being a purist. I get attached to the original and am reluctant to embrace the new. I kinda have to mull it over....consider it....talk myself into it and then ease on in. It's not often that you'll see me among the first to jump on a bandwagon.

With that said...in making this salsa....I was...timid. Not sure what to expect and how it would fill the roll that red tomato salsa has. Well...it doesn't. But that's not a bad thing. It has it's own roll. It's own flavors and it's own character. Once made...it's best after it has sat for a couple of hours and served at room temperature. It's even better the next day. I mean way better. Sitting here thinking about it, I want some with a tray of nachos. Not the kind you get from fast food places...but real nachos. Tortilla chips with melted cheddar cheese all over them....smothered in this salsa. I wish I had thought of that when I still had some. Gee darn....guess I'll have to make more.

Are you wondering where this recipe came from? Well, lemme tell ya. The gals over at Muy Bueno are releasing a cookbook very soon. October 1st to be exact. What does all this have to do with Mushroom, Jalapeno, and Cilantro Salsa? Well....I happen to have a copy of said cookbook. I'm participating in the Muy Bueno Cookbook Spotlight & Cook-Off sponsored by Hippocrene and hosted at girlichef 

And you know what else? You will have a chance to WIN the Muy Bueno cookbook. I will be hosting a GIVEAWAY the first week in October..so be on the lookout! 


Mushroom, Jalapeno, and Cilantro Salsa
Printable Version

1 lb fresh white mushrooms, finely chopped
1 small red onion, finely chopped
2 jalapeno peppers, stemmed and finely chopped
Handful of cilantro, chopped
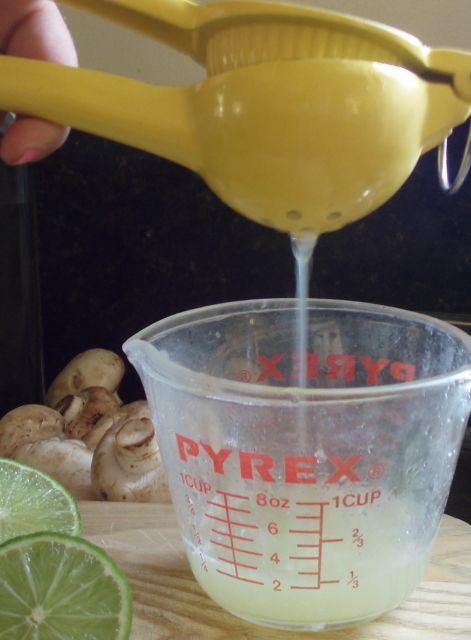
3/4 cup fresh lime juice
1 TB olive oil
Salt to taste

(the peppers in the above picture are from my garden. The fat red one is a jalapeno. The others are unknown. My point? Salsa is not an exact science.)


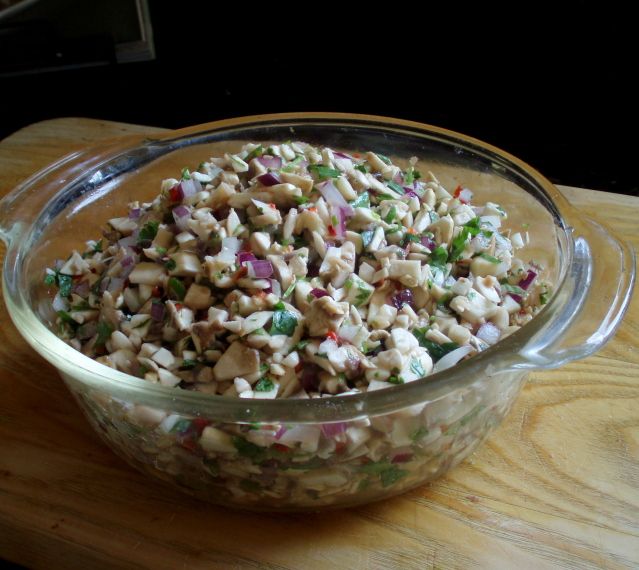
In a bowl, combine the mushrooms, red onion, jalapenos and cilantro. Add the lime juice and olive oil and gently toss. Salt to taste.


Let it sit for a couple of hours or...if you have time and you've thought in advance, stick it in the fridge over night. Serve at room temperature.

Now....the night I made this, we had carne asada soft tacos for dinner. I dipped my tortilla chips in it, I spread it all over my tacos...and enjoyed it. (photos came out like crap so I'm not showing 'em).

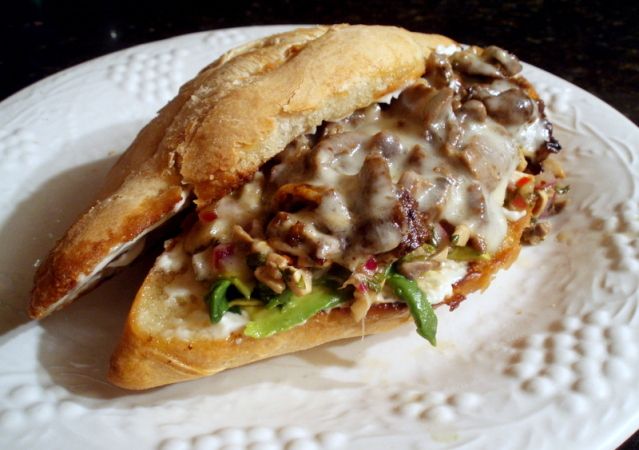
The next night....(this is how I can attest to the fact that its sooooo good after a day) I decided to grab a bolillo roll, and make a carne asada "sub". I reheated the carne asada covered in melted cheese...and heated up a extra large spoonful of the Mushroom, Jalapeno, and Cilantro Salsa and added that to the sandwich, along with some sliced avocado......


Oooooomg!! One of the best sandwiches EVER!!

This salsa not only has the traditional salsa experiences; jalapeno heat, crunchy onion, soothing cilantro and limey tang....but add to that the meaty texture and earthy flavor of mushrooms. It's a whoooole new level for salsa.


Saturday, September 8, 2012

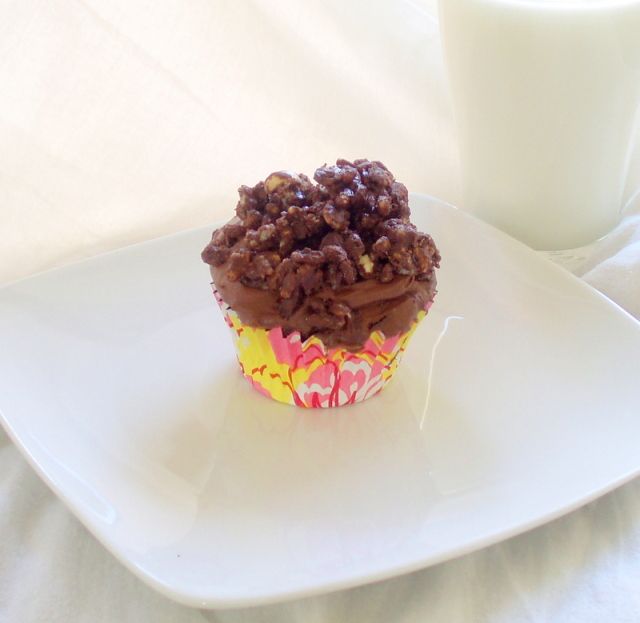
Devil's Food Cupcakes with Hazelnut Crunch


Are you ready for this? I mean.....are you really ready for this?!

This is a Bon Appetit recipe for a 3 layer cake. I didn't have a need for cake. So I decided to make cupcakes. Easier to share at work that way.....so I wouldn't have to eat them all myself. Cuz as good as these are...I would eat them all. They are the fluffiest, lightest cupcakes I have ever eaten in my life. Hands down!


Be prepared though...there are a few steps. And a lot...I mean a LOT of beating. But it's all worth it. Trust me. Hopefully you have a KitchenAid stand mixer (unlike yours truly)...it will go by quicker than if you're using a handheld.

Another thing...there are 3 parts to this cupcake. You have the cake part, the frosting...and then you have the crunchy topping. You can make the cake part (cupcakes) a day in advance. Everything else should be made the day you're going to assemble them. They store nicely in the fridge, covered. Just let them sit at room temperature for an hour before eating...gives the icing time to soften a bit. The only part of the cupcake that suffers over time ...is the crunchy topping. It loses its crunch. Not that it goes bad, it's just not as good.

Oh...and did I mention that the frosting alone has ONE POUND of chocolate in it? Oh ya, baby....give me that chocolate!! One thing I did (by accident but it turned out great) was that I used semisweet chocolate, only, in the frosting. The recipe called for 8 oz of high quality milk chocolate (plus 8 oz of whatever kind of semisweet chocolate) and some how I missed the word "milk". I ended up adding some powdered sugar to sweeten it up a bit. You can use milk chocolate as the original recipe calls for or do it the way I did. Which ever you prefer...it's going to be great!

Ok, ready or not ...here goes

Devil's Food Cupcake with Hazelnut Crunch
Printable Version
Makes 36 cupcakes

Part 1 - Cake:
2 1/3 cups cake flour
1 cup unsweetened cocoa powder
1 1/2 tsp baking soda
1 tsp salt
1/4 tsp baking powder
2 tsp instant espresso powder
1 cup hot coffee
1 cup buttermilk
2 1/2 cups sugar
1 cup unsalted butter, room temperature
4 large eggs
1 large egg yolk
1 1/2 tsp vanilla extract
4 oz semisweet or bittersweet chocolate (not to exceed 70%), melted and cooled

Preheat the oven to 350'. Line 36 muffin cups (or work in batches).

Sift together the flour, cocoa powder, baking soda, salt and baking powder into a medium bowl. Set aside.

Combine the coffee and espresso powder into another medium bowl then whisk in the buttermilk. Set aside.

In a large bowl, beat together the sugar and butter, until light and fluffy (this should take about 5 minutes). Add in the eggs one at a time, beating each egg until incorporated into the mix before adding the next one. Scrape down the sides as needed. Then beat in the egg yolk and vanilla. Turn the mixer onto high and continue beating until the mixture has doubled in volume and is very light and fluffy. This should take about 3 minutes. Scrape down the sides of the bowl, making sure the eggs and the butter mixture are well incorporated. Now beat for another minute.

(Told ya there was a lot of beating. And we just got started!)

Turn the speed down to low and beat in the flour mixture in thirds, alternating with the coffee mixture....beginning and ending with the flour mixture. Then drizzle in the melted chocolate. Mix until just blended.

Fill the muffin tins about 3/4 full (I used a standard sized ice cream scoop to measure and pour..works great!).

Bake for about 18 - 20 minutes, or until toothpick inserted in the center comes out clean. Cool on a wire rack.

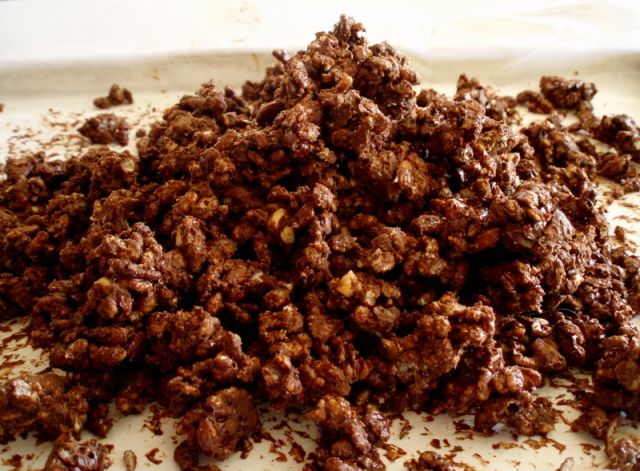
Part II - Hazelnut Crunch
1/4 cup hazelnuts
2 oz semisweet or bittersweet chocolate (not to exceed 70%) chopped
2 TB unsalted butter
1/2 cup Nutella
3 cups toasted rice cereal

Preheat the oven to 350'.

Spread the hazelnuts onto a parchment paper lined cookie sheet. Toast the nuts for about 6 - 7 minutes or until fragrant. Keep an eye on them. You don't want them to burn. They go from toasted to burned rather quickly. Allow to cool. Chop coarsely. Set aside.

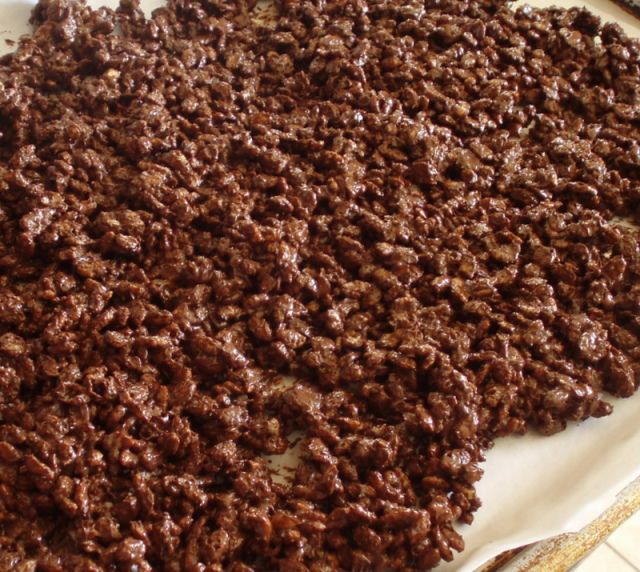
In a double boiler, combine the chocolate and butter. Heat until melted, stirring often. Remove from heat. Add in the chopped hazelnuts and Nutella. Stir until well mixed. Fold in the rice cereal.

Spread mixture onto the parchment lined cookie sheet.  Freeze for about 30 minutes.


Break up the hazelnut mixture with your hands, into small pieces. Place in a bowl, cover and stick it in the fridge until we're ready to use it.


Part III - Frosting
8 oz of high quality chocolate, chopped (original recipe calls for milk chocolate. I used semisweet and added about *1/2 cup powdered sugar in the end to balance out the sweetness)
8 oz of semisweet or bittersweet chocolate (not to exceed 61%), chopped
1 1/2 TB light corn syrup
1 1/2 cups heavy cream
1 cup chilled, unsalted butter, cut into 1/2" cubes
*1/2 cup powdered sugar, sifted (use powdered sugar ONLY if you don't use milk chocolate as stated above)

In a medium bowl, combine both chocolates and the corn syrup.

In a small saucepan, bring the heavy cream just to a boil. Pour over the chocolate and stir until the chocolate is melted and smooth.

Using a mixer, beat for about 6 or 7 minutes until the chocolate mixture has cooled.

While the mixer is still running, beat in a few pieces of butter at a time. Beat until incorporated before adding the next few pieces of butter. If using just semisweet chocolate, beat in the powdered sugar. Continue beating until the chocolate is thick and has lightened in color. If you're using a stand mixer, this should take about 5 minutes. If you have a handheld mixer....it could take up to 15 minutes. During this time, if the frosting seems to be really thin, stop. Place in the fridge to chill and firm up a bit, then continue beating.

Once the frosting is done, generously ice your cupcakes and sprinkle the hazelnut crunch over the top.


I made these a week ago. I really wish I had one right now.

Side note: I bought some of those foil lined cupcake liners that don't get messed up during baking. They work great, as you can see. No oil smudges seeping through the liner. Funny thing though...the instructions for the liners said that you don't have to have a muffin tin to use them. Just place the liners on a cookie sheet, fill with batter and bake.


Sure it works...if you want to make football cupcakes (football season IS upon us you know).

Thursday, September 6, 2012

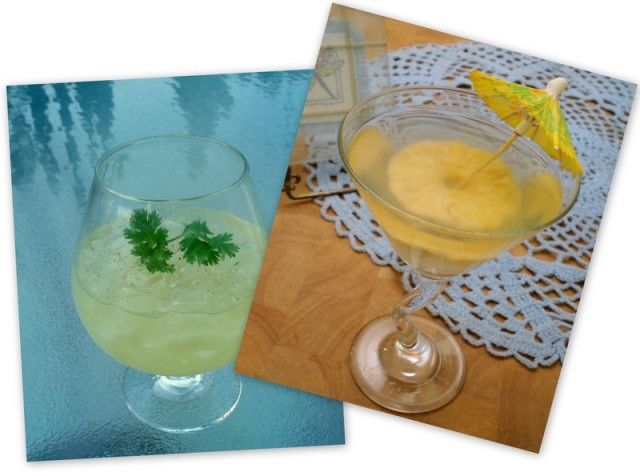
Cocktail and Mocktail


Are you familiar with Marx Foods? They have some pretty cool fine foods and exotic spices. They sent me a few samples of some of their spices and asked me to participate in their Cocktail & Mocktail Mixology Contest. Of course when I said yes, I had no idea what spices they were going to send me. Wow...what a challenge. I got Fennel Pollen, Saffron Threads, Juniper Berries, Long Pepper, Dill Pollen and Dried Pineapple. (I had no idea spices came as "pollen") After reading up and doing some research on what flavors compliment each other, I came up with a couple fun drinks.

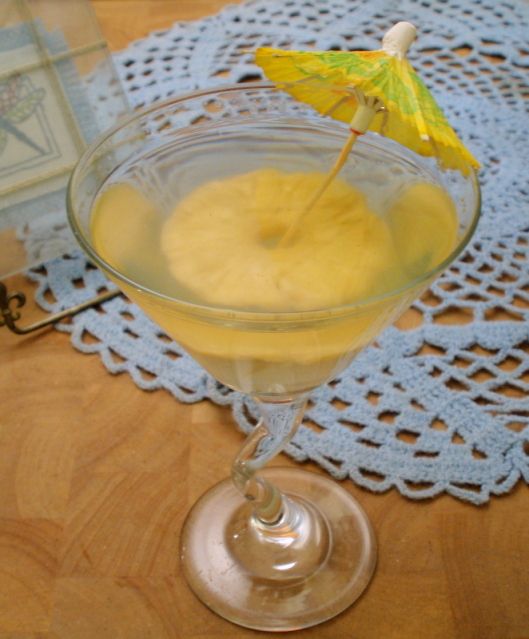
Pineapple Express Cocktail


Makes 2 cocktails

1 cup coconut rum
2 slices Dried Pineapple
1 pinch Fennel Pollen
2 shot pineapple juice
club soda

In a small bowl, combine the coconut rum, dried pineapple and fennel pollen. Cover and set aside until pineapple is tender. This could take several hours


Remove the pineapple from the rum mixture and place one slice in each glass. Fill a shaker half way full with ice. Add 3 shots of the rum mixture and 1 shot of pineapple juice. Shake and pour into the glasses. Top with club soda.


Pepper Long Stocking Mocktail


makes 1 mocktail

1/4 tsp grated fresh ginger
6 cilantro leaves, plus more to garnish
1 Long Pepper Peppercorn
2 shots ginger ale
1 shot lemonade

Muddle the ginger and cilantro leaves. With a microplane, zest in a good pinch of long pepper. Add ice, ginger ale and lemonade. Shake lightly and strain into an ice filled glass. Garnish with cilantro.