Yum Peaceful Cooking

Sunday, April 28, 2013

Quinoa and Roasted Beet Salad (and a Giveaway)


This is the second time in my adult life that beets have found their way into my kitchen. The last time these purple-ish red veggies crossed my threshold was back a few years ago when I was baking my way through Healthy Bread in Five Minutes a Day and I decided to give beets a break (from my childhood memory of having to gag them down) and made some beautify Red Beet Buns.


Loved how they looked but hated how they tasted.

Well, I was faced with them again a couple of nights ago that all started with a phone call that went something like this:

me: "Hello?"
caller: "Hi, this is Nicole from Whole Foods Market and I'm calling to remind you about the cooking class that you signed up for."
me: "Cooking class?" (First of all I had no idea they HAD cooking classes. Second of all, I couldn't remember the last time I'd been to Whole Foods)
caller: "Yes, you've signed up for our Transition to a Gluten Free Diet cooking class"
me: "Ooooh...(the bells are ringing) my daughter must've signed me up"

Turns out that yes, my daughter signed us both up for this class. Since it was free, I figured why not. So I went. It was more like a lecture than a real cooking class. The place was packed. The instructor/dietitian was wonderful and demonstrated how to make several dishes along with sharing some great information about eating gluten free.

I know there are a lot of people out there who have to eat gluten free do to Celiac Cisease. I also know that there are a lot of people out there who just choose to eat gluten free. What I didn't know was that somewhere between those two reasons are the gluten intolerant. My youngest child has gone gluten free. It started out as a choice after finding out about GMO foods but ended up being more of a mild sensitivity reason. Apparently gluten can possibly cause a lot of things that you wouldn't even realize (headaches, hair loss, dry cracked skin are just a few of the possibilities).

Here's a great list of websites that were recommended at the class if you want to do more research:
www.celiac.org
www.gluten.net
www.csaceliacs.org
www.celiaccenter.org
www.foodallergy.org
www.livingwithout.com

(yes, I'm hosting a giveaway...here's a sneak peek. more details in a minute)


Back to beets. Ok, so there I was, sitting in a room full on strangers, and the assistant was passing around one of the foods that was prepared. The star ingredient was suppose to be quinoa. But all I could think about were the beets inside that little cup that was heading my way. Sure, I could've said 'No Thank you, I'll pass'. But that wouldn't have been very foodie of me. So I took the cup...looked at it...my nostrils flared a little as I eyeballed those big chunks of beets...sniffed a little


Then came the tentative, cautious, very doubtful bite....

Omg...it was good!! Really? Yes, really!! I mean...of course it still tasted like beets but there's something in the roasting process that mellows and sweetens the beet.

Quinoa and Roasted Beet Salad
Printable Version
1 bunch of beets
Greens from 1 bunch of beets
Salt to taste
1 to 2 TB extra virgin olive oil
2 garlic cloves, minced
2 tsp caraway seeds, lightly cruhed
4 cups cooked quinoa
Crumbled goat cheese to garnish (optional, I opted out)

Preheat the oven to 400' F

Trim the greens off the beets. Scrub the beets and wrap them individually in foil. Bake for about an hour, until for tender. Let them cool. Once cool enough to handle, peel off the skins, cut into 1/4" dice. Set aside.

While the beets are in the oven, cook your quinoa. 1 cup of dry quinoa yields about 3 cups. This recipe calls for 4 cups. You can cook 2 cups of dry quinoa per the package instructions and put whats leftover in the fridge. It'll be good for a couple of days. Or, you can freeze it. Quinoa freezes very well and thaws quickly for future use.


Wash the beet greens and remove the center vein. Steam for for 2 or 3 minutes then plunge them into ice water to 'refresh' them a bit. Squeeze them dry and chop. (beet greens act a lot like spinach greens).

In a large heavy skillet, heat the olive oil over medium heat. Add the garlic and cook, stirring, until fragrant (about 30 seconds). Add in the caraway seeds and beet greens along with some salt and pepper to taste. Cook and stir for about 30 more seconds. Toss in the quinoa and beets


Toss together until everything is well combined, heated through and the quinoa is beet red.
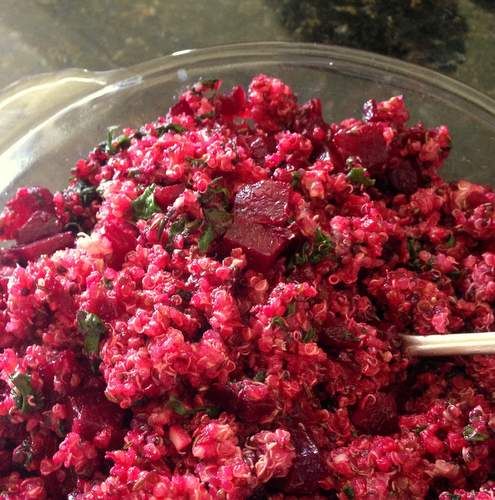

And there you have it...a beautiful salad full of amazing nutrients. And it's gluten free for those who need it. And hey...now I don't have to say that I don't like beets. I can say...I like roasted beets.


Now...its GIVEAWAY time!!


Just in time for Mother's Day. Tate's Bake Shop would love to send 1 lucky winner this beautiful, chock full of goodies basket. You will find it packed with:

Lemon Tea Loaf
Buttery-rich Shortbread Squares
Individual Coffee cake
Box of Tate's Bake Shop's famous crispy Chocolate Chip Cookies
Baking with Friends Cookbook

Entering to win is simple: Leave a comment.

If you'd like a better chance at winning, do a few extra things:

Announce the giveaway on:
Facebook (then leave a comment)
Twitter (then leave another comment)
Google+ (and another comment)
etc etc.

Basically, each comment you leave stating how you've shared the news about my giveaway, will equal one entry.

Contest ends May 1st, 11:59 pm 

Tate's Bake Shop is also giving all my readers (and their family and friends) a discount. All purchases made until 5/12/13 will receive a 20% discount by using the discount code: mom13

Good luck!

**** 5/1/13 note: I had the incorrect picture of the basket posted before. It has now been corrected. I appologize for any inconvenience or misrepresentation.

Sunday, April 21, 2013

Jamaican Jerk Pulled Pork Sandwich


I looooove me a good sandwich. They're versatile. They're portable. Often, they contain a portion from each of the food groups....meat, grains, dairy (ie: mayo), vegetables and in this case...fruit. Yes...there is some fruit in this sandwich as part of the tropical coleslaw.

Which I will share about at the end of this post.

Right now....I want to talk about butts. Pork butt. Aka: Boston butt. Aka: pork shoulder. All the same cut...known by a different name. More often due to where you live. Confusing, non the less. So I understand why the meat industry is changing the names of the cuts of meat. They want to be consumer friendly, less confusing and more appealing.

Appealing...is there something unappealing about the names we have: loin? breast? thigh? butt? rump roast? (giggles)

My concern? When I'm looking for a cut of me listed in a recipe that I got from an old cookbook.....how will I know what it's called at the store? The meat industry seems to do this often. I have a cookbook from 28 years ago that doesn't coincide with my local grocery store meat department, not to mention my older cookbooks. Fun times ahead.

I wonder what they'll change the Boston Butt / Pork Shoulder name too...

O'well...as long as they don't start changing the cuts of meat. If we don't know the name...hopefully we'll recognize the cut.....


Yes...this is a nice butt. It's a very recognizable cut of meat. And I think that it's current name, butt, sounds appealing (though it's not anatomically accurate). But it's more appealing than saying...'that's a nice shoulder'. I dunno....I mean, shoulders are nice an all. They're just not as sexy as butts. And food is sexy...I say, let's stick with butt.

Sooo...let's talk about my butt. It's rather big. Too big..... ba du bump.....

Honestly....this cut really was too big for my family so I cut it half and stuck one half in the freezer for later. Besides, I have this amazing seasoning and I didn't want to use up the whole jar in one swoop.

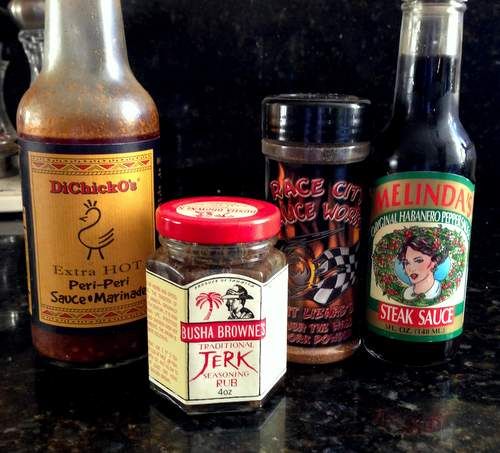
Speaking of this seasoning. If you ever see Busha Brown's Traditional Jerk Seasoning Rub at the market...buy it!


It's amazing! The aroma alone will make your mouth water...the combination of citrus, spicy, hot...dang. Good stuff.

If you can't find it locally, you can get here: Carolina Sauce Company That's where I got mine from. Along with some other amazing seasonings and sauce.


I won them a while back in a little context on their Carolina Sauce Company Facebook fan page. All of these items are wonderful but there's something special about the Jerk Seasoning.

Jamaican Jerk Pulled Pork Sandwich
Printable Version

3 lbs Boston Butt/Pork Shoulder
2 oz Traditional Jerk Seasoning Rub
12 oz beer
Chicken Broth or water

Preheat your oven to 275' F

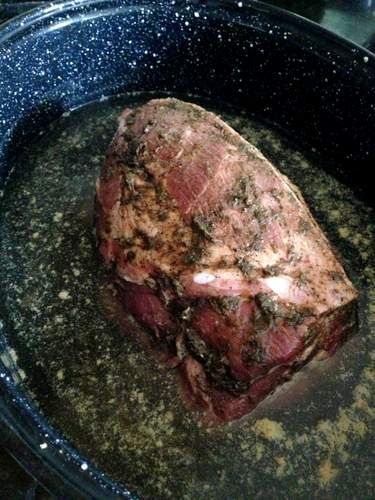
Rub the seasoning all over the butt and place in a roasting pan. Pour a can of beer into the roasting pan. Add enough chicken broth or water (if using water, add some chicken bullion if you have it. That's what I did) to bring the liquid up to the mid point of your meat.


Cover tightly with foil and cook for about 6-7 hours.


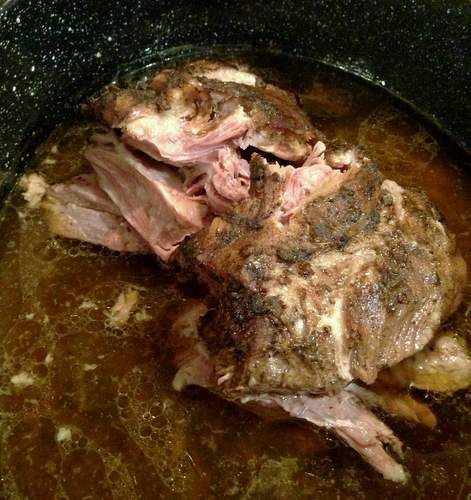
And there you have it....a tender, fall off your fork slab of pork. So tender that when I tried to remove it with a fork and spatula (the spatula was suppose to support the bottom)....the meat fell apart.


I love when that happens.


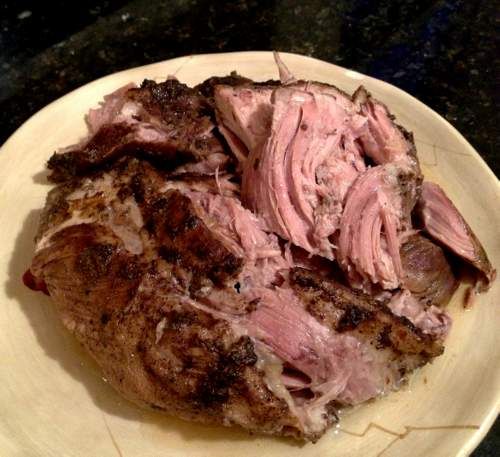
You know I didn't behave here....I grabbed some and tossed in my mouth. Mmmm.

Use a couple of forks to shred the meat...pour some of the juices from the roasting pan over it and dive in.

Or make it into a sandwich.

With coleslaw.

And if you're feeling a bit adventurous....try adding some fruit to your coleslaw to go with the island theme (remember? Jamaican, mon). Add some pineapple, mango and strawberries to the slaw....and pile it on...


Don't forget your napkin.

The only thing that would've made this sandwich better?.....a slathering of Busha Brown's Jamaican Jerk BBQ sauce.

Thank you Gloria and Carolina Sauce Company for introducing me to this wonderful seasoning. I'm hooked!!

Monday, April 15, 2013

Curry Tofu Hummus


Did you know that April is National Soy Foods Month

Neither did I. Until recently. 

My friends over at FoodieBlogRoll hooked me up with some soy foods products to help spread the word and share some ideas on what you can do with soy foods. 

I'm not a soy person, personally but one of my daughters is lactose intolerant and soy foods products is one of the ways she gets around her tummy aches caused by dairy. I also use soy flour in a lot of the breads that I make for her. Therefore, I'm not a stranger to soy. Plus...I really enjoy soy nuts and I absolutely love eating edamame...those ones you get at Costco. Omgohs.....They're so addicting. 

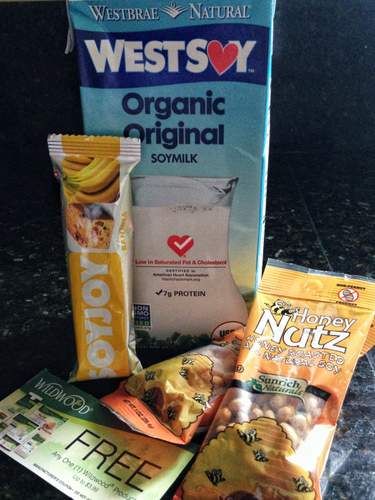
Anyways....this is what I received in the mail the other day....


These things are always a surprise. You never know what you're gonna get until it arrives. Hmmm...what to do...what do. I didn't want to do anything typical here so I started thinking about cheese. I've made cheese...soft cheese from milk, in the past so I figured you could do the same thing with soymilk. 

Only it's called tofu. 

Which sorta confused me because I know there's soy cheese out there. Apparently the beginning stages for both are the same. Some blogs even call tofu, soy cheese. Which confused me a little more. So I looked it up on that handy dandy website known as Wikipedia and it said that tofu is the curd that comes from soy milk which is pressed and is highly perishable while cheese starts off the same way but then its salted and ripened. Soy cheese is therefore more flavorful than most tofu.  

With all that said, I started on my tofu making adventure....with a little help from LAFujiMama


Tofu
4 cups soymilk
1/2 cup water
1 TB apple cider vinegar
1 TB lemon juice

Bring the soymilk to a boil, stirring occasionally so it doesn't burn. While that's going on, combine the water, vinegar and lemon juice. 

Reduce the heat and simmer for 3 minutes. 

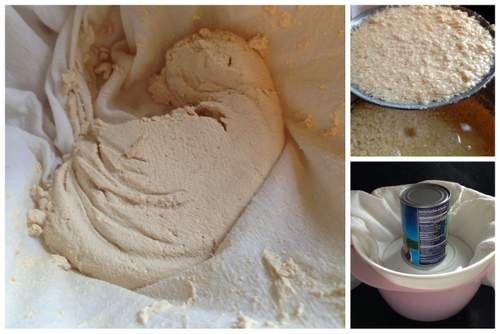
Remove from heat and add 1/2 of the water mixture. Stir vigorously about 5 or 6 times. Add the remaining water mixture and stir gently, in a figure 8 fashion until curds begin to form. 

Cover with a lid and let sit for 15 minutes. This is when you'll see the full separation. Now from what I've read, the size of the curd will vary depending on the protein content of your soymilk. 

Line a strainer with a cotton cloth and place over a bowl. 


With a large slotted spoon, remove the curds and place them into the lined strainer. Fold the cloth over the curds and place a plate (for even distribution) over the cloth and press until most of the liquid is gone. Place a heavy object on top to get the remaining liquid out. This should take a few minutes. The less liquid remaining will create a more firm tofu. 


I ended up with a very soft tofu. I think it is from a couple of things. One...I had a very small curd formation. Two...I couldn't get anymore liquid out of my curds.

At this point you can place the tofu in a bowl of cold water and gently run cold water into the bowl (not allowing the water to run directly onto the tofu) for several minutes. This is suppose to make the tofu set up. I found that my tofu was just too soft to undergo this process and was dissipating into the water so I stopped. To store your tofu, you need to cover it with cold water and refrigerate.

I used mine immediately.


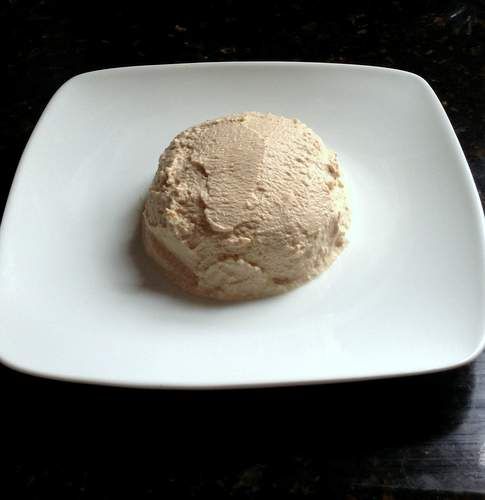
Another thing I noticed. My tofu is a tan color. The soymilk was a light tan coming out of the container so I'm not sure if that's the reason....but that's what happened. I've been told that it looks like coffee ice cream. (I assure you, it doesn't taste like it though.)

Well, never the less, the color wasn't an issue because this lovely silken mass was destined to become a dip.

Tofu Curry Hummus
Printable Version
1 can garbanzo beans, drained, liquid reserved
5 oz silken tofu
1 TB tahini
juice from 1/2 lemon
2 - 4 tsp curry powder
Salt to taste
Roasted soy nuts to garnish
Olive oil to garnish

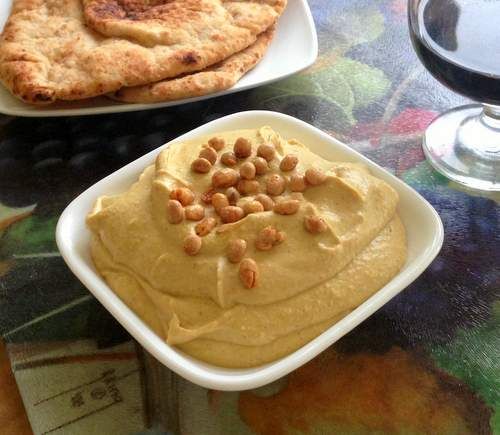
Combine garbanzo beans and tofu in a food processor. Process until smooth. Add about 1 TB of reserved garbanzo liquid, while processing, until just under desired thickness. add the tahini, lemon juice and curry powder (to taste) and process until smooth. If you desire a thinner hummus, add a bit more reserved garbanzo liquid. Salt to taste. Garnish with a sprinkle of soy nuts and a drizzle of olive oil. Serve with your choice of bread.


What an amazingly tasty dip....but you have to be a lover of curry! But wow...smooth, delicious and oh so healthy. I know this was a really long process to get from A to Z but the fun was in the making.

And now...a few words from our sponsor:


April is National Soyfoods Month which makes it the perfect time to learn how soy can help create a healthy diet and to discover easy ways to incorporate it into everyday meals.  Packed with protein and fiber, soyfoods are a great way to reduce calories, saturated fat and maintain your weight.

The Soyfoods Association of North America (SANA) provides information about the health benefits and nutritional advantages of soy. SANA offers fun recipes and convenient ways to incorporate soy into meals for everyone – from athletes to families. SANA is dedicated to spreading the word about soy, especially during National Soyfoods Month in April!

Soyfoods aren’t just for vegetarians anymore. In fact, dishes made with soy are quick, tasty, and often healthier than traditional protein sources.

Since April is National Soyfoods Month it’s the perfect time to tell your readers about the benefits and ease of cooking with soy!

Here are just a few ways that soy can help make your life easier and healthier:

Take this mixed berry smoothie up a notch with creamy and delicious WESTSOY Soymilk made from whole organic soybeans:
Berry Smoothie
WESTSOY Soymilk

Need a snack on-the-go?  Grab some gluten free SOYJOY bars to fuel up with nutrients in seconds.
SOYJOY bars

On those busy weeknights, add some Wildwood tofu to the standard stir-fry for more protein or this spinach fettuccini to your favorite pasta sauce.
Wildwood Tofu

Packing lunches with the same snacks can get a little boring, but honey roasted soy nuts are a sweet and crunchy snack packaged in individual sizes, perfect for the lunch box.
Honey Roasted Soy Nuts

Packed with protein and fiber, soyfoods are a great way to reduce calories, cholesterol and saturated fat.
They also serve as a great source of iron, calcium, vitamin B-12, magnesium and zinc.

To find out more about Soy Foods Month, visit the links below:

April is SoyFoods month! Explore the site for recipe ideas and ingredients!
Follow the SoyFoods Association on Twitter at @SocialSANA
SoyFoods Association on Facebook


This sponsorship is brought to you by the Soyfoods Association who we have partnered with for this promotion.

Saturday, April 6, 2013

Flattered Breasts - 50 Shades of Chicken


Ok, so the picture doesn't quite capture the "moment" as depicted in the cookbook, 50 Shades of Chicken. I really need to work on my nighttime pics and get some tips on food styling. 

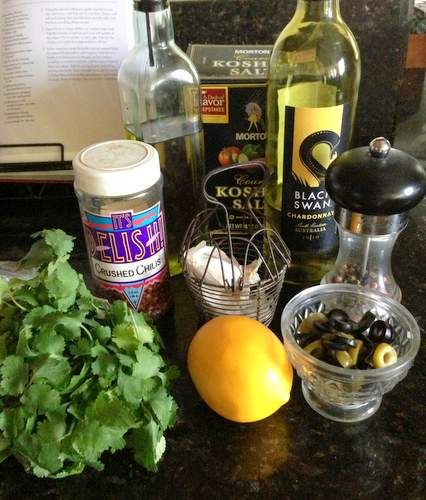
The rated G version of this recipe is called Sauteed Chicken Breasts with Garlic, Olives, and Wine. 

The rated R version of this recipe starts off like this: "Suddenly he seizes me and lays me out on the counter, claiming me hungrily. His fingers pull me taut, the palms of his hands grinding my soft white meat into the hard granite, trapping me. I feel him. His stomach growls, and my mind spins as I acknowledge his craving for me."

Yes, its as fun to read this cookbook as it is to cook the recipes. 

And eat them.

So good, so easy. Simple ingredients and very quick. 


Flattered Breasts (Sauteed Chicken Breasts with Garlic, Olives, and Wine)

4 boneless, skinless chicken breasts, patted dry
1 1/2 tsp salt
1/2 tsp black pepper
3 TB flour
2 TB extra virgin olive oil
3 garlic cloves, minced
Pinch of pepper flakes
1/4 cup dry white wine
1/4 cup chicken broth
1 TB lemon juice (fresh squeezed is best)
2 TB flat-leaf parsley (I used cilantro instead)
2 TB butter, cut into small pieces, chilled
2 TB kalamata olives, pitted and sliced (I used regular black and green olives)

Get out your rolling pin, place each breast between plastic wrap and 'slap them into submission'. Or, just butterfly them into thin slices. You want them about 1/4" thick. Season them with salt and pepper to taste and lightly dredge them with flour. 

Heat the oil in a large skillet over medium-high heat. Cook the chicken in batches for about 3-4 minutes on each side, until golden brown. Remove them from the skillet and keep warm on a plate, covering them with foil.

Saute the garlic and red pepper flakes for about 30 seconds. Add in the wine, chicken broth, and lemon juice and simmer, scraping up the brown bits of yumminess. Allow to simmer until the sauce thickens down to a glaze. 

Add the parsley, butter and olives, stirring constantly. If more salt is needed, now is the time to add it. Return the chicken to the pan and heat through....about 2 minutes. 

Serve and enjoy. 

Told ya it was quick and easy. 


Wednesday, March 27, 2013

Potage Parmentier - Leek and Potato Soup


Yesterday my daughter brought home a leek. A very large leek. My mind instantly went to an amazing Julia Child recipe: Potage Celestine. But what I needed tonight was simplicity at its finest (short of having it delivered). I had spent most of the day pulling weeds and prepping my little garden strip for planting. I'm exhausted to say the least.

After flipping through a couple cookbooks, I discovered that Potage Parmentier fit the bill. I mean...seriously. Soup doesn't get any more simple or easier than this.

And it's delicious. It's satisfying without being heavy. It has full flavor and a bit of richness without a dozen ingredients. Aaaaaaaand...it's a Julie Child recipe from Master the Art of French Cooking.

Can it get any better than that?

Did I mention that its vegetarian? And if you use vegetarian butter....it's vegan!

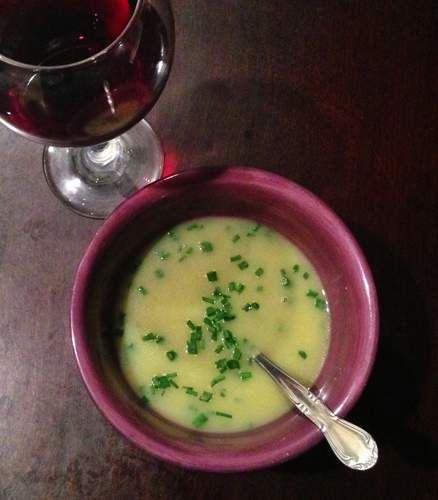
Side note: you may choose to drink a white wine with your soup. I had started the red a while ago....and kept with it. A nice Merlot. Which happened to sweeten up nicely with my dinner.

Potage Parmentier - Leek and Potato Soup
Printable Version

1 lb potato, peeled and dinced
1 lb leek, thinly sliced
2 quarts water
1 TB salt
Salt and Pepper to taste if needed
3 TB softened butter
3 TB minced chives

In a large pot, simmer the potato, leek, water and salt, partially covered for about an hour. Remove from heat. Puree with an immersion blender or blender..or a fork if you have to. Season with salt and pepper to taste (the salt may not be needed). Just before serving, stir in the butter a little at a time. Garnish with chives.

That's all she wrote.

Sunday, March 24, 2013

Thighs Spread Wide - Fifty Shades of Chicken


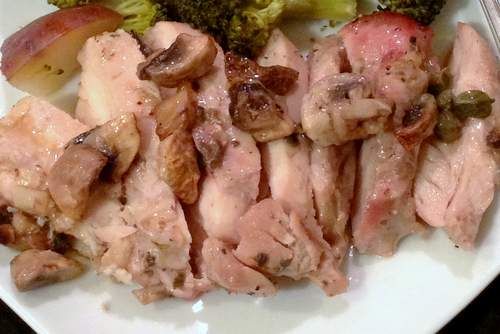
Thighs Spread Wide - Roasted Chicken Thighs with Mushrooms

There are some books you can't NOT buy. Fifty Shades of Chicken, a parody in a cookbook, is one of those books.


I couldn't help myself. I tried. I glanced, I picked it up...giggled to myself, put it down and walked away. I even got as far as leaving the bookstore and going home. Only to find myself thinking about it. Often. I cook chicken a lot. 90 percent of my dinners are chicken. I have friends who call me The Chicken Queen. So, I think it was meant to be. Destiny. A requirement for The Chicken Queen to possess this particular cookbook. 5 days. I put myself through 5 days of thinking about the book before I realized....YES! I must make it mine.

There are 50 chicken recipes. As if I need more, right? But honestly, is it possible to have too many recipes of any kind? Of course the main question is....are they quality recipes. The answer? Yes. Delicious. And so fun to read. I mean when a cookbook starts off with "How have I gotten myself into this? I glance around the the spotless, meticulously organized kitchen: trussing twine, skewers, mallets-is that a cleaver? Holy crap." Or a recipes reads: "I must have you now," he says breathlessly, throwing me down and opening my thighs on the first surface he can find. "On this?", I ask. "Isn't this a baking sheet?" "It'll have to do." (keep in mind this is from the chicken's perspective. And yes. We are talking about chicken. In this case, chicken thighs, to be more exact).

Anyway...It totally cracks me up. And this book contains wonderful, quality, recipes. You might blush while you're cooking dinner. Have some wine and blame it on that if it bothers you. Besides, there is a saying about food being sexy. If you ever doubted it, this is your proof. Food porn. On more levels than you may have imagined.

If Fifty Shades of Grey wasn't your thing (and I know there are a lot people who wouldn't read the trilogy), that's totally fine. I hope you can still at least enjoy the recipe for the ingredients alone.

Thighs Spread Wide (Roasted Chicken Thighs with Mushrooms)
Printable Version

1 1/2 lbs boneless, skinless chicken thighs, patted dry
1 tsp salt
1/4 cup chopped fresh oregano (I used 1 tsp dried)
2 TB fresh lemon juice
2 garlic cloves, minced
1/2 tsp pepper
8 oz cremini mushrooms, quartered
1/3 cup olive oil
2 - 3 tsp capers
2 TB white wine (or chicken broth)
Garnish: flat leaf parsley, chipped and lemon wedges

Sprinkle the chicken with salt. Set aside.

In a large bowl, combine the oregano, lemon juice, garlic, pepper, mushrooms and olive oil. Add the chicken and stir to coat. Allow to marinade for up to 4 hours (in the refrigerator). If you can't wait...then 15 minutes will do, at room temperature will do.

Preheat the oven to 500' F.

Arrange the thighs (spread open) on a 9x13 baking dish, scattering the mushrooms and capers over and around the chicken.

(I cut the recipe in half since Sir Sportsalot and I were the only ones eating dinner.)


Pour in the wine and roast for about 25 minutes, or until the chicken is cooked through (juices run clear).

Garnish with parsley and lemon if desired.


I didn't have the parsley but I did drizzle with lemon juice...just forgot to leave a pretty wedge on the plate. This dish is so simple. Full of flavor. And very tender..as is all thigh meat. Btw, I read that 3 oz of chicken thighs only have 40 more calories than 3 oz of breast meat. Your cooking method will of course effect the true outcome of that statement.

I have a lot of cookbooks dedicated to just chicken. Even if you took away all the Fifty Shades of Grey parody stuff.....I have to say, this is the best chicken cookbook I own.

Not to mention, the only one that contains the "F" word.

Saturday, March 16, 2013

Pistachio Muffins


I love pistachios. Actually, I love most nuts (this is not a reflection of my personality). Out of all the nuts out there, I wonder why the pistachio has it's own muffin? I mean...you never hear about peanut muffins, or almond muffins...or even cashew muffins. hmmm...interesting. (sorry, I don't have an answer for this. I can't even find anything about the origin of pistachio muffins. And yes, I did Google it).

It wasn't until very recently that I even tasted a pistachio muffin. I mean...within the past few months. You know when you hear about or see a certain food and you have a mental idea of what it's all about? And for some reason it just doesn't mesh with your mental taste buds? That's how it was for me. I thought it was odd that the muffin is green. Mentally, I assumed there were artificial flavorings involved. Some things, I just can't do artificially. Nut extracts are among them. Thank God that's not the case here. Once I tasted them...and discovered that the "green" is for looks only (induced by food dye), and not necessary, and the only nut flavor is from the actual nut itself...and some spices are added in there for a very nicely orchestrated pallet experience...well, my confounded predetermined opinion of pistachio muffins changed. 

I did a lot of searching to find a recipe that matches my culinary style/taste. I found a lot of them that start off with a cake mix. Then there were tons of them that included pistachio pudding mix (THERE it is! The artificial flavoring in full motion right there! Ya, it's a good thing those recipes were not my first experience). Ok, if that's not an issue for you...and you desire a stronger, bolder pistachio flavor...then maybe one of those recipes would be better for you. Anyway, the recipe I found, that inspired me was at ScarlettaBakes. I made a few changes. Going green was one of them. I almost didn't add the dye but since St. Patricks Day is tomorrow....well, I couldn't resist. If you don't want them green...leave the dye out. You might even "feel healthier" eating them in their natural state.

These muffins are nice and moist (is there another word I can use to get that point across?). I love the combination of pistachio, cinnamon and nutmeg. I used roasted pistachios. Raw would be perfectly fine too. Actually, I would've preferred raw but I didn't have any on hand. I think if you were to use the nut in the raw...you'd end up with more of the oils and a more pure pistachio flavor.


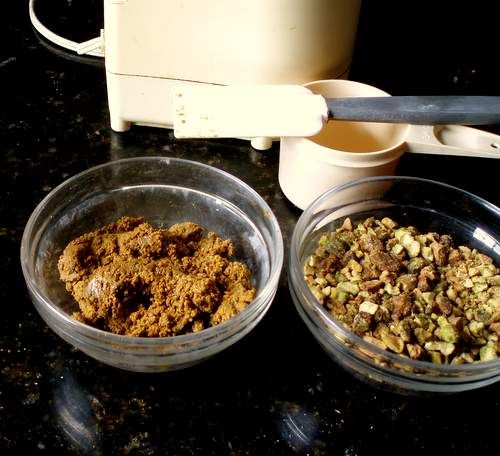
One of the things I like about this recipe is that you take some of the nuts and puree them into a paste...well...a nut butter actually, leaving the rest of the nuts to be roughly chopped. I believe this method infuses more of the natural flavor in the muffin rather then having to rely on....say.....pudding mix?  

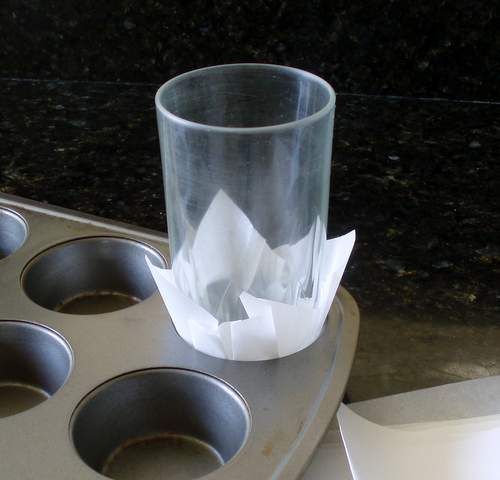
Before I get into the whole recipe spiel, let me share what I did for the muffin cup. I just couldn't put these muffins in a little frou-frou paper cups. Besides...the firm crust, contrasting with the moist insides is one of the muffin qualities that appeals to me. And those store bought paper liners tend to peal off some of it. 

What I did was cut some parchment paper into 5 1/2" squares and then pressed them into the muffin tin with the bottom of a glass


Just a little heads up here....the paper doesn't stay down very well, so make them as you need them...one at a time. 


The weight of the dough will force the paper to the bottom of the cup then you can continue on to the next. 

Yes, it's a tiny bit time consuming, but the results are cool. And...if you find that you don't have any store bought liners on hand....bazinga! Now you can just make your own. And don't be surprised that the round shape is not perfect. You will end up with some grooves and indents and bulges. But hey, that just adds to its rustic appeal. (funny how imperfections are made acceptable..and oftentimes desirable just by calling them rustic. OMG...I AM RUSTIC!! HA! Oh wait...never mind. That just makes me sound old. Really, really old).

Somebody stop me now. 


Pistachio Muffins
Makes 24 standard sized muffins

2 cups white sugar
1 cup butter, room temperature
2 large eggs
3 cups all-purpose flour
1 tsp baking soda
2 tsp baking powder
1/2 tsp salt
1 tsp cinnamon
1/4 tsp nutmeg
1 cup buttermilk
3/4 cup pistachios, roughly chopped (more if you want to sprinkle some on top of the muffins)
3/4 cup pistachios, pureed (instructions below)
1 tsp vanilla extract
Green food coloring (optional)

Preheat your oven to 375' F
Line 24 standard sized muffin cups

In a food processor, process 3/4 cup of pistachios in 30 second increments until pureed, scraping down the sides as needed. This should only take 3 or 4 increments.

In a large bowl, cream together the butter and sugar. While the mixer is still running, add the eggs one at a time then add in the vanilla extract and green food coloring, if desired. I used a few squirts of the gel kind, eyeballing it until I liked the shade. Beat until just combined. Set aside.

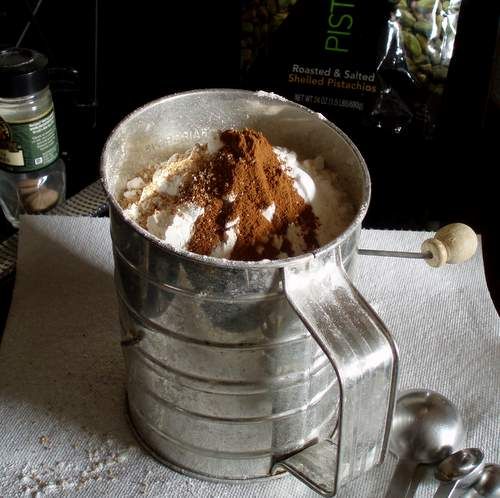
Sift together the flour, baking soda, baking powder, salt, cinnamon and nutmeg. 


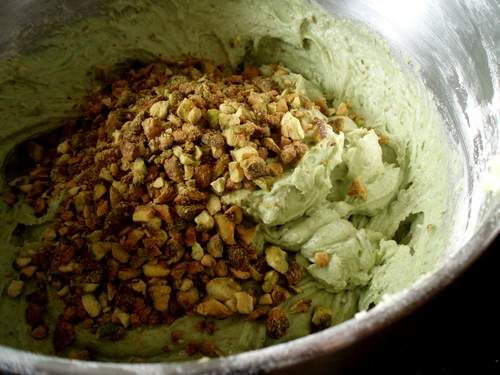
With the mixer on low, add the sifted ingredients to the creamed butter, alternating with the buttermilk. Beat until just incorporated. Beat in the pureed pistachio nuts. Fold in the chopped nuts.


Fill each muffin cup with the batter. I used an ice cream scoop for uniformity. If you have any left over pistachios, give them a rough chop and sprinkle them over the muffins.


Bake for 20 - 23 minutes or until a toothpick inserted in the middle comes out clean. 


Allow to cool slightly before enjoying

Happy St. Patrick's Day!