

When it comes to the term "unprocessed", people have various ideas of what that means. I'm not here to tell you what's right or what's wrong. All that matters is what's right for you.
Do you take the term literally? 'unaltered from an original or natural state'. Or do you look at it from a food standard point of view by judging the food as being unprocessed or not, based on the ingredients?
To process means to perform a series of mechanical or chemical operations in order to change or preserve something. Technically, we do this in our kitchens at some level, every time we cook or bake.
My view of "unprocessed" when it comes to food, is all about the ingredients. Bottom line. For example....flour. It goes through a process from it's original state as a grain in order to become the fine powder we bake with. Because I can, and do, buy flour from the store that is unbleached and NOT enriched, even though the grain has gone through a 'process' in order to become flour (and will again when it becomes bread), from a food standard point of view, it is "unprocessed'.

Now let's talk bread! Sourdough bread comes from a sourdough starter, also known as wild yeast. It doesn't like to be kneaded so basically all sourdough breads are no-knead. They're also slow rising.
If you want to make your own sourdough starter (it really is fun and if you have kids, the process could be fun for them too), here's a link to my post about how to make your own Sourdough Starter.
This loaf of bread almost became just a sourdough whole wheat bread. I couldn't find anything that said "whole grain" on the shelves with all the flours. So I went to the bulk bin section (I love stores that sell things in bulk out of bins!) and found some wheat berries. Now I was excited!!! Not that I have a grain mill or anything...but I do have a food processor. And it worked just fine for my purposes. It didn't grind it down as smoothly as a grain mill would, but I love the texture that I ended up with.

Of course, if you don't want to go through this or you can't find wheat berries, just use all whole wheat flour instead.
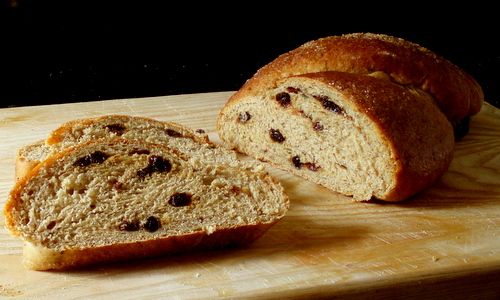
Another optional addition for this bread is adding Vital Wheat Gluten. Although it is processed it could be an exception that you allow in order to have a lighter loaf of bread. I made one loaf without and one with it. There was a difference in the crumb of course....the vital wheat gluten created a crumb that wasn't as dense, which might be preferable for sandwiches. The flavor was the same in both. I will include it in the ingredients. You choose whether or not you want to add it. Pictured is the loaf with vital wheat gluten added.

Note: If you grind any grains for your bread, I highly recommend weighing the flours rather than using a measuring cup. Flour from a bag has settled and will be more "packed" when measuring as opposed to freshly ground flours which have a lot more air fluff to them. This will result in an inaccurate measuring when using measuring cups. As a guide, 1 cup of whole wheat flour weighs 130 grams or 5 oz. This loaf of bread contains a total or 455 grams of flour. (various kinds of flours have a different weight)
Whole Grain, No-Knead Sourdough Bread
Inspired by: Nourished Kitchen2 1/2 cups whole wheat flour
1 cup whole grain wheat flour (ground wheat berries) You can substitute whole wheat flour
3 tablespoons vital wheat gluten (optional)
1/4 vigorous sourdough starter
1 1/2 cups luke warm water (room temperature)
2 teaspoons kosher salt
In a stand mixer, with a dough hook, combine all of the ingredients and mix on medium-low speed until a ball forms and sides of the bowl are clean, about 3 or 4 minutes (this can be done by hand but will take longer).

Oil a large glass bowl, to prevent sticking, and put the dough ball inside.

Cover with plastic wrap and let sit on the counter until it has doubled in size. This could take 6 to 8 hours.
Place a dutch oven or bean pot that is oven safe into the oven and preheat to 450' F.
While your oven is preheating, remove the dough from the bowl, onto a well floured surface. Form into a ball.

Cover it with the bowl and let set for 30 minutes.
Remove the bowl (reshape into a ball if the dough has spread) and carefully place into your preheated dutch oven. Cover with a lid (or foil if you don't have an oven safe lid) and bake for 30 minutes.
Remove the lid and continue baking for an additional 15 minutes or until it's a nice deep brown.
Remove from the oven and let the bread cool on a cooling rack before slicing.

Now let me tell you about a little handy trick I've learned over the years. If you have an electric carving knife....they are perfect for slicing bread!

This will not be anything like your typical store-bought wheat bread. Not only will the flavor be so much better and pure, but the texture will be very different. Because this is a sourdough bread, it will have that slight tang and chewy, 'toothy' texture.
Today's Sunday Supper is all about unprocessed. Enjoy the wholesome recipes below and feel good about what you're eating.
Alluring Appetizers and Stunning Sides
- Brioche Dinner Rolls by That Skinny Chick Can Bake
- Stuffed Peppadew Peppers by An Appealing Plan
- Homemade Fennel-Maple Mustard by Culinary Adventures with Camilla
- Sweet Potato Noodles & Brussels Sprouts Salad with Lemon Tahini Dressing by The Girl In The Little Red Kitchen
- Whole Grain, No-Knead Sourdough Bread by Peaceful Cooking
- Sweet Potato Fries by Hezzi-D's Books and Cooks
- Indian Spiced Dal and Sag Aloo by Happy Baking Days
- Homemade Energy Bars by The Foodie Army Wife
- Honey Thyme Chicken by Cindy's Recipes and Writings
- Sweet Potato and Carrot Hash by Fit Foodie Runs
- Roasted Parsnips and Carrots with Cardamom and Maple Syrup by Kudos Kitchen by Renee
- Spicy Smashed Fingerling Potatoes by Magnolia Days
- Autumn Panzanella by Crazy Foodie Stunts
- Black Bean and Corn Salsa by What Smells So Good?
- Curried Apple Chips by The Wimpy Vegetarian
- Stuffed Acorn Squash by Rhubarb and Honey
- Homemade Hash Brown by Basic N Delicious
- Raw Salted Chocolate Chip Oat Healthy Bars by Wallflour Girl
- Roasted Sweet Potatoes and Brussels Sprouts by Peanut Butter and Peppers
- Basic Roasted Cauliflower by Cupcakes & Kale Chips
- Baked Beet Chips by The Dinner-Mom
- Crispy Tex-Mex Quinoa Patties by Bobbi's Kozy Kitchen
- Authentic Chicken Tinga by Shockingly Delicious
- Jacket Potato Party by Jane's Adventures in Dinner
- Mom's Homemade Vegetarian Meatballs by The Life and Loves of Grumpy's Honeybunch
- Chicken and Sweet Potato by MealDiva
- Chinese Five Spice Chicken Stir Fry by Nosh My Way
- Easy Slow Cooker Chili by Amee's Savory Dish
- Coconut Chicken Tenders with Honey Mustard Dip by Casa de Crews
- Grilled Burgers with Garlicky Arugula by Cooking Chat
- Baked Zucchini with Spicy Tomatoes by Food Lust People Love
- Fall Squash Soup by Ruffles & Truffles
- Stuffed Sweet Potatoes by Momma's Meals
- White Bean Pesto Stew by eating in instead
- Seared Pork Stack by annaDishes
- Gnocchi with Peas and Pesto by Curious Cuisiniere
- Pumpkin & Sausage Pasta by Confessions of a Culinary Diva
- Raw Vegan Chocolate Cheesecake by Killer Bunnies, Inc
- Vegan Mini Chocolate Cream Cakes by NinjaBaking.com
- Gluten Free Peanut Butter Blondies by Pies and Plots
 Join the #SundaySupper conversation on twitter on Sunday! We tweet throughout the day and share recipes from all over the world. Our weekly chat starts at 7:00 pm ET. Follow the #SundaySupper hashtag and remember to include it in your tweets to join in the chat. To get more great Sunday Supper Recipes, visit our website or check out our Pinterest board.
Would you like to join the Sunday Supper Movement? It’s easy. You can sign up by clicking here: Sunday Supper Movement.
Join the #SundaySupper conversation on twitter on Sunday! We tweet throughout the day and share recipes from all over the world. Our weekly chat starts at 7:00 pm ET. Follow the #SundaySupper hashtag and remember to include it in your tweets to join in the chat. To get more great Sunday Supper Recipes, visit our website or check out our Pinterest board.
Would you like to join the Sunday Supper Movement? It’s easy. You can sign up by clicking here: Sunday Supper Movement.








 Posts
Posts


