As the days get cooler (and I use that term lightly here in Los Angeles) we tend to seek foods that are comforting and warm.
Today's Sunday Supper is all about warming trends. With temps still in the upper 80's and 90's around here, I'm going to define "warming trends" as being warmed from the soul.
Alfredo seems to do that for me.
It took a while for it to dawn on me that my most favorite Italian dish is anything Alfredo. A nice warm plate of creamy Alfredo and pasta, with or without meat and vegetables just makes me happy. Add bacon to the mix and we have ourselves a whole new level of yum!
That brings me to this lovely, super easy, one skillet, soul warming dish.
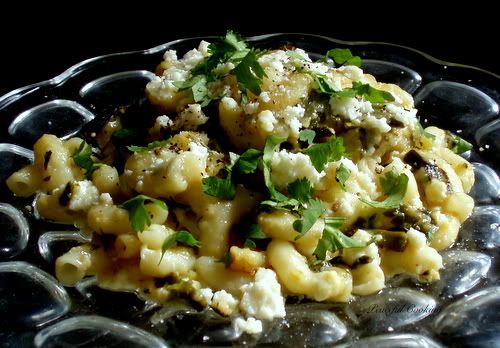
Creamy Stove-Top Alfredo with Bacon and Green Beans #SundaySupper
Inspired by Better Homes and Garden magazine "One-Pan Recipes"Printable Version
4 slices thick-sliced bacon, coarsely chopped
2 garlic cloves, minced
8 oz pasta, uncooked (recommended: rigatoni, penne, rotini)
1 cup green beans, cut into bite-sized pieces
14.5 oz chicken broth
1 cup water
1/2 teaspoon salt
1/4 teaspoon pepper
1/4 - 1/3 cup cream (I used half and half)
1/4 cup grated Parmesan cheese
Garnish:
grated Parmesan cheese
Crumbled, crisp-cooked bacon

Before I get started, I always like to get all of the ingredients prepared and measured. Makes the whole process of cooking run so much smoother.
In a very large skillet, cook the bacon over medium heat until nice and crispy. Add the garlic and stir for 30 seconds. Drain off the fat (I left a little in there for flavor) and add the pasta, green beans, chicken broth, water, salt and pepper.

Bring to a boil, reduce heat, cover and simmer for about 15 minutes or until the pasta is tender, stirring once.
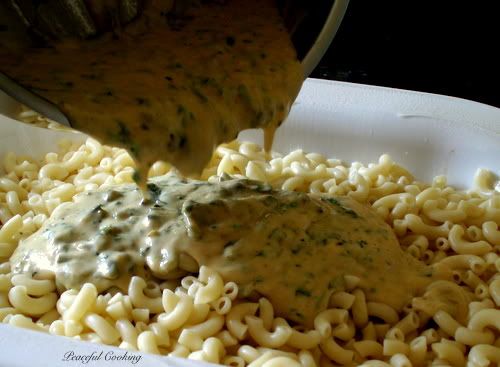
Stir in the cream and cheese. Cook and stir for 2 minutes to heat things through and get the cheese all melted.
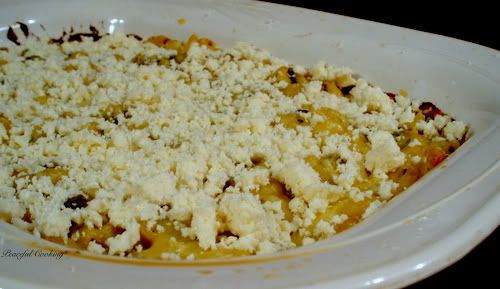
Garnish with more cheese and bacon crumbles if desired and serve.

Beverages
- Drunken Pumpkin Spice Latte by Hezzi-D's Books and Cooks
- Hot Mulled Caramel Apple Sangria by The Crumby Cupcake
- Mexican Atole by Curious Cuisiniere
- Gluten Free Hot Spiked Apple Cider by Gluten Free Crumbley
- Apple Pear Crisp by The Freshman Cook
- Bananas Foster by Pies and Plots
- Chocolate Hazelnut Lava Cake by Brunch with Joy
- Fudge Pudding Cake by Cosmopolitan Cornbread
- Honeycrisp Apple Tart by The Redhead Baker
- Pumpkin Cheesecake in Pumpkins by Desserts Required
- Warm Cardamom and Coconut Rice Pudding by Fearless Dining
- Beef Brats and Beans Soup by Cindy's Recipes and Writings
- Beef Pot Pie with Herbed Biscuits by From Gate to Plate
- Best Ever White Bean and Mushroom Soup by Pancake Warriors
- Braised Venison with Plums by Food Lust People Love
- Butternut Squash Chili by Amee's Savory Dish
- Butternut Squash Risotto with Pears and Sage by The Wimpy Vegetarian
- Carbonnade Flamande by Tara's Multicultural Table
- Classic Italian Meat Sauce by That Skinny Chick Can Bake
- Creamy Cauliflower Broccoli Cheese Soup by Cupcakes & Kale Chips
- Hearty Chickpea Soup by The Food Hunter's Guide to Cuisine
- Creamy Stove-Top Alfredo with Bacon and Green Beans by Peaceful Cooking
- Crockpot Creamy Chicken and Noodles by Confessions of a Cooking Diva
- Curry Debal by Palatable Pastime
- Easy Sweet Potato Soup by Healing Tomato
- Easy Zuppa Toscana Soup Copycat by Fantastical Sharing of Recipes
- French Onion Soup by Grumpy's Honeybunch
- Gingered Butternut Squash Soup by Noshing With The Nolands
- Hearty Turkey Lentil Soup by A Gouda Life
- Hearty Vegetable Beef Soup by Party Food and Entertaining
- Mango Habanero Sauce by What Smells So Good?
- Oxtail Stew by Nosh My Way
- Pumpkin Cinnamon Rolls with Maple Cream Cheese Frosting by Serena Bakes Simply from Scratch
- Red Lentil Soup by My San Francisco Kitchen
- Roasted Squash Soup by A Day in the Life on the Farm
- Turkey Enchilada Casserole with Salsa Verde by Food Done Light
- Slow Cooker English Roast by Wholistic Woman
- Slow Cooker Lamb Rogan Josh by Caroline's Cooking
- Easy Slow Cooker Pot Roast with Mushroom Gravy by Feeding Big
- Slow Cooker White Chicken Chili by Renee's Kitchen Adventures
- Spice Rubbed Braised Beef by FamFriendsFood
- Spicy Meatball Tortilla Soup by The Weekend Gourmet
- Sweet Potato Soup with Bacon by Cooking Chat
- Turkey Chipotle Chili by The Complete Savorist
- Tuscan White Bean Soup with Ham by Big Bear's Wife
 Join the #SundaySupper conversation on twitter on Sunday! We tweet throughout the day and share recipes from all over the world. Our weekly chat starts at 7 pm ET. Follow the #SundaySupper hashtag and remember to include it in your tweets to join in the chat. To get more great Sunday Supper Recipes, visit our website or check out our Pinterest board.
Would you like to join the Sunday Supper Movement? It's easy. You can sign up by clicking here: Sunday Supper Movement.
Join the #SundaySupper conversation on twitter on Sunday! We tweet throughout the day and share recipes from all over the world. Our weekly chat starts at 7 pm ET. Follow the #SundaySupper hashtag and remember to include it in your tweets to join in the chat. To get more great Sunday Supper Recipes, visit our website or check out our Pinterest board.
Would you like to join the Sunday Supper Movement? It's easy. You can sign up by clicking here: Sunday Supper Movement.


.JPG)