Yum Peaceful Cooking: vegan
Showing posts with label vegan. Show all posts

Saturday, April 26, 2014

Vegan Chocolate Hazelnut Spread


Chocolate hazelnut spread. A great flavor combination. And, that very famous brand.....which I really did like.....except for one thing. It left a strange waxy coating in my mouth. And honestly.... it's not the healthy snack spread that's boasted about on those commercials. I mean...really....2 tablespoons at 200 calories? Over half of the calories come from fat.  Not to mention 21 grams of sugar, 12 grams of fat, plus....artificial flavors. 

As if we should expect anything else. After all, it is the sad fact of processed food. 

But that's beside the point....my focus here is on an amazing alternative. Because no matter how much I question the "famous" one....I still crave that combination.  Because really...I do love it. And now I have a great, healthy, easy alternative. That not only leaves my mouth feeling 'wax-free', but makes me feel so much better about eating it. 

My daughter found the recipe on Instagram and unfortunately there wasn't a website link for me to give credit to. If you are an 'instagramer'...you can find the recipe on laulweighlossjourney's account. 

I've made this mock Nutella twice. Once I blanched the hazelnuts first to remove the skins. The second time I left the skins on. There's no difference in the texture or flavor. Just in color.....


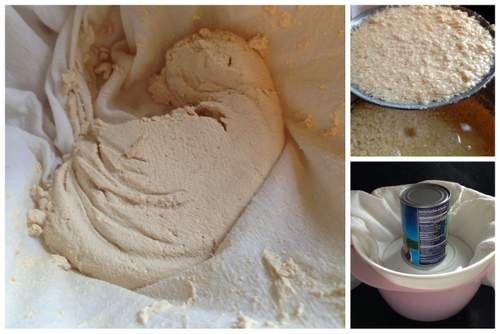
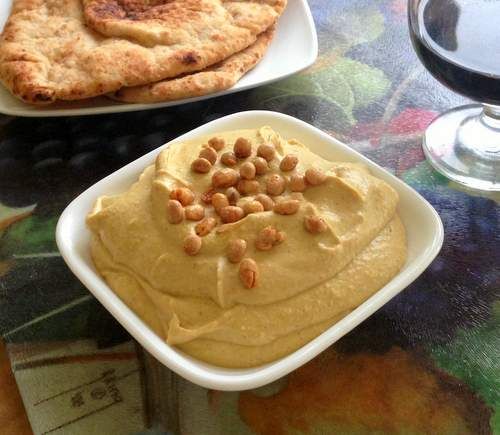
The main difference between the store brands and the homemade version is the consistency. It's thinner....and a bit grainier. You'll think you messed up when you first mix it up but don't worry, it does thicken once refrigerated. It doesn't become as thick as store brands, but it's enough. 

And really....it's so easy. No cooking involved. Just a food processor. And if you make your own almond milk (which doesn't get cooked)...you can call this "raw". All of the ingredients are raw, or are available raw.

Are you ready to get a little healthier and step a little further away from the processed?

Let's do it! 

Vegan Chocolate Hazelnut Spread

1 cup hazelnuts (skins on or off, its up to you)
1 TB coconut oil
3 TB cacao powder
4 TB maple syrup
1/8 tsp salt (also known as 'a pinch')
1/2 cup almond milk

In a food processor, pulse the hazelnuts a few times then puree them until they start forming a paste. Add in the coconut oil and continue processing until smooth. 


Add in the remaining ingredients and process until completely combined and smooth and creamy.

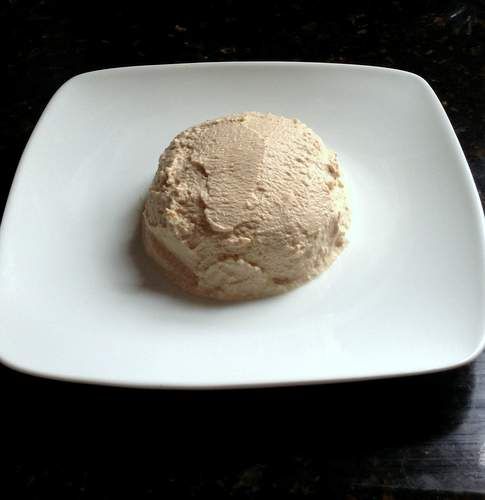
It will be a bit runny, but just pour and scrape it into a container (mason jars work great!), cover and place in the refrigerator.

After a couple of hours, you will notice that it's getting thicker. After that, I have no idea because It has yet to last more than 12 hours in my house. 


My daughter found some Belgian Chocolate Thins at the Italian Deli today....and let me tell you....I could eat the whole box with my Chocolate Hazelnut Spread. 


And not feel guilty.

Well, at least not very much. 

Friday, March 21, 2014

Quinoa Pasta and Roasted Beet and Garlic Sauce


Only one other time in my whooooole life have I liked something with beets. It was about a year about when I made a Quinoa and Roasted Beet Salad.

I don't enjoy the earthiness of them. I love the color though.

My girls love beets and it's because of them that I found this recipe. I won't proclaim to be a beet lover. But I love this particular recipe.

I recently signed up to have fresh, organic produce delivered to my home...straight from local farms. It's pretty cool. I'm just giving it a test run to see how it goes. Anyway...my first delivery was the other day


I got beets. I knew they were coming. I could've put them on the 'no-no' list but since my girls love them, I went ahead and let them come.

In my Google search for beet recipes, I came across a Huffpost link that claimed to turn any beet hater into a lover. (They weren't kidding!)

A little tweaking from the original recipe and we have here a vegan, gluten-free and dairy-free recipe. So delicious! Just a slight hint of that earthy beet flavor (that I usually don't like) but the sweetness that beets are known for pulls forward from the roasting, offset and wonderfully paired with roasted garlic and thyme.


Quinoa Pasta and Roasted Beet and Garlic Sauce
Inspired by: BevCooks
Printable Version

3 beets, peeled and cubed
3 TB light olive oil, divided
3 sprigs fresh thyme (I use lemon thyme...love the stuff)
4 cloves of garlic (papery skins left on)
1 TB balsamic vinegar
2 TB extra dry vermouth
1/2 cup Parmesan style aged nut cheese divided
1/2 cup vegetable stock
1/4 cup plain cultured coconut milk (similar to plain yogurt)
1 tsp sugar
8 oz quinoa pasta,cooked according to the package directions
Sea salt and fresh ground pepper

Preheat oven to 400' F

Line a baking sheet with parchment paper. Place beets, thyme and whole garlic cloves on the baking sheet and toss with 1 TB of olive oil, salt and pepper.

The reason I left the papery skins on the garlic, was to protect them from burning while in the oven.

Bake for about 45 minutes. Check them after 30 minutes just in case. The actual baking time will vary depending on how big or small your beet cubes are. Once they're tender, they're done.

Once done, remove the papery skins from the garlic and any thyme stems you can find. Place it all in a food processor along with the remaining 2 TB of olive oil, the balsamic vinegar, vermouth and 1/4 cup of 'cheese'. Puree until smooth.

Place your deep rich beet puree into a saucepan along with the vegetable stock and cultured coconut milk. Stir well until combined and heat to a simmer, over medium heat.


Add the sugar, remaining 1/4 'cheese' and if needed, a bit more salt. Simmer on low for about 15 minutes, stirring frequently.

This is a good time to cook your pasta. Once the pasta is cooked and drained, add it in with the sauce and give it a good stir.

Serve with more 'cheese' and a bit of thyme leaves.


(ok, I confess here...I'm not lactose intolerant the way my youngest daughter is, so I topped mine with real, shredded Parmesan cheese)

Oh so good! So beautiful. So hearty. Not to mention...GOOD FOR YOU!!

Btw...those beet leaves that you cut off? Save them! Do. Not. Throw. Them. Away.

Why?

You can bake them. And make beet greens chips, just like you do with kale. Just wash, dry thoroughly, remove tough stems. Drizzle with olive oil, salt, pepper and a bit of garlic powder. Place on a baking sheet and bake for about 20 minutes in a 375' oven. Turn off the heat and let sit in cooling oven for an additional 10 minute or until the edges are starting to brown but not burnt.


Other than the stems and the skinny root at the end of the beet...we have just consumed a lot of beet stuff.

And it was good!

Sunday, August 18, 2013

Crabless Cakes


When my Food & Wine magazine arrived, boasting 25 vegetable dishes, my daughter was on it like bees on honey.

"Mom, we should go through this magazine and make all of the recipes!" Thank God she didn't mean, all of them on the same day. I mean, I like my vegetables and all, but for some reason they're kinda high maintenance. Lots of prep work. All that washing, drying, cutting.

I know...I am can be very lazy sometimes. I try not to be. But I can't help it.

This recipe does have quite a bit of prep work. Of course I did increase that a little by grilling the corn before using it. I figured since there was so much corn in these cakes, that the flavor would be a plus. Which it was. And I can say that the added step was worth it.


I didn't fire up the grill or anything. I just took a gas grill grate that I bought from the hardware store and plopped it on the stove top, over the flame...and grilled away. (works great for grilling peppers and such indoors as well).

Once they cooled off, I cut the kernels off the cob, and ended up with a little more than the needed 2 1/2 cups.


Crabless Cakes
Inspired by the August 2013 addition of Food & Wine magazine

1 TB Extra Light Olive Oil, plus more for frying
2 1/2 cups fresh corn kernels (about 4 ears of corn)
1/4 cup minced onion
1/4 cup minced roasted red bell pepper (I used it from a jar)
15 oz can whole hearts of palm, drained, thinly sliced and diced
2 tsp Old Bay seasoning
2 TB chopped fresh flat leaf parsley
1/4 vegan mayonnaise
2 tsp Dijon mustard
1/4 cup plus 2 TB plain dry gluten free bread crumbs, plus more for coating
Salt and Pepper

In a non-stick skillet, heat 1 TB olive oil over high heat. Add the corn, onion and bell pepper. Cook for about 4 minutes, until crisp tender.


(I could've used the green bell pepper as called for in the recipe, but I love the color variation.)

Take 1 cup of the sauteed mixture and pulse it in a food processor to create a course puree. 

Put the hearts of palm in a medium sized bowl. Using a fork, mash them into shards. Add the pureed corn mixture and the remaining sauteed corn mixture along with the Old Bay seasoning, parsley, mayonnaise, mustard and bread crumbs. Season with salt and pepper to taste (yes, you can taste it...its all veggies). Stir to combine so that everything is evenly moist. 


(Until making this recipe, I had no idea how good veganaise really is. I'm a Best Foods kind of gal, and I would not turn my nose up to the jar of Follow Your Heart Soy Free Veganaise that my daughter brought home. Good stuff!)

Line a baking sheet with parchment paper (no, you are not going to be baking these). Fill a pie plate or shallow, wide mouthed bowl with bread crumbs. Season the crumbs with a little salt and pepper. 

Scoop about 1/4 cup of the mixture, roll it in the bread crumbs to coat and then flatten it just a little to form a nice little fat 2" mound. You'll have about 18 cakes in the end (and very messy hands). 

(the cake in my daughters hand is too thin. Read the "tip" at the end of this post to see why that's an issue)

Using the same non-stick skillet, wiped clean and filled with 1/8' of oil, fry the cakes in batches over moderate heat.


Cook for 2 minutes per side, until golden brown. Be careful when flipping them, as they are a little on the fragile side. Remove them to a paper towel lined plate.

Wipe the skillet clean and use fresh oil for each batch until all the cakes are cooked.


Serve hot, over a nice bed or fresh greens.


These are a delicious alternative to crab cakes. Since my daughter is vegetarian and I'm allergic to shellfish, this was a great middle ground dish for the two of us. Because they are all vegetable, no meat, no egg, there were no worries about under cooking.

But let me give you a tip: I had originally envisioned flatter cakes that are a little crispy on the edges (kinda like potato pancakes). Don't go there. These are very delicate cakes and fall apart easily. Maybe adding a bit more veganaise would help? Or pureeing more of the corn mixture, instead of only 1 cup? Anyway, I highly recommend making the cakes fat rather than thin. My first batch, were thin. And looked beautiful.....until I tried to flip them


Thats when they fell apart and became a sort of hash. They still tasted great...but thats not what I was going for.

I eat the crumbs anyway.

Wishing I had some crumbled bacon to mix with it.

Sunday, April 28, 2013

Quinoa and Roasted Beet Salad (and a Giveaway)


This is the second time in my adult life that beets have found their way into my kitchen. The last time these purple-ish red veggies crossed my threshold was back a few years ago when I was baking my way through Healthy Bread in Five Minutes a Day and I decided to give beets a break (from my childhood memory of having to gag them down) and made some beautify Red Beet Buns.


Loved how they looked but hated how they tasted.

Well, I was faced with them again a couple of nights ago that all started with a phone call that went something like this:

me: "Hello?"
caller: "Hi, this is Nicole from Whole Foods Market and I'm calling to remind you about the cooking class that you signed up for."
me: "Cooking class?" (First of all I had no idea they HAD cooking classes. Second of all, I couldn't remember the last time I'd been to Whole Foods)
caller: "Yes, you've signed up for our Transition to a Gluten Free Diet cooking class"
me: "Ooooh...(the bells are ringing) my daughter must've signed me up"

Turns out that yes, my daughter signed us both up for this class. Since it was free, I figured why not. So I went. It was more like a lecture than a real cooking class. The place was packed. The instructor/dietitian was wonderful and demonstrated how to make several dishes along with sharing some great information about eating gluten free.

I know there are a lot of people out there who have to eat gluten free do to Celiac Cisease. I also know that there are a lot of people out there who just choose to eat gluten free. What I didn't know was that somewhere between those two reasons are the gluten intolerant. My youngest child has gone gluten free. It started out as a choice after finding out about GMO foods but ended up being more of a mild sensitivity reason. Apparently gluten can possibly cause a lot of things that you wouldn't even realize (headaches, hair loss, dry cracked skin are just a few of the possibilities).

Here's a great list of websites that were recommended at the class if you want to do more research:
www.celiac.org
www.gluten.net
www.csaceliacs.org
www.celiaccenter.org
www.foodallergy.org
www.livingwithout.com

(yes, I'm hosting a giveaway...here's a sneak peek. more details in a minute)


Back to beets. Ok, so there I was, sitting in a room full on strangers, and the assistant was passing around one of the foods that was prepared. The star ingredient was suppose to be quinoa. But all I could think about were the beets inside that little cup that was heading my way. Sure, I could've said 'No Thank you, I'll pass'. But that wouldn't have been very foodie of me. So I took the cup...looked at it...my nostrils flared a little as I eyeballed those big chunks of beets...sniffed a little


Then came the tentative, cautious, very doubtful bite....

Omg...it was good!! Really? Yes, really!! I mean...of course it still tasted like beets but there's something in the roasting process that mellows and sweetens the beet.

Quinoa and Roasted Beet Salad
Printable Version
1 bunch of beets
Greens from 1 bunch of beets
Salt to taste
1 to 2 TB extra virgin olive oil
2 garlic cloves, minced
2 tsp caraway seeds, lightly cruhed
4 cups cooked quinoa
Crumbled goat cheese to garnish (optional, I opted out)

Preheat the oven to 400' F

Trim the greens off the beets. Scrub the beets and wrap them individually in foil. Bake for about an hour, until for tender. Let them cool. Once cool enough to handle, peel off the skins, cut into 1/4" dice. Set aside.

While the beets are in the oven, cook your quinoa. 1 cup of dry quinoa yields about 3 cups. This recipe calls for 4 cups. You can cook 2 cups of dry quinoa per the package instructions and put whats leftover in the fridge. It'll be good for a couple of days. Or, you can freeze it. Quinoa freezes very well and thaws quickly for future use.


Wash the beet greens and remove the center vein. Steam for for 2 or 3 minutes then plunge them into ice water to 'refresh' them a bit. Squeeze them dry and chop. (beet greens act a lot like spinach greens).

In a large heavy skillet, heat the olive oil over medium heat. Add the garlic and cook, stirring, until fragrant (about 30 seconds). Add in the caraway seeds and beet greens along with some salt and pepper to taste. Cook and stir for about 30 more seconds. Toss in the quinoa and beets


Toss together until everything is well combined, heated through and the quinoa is beet red.


And there you have it...a beautiful salad full of amazing nutrients. And it's gluten free for those who need it. And hey...now I don't have to say that I don't like beets. I can say...I like roasted beets.


Now...its GIVEAWAY time!!


Just in time for Mother's Day. Tate's Bake Shop would love to send 1 lucky winner this beautiful, chock full of goodies basket. You will find it packed with:

Lemon Tea Loaf
Buttery-rich Shortbread Squares
Individual Coffee cake
Box of Tate's Bake Shop's famous crispy Chocolate Chip Cookies
Baking with Friends Cookbook

Entering to win is simple: Leave a comment.

If you'd like a better chance at winning, do a few extra things:

Announce the giveaway on:
Facebook (then leave a comment)
Twitter (then leave another comment)
Google+ (and another comment)
etc etc.

Basically, each comment you leave stating how you've shared the news about my giveaway, will equal one entry.

Contest ends May 1st, 11:59 pm 

Tate's Bake Shop is also giving all my readers (and their family and friends) a discount. All purchases made until 5/12/13 will receive a 20% discount by using the discount code: mom13

Good luck!

**** 5/1/13 note: I had the incorrect picture of the basket posted before. It has now been corrected. I appologize for any inconvenience or misrepresentation.

Monday, April 15, 2013

Curry Tofu Hummus


Did you know that April is National Soy Foods Month

Neither did I. Until recently. 

My friends over at FoodieBlogRoll hooked me up with some soy foods products to help spread the word and share some ideas on what you can do with soy foods. 

I'm not a soy person, personally but one of my daughters is lactose intolerant and soy foods products is one of the ways she gets around her tummy aches caused by dairy. I also use soy flour in a lot of the breads that I make for her. Therefore, I'm not a stranger to soy. Plus...I really enjoy soy nuts and I absolutely love eating edamame...those ones you get at Costco. Omgohs.....They're so addicting. 

Anyways....this is what I received in the mail the other day....


These things are always a surprise. You never know what you're gonna get until it arrives. Hmmm...what to do...what do. I didn't want to do anything typical here so I started thinking about cheese. I've made cheese...soft cheese from milk, in the past so I figured you could do the same thing with soymilk. 

Only it's called tofu. 

Which sorta confused me because I know there's soy cheese out there. Apparently the beginning stages for both are the same. Some blogs even call tofu, soy cheese. Which confused me a little more. So I looked it up on that handy dandy website known as Wikipedia and it said that tofu is the curd that comes from soy milk which is pressed and is highly perishable while cheese starts off the same way but then its salted and ripened. Soy cheese is therefore more flavorful than most tofu.  

With all that said, I started on my tofu making adventure....with a little help from LAFujiMama


Tofu
4 cups soymilk
1/2 cup water
1 TB apple cider vinegar
1 TB lemon juice

Bring the soymilk to a boil, stirring occasionally so it doesn't burn. While that's going on, combine the water, vinegar and lemon juice. 

Reduce the heat and simmer for 3 minutes. 

Remove from heat and add 1/2 of the water mixture. Stir vigorously about 5 or 6 times. Add the remaining water mixture and stir gently, in a figure 8 fashion until curds begin to form. 

Cover with a lid and let sit for 15 minutes. This is when you'll see the full separation. Now from what I've read, the size of the curd will vary depending on the protein content of your soymilk. 


Line a strainer with a cotton cloth and place over a bowl. 


With a large slotted spoon, remove the curds and place them into the lined strainer. Fold the cloth over the curds and place a plate (for even distribution) over the cloth and press until most of the liquid is gone. Place a heavy object on top to get the remaining liquid out. This should take a few minutes. The less liquid remaining will create a more firm tofu. 


I ended up with a very soft tofu. I think it is from a couple of things. One...I had a very small curd formation. Two...I couldn't get anymore liquid out of my curds.

At this point you can place the tofu in a bowl of cold water and gently run cold water into the bowl (not allowing the water to run directly onto the tofu) for several minutes. This is suppose to make the tofu set up. I found that my tofu was just too soft to undergo this process and was dissipating into the water so I stopped. To store your tofu, you need to cover it with cold water and refrigerate.

I used mine immediately.


Another thing I noticed. My tofu is a tan color. The soymilk was a light tan coming out of the container so I'm not sure if that's the reason....but that's what happened. I've been told that it looks like coffee ice cream. (I assure you, it doesn't taste like it though.)

Well, never the less, the color wasn't an issue because this lovely silken mass was destined to become a dip.

Tofu Curry Hummus
Printable Version
1 can garbanzo beans, drained, liquid reserved
5 oz silken tofu
1 TB tahini
juice from 1/2 lemon
2 - 4 tsp curry powder
Salt to taste
Roasted soy nuts to garnish
Olive oil to garnish

Combine garbanzo beans and tofu in a food processor. Process until smooth. Add about 1 TB of reserved garbanzo liquid, while processing, until just under desired thickness. add the tahini, lemon juice and curry powder (to taste) and process until smooth. If you desire a thinner hummus, add a bit more reserved garbanzo liquid. Salt to taste. Garnish with a sprinkle of soy nuts and a drizzle of olive oil. Serve with your choice of bread.


What an amazingly tasty dip....but you have to be a lover of curry! But wow...smooth, delicious and oh so healthy. I know this was a really long process to get from A to Z but the fun was in the making.

And now...a few words from our sponsor:


April is National Soyfoods Month which makes it the perfect time to learn how soy can help create a healthy diet and to discover easy ways to incorporate it into everyday meals.  Packed with protein and fiber, soyfoods are a great way to reduce calories, saturated fat and maintain your weight.

The Soyfoods Association of North America (SANA) provides information about the health benefits and nutritional advantages of soy. SANA offers fun recipes and convenient ways to incorporate soy into meals for everyone – from athletes to families. SANA is dedicated to spreading the word about soy, especially during National Soyfoods Month in April!

Soyfoods aren’t just for vegetarians anymore. In fact, dishes made with soy are quick, tasty, and often healthier than traditional protein sources.

Since April is National Soyfoods Month it’s the perfect time to tell your readers about the benefits and ease of cooking with soy!

Here are just a few ways that soy can help make your life easier and healthier:

Take this mixed berry smoothie up a notch with creamy and delicious WESTSOY Soymilk made from whole organic soybeans:
Berry Smoothie
WESTSOY Soymilk

Need a snack on-the-go?  Grab some gluten free SOYJOY bars to fuel up with nutrients in seconds.
SOYJOY bars

On those busy weeknights, add some Wildwood tofu to the standard stir-fry for more protein or this spinach fettuccini to your favorite pasta sauce.
Wildwood Tofu

Packing lunches with the same snacks can get a little boring, but honey roasted soy nuts are a sweet and crunchy snack packaged in individual sizes, perfect for the lunch box.
Honey Roasted Soy Nuts

Packed with protein and fiber, soyfoods are a great way to reduce calories, cholesterol and saturated fat.
They also serve as a great source of iron, calcium, vitamin B-12, magnesium and zinc.

To find out more about Soy Foods Month, visit the links below:

April is SoyFoods month! Explore the site for recipe ideas and ingredients!
Follow the SoyFoods Association on Twitter at @SocialSANA
SoyFoods Association on Facebook


This sponsorship is brought to you by the Soyfoods Association who we have partnered with for this promotion.

Monday, February 25, 2013

Thai Kitchen Zing Rolls


I decided to try another recipe from Thai Kitchen and Simply Asian. I posted one recipe for Spicy Kung Pao Chicken Wings with Sweet Chili Dip which I loved.

I then decided to try the Zing Rolls. Which happen to be Vegan. Not that I'm into vegan but one of my daughters is.

The ingredients were simple and easily acquired. Except for the Rice Paper Wraps. I looked at various local markets. No luck. Then I remembered an excellent Asian market a few miles away and decided to head out one Saturday morning. After searching several isles, including the refrigerated isle and freezer (I was thinking they'd be with the won ton wraps and such)...I finally tracked down a store employee and was directed to a dry goods isle.

All this to find a simple, tortilla like package of white disks. For 98 cents. For 100 wraps. I think I spent more in gas getting there.


You see...I am not, in the least, familiar with rice paper wraps. They're pretty cool little things. No cooking required. Just a little softening in warm water. Not only is this dish vegan, but other than cooking the rice noodles, it's raw. And I don't know about your area but raw, vegan food is HUGE around here.

And my daughter has jumped on that wagon. Big time.

Now, let me talk a little about these rice noodles. Red rice noodles to be exact. Yes, they have that reddish thing going on. Yes they are made of rice. I ended up spending a lot of time separating the noodles once cooked. I think if you use lots of water and spend some time stirring, it will save you time in the long run.


Also....once cooked, they have this pinkish hue thing happening. Sort of a fleshy color. When you put the spring roll together....don't be shocked or surprised if it resembles a...um...particular part of the male anatomy.

Just know....these spring rolls taste wonderful! The vegetable combination is fantastic. It's like having the perfect salad (minus the lettuce)...all rolled up tightly, in a little roll...easily enhanced with your favorite dip.


Zing Rolls

1/2 box Thai Kitchen Red Rice Noodles
12 round rice paper wrappers (8 1/2 inch)
2 large red bell peppers, thinly sliced
2 large cucumbers, peeled, seeded and cut into thin strips
3/4 cup shredded carrots
2 medium avocados, peeled, seeded and thinly sliced
2 TB chopped fresh cilantro
1/4 cup chopped peanuts
Thai Kitchen Sweet Red Chili Sauce for dipping

Bring a large pot of water to a boil. Remove from heat. Add rice noodles, stirring to separate noodles. (I suggest that you stir longer than you think you have to so they don't stick together). Let stand 8 to 10 minutes or until noodles are tender but firm. Drain well. Place in a large bowl of  cold water. Separate noodles fully. Set aside.

Fill a 9" pie plate with warm water. For each spring roll, dip 1 rice paper wrap in water to wet completely. Place on your work surface. Blot dry with a paper towel.

Place 1/3 cup of rice noodles in bottom third of the rice paper.


Layer with 4 bell pepper strips, 8 cucumber strips, 1 TB carrot, 2 avocado slices, 1/2 tsp cilantro and 1 tsp peanuts.


Fold in sides,


then gently roll tightly to enclose filling.


Place spring roll on a platter. Cover with a damp paper towel and plastic wrap. Repeat with remaining rice paper wrappers and filling ingredients to make 12 spring rolls.

Refrigerate for at least 30 minutes or up to 2 hours. Serve with dipping sauce.


I used the Sweet Red Chili Sauce.