Yum Peaceful Cooking: Condiment
Showing posts with label Condiment. Show all posts

Sunday, July 17, 2016

Ginger Peach Freezer Jam for #SundaySupper


I have a thing for freezer jam. A lifetime love affair actually. If my taste buds had them, they'd drop to their knees with each bite. It's the fresh fruit flavor that gets me every time because freezer jam is never heated which means the fruit isn't cooked. You mash, dice, mix and pour. The only heated ingredients are the water and pectin.

And it's super easy to make. No special equipment needed other than your clean sterile jars.

Peaches are in season right now....juicy and bursting with flavor. Perfect for making jam. Add a bit of ginger and you've taken things to a whole new level. Fresh, sweet and zingy.


Did I mention easy? (just want to make sure that sinks in).

Wash and peel your peaches and you're ready to roll!

Here's a little ginger tip before you get started. Use the edge of a spoon to scrape the skin off your ginger.

Want another tip? Keep your ginger in the freezer. Not only does it prolong the life, but frozen ginger grates super easily!

Ginger Peach Freezer Jam

Inspired by: Sure-Jell Peach Jam

3 cups cubed fresh peaches (about 2 lbs fully ripe peaches)
2 TB fresh grated ginger
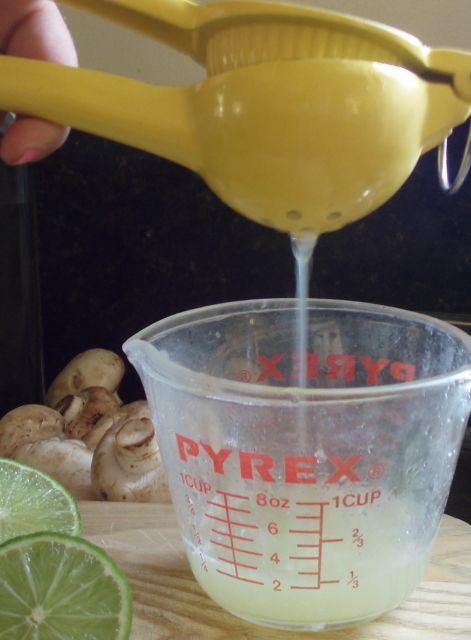
2 TB fresh squeezed lemon juice
4 1/2 cups sugar
3/4 cup water
6 tablespoons fruit pectin

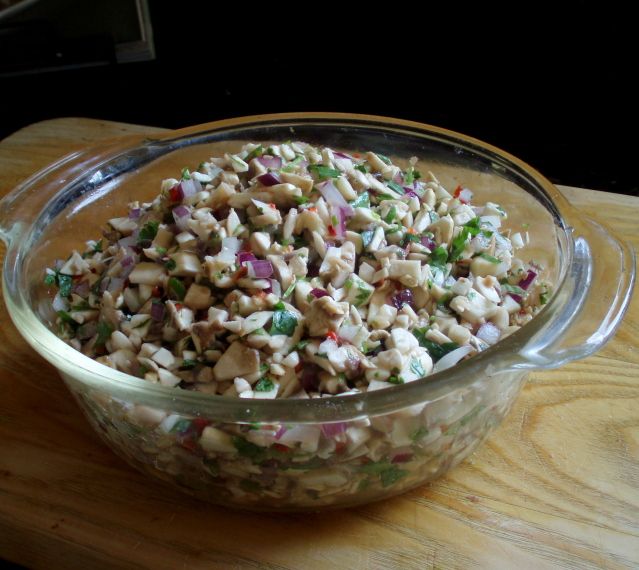
In a food processor, pulse your peaches until the desired chunkiness. Don't puree it. You want some of those bits and pieces of fresh fruit. This is jam, not jelly.


In a large bowl, combine the peaches, ginger, lemon juice and sugar. Let sit for 10 minutes, stirring occasionally
.
In a sauce pan, combine the water and pectin. Bring to a boil then stir while boiling, for 1 minutes.

Add the pectin to the peach mixture and stir for 3 minutes.


Pour into sterile jars within 1/2 inch from the rim. Put on the lids and let sit at room temperature for 24 hrs.


Store in the freezer for up to a year. Once opened, it keeps in the refrigerator for up to 3 weeks.


Spread a little yumminess over your bagel and cream cheese for a breakfast treat.

Besides the obvious toast or bagel application, this will be great as an ice cream topping, or used as a glaze for some grilled pork tenderloin.

Today is all about peaches and our Sunday Supper team has got a bushel of recipes where peaches are the star....

Starters:
Breakfasts:
Beverages:
Condiments:
Sides & Salads:
Main Dishes:
Desserts:
Sunday Supper MovementJoin the #SundaySupper conversation on twitter on Sunday! We tweet throughout the day and share recipes from all over the world. Our weekly chat starts at 7:00 pm ET. Follow the #SundaySupper hashtag and remember to include it in your tweets to join in the chat. To get more great Sunday Supper Recipes, visit our website or check out our Pinterest board. Would you like to join the Sunday Supper Movement? It’s easy. You can sign up by clicking here: Sunday Supper Movement


Saturday, January 16, 2016

Cajun Style Gyro


These gems are bursting with flavor....tender, juicy and a bit spicy. We have here some Blackened Chicken, a Cajun Salsa, some delicious Cajun Dip drizzled all over it....all wrapped up in a pita.

Pure yum factor going on here.

The inspiration for such a diverse concoction comes from the tahini I used in the dip. Sesame King Cajun Tahini to be more specific. I had no idea there were flavored tahini's out there....so cool! They currently have Garlic, Honey, Cajun and Olive Oil flavors. All of which would be great in so many recipes. Hummus of course (how fun to have various flavor themes), dressings, sauces, dips.


Before Sunshine International Foods sent me some of their tahini, I had only used it in hummus. They have unknowingly guided me to expand my ways.


Cajun Dip

6 tablespoons Greek yogurt
1 tablespoon Sesame King Cajun Tahini
1 1/2 teaspoons cilantro, finely chopped
1 teaspoon cajun seasoning
Salt and pepper to taste (about a pinch)

Combine all of the ingredients in a bowl, cover and refrigerate until ready to use.

Cajun Salsa
1 large tomato
2 green onions
1 - 2 tablespoons cilantro, finely chopped
1/4 cup bell pepper, diced (use which ever color you prefer)
1/4 teaspoon creole seasoning
1 garlic clove, minced
Salt to taste

Combine all ingredients in a bowl, cover and refrigerate until ready to use.


Blackened Chicken
3 or 4 Boneless, skinless chicken thighs (breasts can be used instead)
1 tablespoon creole seasoning
Olive oil

Preheat the oven to 400'F

Drizzle chicken with a small amount of oil then sprinkle a good amount of creole seasoning on both sides of the chicken.

Heat 2 teaspoons of oil an oven safe skillet over medium-high heat. Cook the chicken for a minute or so on each side. Place skillet in the oven and bake for 10 minutes.

Remove and cover lightly to rest. Slice thinly

Set up your station...


Grab a pita, and put it together the way you would a taco....meat, salsa and dip. Fold, wrap and chow!


The Cajun Tahini added depth to the dip. The tahini itself doesn't have heat to it, so don't worry about that if you shy away from spicy foods.

Sesame King Tahini is certified kosher, pasteurized and made in the USA. Plus, the list of ingredients is short and simple. Nothing in there that I don't recognize. Love that!

I was not compensated for this post, however Sesame King supplied me with product samples. All opinions are my own.

Sunday, August 10, 2014

Savory Fig and Sweet Onion Freezer Jam #SundaySupper


One of the best things about summer is the abundance of fresh fruits and vegetables. The gardens are filled with ripened produce and the farmers markets are loaded with whatever you can't / don't grow.

But soon enough, it all comes to an end. (boo-hoo)

No fear! Sunday Supper is hear! Today it's all about saving summer! We have how-to's on dehydrating, freezing, making sauces, jams, pickling, oh my gosh...there's so much you can do to save those summers flavors.


I recently made Grilled Fig Onion Glazed Pork Tenderloin and afterward I was bummed cuz I won't be able to make this year round. Figs aren't always in season. And that's when it dawned on me....I can make a savory jam with the very same ingredients I used to make the glaze....voila! My summer flavor has been saved for the whole year!


Savory Fig and Sweet Onion Freezer Jam
makes about 10 cups of jam
Printable Version

1 tsp light olive oil
1 1/2 cups thinly sliced sweet onions
2 tsps white balsamic vinegar
1 garlic clove, minced
7 cups chopped figs, stems trimmed off (about 2 1/2 lbs)
1/4 tsp ground black pepper
4 cups sugar
juice from 1 lemon
1 box of fruit pectin

Wash and sterilize enough jars and lids to hold a total of 10 cups of jam.

Heat the oil in a large heavy skillet or sauce pan over medium-low heat. Add the onions and saute, stirring often until tender and just starting to turn a nice golden color. Stir in the garlic and saute for another minute. Deglaze with the balsamic vinegar. Remove from heat.

Add in the chopped figs, sugar and black pepper. Stir to combine. If you prefer a less chunky end result, use a potato masher and smash everything up a bit.

Stir in the lemon juice and pectin. Place over low heat and bring to a boil. Reduce heat and simmer until thickened, about 30 minutes, stirring occasionally.

The way to test if your jam is ready, is to place a glass plate in the freezer. Place a dab of your jam in the middle of the very cold place and turn your plate on it's side. If the jam begins to quickly run, it's not thick enough. If it runs slowly or stays put, it's ready for the jars.

Carefully spoon the jam into your clean jars, leaving about 1/4" space at the top. With a clean, damp cloth, wipe up the spills and make sure the edge is clean and put your lids on.


Allow to cool to room temperature before freezing or using.

The aroma is mouth watering...the caramelized onion and balsamic vinegar seems to dominate the jar, but when you taste it\ you're surprised by the sweetness that accompanies the delectable flavor of fig while the onion is just a lingering after flavor that brings it all full circle.

Not only is this an amazingly delicious glaze, but if you really want to wow your taste buds (and who doesn't?) then you must try it with brie cheese in the center of a bundled up puff pastry!

So simple, easy and quick...

Preheat your oven to 400'
1 sheet of puff pastry, thawed (cuz I use the frozen kind)
1 wheel of brie cheese
about 2/3 cup of Savory Fig and Sweet Onion Freezer Jam
1 egg mixed with 1 TB water

Line a baking sheet with parchment paper.

Lay the puff pastry sheet on a floured surface. Place the brie in the center. Top with the jam


Pull all the sides up to the center and pinch a little so they stick together some, to resemble a cute little bundle fulled with surprises.

Brush the top and sides with the egg wash.


Carefully place it on the lined baking sheet and into your oven. Bake for about 30 minutes or until golden brown.


Allow to cool for about 10 minutes before serving. You might even want a little extra jam handy to toss a glob or two on your plate to ensure that you have a little of everything in each bite. The is the perfect balance of sweet and savory, gooey cheesy buttery flakiness.

I'm not sure if 10 cups is going to last me through the winter....

For more delicious tips and how-tos and fantastic recipes on saving summer, visit the other Sunday Supper blogs.


Learn how to …

Sip sunny cocktails and smoothies

Scoop up special salsas and sauces

Jump into jellies, jams and preserves

Pucker up for pickles

Slurp and spoon soup and a side dish

Dive into divine desserts


Sunday Supper Movement
Join the #SundaySupper conversation on Twitter on Sunday! We tweet throughout the day and share recipes from all over the world. Our weekly chat starts at 7 p.m. ET. Follow the #SundaySupper hashtag and remember to include it in your tweets to join in the chat. To get more great Sunday Supper Recipes, visit our website or check out our Pinterest board.


Would you like to join the Sunday Supper Movement?
It’s easy. You can sign up by clicking here: Sunday Supper Movement.


Saturday, April 26, 2014

Vegan Chocolate Hazelnut Spread


Chocolate hazelnut spread. A great flavor combination. And, that very famous brand.....which I really did like.....except for one thing. It left a strange waxy coating in my mouth. And honestly.... it's not the healthy snack spread that's boasted about on those commercials. I mean...really....2 tablespoons at 200 calories? Over half of the calories come from fat.  Not to mention 21 grams of sugar, 12 grams of fat, plus....artificial flavors. 

As if we should expect anything else. After all, it is the sad fact of processed food. 

But that's beside the point....my focus here is on an amazing alternative. Because no matter how much I question the "famous" one....I still crave that combination.  Because really...I do love it. And now I have a great, healthy, easy alternative. That not only leaves my mouth feeling 'wax-free', but makes me feel so much better about eating it. 

My daughter found the recipe on Instagram and unfortunately there wasn't a website link for me to give credit to. If you are an 'instagramer'...you can find the recipe on laulweighlossjourney's account. 

I've made this mock Nutella twice. Once I blanched the hazelnuts first to remove the skins. The second time I left the skins on. There's no difference in the texture or flavor. Just in color.....


The main difference between the store brands and the homemade version is the consistency. It's thinner....and a bit grainier. You'll think you messed up when you first mix it up but don't worry, it does thicken once refrigerated. It doesn't become as thick as store brands, but it's enough. 

And really....it's so easy. No cooking involved. Just a food processor. And if you make your own almond milk (which doesn't get cooked)...you can call this "raw". All of the ingredients are raw, or are available raw.

Are you ready to get a little healthier and step a little further away from the processed?

Let's do it! 

Vegan Chocolate Hazelnut Spread

1 cup hazelnuts (skins on or off, its up to you)
1 TB coconut oil
3 TB cacao powder
4 TB maple syrup
1/8 tsp salt (also known as 'a pinch')
1/2 cup almond milk

In a food processor, pulse the hazelnuts a few times then puree them until they start forming a paste. Add in the coconut oil and continue processing until smooth. 


Add in the remaining ingredients and process until completely combined and smooth and creamy.

It will be a bit runny, but just pour and scrape it into a container (mason jars work great!), cover and place in the refrigerator.

After a couple of hours, you will notice that it's getting thicker. After that, I have no idea because It has yet to last more than 12 hours in my house. 


My daughter found some Belgian Chocolate Thins at the Italian Deli today....and let me tell you....I could eat the whole box with my Chocolate Hazelnut Spread. 


And not feel guilty.

Well, at least not very much. 

Saturday, November 16, 2013

Blueberry Freezer Jam with Rosemary and Shiraz


For the past week I've had 'blueberry' on the brain.

Not because they're so good for you. Not because they contain antioxidants. Not because they're loaded with vitamin C, manganese, and fiber. And the fact that they're low in fat and calories and are just so dang tasty, has nothing to do with why blueberries have been on my mind either. I buy them every week so whats so special now?


Well, ever since I attended A Very Blueberry Thanksgiving last weekend, I can't stop thinking about these Little Blue Dynamos.

So I decided to hit the kitchen and make something that was meant to last. Longer than a side dish or a smoothie.

Freezer jam!!  I'm a huge fan of freezer jam. Not only is it easy but it's worry free (no concern about canning and lids sealing or the chance of botulism). And the fresh fruit flavor in freezer jams just can't be beat. That's right..fresh fruit as in....not cooked. There is a very different flavor going on between canned jams and freezer jams. I'm not saying canned jams aren't good. I'm just saying....they're different.


Speaking about 'different flavors going on'...are you wondering about the rosemary aspect here? Believe it or not, rosemary could quit possibly be blueberry's new best friend. (Sorry lemon, make room for a new member of the group). Lemon still has it job as "flavor brightener" but rosemary adds a new dimension and depth, and it's a mutual experience. Blueberry helps define the sweetness of rosemary and the rosemary balances the tang of the blueberry while adding this almost.....I dunno...cocktail, mixology level. Peppery, sweet, sappy, yet sill all blueberry. It's just delightful!


Btw...this jam is all grown up. Not only is it packing some earthy sweetness, but it's packing vino. Shiraz to be more specific.

Sorry kids, but this batch will not be found with the peanut butter in your lunch pails.

Blueberry Freezer Jam with Rosemary and Shiraz
Makes about 7 8oz jars of jam

Prepare 7 or 8 8oz jars and lids for canning by cleaning, then rinsing with boiling water and drying thoroughly.

3 cups frozen blueberries, thawed
5 1/4 cups white sugar
zest from 2 lemons
1 pack of pectin
3/4 cup Shiraz wine
Leaves from 1 4" fresh rosemary stem, minced

In a food processor or blender, pulse the blueberries 3 or 4 times, just enough to break them up without pureeing. If you do not have a blender or food processor, you can mash them with a potato masher. You might have more obvious pieces of blueberry skin as a result.

In a large bowl, combine the 'mashed' blueberries, sugar, and lemon zest. Allow to sit for 10 minutes, stirring occasionally.

In a small saucepan, combine the pectin, wine and minced rosemary. Heat over high heat, bringing to a boil while stirring constantly. Boil and stir for 1 minute, or until pectin has dissolved. You will notice the pectin mixture turn a foamy pink. Keep going...it'll quickly become a beautiful clear, deep red.

Add the pectin mixture to the blueberry mixture and stir for 3 minutes.

Fill your prepared jars to about 1/2 below the rim. Clean up anything that may have spilled on the rim or the sides. Cover with lids and allow to rest out on the counter for 24 hours.

Once set, store in the freezer for up to a year. After a jar has been opened, keep refrigerated and use within 3 weeks.


If you can put the spoon down and stop eating it as is for just a minute, try it over a block of cream cheese, smeared all over a slice of fresh baked bread. If you're inclined to share, you might want to present this at your next party. The holidays are just around the corner. Then send your guests home with their own jar.

For more information and recipes, visit the U.S. Highbush Blueberry Council and see what all the buzz is about Little Blue Dynamos.

Monday, November 11, 2013

A Very Blueberry Thanksgiving


It works. Blueberries with your Thanksgiving feast. I swear! If you're not much of a cranberry fan, then go for the little blue dynamos! If you LOVE blueberries, then just do it! You get that slight tartness with a little sweet, of course, but blueberries also work in savory dishes.

I promise!

Until yesterday, I had no idea that blueberries were so versatile.

I attended A Very Blueberry Thanksgiving luncheon with Food Bloggers of Los Angeles, hosted by Erika of In Erika's Kitchen, sponsored by Blueberry Council and Rioja Wines.


Every dish had blueberries in it, from the appetizers to the main course and last but not least, the dessert. The courses were magnificently paired with 6 different Rioja Wine varieties.

One thing that stuck in my head, as I listened to the Little Blue Dynamos guys talk about blueberries, was the quality of produce that comes from Chile. For some reason I have always thought that imported produce wasn't as regulated as domestic. Well, Chile is an "export powerhouse" and in order to sustain that, they need to maintain a high level of quality and safety standards. Not just US standards but also Canadian, South Korean and European, just to name a few. What that means is the quality is just as good, if not better than what we get domestically. And since their harvesting time is opposite of ours (due to that south of the equator thing) we have the benefits of obtaining various fresh fruits during our winter months.

Our Rioja Wine representative had so much to say (and I realize even more, how little I know about wine). I thoroughly enjoyed each selection that was presented (I even won a bottle!). Here's a nice little tip: if you have a bottle of wine and the tannin is just a little too strong for you, place the bottle in the fridge for about 15 minutes or so and the flavor will soften and you'll have a nice smooth wine to enjoy.

If you follow me on Instagram (PeacefulCooking), twitter (ImStuffed) or facebook (Peaceful Cooking) you will have seen previews of the following amazingly delicious dishes on Sunday. All of which contained blueberries. Every single dish was fantastic. I'm going to share photos and links to the recipes since there are several, rather than make this post 2 miles longs (instead of just 1 mile).

First up we had.... 

Pre-feast nibbles:
Paired with Muga Blanco 2012

Mashed Potato Pops with Blueberry "Not Ketchup"
Printable Recipe


These little pop-in-your-mouth morsels were very good with that little crispy-crunch on the outside. But what made them beyond good, was the Blueberry "Not Ketchup"! Seriously people, you have to try it. It's not too sweet, very smooth with a slight tang. If it were socially acceptable, I would've been eating the dip with those skewers once the potato balls was gone. It's that good!

Pumpkin Soup Shooters with Dried Blueberry Dust
Printable Recipe


Light, subtle flavors, not too thick or heavy. Just enough to keep you from fainting due to starvation while waiting for the big meal! (you know how it is....you don't eat all day because you want to save your appetite) Adding the fun little dusting of blueberries gives this soup shooter that special festive touch.

First Course:
Paired with: Cune Rosado 2012

Butternut Squash Salad with Blueberry Balsamic Vinaigrette
Printable Recipe


Oh my goodness! This is one dish I wish I had taken more of. And a definite addition to my table this year! I'm not much of a salad person but when the flavors and textures blend so wonderfully, I just couldn't help myself. I love this salad. I'm not sure which ingredient won me over...of course the blueberries...but then the pepitas spoke to me....and then...I think the Blueberry Balsamic Vinaigrette started singing to me. Yes! That's what it was. (Nothing like a private serenade)

Side Dishes
Paired with: Cune Rosado 2012
Vina Herminia Tempranillo 2012
Torre  de Ona Finca San Martin 2010
Conde de Valdemar 2010

Chili Roasted Sweet Potatoes with Dried Blueberries
Printable Recipe


Sweet potato fans...here's your chance to get out from under that sweet potato casserole! Healthy, quick and easy and look how beautiful that is. Talk about back to the basic with a new twist. Delish!!

Pulled Turkey Sliders with Blueberry Chutney
Printable Recipe


This is actually a great idea for turkey leftovers. Or maybe a little something to hold over those football fans until the feast is served. If you're an early Thanksgiving Feast eater...then how about a quick bite before you go to bed. Whatever you choose, it's gonna work. These are easy, delicious and fun to eat!

Blueberry Stuffin' Muffins
Printable Recipe


Baking stuffing in a muffin tin? YES!! Little individual servings and everyone gets the best of both worlds....the moist center and the crunchy top. I'm sure you've seen people add cranberries, apples, grapes..etc to their stuffing. Why not blueberries? This whole dish is ingenious! (and look how cute they'd be next to the Pulled Turkey Sliders above!)

Brussels Sprouts with Blueberry Balsamic Glaze
Printable Recipe


If you struggle to find that vegetable side dish that can stand up to the main course, look no further! Brussels sprouts are roasted in a blueberry balsamic glaze yet they maintain their cabbage like integrity that so many enjoy.

Main Course:
Paired with: Lan Edicion Limitada 2008 (my personal favorite of all the wines offered)

Boneless Roasted Turkey Breast with Blueberry Salsa
Printable Recipe


I'm sorry I didn't get a picture of the turkey this was served with but we all know what that looks like. I went back for seconds and all that was left was a little of this salsa....and I was totally fine with that. The combination of blueberry, green apple, and red onions is phenomenal! If you're going to skip the gravy, for whatever reason, then this is the perfect compliment for your turkey.

Last but not least.....

Dessert
Paired with: Blueberry Mulled Cider
Printable Recipe
A lovely refreshing yet comforting cider to finish with. (I don't know why I failed to take a picture. Maybe I drank it before thinking about it)

Pumpkin Blueberry Triffle
Printable Recipe


What a way to end the day! This is truly a delightful dessert. It's not heavy, it's not too sweet. It doesn't make you groan at the end as if you ate so much and wished you hadn't. I should've brought some home though, because now as I'm looking at it, I really want some. It has all the right holiday spices and flavors rolled up in perfect harmony.

If you're looking to switch things up a bit, or introduce a new dish....maybe you have the privilege of enjoying more than one Thanksgiving dinner....the dishes above come highly recommended, by yours truly.

Thank you Blueberry Council and Rioja Wines for sponsoring such a lovely spread.

And Thank you again Erika for a wonderful afternoon, for your hospitality and your expertise in the kitchen!

Saturday, September 21, 2013

Curried Apple Chutney


It's canning season. Summer is ending today and fall begins tomorrow.

August 12th was Can it Forward Day. What an exciting day that was. Really...fun, informative, and inspirational. Ball had a fun filled day of live online canning seminars....FREE!! With lots of giveaway opportunities.

It was through one of those many opportunities that I won a Ball Home Canning Discovery Kit from Debby over at A Feast for the Eyes Thank you so much Debby!!!


Can I tell you how thrilled I was? That cool little basket was the biggest score for me. I don't have any special tools or anything for my canning adventures so having this basket that gets submerged into the boiling water along with the jars was a huge plus! No more dropping jars into the water cuz they slipped from the tongs that I've always used that aren't for holding jars. No more spilling near boiling water on me as I take the jars out cuz there's always just a little bit of water on the lid. And it's not like the basket is a pricey item, far from it, but I just don't shop online much. Soo...my lovely kit came with all this stuff in the picture...plus a coupon for a free case of jars! Talk about inspirational! How can you have all this cool stuff and not want to can something!

As I browsed through my newly acquired Blue Book Guide to Preserving, I spotted a lovely sounding recipe for Chutney. The ingredients were handy. I think all I had to do was buy enough apples and raisins. Everything else was already in my pantry.

I'm going to share just the recipe with you, not much of the whole canning process. If you're not experienced in preserving and canning (or you need a refresher), I highly highly insist recommend browsing through Ball's website, Fresh Preserving where you'll find instructions on how to get started, along with video tutorials, recipes, products, and an online community with discussion boards.

Canning and preserving is not difficult but there are important precautions and procedures that need to be followed.

This chutney was made using the boiling water method. Besides the jars, all you really need is a large, deep stockpot. One that's deep enough to be able to cover the jars with about 2 inches of water, once submerged. You don't need anything fancy. Of course if you have fancy, or you want fancy....then go for it. It does make things a little bit easier.

One more thing before I get started....this was suppose to yield about 10 pints. I don't know what I did...but I got a little more than 5 pints out of it. I'm thinking....maybe I cooked the chutney down too much before canning? Who knows....its fine...because 5 pints of chutney will last us quite a while. I think. hmmm...maybe not, because this stuff is so very good. It's only been a week and I've already gone through 1/2 a pint.


Curried Apple Chutney
Yields about 10 pints

2 quarts of chopped, peeled, cored apples (about a dozen large or 16 medium)
2 lbs raisins
4 cups brown sugar
1 cup chopped onion
1 cup chopped sweet pepper
3 TB mustard seed
2 TB ginger
2 tsp allspice
2 tsp curry powder
2 tsp salt
2 hot red peppers, chopped
1 clove garlic, minced
4 cups vinegar

In a large saucepan, combine all of the ingredients. Simmer until thickened, stirring frequently.

I let this simmer for a good hour. I wanted the chutney to be on the soft side, yet chunky. I didn't want a relish type consistency....ie: crunchy.

Ladle the hot chutney into hot jars (this prevents the jars from possibly cracking), leaving about 1/2" headspace (this would be the measurement from the top of the jar to the top of the food).

Using a nonmetallic spatula, run it around the inside of each jar, pressing slightly to remove air bubbles.

Using a clean cloth, wipe the edge of the rim and side of each jar. Place the two-piece lids on the jars and process in boiling water for 10 minutes.

Turn the heat off and let sit for 5 minutes before carefully removing the jars from the hot water.

Repeat as necessary until you have processed all of your jars of chutney.

Allow to sit at room temperature for 12 to 24 hours. Test the lids to make sure they have sealed (the center of the lid should be concave).

At this point you can should remove the outer band. Actually, I highly recommend it. You see, I learned something on that special Can it Forward day. Since its the flat lid that seals and keeps your newly preserved vegetables and fruit fresh, if the canning process has failed at any level, bacteria begins to grow inside the jar causing a build-up of gases. These gases will break the seal and mold will form...thus warning you that what's inside is not edible. If the bands are left on, the seals are forced to stay shut, despite the havoc inside and there will not be that easily defined visible warning.

Store for up to a year.


Need a little idea on what do use it for? Try one of my new favorite dishes:


Pork Tenderloin would also be wonderful. Or just spread it on a cracker with some cream cheese. Maybe a bagel? You could just lick it off the spoon...I won't tell. 

Thursday, September 20, 2012

Mushroom, Jalapeno, and Cilantro Salsa


There are a lot of different kinds of salsas running around out there. There's red tomato, tomatillo, strawberry, mango...etc etc. But have you tried Mushroom, Jalapeno, and Cilantro Salsa?

Let me start off by telling you a little secret. Sometimes I get stuck on being a purist. I get attached to the original and am reluctant to embrace the new. I kinda have to mull it over....consider it....talk myself into it and then ease on in. It's not often that you'll see me among the first to jump on a bandwagon.

With that said...in making this salsa....I was...timid. Not sure what to expect and how it would fill the roll that red tomato salsa has. Well...it doesn't. But that's not a bad thing. It has it's own roll. It's own flavors and it's own character. Once made...it's best after it has sat for a couple of hours and served at room temperature. It's even better the next day. I mean way better. Sitting here thinking about it, I want some with a tray of nachos. Not the kind you get from fast food places...but real nachos. Tortilla chips with melted cheddar cheese all over them....smothered in this salsa. I wish I had thought of that when I still had some. Gee darn....guess I'll have to make more.

Are you wondering where this recipe came from? Well, lemme tell ya. The gals over at Muy Bueno are releasing a cookbook very soon. October 1st to be exact. What does all this have to do with Mushroom, Jalapeno, and Cilantro Salsa? Well....I happen to have a copy of said cookbook. I'm participating in the Muy Bueno Cookbook Spotlight & Cook-Off sponsored by Hippocrene and hosted at girlichef 

And you know what else? You will have a chance to WIN the Muy Bueno cookbook. I will be hosting a GIVEAWAY the first week in October..so be on the lookout! 


Mushroom, Jalapeno, and Cilantro Salsa
Printable Version

1 lb fresh white mushrooms, finely chopped
1 small red onion, finely chopped
2 jalapeno peppers, stemmed and finely chopped
Handful of cilantro, chopped
3/4 cup fresh lime juice
1 TB olive oil
Salt to taste

(the peppers in the above picture are from my garden. The fat red one is a jalapeno. The others are unknown. My point? Salsa is not an exact science.)


In a bowl, combine the mushrooms, red onion, jalapenos and cilantro. Add the lime juice and olive oil and gently toss. Salt to taste.


Let it sit for a couple of hours or...if you have time and you've thought in advance, stick it in the fridge over night. Serve at room temperature.

Now....the night I made this, we had carne asada soft tacos for dinner. I dipped my tortilla chips in it, I spread it all over my tacos...and enjoyed it. (photos came out like crap so I'm not showing 'em).

The next night....(this is how I can attest to the fact that its sooooo good after a day) I decided to grab a bolillo roll, and make a carne asada "sub". I reheated the carne asada covered in melted cheese...and heated up a extra large spoonful of the Mushroom, Jalapeno, and Cilantro Salsa and added that to the sandwich, along with some sliced avocado......


Oooooomg!! One of the best sandwiches EVER!!

This salsa not only has the traditional salsa experiences; jalapeno heat, crunchy onion, soothing cilantro and limey tang....but add to that the meaty texture and earthy flavor of mushrooms. It's a whoooole new level for salsa.