Yum Peaceful Cooking: Pastry
Showing posts with label Pastry. Show all posts

Wednesday, April 27, 2011

Apple Craisin Turnover and a Margarita


Have you ever read a book just because it was associated with cooking in some form, even though the plot was horrible?

I don't advise it. It can tend to be mentally painful.

My neighbor gave me a book to read. She thought I'd enjoy it because after each chapter there's a recipe. Sounds like fun. I've read books like that before that were enjoyable.

I'm really having a hard time getting through 'Apple Turnover Murder'. But I'm enjoying some of the recipes. (looking forward to trying watermelon cookies in the near future....just because it sounds so .... odd).

At least the book has some fun, interesting and rather tasty recipes. These apple turnovers were simple, easy and very good!

And just because I like you so much, I'm going to share the recipe with you so you are not forced to suffer through the book just so you can enjoy a good turnover.

Apple Craisin Turnover
Printable Version

1 - 17.5 oz package of frozen puff pastry sheets
4 1/2 cups apples (about 4, I used Gala and Fuji),  peeled, cored and chopped
1/2 cup craisins (dried cranberries)
1 TB lemon juice
1/3 cup sugar
1/4 cup flour
1/4 tsp ground nutmeg
1/4 tsp ground cinnamon
1/4 tsp cardamon (if you don't have cardamon, don't stress...you can leave it out.)
1/4 tsp salt
1 egg
1 TB water
Sugar

Preheat your oven to 400' F. Line a cookie sheet with parchment paper.

Thaw the puff pastry sheets according to the instructions on the box.

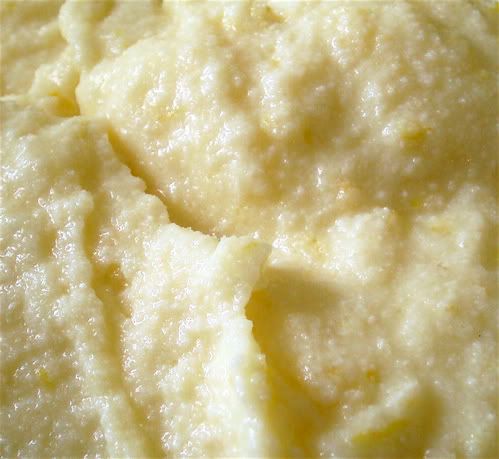
Meanwhile, prepare your apples. In a mixing bowl, combine the apples, craisins and drizzle the lemon juice over them. Toss to thoroughly coat.


In a small bowl, combine the 1/3 cup sugar, flour, spices and salt. Add to the apple mixture and toss to coat.

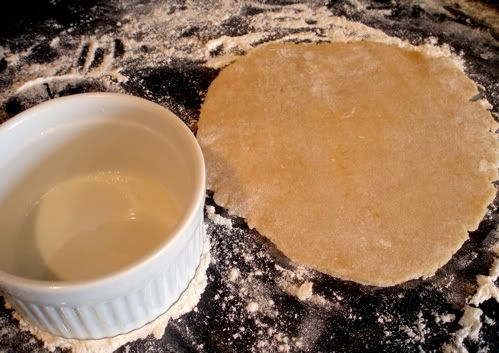
When your pastry is ready, on a lightly floured surface, roll one of the pastry sheets into a 12" x 12" square (you can put the other sheet in the fridge for now). Cut vertically and horizontally to create 4 equal squares (6"x6")


Now to prep the assembly line. In a small bowl or cup, beat the egg and water to make your egg wash. Have a slotted spoon, fork and sharp knife handy as well as a small bowl of sugar for sprinkling.

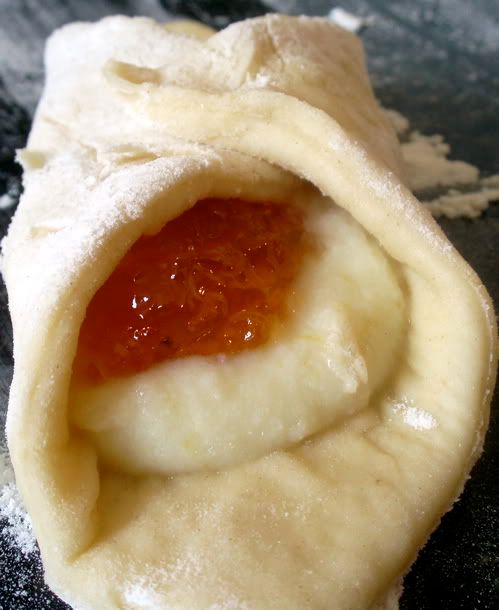
With a pastry brush, dampen the edges of a square with the egg wash.
With a slotted spoon, scoop about 1/4 cup of filling onto the center of the square.
Pull one corner over the filling to the opposite corner to create a triangle.
Press the edges together to seal. Using the fork, press along the edges to make it pretty (and to make a better seal).
Make 2 slits in the top with your knife to ventilate
Transfer to your prepared cookie sheet and repeat with the remaining 3 squares.


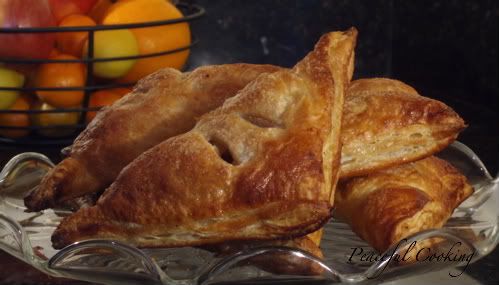
When all four squares are ready and on the cookie sheet, brush the tops with some egg wash. Sprinkle with some sugar.

(every time I see this photo, stingray comes to mind)

Bake for 25 minutes or until golden brown.

While those are baking, prepare the second pastry sheet into 4 more apple turnovers.

Allow the turnovers to cool for 5 minutes and enjoy while warm


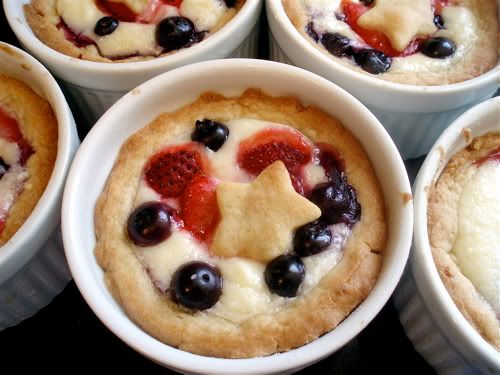
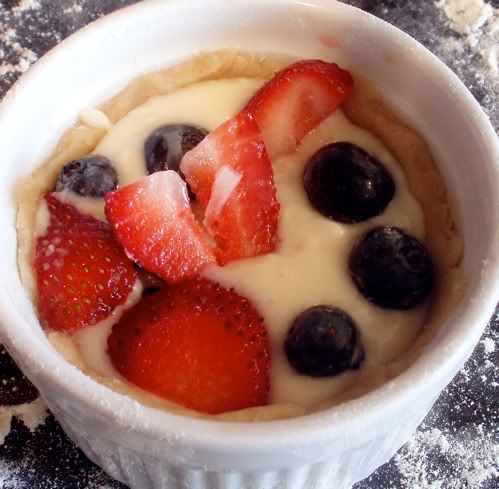
And there you have your own little miniature personal take along pie. I think I'd like to make a blueberry-lemon version. Or cream cheese and strawberry. What kind would you try?

Speaking of strawberry. Let's get a little more adult here. Have you tried strawberry and pink lemonade together?

As a margarita?


I'm one of the co-contributors for Cocktail Puppy. If you'd like to try this wonderfully refreshing margarita (my latest adult beverage contribution) then head on over for the Strawberry Pink Lemonade Margarita recipe. If margs aren't your thing, I'm sure you'll find something there that is.

Unless of course all you want is plain beer.

This is my entry into Hearth and Soul this week....make it from your hearth and feed your soul

Hearth and Soul Hop at the Hearth and Soul Hop Hub

Wednesday, July 7, 2010

Star Bangled Pastry and A WEEEEEENNER!!!


Have you ever had a vision in your head of what you wanted to create? Only to have a major flop! But the flavor was so incredible that you couldn't just walk away. Just like a dog with a bone, you weren't giving this thing up....you're bound and determined to make it work.

It all started with a pile of blueberries...an old newspaper clipping from the early 80's and a very stubborn woman in the kitchen (that would be me!)

The original recipe was for pastries called Four Corner Hats, filled with dried fruits and walnuts. I thought they were so cute and wanted to use my blueberries in them....with some cheese cake style filling instead of the dried fruits and nuts.

Star Spangled Pastries Printable Version

Thus in mind, I happily prepared the pastry:

Four Corner Hats Pastry

2 cups all purpose flour
2 teaspoons baking powder
1/4 teaspoon salt
1/2 cup sugar
1/4 cup firmly packed brown sugar
1/2 cup chilled butter
1 egg
1 teaspoon vanilla
1 tablespoon lemon zest (original recipe called for orange zest)
2 tablespoons water

Stir together the flour, baking powder, salt and sugars. Cut in the butter until mixture resembles coarse meal. Add remaining ingredients and knead to form a dough. Divide into 3 portions. Flatten each to about 1/2 inch thickness. Wrap in plastic wrap and chill for at least 2 hours. (I let mine chill over night).

The next morning, I prepared my filling:

Cream Cheese Filling

8 oz cream cheese at room temperature
3 tablespoons beaten egg
2/3 cup sugar
1 teaspoon vanilla
1 tablespoon fresh lemon juice

Combine all ingredients...not worrying about any minor lumps.

Easy- peasy so far.

Preheat the oven to 400'. Remove 1/3 of the dough from the fridge and quickly roll on heavily floured surface to about 1/8 inch thickness. Cut into 3 inch circles. Place a heaping teaspoon of filling in center.

Fold 4 "sides" of the circle up to partially cover the filling. Most of the filling should be visible. Pinch sides together at corners. Plop a few blueberries on top of the visible filling.

Place on a greased baking sheet about 1 1/2 inches apart. Bake for about 12 minutes or just until golden.

And this is what you get......


Lovely little blueberry pastry pancakes. This is NOT what the picture in my head looked like. At all. Not even a little bit.

But the flavor....WOW. Ok...think....think...think.....what can I do?

Hmm...let's pre-bake the little pastries and then fill them with cream cheese and berries. Right?

Wrong!! I ended up with a pastry cookie (no picture provided...just imagine something resembling the above pancakes only not as colorful).

Sigh.

This is the point where you will find me walking in circles in my kitchen, occasionally opening a cupboard that I've opened a million times over the years...expecting the solution to jump right out. As if there's something in there that I'm not aware of.

Or that I have forgotten that I had....

Ramekins

RAMEKINS!!! Oh bless you! You sweet little ramekins. The answer to my prayers. Yes....ramekins!!

Have you ever been so excited about a set of ramekins? Ya, me neither.

And there you have it....Place a circle of pastry dough inside a greased ramekin


At first it doesn't look real pretty


But work it in and trim off the excess. I had the pastry lined up with the little rim inside the ramekin that's about 1/2 inch from the top. The pastry will rise while baking and you don't want a mess after all this work.

Drop some berries in the bottom


Add a couple of spoonfuls of cream cheese mix in there and top with some more berries


Oh...here's a tip....keep all dough that you are not currently working with, in the fridge. Also, after assembling each ramekin, stick it in the fridge until you have them all completed. This dough loses itself as soon as it starts to warm up.

I had a little extra dough left so I cut out cute little stars and placed one on top


I wasn't sure how high these little beauties would rise so I placed all of the ramekins on a baking sheet (to catch any spills). Because there was more filling in these than there was in the "Four Corner Hats", I turned the oven temp down to...

375' F, and baked for 23-25 minutes, until golden brown.


The pastry is soft and yummy and just sooo good! And of course, anything with cream cheese or that is cheese cake like is a winner in my book.

I served these on July 4th. I think they'd also be great for Labor Day or Memorial Day or just about anytime. Just change the fruit to match the occasion.

And...if you find you STILL have some dough left....


Make a cute little rustic free-form tartlet filled with only fruit. It just might be the first thing to disappear.

Soo...is there another reason you're hanging out with me? Was there something else you wanted to know?

Who the lucky winner is maybe? The lucky individual who gets to go on an $80 shopping spree at CSNstores.com?

First of all, I want to thank everyone for participating! I wish you all could've won! (Including me!!)

But since that couldn't happen, I had to write down all your names and place them in my lucky hat....or shall I say, my lucky margarita pitcher


mix it well, close my eyes and mix it some more...... and pull out a name

Drum roll please.....

SPRYTE!!!


(Que: confetti, balloons, music from Miss America pageant and flashing cameras) YEAH!!! Congrats girl!!! I'll be emailing you the Gift Certificate code :)


Note: Yes...I know it's suppose to be Star "Spangled" Pastry...but since this started out as a mess...I figured "Bangled" would be more apropo.


Monday, June 14, 2010

Danish with Lemon Ricotta Filling and Kumkwat Jelly


Delish. Yummy. Dangerous. Addicting. Versatile. Easy. Not Simple. Quick for a Danish standard...from what Natashya says over at Living In The Kitchen with Puppies, which is where I came across this wonderful recipe.....but not fast by any means.

This is my first experience making a Danish and it really was fun! I have a lot to learn in the technique area, but everyone has to start somewhere, right? One day I'll look back at this post and cringe at my lack of something...form or handling.... but today...I'm proud. :)

I'm going to show you the steps and all my imperfections. Maybe you'll learn something. Or maybe you can teach me something....a tip? a trick? Either way, it's all good. All the way down to my rolly polly tummy.

I don't have the recipe for the Kumkwat Jelly....that was a gift from my adopted grandmother, Ruth, next door. I'll work on getting it if y'all are interested.


The night before....begin preparing your pastry.

Natashya says this recipe comes from Nigella Lawson...

Processor Danish Pastry
Printable Version
(filling recipe and printable link below)

1/4 cup warm water
1/2 cup milk at room temp
1 large egg at room temp
2 1/4 cups white bread flour
2 1/4 teaspoons yeast
1 teaspoon salt
1 tablespoon sugar
1 cup unsalted butter, sliced...cold

In a measuring cup  mix together the water and milk. Add the egg and beat with a fork to combine. Set aside.

Put the flour, yeast, salt and sugar into your food processor. Pulse for a second to combine. Add the butter and pulse for a couple of seconds until the butter is cut into the flour mixture with visible chunks.


Pour the contents of the food processor into a large mixing bowl and pour the egg mixture into the bowl. Fold the ingredients together until just combined....you don't want to over do it.


It may not be pretty but I'm pretty sure those little chunks of butter are important. They have a special purpose....an important roll....in creating buttery, flakey pastry.

Cover the bowl with a plastic wrap and store in your fridge overnight. (You can actually store it up to 4 days...but who has that kind of patience? I want my pastry NOW!)

After the longest night in history (aside from Christmas Eve)....remove the bowl from the fridge and let it come to room temperature.

Lightly flour your surface and dump the dough in the middle. roll the dough out to about 20 inches. I think that was a little too thin....next time I'm going to try 18 inches and see what happens.

Now...fold your dough the way you do a letter....into thirds....


Kinda wish it was more precise but I'm not all that good with this sort of thing and I was afraid to overwork the dough.

Next you're going to turn the dough so that the folded edge is on your left and roll it out to 20 inches again. Repeat this process 3 times.

Now I'm confused....do you do the whole process 3 times or 4 times? Let see....if you do it once...then repeat 3 times...that's a total of 4 times. Hmmm...I think I only did the whole process a total of 3 times but maybe it's suppose to be 4?

Cut the dough in half, wrap each piece in plastic wrap and refrigerate for 1/2 hour. You can freeze the dough at this point for later use if you desire.

While the dough is chillin', make the filling:

Lemon Ricotta Filling for Danish
Printable Version

1 cup ricotta cheese
6 tablespoons sugar
Pinch of salt
1 tablespoon lemon zest
1 large egg, beaten
3 tablespoons unsalted butter, melted and cooled

Combine all ingredients


Take your pastry (one sheet at a time...leaving the other sheet in the fridge). Unfold the pastry and roll it into a rectangle...not much.


Size isn't specified but since it's going to make 6 Danishes, I had the height 2/3rds the length. Then I cut it half, length wise and then into thirds height wise, so that I ended up with 6 squares. My squares were a bit of a mess so I trimmed them a bit


Those little squiggly pastry bits have a purpose.....stay tuned.

Fill each square with a wad of Lemon Ricotta Filling and dab a bit of your favorite jam on top


Fold up the corners. I only folded two opposite ends but you can do all 4 if you'd like. Pinch the corners together and place onto a baking sheet that's been lined with parchment paper (love that stuff!!!)


Brush with an egg wash (1 egg beaten with 2 tablespoons of milk). Let them rise for about 1 1/2 hrs, or until they have doubled in size.

Get the other half of your pastry out of the fridge and make your second batch.

About an hour into the rise time, preheat your oven to 350'F.

Just before baking, check to see if you pinched the corners together enough....if they're being defiant....pinch them together again.

Place them in the oven and bake for about 15 minutes....until nice and golden brown. I think I ended up having to bake them a few minutes longer...just keep an eye on them.

Transfer to a wire rack to cool a little. (plop your second batch into the oven)


As you can see...I'm not a good pincher. Several of them rebelled. Badly. Not that it affected the flavor...they just weren't all neat and pretty looking.

Mix together a little clear glaze....1/3 cup sugar, 1/4 cup water in a small sauce pan. Bring to a boil and remove from heat.

Brush the Danishes with the glaze to make them all pretty and shiny.


YUM!!!

Ok, remember those pastry scraps? I rolled them in butter and smothered them in cinnamon and baked them into these lovely little cinnamon pastry fries...


This is my entry into Two for Tuesdays Real Food. I read about it over at Heathers... GirliChef. This is a while new thing....and from what I understand (correct me if I'm wrong)...Real Food is about cooking / baking/ stuff that is not from processed foods. Heather explains it a lot better than I do...so head on over to her place and check it out.


It sounds like a lot of fun...and it's pretty much how I try to cook anyways....well...most of the time.