Yum Peaceful Cooking: HBinFive
Showing posts with label HBinFive. Show all posts

Sunday, October 2, 2011

Light Wheat Sandwich Bread


I'm not a big fan of the flavor of whole wheat. I know, I know...white flour is so bad for you. I can't help it. I've tried. I've especially put forth a strong effort these past 2 years as I baked with the HBin5 bread baking group. If you look along the right side of my blog, scrolling down to the "Labels" section, you will see HBin5 where I have linked all the bread posts I baked with the group (over 30 posts). Not all are whole wheat. But there's a whole heck of a lot of them. (BTW...HBin5 is short of Healthy Bread in Five Minutes a Day).

But I still don't enjoy the taste of whole wheat bread. 

This does not mean that I didn't gain anything from this cozy little HBin5 adventure. In fact...I learned more than I can express in this one little post. I met fantastic people whom I will never forget. I gained an enormous amount of knowledge and 'yeast confidence'.  And I have grown to love baking bread. I've stepped way beyond my comfort zone and discovered that it's comfortable out there as well.

Somewhere along the line, it became a goal of mine to find a whole wheat sandwich bread that Sir Sportsalot would like. He's a Roman Meal kinda guy and it would make my day if I could trump the store bought stuff.


This recipe is probably as close as I've been able to come, so far. It's not an HBin5 recipe. It's not even a no-knead recipe. It's just a good recipe that I found over at SmittenKitchen
 
With minor alterations.

I do know one thing....without HBin5, I would not have attempted to make this loaf of bread.

The crust is firm without being "crusty" or chewy.  The crumb is soft and airy with just the right amount of firmness. Its not going to fall apart on you from the weight of the tiniest amounts of sandwich makings. It's substantial without being dense. It has that wheat-ie flavor but it's light enough (and gentlemanly enough) to step aside and allow the others to shine. You want to be able to taste the meat. You want to experience the full bodied flavor of your freshly sliced tomato straight out your garden. This bread knows its not the center of attention....but more of a supporting cast, and does it's job with grace.


Light Wheat Sandwich Bread
Printable Version

2 1/2 cups unbleached bread flour
1 1/2 cups white whole wheat flour
1 1/2 TB sugar
1 1/2 tsp salt
3 TB powdered milk
1 1/2 tsp yeast
2 tsp barley malt syrup
1 1/4 cups lukewarm water
2 TB shortening

In a large bowl, combine the flours, sugar, salt, powdered milk and yeast. Dissolve the barley malt syrup in the water. Add the water mixture and the shortening to the flour mixture. Stir until thoroughly combined and the dough forms into a ball. (I started off using a spatula or spoon and ended up just using my hands).

If by chance after you've tried working it all together with your hands, you still cannot incorporate all of the flour in the bowl, add a little more water. (tsp at a time). You want the dough to be soft and supple but not a shaggy mess.

Sprinkle your counter with flour and turn the dough out. Knead away, adding a little flour if needed. Knead for at least 10 minutes (by hand). I kneaded for 15 minutes. The dough will be ready when you can gently stretch it without it tearing apart.

I learned something yesterday as I watched one of those cooking shows out there. It is very unlikely that you'd over knead your dough if kneading by hand. (If you're using a machine...then yes....it can happen. Make sure you obey the time frames specified in a recipe) So....knead away. Fold, push, pull, rotate....repeat. Or whatever way you find yourself kneading. Some say that all you have to do is fold and flatten, rotate. No muscle work involved at all. Your main goal, however you achieve it,  is to get the gluten working.

I wish I had known that a long time ago. It would've really alleviated a lot of my yeast based fears.

Lightly oil a large bowl. Put your dough into the bowl, rotating so that the surface gets coated with the oil. Cover the bowl with plastic wrap and allow to rise for 1 1/2 to 2 hrs. The dough should be doubled in size (which is difficult to gauge exactly. Don't stress. You'll notice it has gotten really big.)

Remove the dough from the bowl and shape it into a 6" x 10"rectangle by pressing it with your hand on the counter.

Starting at the short end, roll the dough up the length a little at a time. With each "roll" pinch the crease with your fingers to secure the dough in place and strengthen the tension. Once you get to the end, pinch the final seam closed (using your hand or the thumbs...you don't really want "pinch" marks on your bread).

Lightly oil an 8.5 x 4.5" bread pan. Place the dough into the pan. The ends of the loaf should reach ends of the pan. This will aid in an even rise.

Mist the top of the dough with cooking spray and cover with plastic wrap. Allow to rise, at room temperature for about 90 minutes. Could be shorter. Could be longer. You'll know it's ready when you poke the dough with your finger and it does not spring back at you very quickly (or at all).

Preheat your oven to 350' F. Make sure your rack is in the middle of the oven.

Bake for 30 minutes. Rotate 180' and continue baking for another 20 - 30 minutes. If you have an instant read thermometer, the inside temperature should be about 190' F. The top and sides will be a nice golden brown.

Immediately remove the loaf from the pan and allow to cool on a rack for at least an hour (or more). This is VERY important. I know...it's hard. You can smell that warm bread and it's begging to be smothered in butter. But...

NO!

You have to wait. The dough is going to continue to do its thing for a bit. You don't want all the inside steam to escape. Just let it be. Let it settle. Allow the crumb to come into it's own. That's the only way you will achieve that light, airy crumb. Otherwise, it'll be a bit doughy and almost sticky. You'll know immediately you've done wrong. The bread will leave a smear mark along the knife. A tale-tale sign that the bread wasn't allowed to fully cool. So do yourself a favor. Just walk away.

I promise, it will be worth the wait. And then you can do anything you want. Slice, dice, rip, break....toast, butter, grilled cheese. It's all good.


I will have more HBin5 and ABin5 recipe posts in the future. (one coming up pretty soon in fact). It doesn't seem like it's been 2 yrs already but the HBin5 Bread Braid is officially done. I have a feeling that we'll all stay in touch and it will seem as if it's still in progress. I can't imagine not sharing my bread with the group...or reading what they have to share. I can't imagine the group not being there to support each other as we work through our bread issues and questions. Thank you all in the HBin5 Bread Braid group!! It's been a wonderful adventure. Sooooo.....whats next?

I want to take a minute to give a special thank you and hug to {{{{Michelle}}}} over at BigBlackDogs.net  You are an amazing woman. I will never make bread without thinking of you, your courage and your strength. This is not good-bye by any means...but a segue to the next stage.

Monday, February 14, 2011

Buttermilk Bread

Things are not always as they seem.

Don't judge a book by it's cover.

Not just another pretty face....

Yes, these are some of the cliche's that come to mind when I see this particular loaf of bread.

Not everything comes out the way you plan. Sometimes things beyond your imagination occur. I like to think of them as food bloopers. Some are disastrous. Not even edible (those are the worst).

Some are just ugly. But the flavor isn't affected. That happens to be the case with this loaf of bread.

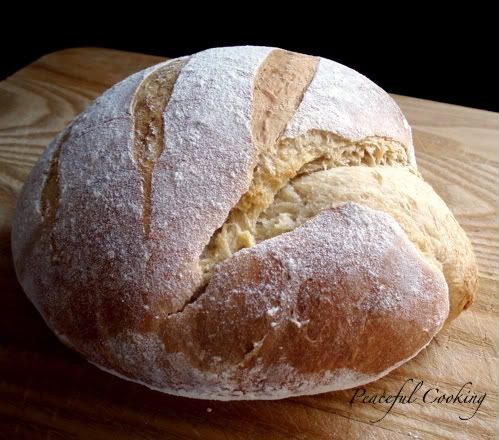
Yes, I know. Other than the instant read thermometer hole, this appears to be a lovely loaf of bread. But I guarantee that if it were in the window of a bakery. It would not sell. Based on looks alone. But first...let me give you the recipe. Tell you how it's made. And hopefully when you make it yourself, you're results will be a whole heck of a lot prettier than mine.

Buttermilk Bread
from Artisan Bread in Five Minutes a Day
Printable Version

6 1/2 cups a.p. flour
1 1/2 tablespoons yeast
1 1/2 tablespoons salt
1 1/2 tablespoons sugar
2 cups lukewarm water
1 cup buttermilk

In a large container, whisk together the flour, yeast, salt and sugar. Add the water and buttermilk and stir with a wooden spoon until combined. Do not knead.

Did I mention that this is a no-knead bread?

Cover the container loosely, and allow to rest on the counter for about 2 hours. If you go over 2 hours...don't worry. It's not going to ruin anything.

Place in the fridge for a bit. Over night would be good. Up to 7 days is fine. The dough is easier to handle once it's been chilled.

Lightly dust the top of the dough and grab a big handful, about 1 pound, and shape it into a nice tight ball by rotating the dough in your hands and 'pulling' the dough down and under. This should only take a few seconds.

Dust a pizza peel with corn meal or flour, or use a sheet of parchment paper and set the ball of dough on it and let it rise, covered loosely with a piece of plastic wrap.

The rise time is dependent upon the temperature of the surroundings. The book says 1 hour and 40 minutes. But if it's a bit on the cool side in your kitchen, it may take a bit longer. What I try to do is test the dough. I poke it with two fingers. If it springs back instantly...I know it's not done resting. The yeast hasn't completed its job. If the indent stays and bounces back very slowly....it's a good guess that it's ready to bake.

After about an hour or so of rising time....preheat the oven to 350' F for about 30 minutes if you're using a baking stone. If you're going to bake the bread on a cookie sheet (with the parchment paper), it only needs to preheat for about 10 minutes.

Once the dough is done rising, dust the surface with a bit of flour and slice it about 1/4 deep a couple of times. Bake for 45 minutes or until the inside temperature reads about 205' F (that's where the instant read thermometer comes in handy). If you're using parchment paper, remove the paper after about 15 - 20 minutes.

Allow to cool completely before slicing.

I knoooooow. It smells so good! You just want a nice warm slice with melting butter on it. But trust me. YOU HAVE TO WAIT!!

Why? (I could soooo be mom right now and just say "because I said so") The reason is....the needs to cool so that it won't be (for lack of a better word) doughy inside. You want a nice dry crumb, right?

Ok...so I did all this. As usual. But I might not have allowed my dough to fully rise. I'm not sure. Maybe there was a time issue on my part and I got impatient (bad girl). But let me know how it went....

It looks beautiful from this view, don't you think?


Then you rotate the bread 45' and you see this.....


What???? Good lord....

So you turn it around another 45' to get a full view of what's going on.....(if you are not into horror of any sort, you may want to close your eyes)


OMG!! It's giving BIRTH!!!! To a whooole nother loaf of bread!!!

WHAT have I created? I feel like Dr. Frankenstein! "It's ALIVE!!!"

But being the true foodie that I am....I had to slice it. Taste it....get an grasp the full experience of this...this....creature...


And it was GOOD! Even though the exterior was not for the faint of heart....the essence spoke for itself. A delicious loaf of homemade bread totally worth eating.

And now....If I may....I have a favor to ask for you. Now that I've bared my soul and (near failure)...If you could take a moment of your time and vote.

I have entered the Pom Wonderful Cupcake Contest with a delightful little cupcake that I've named Pom-Berry Kiss that looks like this...


It's a Pomegranate Raspberry cupcake with a milk chocolate flavored icing. Talk about moist! You can also find the recipe when you vote :). (please disregard the christmas cupcake liner...it was all I had and time was of the essence with no time to run to the store just for liners).

There's a badge at the top of my blog that will also lead you to the voting area.

Thank you!!!
  This is my entry for the Hearth and Soul Blog Hop!
hearthandsoulgirlichef

Sunday, January 23, 2011

Veggie Melt on HBin5 Dilled Rye Bread


One of my all time favorite burgers is a Patty Melt. I love everything about it. The meat...the cheese, grilled onions...and the grilled rye bread.

A looooooong time ago, Sir Sportsalot bought me a bread machine for Christmas. I was thrilled!! Wooo hooo...home made bread. Look at me, I'm Betty Crocker and Little House on the Prairie all mixed together....I'm providing wholesome homemade bread in a modern, doable way, for my family......Until I tasted it. Oh how I wanted to believe it was wonderful. I wanted to hold on to that inner pride of being able to make bread from scratch. But there was just something about the flavor that was....off. I was in denial for a long time. I even tried to figure out what to do with that bottom slice....the one with the hole from the little kneading paddle. I bought a bread machine cookbook. Only I never used it cuz I couldn't remember what capacity mine was. But I did try other recipes provided by the manufacture....and really almost enjoyed the herb bread recipe which consisted of caraway seeds, dill and parsley. All those flavors almost successfully masked the machine flavor and the whole family would devoured the loaf. The bread reminded me of rye bread.

Fast forward 15 years and here I am....bread machine in the garage (where it belongs) yet I'm still providing fresh, homemade bread for my family. Without the help of a machine. And I am really proud of myself. I use to be very afraid of yeast....and rising, and resting...and just knowing bread dough. With that knowing though, comes confidence...and sometimes nerve. It's ok to add, and adjust. So with this HBin5 assignment for Dilled Rye Whole Wheat Bread came memories of the rye wanna-be bread of my past. 

Sooooooo....I added caraway seeds and parsley to this dough. Which happened to be a very wet dough and required quite a bit of flour dusting in order to handle. But all in all, it turned out wonderfully!


Great crust, great crumb......delicious flavor. 

One of the joys I get when I make my bread is seeing my kids friends come by and devour healthy bread.

Now that I have these two loaves of amped-up Dilled Rye, naturally my mind thinks 'Patty Melt!!!!'. 

I've made my fair share of patty melts over the years so this time I chose the full blown healthy route.

Don't ask me where I got this recipe for the "Ultimate Veggie Burger" cuz I have no clue. For some reason I emailed it to myself a few years ago...oh, March 18, 2009 at 9:00 PM to be exact (according to the printed email recipe). The recipe seemed rather involved. Too involved for a mere veggie burger (keep in mind...this being said by a meat lover) and I never got around to making it...until now. I studied the recipe and made a few swaps/changes:

makes 6 burgers

Instead of lentils, I used black beans
I doubled the celery
I omitted the leeks (didn't have any on hand)
I doubled the garlic
I omitted cashews (didn't have any on hand and it didn't appeal to me)
I used greek yogurt instead of mayonnaise
I used corn flake crumbs instead of panko ONLY because I had nothing else!!!!

With all that said, here's how things went.....


1 15 oz can black beans, drained and rinsed (thinking back, that may not be necessary)
Salt and Pepper as needed
1/4 cup plus 2 tablespoons bulgur wheat
vegetable oil as needed
1 medium onion, chopped fine (about 1 cup)
1 celery rib, sliced
2 garlic cloves, chopped
1/2 lb mushrooms, sliced (although I only had a couple on hand...wish I had more)
1/4 cup greek yogurt
1 cup bread crumbs or panko crumbs

In a small saucepan, bring 1 cup of salted (1/4 tsp) water to a boil. Stir in the bulgur wheat and cover immediately. Remove from heat and let stand until all the water has absorbed...about 20 minutes.

In a heavy skillet, heat a couple of teaspoons of vegetable oil. Saute the onions, celery, garlic and mushrooms over medium heat until tender.


In a medium sized bowl, combine the bulgur wheat, black beans, sauteed veggies and yogurt.


Transfer the mixture to a food processor and pulse until coarsely chopped...about 15 - 20 times. Transfer back into the bowl and add the bread crumbs and salt and pepper to taste.

Guess what? There's no raw egg or raw meat in this mixture. You are free to taste it and adjust the flavors as needed.

Which I highly recommend you do....I'll explain that in a minute.

Divide your veggie burger mix into 6 equal sized balls.


And shape them how ever you want them....round, square....oval? Yes, I made mine oval because I wanted them to fit nicely on my slices of bread. These will not shrink or change shape. Make them the size you want.

Pour a bit of oil in a skillet, and fry, turning carefully because they aren't as sturdy as meat.


But these babies do brown nicely. At a quick glance you might not realize they're not meat.


I was thrilled with the visual of these burger patties.

The flavor? Not so much. It wasn't awful or anything....just bland.

Not being a vegetarian myself....I didn't realize how important large quantities of herbs and spices are needed for some things. Next time, I'd add more garlic. More salt and pepper....maybe some creole seasoning or old bay. Something. A-1?

Anyways.....I melted some american cheese (cuz for a Patty Melt...that's the only cheese that will do for me), grilled up some onions......


And did enjoy a healthy Veggie Melt.

With a little tweaking, I think this recipe could be a real winner. The ultimate? I think that should be determined by a vegetarian.

What changes would you suggest for this veggie burger recipe?

Wednesday, January 5, 2011

HBin5 Christmas Stollen (Island Style)


Ya...It's January. Christmas is done and over with. Although you wouldn't know it by looking around my house. I still have to take down the tree and repack all those decorations...and you know the drill. Not fun. But this bread was fun. It was the HBin5 assignment for December. The Healthy Bread in 5 Minutes a Day bread group is hosted by Michelle over at Big Black Dogs

 
I did make it before Christmas but just didn't get around to posting it. With all the changes I made, I think this would also be a great bread for Easter (whenever that occurs this year..is it early? late?). Anyway...what was I going to say? Man, it's been a long day. O'well...neeeeeeeext....

I can not post the recipe but if you have the book Healthy Bread in 5 Minutes a Day, you'll find the original recipe on page 279. I will tell you what I changed.....

- As is my custom...I halved the whole wheat flour and replaced it with all purpose, unbleached flour.
- I used the marzipan and not the almond paste (it was an either or thing in the recipe).
- Instead of brandy, I used coconut rum and orange liquor (my favorite is Patron Citronge)
- Instead of candied and dried cherries and such, I used a tropical fruit blend (apricot, pineapple, mango, ginger, etc etc.)
- I soaked the dried fruit in coconut rum over night.
- I then replaced some of the water in the recipe with said soaking coconut rum. I didn't measure the amount of rum used for soaking....I just made sure the fruit was covered. I then measured the rum after soaking and added water to equal the required 2 cups.

Once the dough was ready for use...I rolled it out as required and sprinkled in the marzipan.


You know....if you make a full batch of this dough, it makes three 1.5 lb loaves. The recipe calls for 1/2 cup of marzipan or almond paste. I wonder....are you suppose to divide that into thirds? or use 1/2 cup per loaf? Cuz it was such a small amount that one could hardly tell it was there.

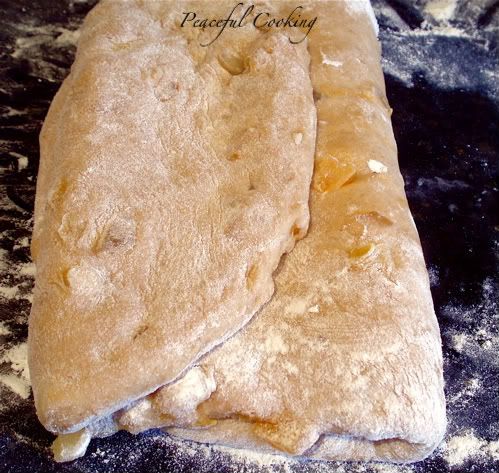
Anyway...I then folded the dough sorta like an "S" shape


Allowed it to rest and then bake until golden brown


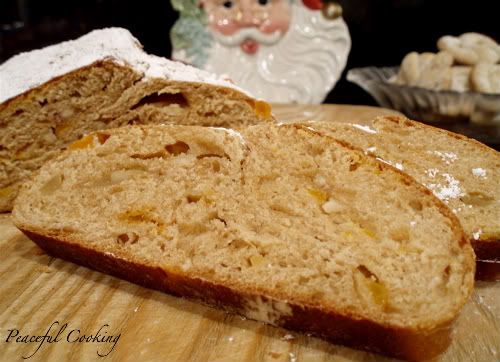
Just look at all those morsels of coconut rum soaked tropical fruits!

I then generously dusted my lovely loaf with powdered sugar


And now I remember what I was going to say earlier that I forgot. When I first read about this bread, all I could think about was the ever feared, dreaded....doorstopper tradition that is referred to as Fruit Cake. I wanted to run away, screaming!!! I just couldn't make myself bake anything that remotely resembled Fruit Cake! That is why I made the changes that I did.

And it was a huge hit!!! You could smell the coconut rum as the bread entered your mouth. The fruit was soft and edible. The bread was flavorful without being too sweet (even with all that powdered sugar). The dough would've made great muffins if I hadn't burnt the bottoms. Although I did save the tops. I think I'll make a nice bread pudding with them.

Sooo...I think this is the last of my holiday recipes that I'm going to share this year. Thank you for putting up with my tardiness.

The next loaf up for assignment is a bit more healthy...Whole Wheat Flaxseed. It was actually "due" on the first of January...but you know me...

Fashionably late as always

My goal is to have some made up this weekend.

Monday, November 29, 2010

HBin5 Tabbouleh Bread, Kibbeh Burgers and a Winner!


Let's get the exciting news out first! I mean...it's not like it's a good news or bad news kind of thing....it's all good, but I wanna mix things up (I usually announce the winner at the end of a post)...Let me tell ya who won the $30 Willow House Giveaway....

Joanna from Go Ahead and Snicker!!!

Let's give Joanna a big round of applause! Woooo hooooo!!! (whistles, cheers, hurrays)

Send me an email or contact Michele from Willow House directly :) Congrats girlfriend!!!

I also want to thank Michele for allowing me to host such a fun giveaway!

And now for the other half...the food half of this post. I've been a little slow in the bread area of my cooking / baking. I haven't had the time or....energy to really dig into the past couple of assignments. Not that Healthy Bread in 5 Minutes a Day takes much time or energy but between the Pom Wonderful Dinner Party, Cupcake Camp LA and Thanksgiving, all within 3 weeks of each other....I had my hands full. Not that I didn't enjoy every minute of everything I was doing and created some great memories and awesome experiences. But, it just didn't leave much room for venturing into new bread. I mean, I did make some bread for the dinner party and in between...just nothing from the new assignments.

Btw...just in case you're new on the block....HBin5 is an online bread baking braid (group) that I participate in, hosted by Michelle over at Big Black Dogs. If you'd like to check it out and see what it's all about, (and please do, I highly recommend it. We still have a year to go in our baking adventures and you're all invited to join in, anytime) click ------>HERE<-----------


Oh boy...I just realized that this particular bread....Tabbouleh Bread with Parsly, Garlic and Bulgur is from a month ago and I totally missed the assignment from the 15th (not sure if I'll get to that or just begin on the Dec. 1st assignment next)....but either way...better late than never. I have to say, this bread was worth the wait. So glad it was late rather than never. I love the aroma....garlic, onions, and parsley, along with the earthiness of bulgur wheat...YUM! I have to say I was surprised that it didn't brown more. But, hey...with all those flavors, you don't sweat the little things, right?


 This dough made beautiful buns regardless.

I want to take a quick moment to say how useful Facebook can be. You see, this was my first experience with bulgur wheat and I really didn't need that much for the dough (I've got lots left over). I asked my friends on Facebook what I could make with bulgur (besides tabbouleh) and I got a whole slew of wonderful ideas! One of them being to make Kibbeh. Kibbeh? (I asked)....What's Kibbeh? After a shared recipe and a little research, I found that it is a Lebanese dish similar (though not exactly) to meatloaf...only more interesting.  Problem is, I'm not a meatloaf fan (I know, I know...so very unamerican of me). Or a fan of large masses of ground meat in any form. That's when I decided to make the meat recipe into burgers (though I did find out I'm not the first person to think of this). The results were wonderful! Flavorful! Delicious!

I'm not claiming that this recipe is authentic. It seems that Kibbeh recipes vary as much as meatloaf recipes do (with a few common threads)....I did adjust my version a bit to suit my families tastes. (I have to admit that I didn't tell anyone what they were eating until afterward....I hate preconceived taste bud notions). 

Kibbeh Burger
Printable Version

1 lb ground meat (I used 1/2 lb beef and 1/2 lb lamb)
1 cup soaked, drained, bulgur wheat
1/2 cup water
2 cups coarsely chopped onion
1 teaspoon salt
1/2 teaspoon pepper
1/2 teaspoon cumin
1/2 teaspoon allspice
1/4 cup lightly toasted pine nuts
1/4 cup chopped parsley
Cheese of your choice (I used a mediterranean cheese called halloumi)
burger buns

In a food processor, process the onions until finely chopped. Add the meat and 1/2 cup water, salt, pepper, cumin and allspice. Process until smooth. Add the bulgur wheat, parsley and pine nuts....mix briefly. Form into 6 patties and cook as you normally would any other burger.

Meanwhile, I mixed a little mayonnaise with some garlic, green onion and lemon juice to spread on my Tabbouleh Burger Buns, after they were toasted a bit of course


A little cheese, lettuce and tomatoes and you have a filling, tasty, if slightly different, kind of burger.


You see that cheese there? Like I mentioned earlier...it's called halloumi. Its a very mild, almost crumbly, a little dense, kinda soft, not so hard cheese made from a mixture of goats milk and sheeps milk (man....it's all over the cheese spectrum). It's suppose to be great for grilling and frying since it holds up to heat really well. Halloumi can be found in Middle Eastern markets in case you'd like to check it out. I like it...and am thinking it would be great for breading and deep frying instead of mozzarella cheese.

And don't go too far away. I have a couple more giveaways up my sleeve coming your way real soon.

This is my entry into Hearth and Soul Blog Hop this week. I hope you take a moment to hop around and see what everyone's been up to.

hearthandsoulgirlichef


Monday, November 8, 2010

Chocolate Syrup and HBin5 Turkish Pear Coffee Bread


"Pear and coffee in the same bread?!" you ask? Ya, I said the same thing. But it's not like it sounds. I mean....it's not what you think. Well, it's not. (do I sound like a guilty teenager?)

Neither flavor is dominant. It's rather interesting. If I handed you a slice and asked you to taste it, I doubt you could detect what's in it, but you'd like it and you wouldn't even know why.

So, why did I make this bread? Because it was one of the assignments from the online HBin5 Bread Braid that I participate in where we're baking our way through Healthy Bread in Five Minutes a Day.


If it weren't for this group, I don't think I would've felt the need or desire to make this dough at all. But I would've been missing out. There's a texture...moist, soft...and you can almost "feel" that pear grit but not quite. The coffee seems to add almost a nuttiness to it but again, not quite. And it's so pretty with it's little speckles.


Yep....those are actual coffee grounds. From fresh ground coffee beans. They almost look like poppy seeds, don't you think? And can you see the little bits of pear skin? I forget what kind of pear I used....but it's brown and firm. I figured since it was being baked, the firmer variety would be best. Especially since these doughs are almost always on the wet side. But...once you puree a pear, regardless of it's variety....it's pretty wet, so maybe that didn't make much of a difference.

If you're interested in the recipe, it can be found on page 185 in the Healthy Bread in Five Minutes a Day cookbook. It's a fantastic book. I highly recommend it. In the year that I've been messing around with the recipes, I have grown leaps and bounds. Not to mention all the advice and tips from the other members in the group. If this sounds like something you'd like to do...you can always join us. We have another year of baking ahead of us. Head on over to Michelle's blog, BigBlackDogs.net and see what we're all up to.

The bread baked up beautifully. I did forget to create the steam in the oven. Instead of a firm artisan crust, it came out soft. Which is actually fine with me. And I think we were suppose to sprinkle some raw sugar on top, which I totally forgot about until just now. That would've been nice.


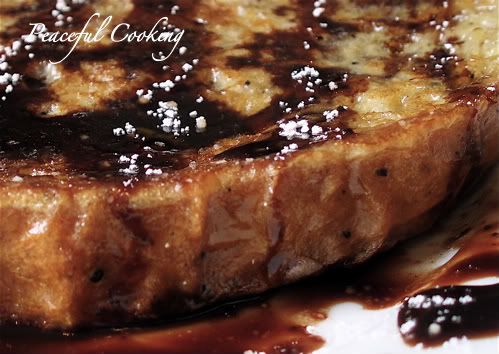
Besides eating it as is, or toasted....I wanted to do something fun. So I made french toast. Instead of using maple syrup....I made chocolate syrup. 

Do you know how easy it is to make chocolate syrup?! OMG!!! And it tastes just like the stuff in those squeezy bottles that you buy at  the grocery stores. I found the recipe on FoodNetwork.com. It's one of Alton Browns recipes...and it totally works! If you have kids...they won't even know that it's not the "other" stuff. I swear. 

The process was so easy and basic, that I didn't even take step by step pictures. There really isn't that much to it.

Chocolate Syrup

1 1/2 cups water
3 cups sugar
1 1/2 cups cocoa powder (dutch processed is recommended)
1 tablespoons vanilla extract
1/4 teaspoon salt
2 tablespoons light corn syrup
Mix the water and sugar together in a small sauce pan, bring to a boil. Whisk in the remaining ingredients....continue whisking until everything has dissolved together. Turn the heat down to low and continue cooking until the sauce has reduced a little and is slightly thickened. Stir occasionally so that the chocolate doesn't burn on the bottom. 

Strain the chocolate and allow to cool to room temperature. (If you have a squeezy bottle, poor it in and fake the kids out!)

And there you have it.....
Rich, dark, homemade chocolate syrup! This recipe makes a lot more than what's shown in this picture. I cut the recipe in half but the actual full fledged recipe makes about 5 cups. 

And you know what else? This makes the most awesome chocolate milk!!!


If I had mini marshmallows, I would've made a nice big mug of hot cocoa but to be honest with you...until today, it hasn't really been all that cold. What I'm really wishing for though....yep, you guessed it....a bottle of Kahlua to spice things up a bit. Now that's chocolate milk at its finest.

This is my submission for The Hearth and Soul Blog Hop this week. Click on the badge below to hope on over and see what else is being shared :)

hearthandsoulgirlichef

Monday, October 25, 2010

Gigi's Creamy Tomato Soup and HBin5 Garlic Baguette


Fall is here! Even in SoCal! Yep....it's been cold (for our standards) and rainy and just plain wonderful. I love weather. Probably because we hardly ever get any other than hot and hotter. When it rains, it lifts my spirits. When we have a good downpour or thunderstorm, I'm as giddy as a school girl (not sure what that means). And I love all the yummy comfort foods that come with cold weather. Roasts, stews, soups, hearty casseroles. It's all good. Top any of that with a homemade loaf of bread and it's heaven! Especially when paired with a fabulous bowl of creamy tomato soup.

As a child, tomato soup was one of my favorites. Even though it was canned....it was still wonderful to my little kid palette. I'd get my bowl of hot soup, grab a stack of saltine crackers and go to town. Dipping some of the crackers and crumbling the others right into the soup. Good stuff, let me tell ya.

Now that I've grown up (for the most part....well, kinda) the canned stuff doesn't appeal to me anymore. I don't remember my mom or grandmother ever making homemade tomato soup, so when I had heard about Karen's recipe....I was all over it. Karen is just one of the nicest, giving ladies I've met....at Bakespace.com.  I've made a few of her recipes and have loved them all. (this is like deja vu....have I said this before?). All us BS'ers (bakespacers) a.k.a. beeps (bakespace peeps....ya, we're all for the corny stuff) know Karen as Gigi. Hmm...not sure where Gigi comes from...but anyways.....this is her recipe and I have to say, it is fabulous! Its quick. It's easy and the flavor is amazing. You take a bite and taste the rotation of ingredients make their way across your palette.... just sit back as your tongue goes through the emotions...ooh, ahh....Wow....YUM!

Karen's Creamy Tomato Soup
Printable Version (I would've given a link to the recipe in Karen's BakeSpace kitchen, but I couldn't find the recipe there...so this is a link to mine. If I find hers, I'll fix it)

Prep time: 10 minutes
Cook time: 50 minutes
Servings: 4


2 tablespoons olive oil
1 medium onion, finely chopped
1 medium leek (white part only) finely chopped (I didn't have any so I added 1/2 yellow bell pepper instead...not that its the same or close, but it worked)
2 cloves of garlic, minced (my addition)
1 medium carrot, peeled and finely chopped
1 medium celery stalk, finely chopped
2 tablespoons fresh basil
2 cups fresh tomatoes, diced or 2 - 16 oz cans diced tomatoes (I used the cans)
3 tablespoons tomato paste
2 tablespoons all purpose flour
2 1/2 cups vegetable stock (I used a homemade stock that I had in the freezer)
1/2 cup light cream (I had Mexican crema on hand, so I used it)
salt and pepper to taste

Heat the oil in a medium to large saucepan and saute the onions, leeks (and / or bell pepper), carrot, and celery until the onion is transparent. Toss in the garlic and saute for another minute

Add the tomatoes and tomato paste and cook, stirring occasionally for about 5 minutes.

Stir in the flour until incorporated and then add the stock and basil. Bring to a boil. Reduce heat and simmer, covered for about 20 minutes. Remove from heat.

In a blender or with an immersion blender, puree the mixture until smooth. If you use a blender, you will need to do this in batches or else you will have tomato soup splattered all over your kitchen.


Return to the pan and bring to a boil again. Reduce heat and simmer for a couple of minutes...3 - 4. Turn off the heat, stir in the cream and season with salt and pepper to taste.


If you happen to have some dough lying around, form it into a baguette (mine always turn out too big and fat, but it's still good)....let it rise its final rise, brush the top with an egg wash, then take the handle of a wooden spoon and make an indent along the top. Take a few cloves of garlic, sliced in half and press them securely into the indent...


I used the Healthy Bread in Five Minutes a day recipe for Whole Wheat Bread, only I halved the wheat flour and subbed in more all purpose flour (as is my typical way of doing it), I used whey left over from cheese making instead of plain water and I added 1/2 teaspoon of barley malt syrup for each cup of flour. I really love this combination. This was the assignment for October 15th for the HBin5 bread braid


Michelle over at BigBlackDogs.net is our fearless leader, mentor and organizer. Without her and the group and all that I've learned this year, there's no way I would've ever attempted anything like this. It's not bakery perfect in looks, but it's wonderful in flavor....


Get a little slice with some butter and serve with your fresh, homemade Creamy Tomato soup that you've garnished with cream, sour cream or yogurt and some fresh basil


Feel the comfort, feel the love and enjoy a grown-up version of a childhood favorite.
This is my submission this week for the Hearth and Soul Blog Hop. Click on the badge below to begin a tour of some fabulous foods.

hearthandsoulgirlichef

Later that week: I loved this bread so much that I made a second loaf. Only this time I remembered a trick I had seen another member of the HBin5 group do...and I thought I'd give it a try. You see, the HBin5 doughs tend to spread....so I built a make-shift retainer along each side of the dough for the second rise to hold it in place:


I wish I had a couple of 2x4's instead...but the dishes worked wonderfully....as you can see from the result below. It still did a bit of spreading in the oven, but not bad


Apparently I didn't press the garlic in deep enough this time cuz they sorta wanted to (and did) pop off but at least it looked a bit more like a baguette :). I'm sorry I don't remember who gave the group this tip (and I know I saw it on your blog)....but if you read this and you know who you are....THANK YOU!!!