Yum Peaceful Cooking: muffins
Showing posts with label muffins. Show all posts

Saturday, March 16, 2013

Pistachio Muffins


I love pistachios. Actually, I love most nuts (this is not a reflection of my personality). Out of all the nuts out there, I wonder why the pistachio has it's own muffin? I mean...you never hear about peanut muffins, or almond muffins...or even cashew muffins. hmmm...interesting. (sorry, I don't have an answer for this. I can't even find anything about the origin of pistachio muffins. And yes, I did Google it).

It wasn't until very recently that I even tasted a pistachio muffin. I mean...within the past few months. You know when you hear about or see a certain food and you have a mental idea of what it's all about? And for some reason it just doesn't mesh with your mental taste buds? That's how it was for me. I thought it was odd that the muffin is green. Mentally, I assumed there were artificial flavorings involved. Some things, I just can't do artificially. Nut extracts are among them. Thank God that's not the case here. Once I tasted them...and discovered that the "green" is for looks only (induced by food dye), and not necessary, and the only nut flavor is from the actual nut itself...and some spices are added in there for a very nicely orchestrated pallet experience...well, my confounded predetermined opinion of pistachio muffins changed. 

I did a lot of searching to find a recipe that matches my culinary style/taste. I found a lot of them that start off with a cake mix. Then there were tons of them that included pistachio pudding mix (THERE it is! The artificial flavoring in full motion right there! Ya, it's a good thing those recipes were not my first experience). Ok, if that's not an issue for you...and you desire a stronger, bolder pistachio flavor...then maybe one of those recipes would be better for you. Anyway, the recipe I found, that inspired me was at ScarlettaBakes. I made a few changes. Going green was one of them. I almost didn't add the dye but since St. Patricks Day is tomorrow....well, I couldn't resist. If you don't want them green...leave the dye out. You might even "feel healthier" eating them in their natural state.

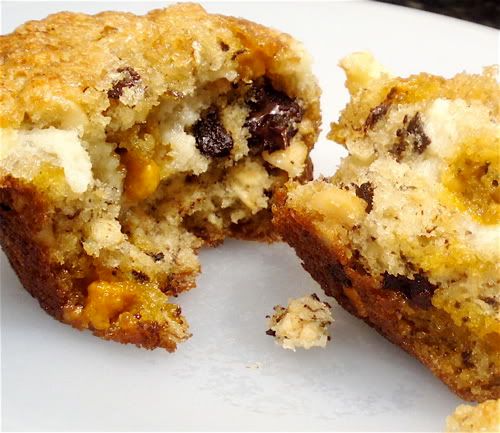
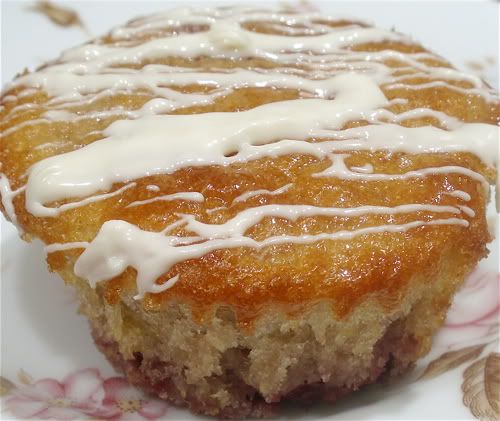
These muffins are nice and moist (is there another word I can use to get that point across?). I love the combination of pistachio, cinnamon and nutmeg. I used roasted pistachios. Raw would be perfectly fine too. Actually, I would've preferred raw but I didn't have any on hand. I think if you were to use the nut in the raw...you'd end up with more of the oils and a more pure pistachio flavor.


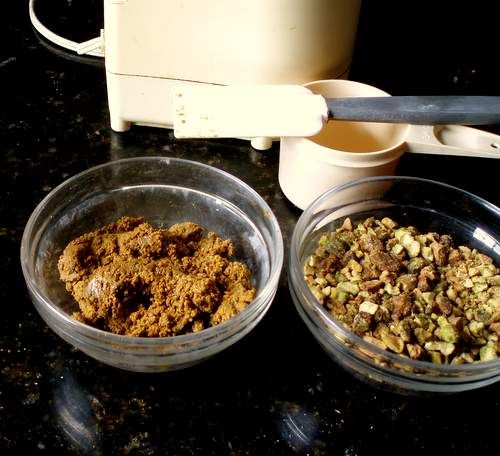
One of the things I like about this recipe is that you take some of the nuts and puree them into a paste...well...a nut butter actually, leaving the rest of the nuts to be roughly chopped. I believe this method infuses more of the natural flavor in the muffin rather then having to rely on....say.....pudding mix?  

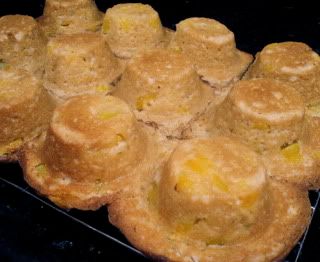
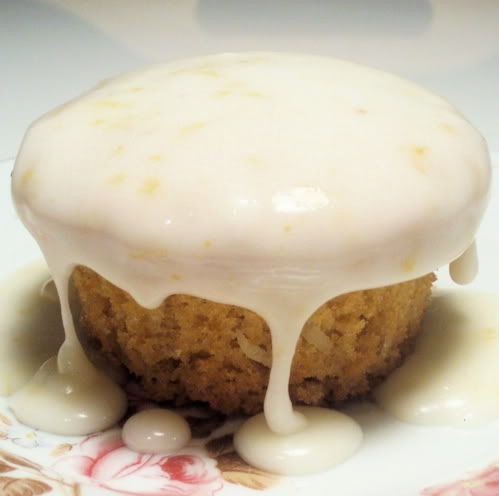
Before I get into the whole recipe spiel, let me share what I did for the muffin cup. I just couldn't put these muffins in a little frou-frou paper cups. Besides...the firm crust, contrasting with the moist insides is one of the muffin qualities that appeals to me. And those store bought paper liners tend to peal off some of it. 

What I did was cut some parchment paper into 5 1/2" squares and then pressed them into the muffin tin with the bottom of a glass


Just a little heads up here....the paper doesn't stay down very well, so make them as you need them...one at a time. 


The weight of the dough will force the paper to the bottom of the cup then you can continue on to the next. 

Yes, it's a tiny bit time consuming, but the results are cool. And...if you find that you don't have any store bought liners on hand....bazinga! Now you can just make your own. And don't be surprised that the round shape is not perfect. You will end up with some grooves and indents and bulges. But hey, that just adds to its rustic appeal. (funny how imperfections are made acceptable..and oftentimes desirable just by calling them rustic. OMG...I AM RUSTIC!! HA! Oh wait...never mind. That just makes me sound old. Really, really old).

Somebody stop me now. 


Pistachio Muffins
Makes 24 standard sized muffins

2 cups white sugar
1 cup butter, room temperature
2 large eggs
3 cups all-purpose flour
1 tsp baking soda
2 tsp baking powder
1/2 tsp salt
1 tsp cinnamon
1/4 tsp nutmeg
1 cup buttermilk
3/4 cup pistachios, roughly chopped (more if you want to sprinkle some on top of the muffins)
3/4 cup pistachios, pureed (instructions below)
1 tsp vanilla extract
Green food coloring (optional)

Preheat your oven to 375' F
Line 24 standard sized muffin cups

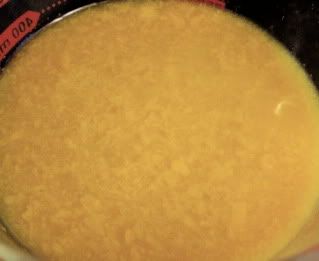
In a food processor, process 3/4 cup of pistachios in 30 second increments until pureed, scraping down the sides as needed. This should only take 3 or 4 increments.

In a large bowl, cream together the butter and sugar. While the mixer is still running, add the eggs one at a time then add in the vanilla extract and green food coloring, if desired. I used a few squirts of the gel kind, eyeballing it until I liked the shade. Beat until just combined. Set aside.

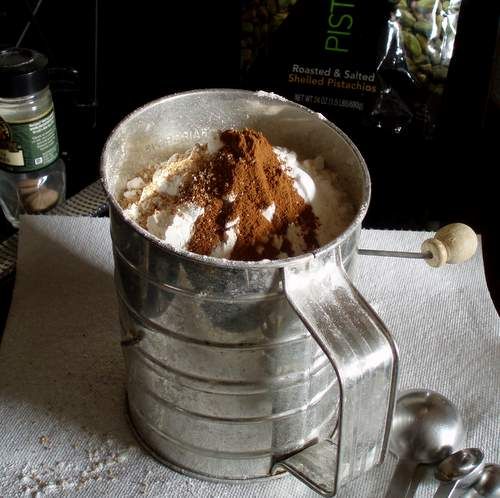
Sift together the flour, baking soda, baking powder, salt, cinnamon and nutmeg. 


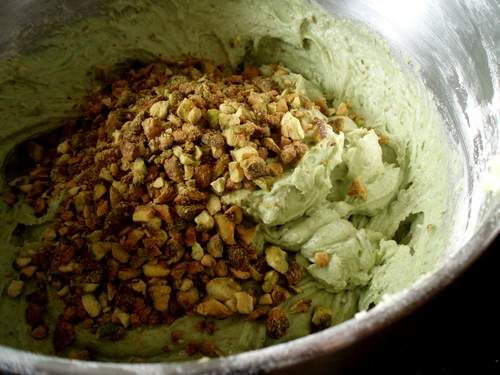
With the mixer on low, add the sifted ingredients to the creamed butter, alternating with the buttermilk. Beat until just incorporated. Beat in the pureed pistachio nuts. Fold in the chopped nuts.


Fill each muffin cup with the batter. I used an ice cream scoop for uniformity. If you have any left over pistachios, give them a rough chop and sprinkle them over the muffins.


Bake for 20 - 23 minutes or until a toothpick inserted in the middle comes out clean. 


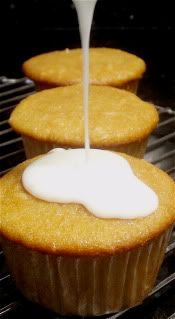
Allow to cool slightly before enjoying

Happy St. Patrick's Day! 


Saturday, March 9, 2013

English Muffins


I post a rather wide variety of recipes here on Peaceful Cooking. It started out with recipes I was familiar with and made often. But as my interests grew....so did my range. Looking back, I can see how I've grown and changed in my cooking styles and food desires. Often times I post recipes that I've tried for the first time. Such as these English Muffins. Just because I post a recipe, doesn't mean I'm an expert at it. Far from it. It just means I've conquered a challenge. An inner challenge. I figure if I show that I can do it...someone out there with inner doubts will see that they can do it too.

With all that said, I feel like I've crossed something off my 'Bucket List' by making English Muffins. It's something I've been wanting to try for a very long time. What held me back was the lack of 3" ring molds to cook them in. Sure, I could've bought them online and spent more money in shipping than the actual product but that doesn't work for me. Someone had told me to use tuna cans with the bottoms and tops removed. My can opener couldn't remove the bottoms because of the rounded edge. Then a Bakespace.com buddy told me that the pineapple cans still have the old style bottoms that work with can openers. YAY!

Just to give you a visual of how the cans are different....


Anyways...with that dilemma solved...I was ready to roll. I used Alton Brown's English Muffins recipe. It's simple enough. And if you've watched his show about how to make them...well, it just makes one even more comfortable baking them. I know I watched that episode once. I just can't remember. I do wish that I had an electric griddle to maintain the temperature. And I wish I knew how big or small a #20 ice cream scoop is. But I'm getting ahead of myself. Let's get this recipe rolling.

English Muffins
Printable Version
Makes 8-10 muffins

1/2 cup non-fat powdered milk
1 TB sugar
1 tsp salt, divided
1 TB shortening
1 cup hot water
2 1/4 tsp yeast (or one packette)
1/8 tsp sugar
1/3 cup water, luke warm (about 110')
2 cups all purpose flour, sifted
Cooking spray

In a large bowl, combine the powdered milk, 1 TB sugar, 1/2 tsp salt, shortening and hot water. Stir until the salt and sugar are dissolved. Set aside to cool.

In a small bowl, combine the yeast, 1/8 tsp sugar and 1/3 cup of water. Stir to combine and let rest until the yeast has dissolved.

Add the yeast to the dry milk mixture. Add in the sifted flour and beat thoroughly with a wooden spoon. Cover and let rest for 30 minutes.

If you're using an electric griddle, preheat it to 300' F. If you're using a skillet on  the stove like I did, you'll want the skillet on a medium to low setting.

Add the remaining 1/2 tsp salt to the dough and beat thoroughly.

Place your metal ring molds on the griddle or in your skillet. Spray with cooking spray


Using a #20 ice cream scoop, place 2 scoops into each ring.

Note: My ice cream scoop isn't numbered. It had been my mother in-laws so who knows how old it is. In my case, I only needed to use one scoop. (I found that out the hard way. I'll share that embarrassment with you later.)

Cover the rings with a lid or if you're using a griddle, place a cookie sheet on top of the rings and cook for 5 or 6 minutes.


Remove the lid and flip the rings using tongs.

Note: When flipping the rings over to cook the other side of the muffin...have the tongs on the top and bottom of the ring, not the sides. This will hold the dough inside the ring and prevent a moment of stress as the dough tries to fall out of the ring.

Cover with the lid and cook for another 5 - 6 minutes, or until golden brown.


Place the muffins on a cooling rack, remove the rings and allow to cool.


With a fork, split each muffin then peak inside and check out the success....

NOOKS AND CRANNIES!! 


Oh m'gosh! I actually made real English Muffins. And they were good! They were especially good toasted with peanut butter smeared all over them.

Whats your favorite way to eat an English Muffin?

Now for the confession of my stress and embarrassment. My success was on the second try. That means...I totally annihilated the first batch. I might have given up after that, but damn... I had worked so hard to get my ring molds!!

With the first batch, I mistakenly thought (assumed?) #20 was the standard ice cream scoop size. Apparently not. I over filled the rings. Mistake number 1.

I didn't properly convert the 300' griddle temp to the setting on my gas stove. Medium heat (5 or 6 setting) was way too hot. The setting needed to be medium low (setting 3, maybe 4). I burnt the little buggers. Mistake number 2.

Of course I didn't realize they were burning until I went to flip them. I took my tongs, grabbed the sides of the ring and flipped. Sounds easy enough. Until the dough falls out. And you find yourself struggles to get everything back in the ring and in it's proper place, without burning yourself, and all the dough wants to do is be FREE...and ooze out, all over the pan. Mistake number 3.

This is how my first batch turned out. Over sized, burnt and just plain funky. So why did I even bother to continue? I mean...the ring molds couldn't have been the only motivation. They're just pineapple tins, after all. And English muffins can be found and bought at any market.


I'll tell you why....cuz even though I had messed up that first batch in multiple ways, I still had to look inside to see if I was at least on the right track. Was it just going to be gooey dough? Or would 'they' be there.

The ever sought-after nooks and crannies.

So I took my fork and split a deformed, mangled muffin and opened it up....


And there they were...bold and beautiful in the midst of disaster. How could I not start a new batch and seek true success?

Now...I want to try my hand at Sourdough English Muffins. Guess they're back on my Bucket List, in a different format. 

Thursday, December 29, 2011

Whole Wheat Oatmeal Raisin Muffins


Not long ago I was challenged.....to make a "healthy muffin". I thought about it for a minute. Asked..."you mean, as in...good for you? Whole wheat? Applesauce? Low fat? That sort of thing?!" And all the while, wondering...why would I want to do that? Next thing I knew.....I heard myself saying..."sure" (in a small, doubtful voice). When I think of "healthy muffins"....I think of earthy, lacking in flavor...cardboard tasting muffins. Probably because that's what the ones I've had at those coffee shops tasted like. Even the not so healthy ones aren't all that great. I usually end up eating the tops off of them and tossing out the rest. (Is that why I have a muffin top?)

I took up the challenge and got started right away. I looked up several recipes. Came across a few that claimed to be healthy but contained things like corn syrup and white flour. I'm sure there are several recipes out there that are wonderful and perfectly healthy. I just didn't come across them and my attention span was waning.

After some research (watching Good Eats) and making some major alterations to a few recipes combined, I came up with a wonderful recipe. The muffins were moist, light and very flavorful. I did some calculations and found out that each muffin is about 163 cal (most those coffee shop  muffins are over double in cals. (at least)....holy cow!!) and they didn't taste anything like cardboard. You wouldn't even know they're whole wheat AND contain wheat bran. Actually....these beauties taste like those famous Vanishing Oatmeal Cookies. If your News Years resolution this year has anything to do with changing some of your eating habits, this would be perfect. 

Say you're not into raisins? Just add some berries instead (or nothing). Want a little crunch? Add some nuts. I think if you take the basics of this recipe and just swap out the cinnamon and/or raisins...you can make it anything you want.

Whole Wheat Oatmeal Raisin Muffins
Printable Version

1 1/4 cups whole wheat flour, sifted
1 cup quick cooking oats
3/4 cup wheat bran
1/2 cup brown sugar
1 tsp baking powder
1 tsp ground cinnamon
3/4 tsp baking soda
1/4 tsp salt
1/2 cup raisins
1 cup applesauce
1/2 cup fat free Greek yogurt
1 TB vegetable oil
1 TB honey (optional)
1 large egg
1 tsp vanilla
2 TB or so of raw sugar (optional)
Cooking spray

Preheat your oven to 375' F
Spray 12 muffin tins with the cooking spray

In a large bowl, combine the flour, oats, bran, brown sugar, baking powder, cinnamon, baking soda and salt. In a small bowl, combine the applesauce, yogurt, oil, honey, egg and vanilla.

Make a well in the dry ingredients. Add the applesauce mixture to the dry ingredients and stir until just combined. You don't want to over stir or you'll end up with a dense muffin. (These aren't like cupcakes which require lots of beating).

Spoon the mixture into the prepared muffin tins. Sprinkle the tops of each muffin with the raw sugar.

Bake for 18 minutes or until the muffins spring back when touched in the center.

Immediately remove from the tins and let cool a tiny bit before eating.


And there you have it....muffins that are so good you won't believe they're healthy. 

I think I would consider this challenge a victory.

If I don't see you until next year....have a happy, safe and prosperous New Year!

Saturday, December 10, 2011

Berry Medley Muffins


I knooooow! They're doing that weird thing in the middle. But, ya know what? That's what happens when you put yummy gooey goodness inside.

It's all under control. No worries. Except for the fact that I can't decide if these are for breakfast or dessert. (as if that's going to dictate when I eat them!)

Not too long ago I was given a whole little pile of coupons for free Duncan Hines and Comstock-Wilderness Fruit Filling stuffs as part of the Foodbuzz Tastemakers program. Perfect timing with the holidays coming up. A girlfriend of mine found cans of Comstock Fruit Filling....Limited Edition Berry Medley. Limited Edition? I've never experienced limited edition food.....kinda makes ya feel a little special or something.

Limited Edition.

Why limited? Why not always? Are they testing the market....to see how much we like the combination of Strawberries, Raspberries and Blueberries? Come on....no test needed guys. It's wonderful! Let's remove the "limited" and make it a permanent "New" Edition to the Comstock family line. Seriously.....out of all the pie fillings I've tried, this is my favorite. There's something about those particular berries that work so well together.


Although...I didn't use mine in a pie. You see, after my little Duncan Hines shopping spree (you should see my cupboard!!! I've got some fun things in there to play with), I grabbed the box of 100% Whole Grain Blueberry Streusel Muffin Mix and the can of Limited Edition Berry Medley and went to work on a combination of my own.


Berry Medley Muffins
Printable Version

1 box of Duncan Hines 100% Whole Grain Blueberry Streusel Muffin Mix
2 eggs
1/2 cup water
1/4 cup vegetable oil

Filling:
1/2 can Berry Medley, Comstock Pie Filling & Topping
4 oz cream cheese, room temperature
1 1/2 tablespoons of a beaten egg
1/3 cup sugar
1/4 teaspoon vanilla extract

Preheat the oven to 375' F. Line 12 muffin tins with cupcake liners. 

For the filling, combine the cream cheese, 1 1/2 TB egg, sugar and vanilla. Mix with a spoon until mostly smooth. Lumps will happen. But if you use a mixer, all the filling will end up stuck on the beaters. Set the filling aside, but do not chill, while we get the muffins going.

Follow the instructions on the back of the box. Easy stuff really...combine the stuff in the box with the eggs, water and oil....but being careful not to over stir. Lumps.....no worries. Rinse the can of blueberries that came in the box with the muffin mix and fold them into the batter.

Now for the fun part. Not the "funnest" part....but just fun. (the funnest part comes at the end when you get to eat them!)

Fill each muffin cup about 1/2 full with the batter, reserving the remainder of the batter. Then put a dollop (about a tablespoon) of pie filling in the middle


Now get that filling that we set aside earlier and put a dollop on top of the berries.


I think its about a tablespoons worth as well. Just eyeball it as you try to evenly divide the filling amongst all 12 muffins.

Get the remainder of the batter and evenly divide it between the muffins to cover up the filling. If it's not perfect....don't stress. It'll all be fine in the end. I had a few that weren't completely covered with batter. Once you have distributed the remainder of the batter, top with the streusel that's provided in the box of muffin mix.


Place in the oven and bake for about 20 - 23 minutes. Or until the tops are golden brown and the crumb mix is lightly brown. You can't do the toothpick test....the inside is just too darned gooey.

Gee, darn.

Let it cool for about 5 - 10 minutes


But wait!!!

You need a fork! Trust me on this one. This is one muffin you can not eat without some sort of utensil


You know what happens when you take a photo like that? It ends up in your mouth. So then you take another photo, just in case...different angle and pose.....and poof! That one ends up in your mouth. After a few more shots......


Ya...thats what happens. True story.

Friday, May 14, 2010

Triple Threat Banana Cream Muffin


Not another MUFFIN!!!!!

I don't know what it is....I just can't seem to get muffins out of my system. And I still have one more muffin in my head that I want to try. (just giving you fair warning that you will have to suffer through yet another muffin post in the near future)

This started out as a simple Banana Scotchie Muffin recipe that was shared with me over on FaceBook. The recipe originally came from the Great American Cookbook.

Do you know what happens when you make muffins at night, after dinner?

They become something for dessert rather than breakfast. That's the only explanation I can come up with.

Chocolate....peanuts....butterscotch morsels....and the same cream filling that I used in the Strawberries and Cream Muffins, were all added. I dunno....I couldn't stop myself. I kept seeing stuff in the cupboard that I wanted to add. I came to my senses when I saw two different kinds of chocolate and the add-ins out weighed the flour and oats.

So I put the white chocolate chips away.

How did they turn out? mmmm.....goood. Crumbly and moist at the same time (probably cuz by the time I mixed everything, there wasn't much left to hold it all together). They are sweet but only in bursts....the oatmeal does a great job of balancing that out. And this muffin really wants to be washed down with an ice cold glass of milk.

Triple Threat Banana Cream Muffin
Printable Version

Cream Filling:
4 oz. cream cheese
1 1/2 tablespoons from a beaten egg
1/3 cup sugar
1/4 tsp vanilla extract

Muffin:
1 cup flour
1 cup oats (I used old fashioned Quaker oatmeal)
1 tsp baking powder
1 tsp baking soda
1/2 tsp salt
1/2 cup sugar
1 ripe banana
1 egg (plus the rest of the egg from the filling)
1/4 cup buttermilk
1/4 cup melted butter
1 tsp vanilla extract
3 oz semi sweet chocolate chunks
3 oz chopped peanuts
3 oz butterscotch chips
Raw sugar (or regular sugar if that's all you have. Or no sugar if you don't want to)

Preheat your oven to 400' F. Spray 12 nonstick muffin tins with cooking spray.

Melt the butter and set aside to cool.

Combine the filling ingredients in a small bowl and set aside.

In a large bowl, combine the flour, oats, baking soda, baking powder, salt and sugar.

In another bowl mash up your banana and mix in the egg (don't forget the left over egg from the filling), buttermilk, melted butter (that has cooled but not hardened again...that would just be dumb) and the vanilla extract.

Add the flour mixture to the banana mess mixture and gently stir, but not too much. Dense muffins are no fun.

Fold in the chocolate, peanuts and butterscotch.

Fill each muffin tin halfway (there will be some batter left...if not, take it out and start over). Scoop a tablespoon'ish amount of filling in each cup and top with a tablespoon'ish amount of the remain batter.

Sprinkle the raw sugar over each muffin (for that nice sweet crispy texture)


Bake for about 12 - 15 minutes


Do you see that cream cheese filling making it's way out? (how could  you not, I know...but I just had to mention it). Good stuff, let me tell you.

If you want to lie to yourself justify this as a good breakfast, keep in mind you have the following:

Antioxidants from the semi-sweet chocolate
Fiber from the oats and a ton of other nutrients
30 essential nutrients and phytonutrients from the peanuts
Dairy from the cream cheese
Potassium from the banana, plus an abundance of other viamins and minerals that provide a natural source of energy.
Choline, protein and the right kind of fat from eggs. Choline helps to regulate the nervous sytem, cardiovascular system and the brain. (and we all know that the brain of a foodie needs regulating)

Sorry...I couldn't really find any health benefits for the butterscotch. We'll consider this ingredient a splurge. Or something good for your morale.

What ever your reason for eating this muffin is, enjoy!

Sunday, May 9, 2010

Strawberries and Cream Muffins


Let me start off by saying Happy Mother's Day to you 
(or your mom...if you're not a mom)

I have been on a huge muffin kick lately. It all started with the Mango Coffecake that I put into cupcake tins, and wasn't sure whether to call them cupcakes or muffins. I think now I've decided that they are indeed a muffin. But they're still labeled Mango Cupcake.

Then I came across the lovely Lemon Raspberry Muffin that I cranked up with some melted white chocolate drizzled over the raspberry glaze soaked muffin.

And most recently were the moist and tasty Peaches and Cream Muffins that grew into an enchanted forrest, as they tried to emulate a mushroom patch. (Guess that's what happens when you fill the tins to overflowing.)

I have seriously enjoyed each of these muffins. They are all fantastic in there various flavors. I think before this little muffin frenzy of mine, my favorite go to muffin was the good ole Blueberry Muffin.  Just your basic standard muffin, nothing fancy. I had never considered anything else really.

Until I discovered how fun it is to play with your muffins. (we'll blame it all on the Mango Cupcakes).

The other day I was poking around in the world of blogs when I came across these gorgeous Strawberries and Cream Muffins at Janes Sweets. It was love at first site. So of course I printed the recipe and tagged the post. Then I read the instructions. With every intent of changing / altering something to make it my own. Some way of tweaking it. You know what I mean, right?

I couldn't change a thing. Pure perfection. At one point I was going to add a little balsamic vinegar to the strawberries to enhance the flavor. I pulled the jar out of the cupboard and then instantly put it back. The strawberries were begging to remain pure.....so I had mercy on them and let them be.

And I'm glad I did. I'm glad I didn't tamper with this recipe. I'm glad I left well enough alone and did as instructed.

Because these Strawberries and Cream Muffins are the....

Princess of all muffins.

(The title of Queen is reserved for cakes. Don't ask me why.....thats just the logic thats running through my head right now. And muffins are very princessy, don't you think? In a very cute, tea-party, dress-up and indulge sort of way. Besides, when they grow up and become cakes, then they can be queen.)

Well let me tell you....they are moist, delicious and just plain fantastic. When you bite into that sugar and strawberry crusted top and then find the surprise in the middle.....the cream cheese smothered berries.....not only do your taste buds sing....but you find yourself doing that little happy dance that can only be induced by food that gives you pure pleasure.

They are that good!

Please don't let the several steps or lengthy instructions send you off. All the steps are easy....and the extra couple of steps to get to muffin bliss is soooo worth it!

Strawberries and Cream Muffins
Printable Version

Filling: (yep...we're going to start with the filling)
4 oz cream cheese, room temperature
1 1/2 tablespoons of egg. (we'll talk about this in a minute)
1/3 cup sugar
1/4 teaspoon vanilla extract

Muffin:
1/2 cup butter
1 1/2 teaspoons vanilla extract
1/8 teaspoon almond extract
1 cup milk
2 eggs, lightly beaten
2 cups all purpose flour
3/4 cup sugar (plus extra for sprinkling on the tops)
2 1/2 teaspoons baking powder
1/2 teaspoon salt
1 cup fresh strawberries, chopped into very small pieces

Preheat the oven to 400'F
Line 12 muffin tins with paper liners

Ok...lets talk about that 1 1/2 tablespoons of egg. You're going to get an egg and beat it. Now don't try and scoop out a tablespoon of egg with your measuring spoon.....cuz the egg will just sorta slide out of the spoon. You gotta scoop the egg into the measuring spoon with another spoon. Be careful not to let any spill slide over the edge...cuz once it starts....the rest follow and you'll end up with an empty spoon again. (egg tends to act like sheep....where one goes, the rest will follow).

Filling:
In a small bowl, combine the cream cheese, 1 1/2 tablespoon of egg, sugar and vanilla extract. Mix with a spoon until its pretty smooth. Don't worry about the little lumps. Set aside (do not chill)

Muffin:
Over low heat, melt the butter. Add the vanilla and almond extracts and the milk. Stir to combine. Let the mixture cool a bit (actually the cold milk cooled my mixture pretty instantly.) Then whisk the eggs in.

In a large bowl, whisk together the flour, sugar, baking powder and salt. Pour the butter mixture into the dry ingredients and blend until just combined. Over blending will create dense / flat muffins. Lumps and flour streaks are acceptable and expected.

Fill each muffin cup, barely 1/2 full with muffin batter. Sprinkle a little bit of the chopped strawberries in each cup. Top the strawberries with a dollop of the cream cheese filling.


Add more muffin mix (about 1 - 2 tablespoons) to each cup.

Take a few more strawberries and sprinkle them over the tops of each muffin....gently pushing them in a bit.


Sprinkle a generous amount of sugar on top to create that nice crunch.

(I always make such a mess when it comes to sprinkling sugar. Is there anyone else out there who's as messy of a cook as I am?)

Bake for about 15-18 minutes...until golden brown and an inserted toothpick comes out almost clean (that cream cheese and the strawberries might get stuck to the toothpick...doesn't mean it's not done).

Let cool for a few minutes before carefully removing the muffins.


I hope this is normal....and I kinda think it is, considering the filling...but as my little babies cooled, the middles sank. Which actually looks adorable to me.....


But maybe I'm a bit partial....I mean, love is blind, right? 

Wednesday, May 5, 2010

Peaches and Cream Muffins and a Blooper


Ya I know...I'm going through a muffin obsession right now.

Maybe I'm relating to them a little too much.....

I like to think I'm just enjoying the until now, untapped, unknown (to me) versatility of the majestic muffin.

Last week, one of the gals I met on my fan page over in Facebook told me about a couple of her favorite muffin recipes. And she said I could blog about her muffins. Thank you Char! You're a doll!

This recipe is a version of her Blueberry Cream Muffin recipe, which she adapted from a recipe she found on Allrecipes.

Blueberries weren't on sale so I decided to use some canned peaches and then added some cinnamon. That's basically all I did differently. Oh...and I doubled the vanilla :)

I also had some bloopers. Stay tuned...I'll share them at the end of this post (just like how they do in the movies at the end)

Peaches and Cream Muffins (in this case, the cream is sour cream)

Printable Version: Peaches and Cream Muffins

4 cups flour
1 1/2 cups sugar
1 1/2 cups brown sugar
1 tsp salt
1 tsp baking soda
1/4 teaspoon cinnamon
4 eggs. beaten
1 cup oil
2 teaspoons vanilla extract
2 cups sour cream
2 - 15 oz cans of peaches, drained and diced

Preheat the oven to 375' and prepare 18 - 24 muffin tins

Combine the flour, sugars, salt, baking soda and cinnamon in a large bowl. In another large bowl combine the eggs, oil and vanilla extract.

Stir your dry ingredients into the egg mixture, alternately with the sour cream. Gently fold in the peaches. Don't over stir!

Scoop batter into the prepared tins and bake for about 20 - 25 minutes or until a toothpick comes out clean when poked in the middle of a muffin.

Let cool for about 5 minutes before removing from the tins.

If desired, top the muffins with a cinnamon sugar mixture prior to baking. If you forget (like I did for the second batch cuz I was so hung up on my blooper) then sprinkle the tops as soon as they come out of the oven. Or you can top them with a streusel prior to cooking, as Char recommended.

A nice gentle flavor, sweet, and very moist! A lovely recipe with great results. If I were to change anything, other than the fruit (cuz thats so easy to do)....I might add a little baking powder for a higher rise.

Just to warn you...I think I have about 2 more recipes I want to explore :)

Now for the bloopers.

Let me explain myself first. My desire was to make jumbo muffins. So I really really filled up those muffin tins. And well....


I ended up with one great big huge muffin top! (I swear they were mocking me!!!) I had to cut them in order to separate them. Then, when I tried to remove them? Well...the tops wanted to come off without the muffin (kinda wish my muffin top would do that!!!!!!)


Thats when I decided a different approach was needed. The old, cover and flip


Then flip again so I wouldn't end up with cooling rack grooves embedded in my muffins.

And well....in the end I had this....


The enchanted forrest of peaches and cream mushroom muffins. (I almost expect a smurf to appear).

I have to say though...that top, which was sprinkled with cinnamon sugar was the best part! All nice and crunchy on the edges and everything. Ya baby!

Saturday, April 24, 2010

Lemon Raspberry Muffins Cranked Up a Notch


The other night I was informed that my kitchen skills would not be required due to outside influences.

The Lakers were scheduled to play and Sir Sportsalot wanted a particular dish from a particular eatery.

And what was the first thing that went through my mind?

"Not cook tonight? What on earth will I do? I'm going to be so bored!!"

Next thought:

"Ooooooh....what yummy thing should I bake to bring with me to work the next day!".

I asked a gal at work what I should make (I needed inspiration)....she immediately said "something chocolate..."

So I went on a quick hunt and came up with a few choices....one of them being Lemon-Raspberry Muffins. A lovely recipe that I had starred and tagged back in September from Debs blog, Kahakai Kitchen. Turns out it's a Nigella Lawson recipe....can't go wrong there. After some deep thought and consideration, the muffins beat out the other recipe I had picked out (which did included chocolate....shocking, I know!!).

Off to the store I went to make a few purchases...raspberries for one. And to my utter disbelief, the store didn't have fresh raspberries!! Seriously? (Vons....your store on Victory and Tampa kinda sucks! Just thought someone should know.)

I was forced to use frozen raspberries (even so, there were only 2 bags to choose from). I also picked up some Cran-Raspberry Juice cuz I wanted a light glaze for the muffins.

Then as I was walking down the baking aisle, I noticed all those bags of chocolate chips and picked up some (just in case I needed to make cookies in the near future. I hate it when we're out of basic stuff like...chocolate chips!) when suddenly the bag of white chocolate jumped out right in front of my eyes! You see, deep inside I was feeling, I dunno....not "right" because I wasn't making something "chocolate" as requested. The white chocolate became the answer and the soother of my inner self, (which, according to a certain coffee commercial, "speaks french").

Now I'm all excited and ready to go!

Lemon Raspberry Muffins:
Printable Version
1/4 cup butter
1 1/3 cups a.p. flour
2 teaspoons baking powder
1/2 teaspoon baking soda
1/4 teaspoon salt
1/2 cup sugar
Juice and Zest from 1 lemon
about 1/2 cup milk
1 large egg
1 teaspoon vanilla
5 oz fresh raspberries 12 oz frozen raspberries, defrosted & drained

Glaze:
1/4 cup cran-raspberry juice
1/3 cup powdered sugar

4 oz white chocolate

Preheat your oven to 400'F. Line 12 muffin tins with 12 paper baking cups.


Stir together the dry ingredients and lemon zest


Love that aroma of fresh lemon! 

In a measuring cup, pour in the lemon juice. Add enough milk to the lemon juice to measure just under 1 cup. Beat in the egg, melted butter and vanilla.

Pour the wet ingredients into the dry ingredients and stir just to combine, try not to over stir. Fold in the raspberries carefully, especially if you're using defrosted berries. (which reminds me...you can really use any berry you want in this recipe.)

Divide the batter between the 12 paper lined muffin cups


Bake for about 25 minutes. Leave in the pan to cool a bit for 5 more minutes as the muffins are moist and almost fragile. Then allow them to cool on a rack for another 15 minutes.


Meanwhile combine the juice and powdered sugar, mixing until the sugar has dissolved. Once the muffins are cooled, spread a spoonful of the glaze over each muffin top.

Melt the white chocolate according to package directions and drizzle some over each muffin.


And enjoy your labor of love....the product of your inner soothing....and be thankful the Lakers redirected your cooking focus for a night from a rushed dinner to an enjoyable treat

Monday, April 19, 2010

Mango Cupcakes with Lemon Glaze


I have a question for you all. What makes a cupcake....a cupcake? As opposed to it being a muffin? Is it the denseness? Or is it wether or not it is covered in icing? What if it's sorta in between? Would that make it a cuppin? ooor.......a muffcake? (giggles)

About once a month, the peeps over in the forums at BakeSpace hold an nonofficial "challenge". For the April Challenge we're making Haitian food (there's still time if you'd like to join in the fun. No pressure....just a nice way to stretch your cooking / baking muscles). These cupcakes (?) aren't Haitian....but they were inspired by a Haitian recipe for Mango Coffee Cake. Not that there was anything wrong with the coffee cake recipe but I knew I'd be bringing this dish to work (let's just call it "weight management"). I figured cupcakes would be more user friendly. So I got busy. made a few little changes in the ingredients and let me tell you....moist, subtle flavors (well...except for the glaze...but glaze isn't allowed to be subtle...goes against its calling) and ooooh so yummy!

I have another question for you....do you have a favorite salt shaker? You know the one...holds plenty, great, steady volume when shook, and a removable lid for easy access? I know that in my "ingredient pictures" I always use my salt grinder to pose for the shot but when it comes to baking, where I need exact measurements, I always use my handy dandy Tupperware salt shaker


I've had this thing since my girls were really little....back in the day when all things Tupperware were essential to a young mother. I haven't had a party in over 10 yrs but let me tell you...I earned a heck of a lot of free stuff. I've heard that they discontinued this style of salt and pepper shakers so I know when this one bites the dust....I'm going to be one bummed-out mamma.

Ok ok...back to the...ummm....cupcakes

Ingredients
1/2 cup butter
1 1/2 cups sugar
2 eggs
1 1/2 cups mango pulp (I used frozen pulp)
2 cups all purpose flour
1 1/2 teaspoon baking powder
1 teaspoon baking soda
1/2 teaspoon ground ginger
1/2 teaspoon salt
1/2 cup buttermilk
1 teaspoon vanilla extract
3/4 cup sweetened coconut flakes

Glaze:
2 cups powdered sugar
3 1/2 tablespoons fresh lemon juice
zest from 1 lemon

Preheat the oven to 350' F. Line 18 muffin tins with those cute little paper cupcake liners.

Cream the butter then gradually add the sugar. The recipe said that it would become fluffy.....


After a few minutes of beating....it still wasn't what I would consider "fluffy"....so I gave up.

One at a time, beat in the eggs. Add the mango pulp and....

Oh wait... let me tell you something about my mango pulp. I mentioned in the ingredients that I used frozen pulp. I was so excited when I found this nifty little bag in the freezer section of the middle eastern market (I've also seen them in the mexican market). I figured at least I wouldn't have to figure out how to tell when a mango is ripe...and how best to "pulp" it...ya know? BINGO!! I bought it. So the night before the planned baking, I took the bag out of my freeze and stuck it in the fridge. I was so proud of myself for even thinking of doing that. I usual forget those kinds of minor details. Anyways....the next day as I was gathering the ingredients, I pulled out the now not-frozen mango pulp....errr...mango liquid? Ya....I found myself with a bag of liquid. Ooookay....lets see where this leaves me....

So, add the mango pulp to the bowl and beat well...


Yep....that's really runny. At this point I needed to decide....omit the liquid (buttermilk in this case)...or forge ahead and let come what may?

What the heck...let's just do it. I mean it calls for a whole 2 cups of flour, right? Thats quit a bit...I hope it's enough.

Now, sift together the dry ingredients and alternately add them and the milk to the runny mango mess. Add the vanilla, blend. Stir in the coconut and let's see how the texture is:


Hey! Not bad. Nice and thick without being too thick. Whew! That was close....I thought I might have to start over and I really didn't want to do that.

Besides, I basically know nothing about mangos....so I'd probably end up with a mango that wasn't ripe. And that wouldn't taste very good, now would it? And I'd end up with mango chunks instead of pulp, I'm sure.

Fill your muffin cups about 3/4 full (they don't rise as much so you don't have to worry about "muffin tops".....unlike some of us.

Bake for about 25 minutes or until an inserted toothpick comes out clean.

Allow to cool completely


Mix together the powdered sugar, lemon juice and zest and begin the fun job of glazing these gorgeous oh so promising babies.


Printable Version: Mango Cupcakes with Lemon Glaze


I am submitting this recipe to Regional Recipes, hosted by Joanne at Eats Well With Others. Regional Recipes is "a blogging event that celebrates food from all over the world!" Her deadline for the Haitian recipes is April 30th, 2010.