Showing posts with label BakeSpace. Show all posts
Friday, September 16, 2011
Citrus Chicken
A couple of weeks ago I was hunting for a new chicken recipe. Nothing in particular in mind....just something I hadn't done before. I came across Grilled Citrus Chicken over at Spryte's Place and the freshness of it...zest and juice from lemon, lime and orange....really got my attention. As I read her post, I noticed that Spryte had gotten the recipe from a fellow BakeSpace member...AND she included the link to the forum thread that lead to the sharing of the recipe. I clicked on the link to see if I would remember the conversation...but of course I didn't. It occurred over 2 yrs ago...but it was fun to reminisce.
The good ole days.
Well...I made a couple of changes in the recipe. Not because it "needed" it by any means...but we weren't grilled and I was in the mood for little bite sized chicken. And I was planning on making rice. The original recipe had Dijon mustard in it. Spryte replaced it with soy sauce. I used both. I'm not a fan of thyme...which was in the recipe. I replaced it with sage. I then made a sauce so go over the chicken and rice.
Let's just say....it was fabulous! A new favorite around here for sure! I wish I had made it 2 yrs ago when it was first shared with all us lucky BakeSpace peeps.
I have to warn ya here...I didn't jot down exact time frames on cooking this dish...you just have to kinda keep and eye on it and go with your gut.
Citrus Chicken
Printable Version
6 boneless skinless chicken thighs or a couple of boneless skinless chicken breasts (I used the prepackaged chicken thighs from Costco) cut into chunks
1 TB each lemon, lime and orange zest
1 TB each lemon, lime and orange juice
2 shallot, chopped
2 garlic cloves minced
1 TB Dijon mustard
1 TB soy sauce
1/3 cup vegetable oil plus extra for the pan
1 1/2 TB honey
2 TB fresh sage, finely chopped
Salt and Pepper to taste
1/4 cup dry vermouth
1 1/2 cups chicken broth
In a sealable baggy, combine the citrus zests and juice along with the shallots, garlic, Dijon, soy sauce, veggie oil, honey, sage, salt and pepper. Squish around to combine. Add in the chicken. Place in the fridge and allow to marinate for a few hours. I wouldn't do it overnight though. Citrus is a fantastic tenderizer but if left too long, it starts to break down the meat. I've even heard that it will begin to "cook" fish. I don't do fish (due to allergies) so I haven't investigated how and why this happens. Or how technically true it is.....anyways....2 - 6 hours is fine.
Add enough oil in a hot skillet to cover the bottom. Pour everything, chicken and marinade, into the heated skillet.
Cook on medium low, stirring often, until liquid is pretty much cooked down. This is were you have to be careful. If the heat is too high or you cook it too long, you could scorch the marinade residue.
Remove the chicken and set aside
Add the vermouth to the hot skillet and deglaze the pan, stirring up all those crispified bits that might be stuck to the bottom...mmmm....lots of flavor in those babies. Add the chicken broth
Allow to simmer until reduced a bit. Not too much cuz you want enough sauce to pour over the chicken and soak into the rice...ya know? Because once the sauce is done, you add the chicken back into the pan and serve it over some nice fluffy rice
Saturday, August 7, 2010
Almond Butter Pudding Cups and Archway Cookies
Not too sweet. A bit on the rustic side. Easy to make.
And this is my entry for the Archway Cookies "Take a Sweet Bite out of Summer" contest. Anyone can enter...if you're interested, the contest runs through August 15, 2010
It all started a few weeks ago when I won a box of Archway Cookies on BakeSpace.com. I was thrilled!! But I had to do a little research. I had never had an Archway Cookie. I looked in my local markets. Nothing. All my east coast buddies were all talking about their favorite Archway Cookie they grew up on. Did I live on another planet? Wth?! Well, come to find out that Archway Cookies are not sold in California. But they are the sister company to Mother's Cookies...and I grew up on those babies!!!
Not long afterward, I received a HUGE....box full of cookies. A dozen different kinds. All from Archway.
The mission: bake, make, create something...
The wheels start spinning. I have a destination...sorta. Vague. I knew I had to create something with the cookies....but I didn't know what. It's hard to come up with stuff when you don't have a specific guide line. But somehow it happened.
Btw..I wasn't the only one who had copious amounts of cookies sent to them. Several other BakeSpace members won the cookies as well. And they too had to come up with something created with Archway Cookies. We all posted recipes and pictures of our cookie adventures in the BakeSpace Forum: Calling all Cookie Tastemakers | Archway Cookie Giveaway Go check it out and see the amazing stuff these people came up with...I mean, not just desserts but you'll find bbq sauce, meatballs and casseroles too.
I made a few things...but this Almond Butter Pudding Cup is my favorite so that's what I'm sharing with you for now.
Almond Butter Pudding Cups
Printable Version
10 Archway Classic Oatmeal Cookies (one package)
1/4 cup sugar
6 tablespoons melted butter
8 oz melted chocolate
12 paper cupcake liners
1/2 cup sugar
2 tablespoons cornstarch
1/4 teaspoon salt
2 1/2 cups milk
1/2 cup Almond Butter
1 teaspoon vanilla extract
For the cookie cups:
Preheat the oven to 375' F
First, let's get the cups out of the way. Toss your cookies, hmmm...let me rephrase that... Place your cookies in a food processor and pulse and grind until crumbled. Or you can place them in a baggy and beat the crap out of them with your rolling pin until you have the same results.
Let your mood be your guide.
Mix in 1/4 cup sugar until combined. Pour in the melted butter and mix until all the crumbs are moistened. Line 12 muffin cups with cupcake liners. (note: I was going to just spray the pan with cooking spray, but I was afraid I'd crumble the cup trying to remove it.)
Evenly divide the crumbs between the muffin tins and press against the bottom and up the sides to form the cup.
Bake for 5 minutes. Allow to cool for a bit then store in the fridge while you're preparing the rest of the stuff.
Melt the chocolate according to the directions on the package. I just put mine in a bowl over a small sauce pan with a bit of boiling water (a make-shift double boiler) and stir until smooth.
Carefully remove the crust from the pan and spread some chocolate inside the cups.
Return to the fridge and allow the chocolate to set. Oh ya...I dropped an extra dollop of chocolate in the middle of each one. Don't ask me why. I'm sure you'd have done the same thing. Cuz seriously, is there such a thing as "enough" chocolate?
For the pudding:
Ah yes...the pudding. My original plan was to make peanut butter pudding. Which would be great. But when I saw a jar of Almond Butter, Creamy with Sea Salt, at Trader Joes....I knew I had to do it. Trade out the peanut butter for almond butter.
Oooooh yaaaaaaaaa.
Combine 1/2 cup sugar, the cornstarch and salt in a heavy bottomed sauce pan. Gradually stir in the milk. Cook over a medium heat, stirring constantly (and I mean CON STANT LY) until the mixture comes to a boil. Be prepared to stand there for a while. It aint gonna happen quickly. But you don't want to stop that stirring, not even for a few seconds. Lumps and pudding do not go together. Once it begins to boil, reduce the heat to low and cook for 2 minutes, stirring occassionally....but regularly. You don't want the bottom to burn.
Add the almond butter and vanilla and stir to combine. Remove from heat. Place the pan on a cooling rack. Cover the pudding surface with a piece of plastic wrap (thus preventing pudding skin from developing) and cool.
You don't want to fill the cups with warm pudding and melt the chocolate. Once cool, fill each cup. Garnish with chopped roasted almonds
Chill well before serving and store in the fridge.
Monday, June 21, 2010
White Sangria
It's been a while since I've mentioned the Wine Club over at BakeSpace. It's also been a little slow in there lately but things seem to be perking up again. Woooo hoooo!!! For the month of June and July, our wine of choice is Sangria. We will be making, tasting and talking about Sangria for another 6 weeks. We just might even have an online Wine Party in the room which can get rather silly. Clean, fun and silly. It's open to anyone. All you have to do is create a forum account and log in. If you'd like to join us, check it out: June / July Wine - Sangria
Anyway....over the weekend I heard about White Sangria for the first time ever!! So of course I jumped all over it, especially when peach was mentioned. It just sounded so refreshing and cool. The perfect drink for hot summer evenings out by the pool, enjoying the cooling breeze.
Or sitting in a chair by the computer writing about it.
And after 2 glasses....thinking to yourself..... 'holy crap!! this shit is strong!!!' Feeling rather good about your creation.
Now I have to say...this is my first attempt and already I have some alterations in mind, which I'll go over in a minute. But it's really good. And soooo worth playing with.
Oh....and I'm not going to do a printable version of this recipe. It's so simple that you can just copy and paste if you really want to. I'll wait until I have a final version before I make it permanent in my BakeSpace Kitchen. Just saying.
White Sangria
1 bottle of Chenin Blanc
1/2 bottle of Peachello (peach version of Limoncello)
1/4 brandy
2 white peaches, pitted, pealed and cut into 8 segments
3 nectarines, pitted, pealed and cut into 8 segments
1 orange, pealed and each segment cut in half
1 cup Sprite
2/4 cup simple syrup
Combine all ingredients and allow to chill several hours
Now....my changes for next time will be to increase the Sprite or just use some gingerale or club soda. And I think I might cup back on the simple syrup. That might be something I'll add after it's been chilled. Then I'll add it to taste....depending on if I'm in the mood for sweet or not. If I had more Sprite right now I'd definitely add more....it's in need of more fizz but I used up what I had. Although, it's not stopping me from drinking what I've got...and totally loving it. Love the intense peachieness. (is that a word? hmmm..it is now)...and every once in a while I get a nice burst of orange.
But I know it can be better!
If you happen to stop into the Wine Club....you'll see my posts in there under the name "ImStuffed". Let the bartender know that I sent you and she'll be sure to take care of you! Besides, when it comes to virtual wine tasting....all the drinks are on the house! hahahaha
Wednesday, May 26, 2010
Gluten Free...who woulda thunk it?
This isn't my first experience with gluten free bread.
This is:
Huge difference!! Not only in looks, but texture, crumb, flavor and recipe! A girlfriend and I had gotten together to give it a try a few months ago.
It was a lumpy, dense mix with an awful, AWFUL after taste!!!
It was my first experience with gluten free anything in any form. And I was grossed out. Thoroughly.
So when HBin5 had a gluten-free bread dough as the assignment back in April....
I passed. And you can go to Big Black Dog's Gluten Free Bread Braid and see what the rest of the crew did
It was a painful decision. I wanted to participate in everything that the group did but that first loaf...well, no pun intended, but it left a bad taste in my mouth.
Apparently the stars were lined up against me though.
The May Recipe Challenge in BakeSpace was to make something gluten free!
Seriously?
This gluten free stuff just wasn't gonna leave me alone.
So I did what any good blogger / foodie would do. I bit the bullet, gritted my teeth...and forged ahead.
And thank God...a wonderful person in BakeSpace participated in this months challenge who has to eat gluten free, and she really gave us some great tips. I have to say....I learned more from this challenge than I have in any of the other challenges I've participated in over the past couple of years.
I did use the HBin5 Gluten-Free Olive Oil Bread recipe, as assigned in April, with a couple of changes.
1. Instead of brown rice flour, I used white rice flour. Not on purpose, really. I bought the white rice flour a while back...so I decided to use it instead of buying more.
2. I know people who can't eat soy, so in order to avoid soy I used Oat Flour instead.
3. The thought of using SO much cornstarch (which I believe contributed hugely to the nasty flavor of the first bread I made) grated on my conscience and taste-buds. Therefore I used Potato Starch instead.
The dough is extremely lumpy
I was tempted to get in there and smash all those lumps with my fingers....but I refrained.
I let it sit on the counter for 2 hours...and was bummed when there was barely any rise at all. I then put it in the fridge for 24 hours as recommended.
I then divided the dough in half and formed two baguettes. In the BakeSpace Recipe Challenge thread, our gluten-free experienced member said that the dough should be smoothed out before baking. GREAT tip!!! It was kinda like playing with clay. The dough doesn't stretch like wheat dough does....it gets formed and molded with damp hands.
I didn't want to go too crazy with the smoothing out part cuz I didn't want the dough to get soggy.
I let those little guys rise for about 2 hours. Once again, I was bummed that there was very little rise. So with trepidation, I slid them into a hot 450' oven and baked them for 30 minutes. Actually, I think I ended up keeping them in there for 35 minutes cuz they weren't all that dark. I have a feeling that gluten-free bread just doesn't get very brown.
When I removed my baguettes, I was pleasantly surprised with how much they had popped in the oven
And how smooth the crust was....and how nice of a crumb it had. And for the big test....the taste. It barely had a bit of that "gluten-free" aftertaste. With a little butter, it was undetectable.
And made into a little mini smoked mozzarella grilled cheese sandwiches....
It was wonderful!
I'm so glad I went ahead and made this bread. Now I won't be afraid or turned off by the idea of participating the next time HBin5 has a gluten-free assignment. And there will be more. I mean, this bread baking thing will be going on well into 2011! :)
BLOG Note: I added something new to my blog....you see the bar at the bottom? (it can be collapsed by clicking the arrow on the far right side if you don't want to see it). Well....It has some fun little tools. I thought I'd give it a try and see if it turns out to be useful. One of the fun little gadgets is the "chat" option. I'm not sure if anyone will ever be in there at the same time as anyone else....but it would be fun to run into you once in a while...if for nothing else then to just say "Hi". Anyways....let me know what you think of my new "toy". If its a pain, I can easily remove it.
Friday, April 23, 2010
Haitian Chicken Thighs.....I mean Legs
And no. I did not fail anatomy. I swear!
And yes....this is one more Haitian dish that I prepared for the BakeSpace Challenge. And I think this will be the last for this challenge. I may have gone a little overboard. I mean I made 3 dishes....but in my defense, I couldn't make up my mind....and what does a gal do when she can't make up her mind?
She chooses ALL!
In case you haven't seen the other two (and you really should) here's the link to
Mango Muffins with Lemon Glaze (a Haitian Mango Coffee Cake turned Muffin)
&
Haitian Carnitas (inspired by Glazed and Braised Pork and became Carnitas with a Haitian influence)
Oh...and just so ya know....I found the recipe for these very tasty chicken legs --->HERE<---
And if you look really really close...you'll notice that I only changed 1 teenie tiny ingredient in this recipe (unlike the other 2)...out of need! A personal need. A need to stay away from all things thyme as much as I can. Why? Well...I don't like it. So I used savory instead. Which reminds me of thyme (do you pronounce that like "time" or do you include the "H".....?) hmmmm....where was I...Ooooh yes...savory reminds me of a more mild version of thyme.
Without further ado....
Haitian Chicken Legs:
Printable Recipe
Juice from 4 limes
Juice from 2 oranges
1/4 cup vegetable oil
1 teaspoon dried savory (or thyme or 1 tablespoon fresh minced thyme)
1 tablespoon fresh minced rosemary
1 tablespoon brown sugar
4 minced green onions
3 minced garlic cloves
1 1/2 teaspoons ground allspice
1 hot pepper, minced (I didn't want too much heat so I used a red jalapeno...which ended up not being hot enough)
10 chicken legs, or 8 chicken thighs
Salt & Pepper to taste
I have some handy dandy lemon and line squeezers (which are sometimes my hands).....but when it comes to oranges, that requires a whole different thing
I love this thing!!! I found it one day at...hmmm...Sav-On Drugs (way before it became CVS). I don't remember how much it cost. I have a feeling it was under $10..like around $7-ish. Anyways...I've had it for about 15 yrs, it's electrical and it still works great. Why don't they make things to last anymore? I mean....about 5 yrs ago I bought a Black and Decker food processor that barely lasted 3 yrs. Whats up with that?
But look how handy this thing is...
The juice is squeezed, seeded and de-pulped...then ready to pour! All in one shot! (sung in soprano voice) Looooooove iiiiit!
Now...mix all your ingredients together in a nice zip lock bag or non-reactive dish, covered....and mix it all up. Oh wait...you might want to mix up everything except the chicken....theeen add the chicken (it'll be a little easier that way)
Marinate the chicken for at least 3 hours. Over night would be best. I think I did mine for about 6 hours though.
Now I didn't serve this meal with the traditional haitian beans and rice and such...I mean, my family can take only so much at a time when it comes to "new" stuff. Therefore I just had a simple side of white rice and corn.
`
I mean...everything goes with white rice and corn, right? And let me tell you....this was really really tasty! It even got a thumbs up by Sir Sportsalot, who is sometimes not into "new" or "improved" things. So that was a biggy.
I am submitting this recipe to Regional Recipes, hosted by Joanne at Eats Well With Others. Regional Recipes is "a blogging event that celebrates food from all over the world!" Her deadline for the Haitian recipes is April 30th, 2010....just in case you want to play too :)
Wednesday, April 21, 2010
Haitian Carnitas
Haitian Carnitas? Do they even make carnitas in Haiti?
Hell, I dunno. But it sounds intriguing, doesn't it? If they don't, they should. If they do....kudos!
Now I don't cook pork very often. Some cuts are a little pricey. Some cuts are a little ...I dunno....weird? (you will never....eveeeeeeeer see pickled pork feet in my kitchen....just sayin).
When I see pork chops, I think...(I know...this is bad!!!) shake-n-bake.
When I see pork butt, I think.....CARNITAS!!!!
When I was looking for some haitian dishes for the BakeSpace forum challenge, I came across a few that caught my attention. Since I couldn't make up my mind...I went with all of them. This is recipe #2 (there's still one more that I need to post). The first recipe was my Mango Cupcakes with Lemon Glaze. Which was another haitian inspired dish but not truly authentic.
Which brings me back to my Haitian Carnitas. The recipe called for pork loin. I had a pork butt that I wanted to use....and well, that led me to a nice alteration with fantastic results. Flavorful, tender... succulent....and a hint of heat (although you can turn up that heat if you want by added more peppers)
Haitian Carnitas
(Printable Version)
6 lbs pork shoulder (aka butt)
1 large onion, chopped
3 oz chopped shallots
1 cup orange juice
12 oz beer
1/4 teaspoon dried savory or thyme
salt and pepper to taste
1 hot red pepper, minced
1 teaspoon paprika
1 teaspoon cumin
1 - 2 tablespoon creole seasoning
3 garlic cloves, minced
2 or more jalapenos, minced
2 teaspoons chicken bullion
Preheat the oven to 250' F
Combine the savory (or thyme), salt and pepper, cumin, and creole seasoning. Rub the pork with the mixture. Place the pork in a large roasting pan. Add the, shallots, peppers, orange juice, beer and chicken bullion.
Cover and cook for a good 7 hours.
When the meat is done....and falls off the bone
let cool a bit then remove the bone and as much fat as you can. (In case you haven't noticed....this particular cut of pork is full of fat. Hmmm...maybe THATS why they call it "pork butt"), leaving the liquid in the roasting pan.
Heat a good sized skillet with a bit of oil and brown the chunks of meat. Remove the meat and set aside. While this is happening, skim as much fat as you can from the saved liquid that's still in the roasting pan. Heat the liquid and reduce....the more the reduce, the more flavor it will have. Add about 2 cups of the liquid to the skillet where you browned the meat and de-glaze the pan.
Pour liquid over meat and serve.
I couldn't serve carnitas, haitian or otherwise, without pico de gallo, guacamole, rice and a warm tortilla
Let's just say..... TASTE BUD HEAVEN!
I am submitting this recipe to Regional Recipes, hosted by Joanne at Eats Well With Others. Regional Recipes is "a blogging event that celebrates food from all over the world!" Her deadline for the Haitian recipes is April 30th, 2010....so there's still time to play too!
Monday, April 19, 2010
Mango Cupcakes with Lemon Glaze
I have a question for you all. What makes a cupcake....a cupcake? As opposed to it being a muffin? Is it the denseness? Or is it wether or not it is covered in icing? What if it's sorta in between? Would that make it a cuppin? ooor.......a muffcake? (giggles)
About once a month, the peeps over in the forums at BakeSpace hold an nonofficial "challenge". For the April Challenge we're making Haitian food (there's still time if you'd like to join in the fun. No pressure....just a nice way to stretch your cooking / baking muscles). These cupcakes (?) aren't Haitian....but they were inspired by a Haitian recipe for Mango Coffee Cake. Not that there was anything wrong with the coffee cake recipe but I knew I'd be bringing this dish to work (let's just call it "weight management"). I figured cupcakes would be more user friendly. So I got busy. made a few little changes in the ingredients and let me tell you....moist, subtle flavors (well...except for the glaze...but glaze isn't allowed to be subtle...goes against its calling) and ooooh so yummy!
I have another question for you....do you have a favorite salt shaker? You know the one...holds plenty, great, steady volume when shook, and a removable lid for easy access? I know that in my "ingredient pictures" I always use my salt grinder to pose for the shot but when it comes to baking, where I need exact measurements, I always use my handy dandy Tupperware salt shaker
I've had this thing since my girls were really little....back in the day when all things Tupperware were essential to a young mother. I haven't had a party in over 10 yrs but let me tell you...I earned a heck of a lot of free stuff. I've heard that they discontinued this style of salt and pepper shakers so I know when this one bites the dust....I'm going to be one bummed-out mamma.
Ok ok...back to the...ummm....cupcakes
Ingredients
1/2 cup butter
1 1/2 cups sugar
2 eggs
1 1/2 cups mango pulp (I used frozen pulp)
2 cups all purpose flour
1 1/2 teaspoon baking powder
1 teaspoon baking soda
1/2 teaspoon ground ginger
1/2 teaspoon salt
1/2 cup buttermilk
1 teaspoon vanilla extract
3/4 cup sweetened coconut flakes
Glaze:
2 cups powdered sugar
3 1/2 tablespoons fresh lemon juice
zest from 1 lemon
Preheat the oven to 350' F. Line 18 muffin tins with those cute little paper cupcake liners.
Cream the butter then gradually add the sugar. The recipe said that it would become fluffy.....
After a few minutes of beating....it still wasn't what I would consider "fluffy"....so I gave up.
One at a time, beat in the eggs. Add the mango pulp and....
Oh wait... let me tell you something about my mango pulp. I mentioned in the ingredients that I used frozen pulp. I was so excited when I found this nifty little bag in the freezer section of the middle eastern market (I've also seen them in the mexican market). I figured at least I wouldn't have to figure out how to tell when a mango is ripe...and how best to "pulp" it...ya know? BINGO!! I bought it. So the night before the planned baking, I took the bag out of my freeze and stuck it in the fridge. I was so proud of myself for even thinking of doing that. I usual forget those kinds of minor details. Anyways....the next day as I was gathering the ingredients, I pulled out the now not-frozen mango pulp....errr...mango liquid? Ya....I found myself with a bag of liquid. Ooookay....lets see where this leaves me....
So, add the mango pulp to the bowl and beat well...
Yep....that's really runny. At this point I needed to decide....omit the liquid (buttermilk in this case)...or forge ahead and let come what may?
What the heck...let's just do it. I mean it calls for a whole 2 cups of flour, right? Thats quit a bit...I hope it's enough.
Now, sift together the dry ingredients and alternately add them and the milk to the runny mango mess. Add the vanilla, blend. Stir in the coconut and let's see how the texture is:
Hey! Not bad. Nice and thick without being too thick. Whew! That was close....I thought I might have to start over and I really didn't want to do that.
Besides, I basically know nothing about mangos....so I'd probably end up with a mango that wasn't ripe. And that wouldn't taste very good, now would it? And I'd end up with mango chunks instead of pulp, I'm sure.
Fill your muffin cups about 3/4 full (they don't rise as much so you don't have to worry about "muffin tops".....unlike some of us.
Bake for about 25 minutes or until an inserted toothpick comes out clean.
Allow to cool completely
Mix together the powdered sugar, lemon juice and zest and begin the fun job of glazing these gorgeous oh so promising babies.
Printable Version: Mango Cupcakes with Lemon Glaze
I am submitting this recipe to Regional Recipes, hosted by Joanne at Eats Well With Others. Regional Recipes is "a blogging event that celebrates food from all over the world!" Her deadline for the Haitian recipes is April 30th, 2010.
Wednesday, September 30, 2009
California Crepe - International Taste Tour
Here we are again.....BakeSpace beeps pulling off another International Taste Tour (formally known as the Coast To Coast Cook-off). This time we chose Crepes.
Ooooooh man, the diversity. Don't ask what you can do with crepes....ask what you CAN'T do with crepes. Seriously, once you've seen what I did, look at the map at the end of this post and see what everyone else did. Great stuff coming your way!
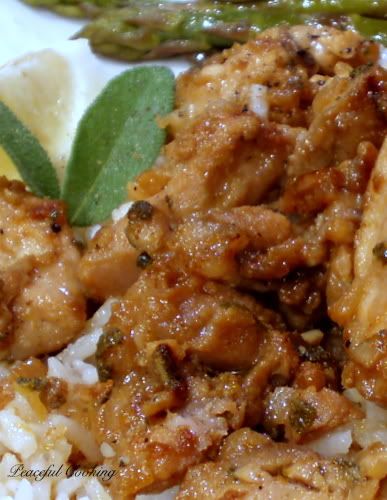
For me...I made a very loosey goosey version that I'll call a California Crepe.
This isn't what I had intended to make when I first started thinking about making my crepes. But it's what I decided to do after visiting a local restaurant for lunch today called Crepe Maker.
OMG...I didn't even know this place existed until today. And what awesome timing!!
So ya.... they have a crepe they make called California Veggie. Only I wanted meat!
Give me meat!!!! You can't have your pudding if you don't eat your meat!
(sorry, Pink Floyd moment)
Anyways....for the actual crepes themselves, I followed Julia Child's recipe.
Did you know that making crepes isn't hard at all??!!! Seriously, I prefer to make crepes over pancakes any day!!! Who would've thunk it?
So, what you need is:
1 cup milk
1 cup water
4 eggs
1/2 tsp salt
2 cups sifted all purpose flour (shit...I totally missed the sifted part, but lets pretend I didn't)
4 Tb melted butter
In a blended (I know, I know...I used a smoothie maker but thats all that was available at the time), combine the milk, water, eggs and salt. Add the flour, then the butter.
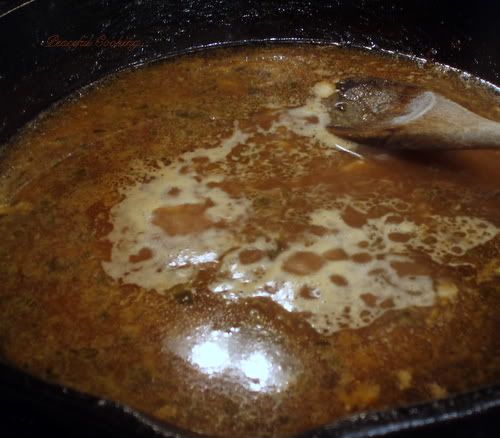
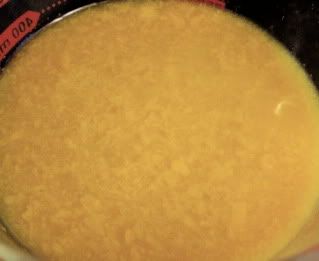
Ok, you might notice that I have brown butter in my little melting pan (top right hand picture). I could say that was planned and who'd know, right? but it wasn't...sigh. I was too busy trying to get the darned blender / smoothie maker to stop leaking so I could put my liquids in there. And well....the butter started smelling reeeeeeeaaal good!! Holy CRAP!!! So I turned it off, and removed it from the heat and well, I had brown butter but thats o.k. Brown butter is good stuff!
Anyways....blend everything together for 1 minute. Use a spatula to scape stuff down if needed and blend again for a second of two.
If you have a blender that you trust, then just put it in the fridge as is. I don't. So I poured mine in a bowl and covered it with plastic wrap. Leave it in the fridge for at least 2 hours. (did you see the good company my crepe batter was in? yep...thats a 6pk of coors sitting off to the right.)
Once the batter has been thoroughly chilled for the required 2 hrs (or more), you want to make sure it is just thick enough to coat a wooden spoon. If it seems too heavy Julia says to beat in a bit of water (a spoonful).
Now....get your crepe pan or an iron skillet. btw...I discovered that I do have a crepe pan, but for this dish, I needed crepes that were rather large so I used my largest skillet.
Soooo...rub the skillet with oil and heat over a medium high heat until the pan just begins to smoke. Lift the pan off the heat and pour 1/4 - 1/2 cup of batter into the pan (since I was using a rather large pan, I needed almost 1/2 cup. You'll need to adjust accordingly).
Quickly rotate the pan in all directions so the batter covers the bottom of the pan in a thin film.
Julia says that the first crepe is always a tester....a guinea pig....a sacrifice. It's to test if you have too much batter in the pan, or if the heat is too high or too low. So don't freak out if the first crepe (or 2 or 3) don't turn out.
Like this one...my first. Too much batter so I poured it back into the dish (as Julia instructed).
Kinda messy looking, don't you agree?
I dunno what exactly happened with the 2nd one...either I didn't have enough batter or I didn't dip and turn the pan quickly enough.
But the 3rd time was a charm and I was beginning to really get the hang of it.....
After the batter has been rotated around (should only take about 2 - 3 seconds to complete this whole procedure), put the pan back onto the heat for about a minute or so. Jerk the pan a bit to loosen the crepe (it really works....the thing starts sliding around) and lift the edges with a spatula and check the underside. When it is a nice light brown, it's ready to turn.
I used a spatula and my fingers to turn the crepe.
After another 30 seconds, its ready to come out. Slide it onto a plate and keep warm while you finish up the rest of them. Btw...you'll need to brush on some more oil and let it heat up just until the pan starts to smoke, between each crepe.
I wanted to see...just for fun...if I could flip the crepe.
My first attempt.....
hmmm.....that didn't go so well. But I was able to salvage the little sucker and continue on.
My second attempt landed the same way, but was a little more stubborn....
Geeez....(here sparky!!! sit boy.....no no, this thing isn't worth begging for. Just eat it).
Ok..forget the fancy stuff. Lets finish up these babies. In the end I didn't have enough batter to make a full sized crepe but I didn't want to waste it...so I poured it in....had issues with the pan rotation and ended up with a triangle crepe.
But you know what? I flipped it in the air, perfectly!!! figures
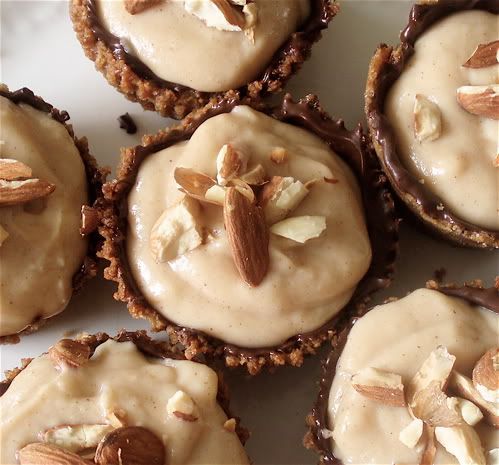
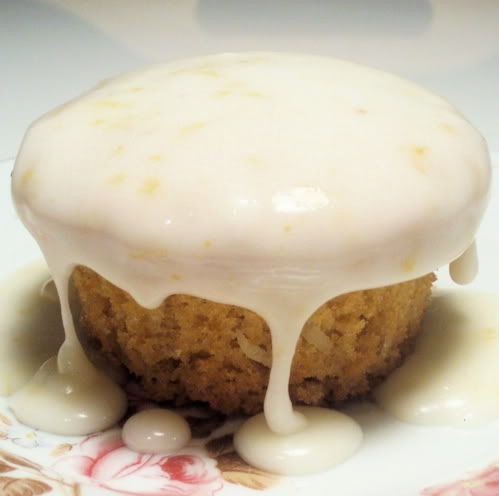
And I smothered that weird little thing with mascarpone and homemade strawberry jam. Holy CRAP!!! That was good!!
Now...all the crepes are made. I'm totally excited. Everything is going great!! woo hoo!
Neeext.....I wanted a nice sauce for my California Crepe and thought Pesto!! ya....creamy pesto. oooh. And...lets give it a little kick.
So here's what I did...
1/4 cup pesto
1/4 cup mayo
1 - 2 Tb horseradish (amount depending on taste)
Combine.
And check these out!!!
I stopped off at Trader Joes and found a basket of small heirloom tomatoes!! Aren't those the most awesome little things you've ever seen?
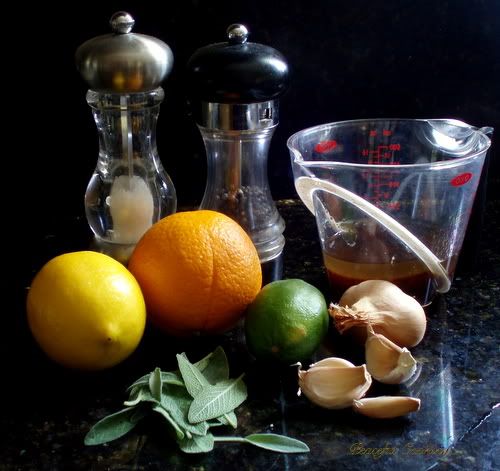
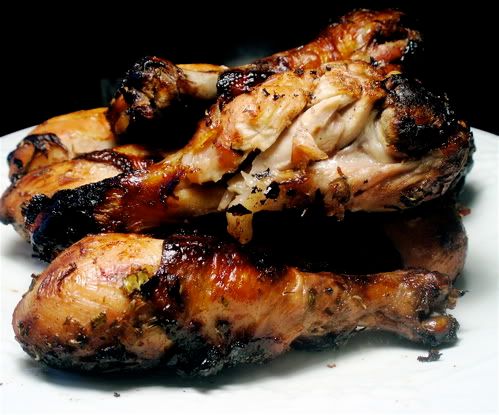
Soooo, back to the crepe making. Next I sauteed some chicken strips that I had marinated in some garlic oil combined with lemon juice. Here's what else I added:
Crepes
Cooked chicken strips
Tomatoes
Pesto sauce
Toasted Pine Nuts
Lettuce
Fresh Spinach
Roasted bell peppers
Marinated Sun Dried Tomatoes
Crumbled Goat Cheese
Sliced Olives
Take a crepe and fold it in half (or almost in half)....and start filling it with goodies, in the center, in a V-shape
Fold one side in, creating a cone shape and then fold in the other side to complete the cone shape:
I happen to have these really cool Martini glasses that Sir Sportsalot gave me one year for Christmas. (Only I don't drink Martinis.)
Glad I found a good use for them
Ok...now that you've seen my version, it's time to check out what everyone else did! Play with the map below and take an International Taste Tour to see what other crepe ideas are out there
Subscribe to:
Posts (Atom)