Yum Peaceful Cooking: strawberries
Showing posts with label strawberries. Show all posts

Sunday, June 1, 2014

Double Chocolate Strawberry Shortcake @Driscollsberry #Strawshortcake


Fresh berries are everywhere. I love them all. But I have to say, strawberries are my favorite.


Every since I was a young child, I knew this to be a fact.


And not just anything strawberry. I mean..none of that strawberry 'flavored' stuff. I need the real thing. Fresh, ripe red, sweet strawberries.

I found a recipe for Old-fashioned Strawberry Shortcake in a really super old cookbook called The American Woman Cookbook. Its a wonderful book, and fun to have around. I did make a few revisions, but kept the basics as they have been for over 70 yrs.

Double Chocolate Strawberry Shortcake

2 cups sifted flour
4 teaspoons baking powder
4 tablespoon dutch cocoa powder
1/2 teaspoon salt
1 tablespoon sugar
1/3 cup shortening
6 oz chocolate chips
3/4 cup milk
1/2 teaspoon instant coffee
2 tablespoons butter, melted
3 cups sliced strawberries
1 teaspoon vanilla (optional)
Whipped Cream
powdered sugar to garnish


Preheat oven to 450' F

Warm the milk just enough to dissolve the instant coffee in. Place in the fridge to cool. 

Sift the flour. Then sift the flour with the baking powder, salt, sugar and cocoa powder. With a fork or pastry blender, cut the shortening into the dough to form crumbles. Stir in the chocolate chips. Pour the chilled coffee and milk mixture gradually into the flour crumbles to form a soft dough. 

On a lightly floured surface, form dough into a ball. Roll out to about 1/2 thick and cut into desired sized circles. Place on an ungreased cookie sheet. Brush the tops with some of the melted butter (reserve the rest for serving). 

Bake for 15 minutes. 

Meanwhile, wash, hull and slice your fresh strawberries. Mix with the vanilla extract and set aside until ready to serve. 


Once the "muffins" are ready, let cool just long enough to handle without burning your hand. With a fork, split the muffins in half. Generously brush each side with melted butter.


Fill with whipped cream, strawberries, and dust with powdered sugar.


What's so timeless about this dessert isn't because it's been around for a long time. Not because there are cartoon characters named after it. Nor is it because it's quick and easy to make.

It's because the muffin, even though in this case is loaded with chocolate, remains a supporting character. It's not sweet and it's not over bearing. It allows the strawberry do with it does best. Shine. With it's natural beauty and sweetness that confirms to all that spring and summer are among us.


Saturday, May 18, 2013

Strawberry Chocolate Torte


It's National Strawberry month and strawberry season is at it's peak. Farmers markets and stands are boasting sweet berries by the pint, half flat or full flat. If you were to drive through Ventura County, CA...you'd probably see a road side fruit and vegetable stand on every corner. As a matter of fact, the yearly Strawberry Festival is going on this weekend in Oxnard. A mere 45 minute drive (without traffic) from my house and I've never been. I don't understand how that's happening. I mean, strawberries are my favorite fruit...I've lived here all my life.....how do I keep missing the most fabulous festival of the year?

I'm so disappointed in myself. I've let my berry love down. This must be remedied!

In the meantime, lets console my strawberry craving with a delightful torte.


This recipe was inspired by a couple of recipes I ran into. As much as I love raspberries (they are a very close second to strawberries...but are fighting for that position with blackberries) I just had to stay true to my first love.

Chocolate Cake with Strawberries
Raspberry Chocolate Torte


Strawberry Chocolate Torte
Printable Version

Cake:
8 oz dark chocolate, chopped
3/4 cup butter, diced
2 tsp vanilla extract
1/4 tsp instant coffee granules
3 1/2 oz toasted almonds
2 heaped TB flour
1/2 tsp salt
5 eggs
3/4 cup granulated sugar (if you have bakers or caster sugar, that would be best)
8 fresh strawberries, plus more for garnish
8 oz cream cheese, room temperature

Glaze:
8 oz dark chocolate, chopped
1/2 cup heavy cream

Preheat your oven to 325' F. Line the bottoms of 2 round cake pans with parchment paper (you can spray the bottom with cooking spray before placing the parchment paper inside, to keep the paper in place).

Cake:
Put the 8 oz of chocolate and the butter in a medium sized, microwave safe bowl.


Melt the chocolate and butter in a the microwave (or use a double boiler) in 30 second increments, stirring in between until nearly all the chocolate is melted. Complete the process by stirring until fully melted.


Set aside to cool. Once cool, stir in vanilla and coffee granules.

In a food process, finely grind the almonds. Add in the flour and salt and transfer to a small bowl. Set aside.

With an electric mixer, beat the eggs in a large bowl until they double in volume (about 5 minutes). Slowly add the sugar and beat for 1 more minute. Fold in the cooled melted chocolate until just combined. Sprinkle in half of the almond/flour mixture and fold until just combine then sprinkle in the other half, folding until just combined.


Divide the batter between the two cake pans. Bake for 15 minutes or until toothpick comes out with only a few crumbs.


Allow to cool in the pans.

Meanwhile, make the filling by smashing the strawberries and combining with the cream cheese.


Carefully remove the cakes from the pans. Place one of a plate. Spread the filling over it. Place the other cake on top.


Thats where I ran into some problems. My cake crumbled....(I think I may have slightly over cooked them)


I pieced it together...hoping the filling would help keep it in place, acting like glue...which it did. But...it wasn't a pretty site.

Thank God for glaze!!!

Lets hurry up and make that glaze so I don't have to see this mess any more...

Glaze:
Bring the cream to a boil. Place the chocolate into a medium bowl. Pour the hot cream over the chocolate and stir until melted.

Spread the glaze over the cake...


The glaze will thicken as it sets. 

Garnish with strawberries and a bit of powdered sugar if desired.


And there you have it. A delicious, seemingly beautiful dessert (who can see the crumbled section, right? No one has to know...trust me) that is bound to satisfy.

Tuesday, July 31, 2012

Limoncello and a Strawberry Lemon Drop to pass the time


Limoncello is one of my favorite liqueurs. But it's a little pricey depending on the brand you buy. And let me tell you....brand makes a huge difference. I've tried a few. One of them was just awful. If I had tried it the first time I ever had limoncello, I would never try it again. Ya, it was that bad.

Anyway...I'm not here to recommend what brand you drink or like...I'm here to show you how to make it yourself. It's not difficult. The most challenging part is getting the skin off the lemon without getting any of the pith (the white stuff) and of course waiting for the end results. Yes...it is time intensive. It's not cheap either. But it is less expensive than buying it from the store. I figure approximately 2/3 the cost (kinda like a "buy 2 get 1 free" sorta thing). Although I did get my lemons for free, which helped.

I've heard a lot of talk over the years about various methods and scientific measuring based on the alcohol used vs the simple syrup added. Rather than letting it intimidate me...I just went ahead and did it. One of my best foodie friends, DeeDee showed me a website that has great information, which is where I went to for all the how-to's and what-for's: Limoncello Quest They have enough information to keep me out of trouble but not too much as to make me shy away from the experience. I have to admit here....they recommended straining the alcohol before beginning the process. I didn't do it.

Here's a little basic info on the two main ingredients:

Lemons:
Smooth skinned lemons are recommended. Thick skins help. Organic is best (less time spent scrubbing the pesticides and wax off and most likely having some still end up in your alcohol). For me, I chose to zest the lemons rather than peeling them. I'm not good enough at peeling without ending up with a lot of pith on there. Besides, peeling is very time consuming. Whats the issue with pith? Bitter. You do not want to end up with bitter results and pith will do that.

Everclear:
There are two proofs out there: 151 (75.5% ethanol) and 190 (95% ethanol). California only sells the 151 proof so I went with that. Just an FYI...Vodka is 80 proof (40% ethanol). There are those out there that think they'll just use Vodka. I wouldn't. If you can get Everclear...do it. For
more info look it up on Wikipedia: Everclear


To start off, you will need:

1 gallon jar with a tight fitting lid
2 - 750ml bottles of Everclear (pure grain alcohol)
17 lemons

Thoroughly scrub your lemons in warm water with a vegetable scrubber. Carefully zest them, making sure you do not zest down to the pith.


Combine the lemon zest and the alcohol in your 1 gallon jar.


Put the jar away in a cool dark place for 45 days. You don't need to do anything. Leave it alone. Forget about it. It might be helpful to put a sticker on the jar with the date you started to help you keep track of time.

Now you have a whole bunch of lemons that are going to dry out in no time. All that lemon juice. Time to start squeezing and freezing


You won't need it for the Limoncello, but you don't want to waste it either. Make lemonade. Or even better, make a drink


Strawberry Lemon Drop
2 parts vodka
1 part lemon juice
1 part simple syrup
a few strawberries

Combine all ingredients, shake with ice and strain into a chilled glass. Garnish the edges of your glass with a little sugar and a strawberry. DELICIOUS!!!

Back to the Limoncello....fast forward 45 days (and lots of Strawberry Lemon Drops later) you will need:

3 1/2 cups white sugar (do not use brown)
5 cups of water

Combine sugar and water in a pot and bring to boil. Allow to boil, stirring once or twice for 5 minutes or until the sugar has dissolved. Allow to cool completely then add to your lemon zest and Everclear mixture. Stir


Aaaaand put it away. Again. For 45 more days.

Shhhhh....don't whine and complain. It's worth it. Use the time to find a few cool bottles to put your freshly made liqueur into.

Once the final (yes, I said final) 45 days are up....it's time to get busy. Using a strainer, strain out the zest.


Then line the strainer with a coffee filter and strain again (you can strain it a few more times if you'd like...I was too lazy that day and only did it once through the coffee filter.)


Pour into bottles and store in the freezer. Not because it has to be in the freezer...but because Limoncello tastes best extremely chilled.


I had bought my favorite store brand to compare


On the left is mine...the right is from the store. The big test.....the taste. There is a HUGE flavor difference. The store bought product tastes more like lemon heads (that lemon drop candy), its a lot sweeter and it appears to have some yellow dye in there. Although it is good. With the homemade version...you can taste the fresh lemons. The sweetness doesn't hit you over the head. It's smooth and refreshing. If you had to compare it in a nutshell...its like comparing homemade lemonade to powdered lemonade mix.

Yes it worth it!! Especially if you have an abundance of free lemons to play with.

Want another cocktail recipe? Check this one out:


Strawberry Limoncello
1 cup frozen or fresh strawberries
3 TB simple syrup
3 TB lemon juice
1 cup limoncello
1 cup club soda

Combine all ingredients in a blender and puree. Pour into chilled glasses. Garnish with lemon slices and strawberries.


Sunday, July 8, 2012

Strawberry Summer Cake


Yep....that's all there was left by the time I was able to snap a picture. This super easy, very yummy Strawberry Summer Cake doesn't last long once it comes out of the oven.

(As always) I have a little story about this cake. You all are familiar with (or most likely have an account with) Pinterest.com  I'm not as hooked on it as a lot of people seem to be. I play over there every now and then. I have a few "boards" with some "pins" hanging around. But I'm not there on a daily basis by any means.

So, with that said, I remembered a recipe I had "saved" for a strawberry cake a while back. It was time to make it but I needed to find it. I immediately went to my Google Reader and searched high and low through my tagged and starred recipes. Nothing. I knew it wasn't in a magazine or cookbook. I don't keep recipes all over the place on my computer or on the internet. Well, I try not to. I do have them stacked around my desk....but that's a different story. I went back to my Google Reader and searched again (just in case I had missed it....stranger things have happened). Still nothing. I went over to Facebook and whined about not being able to find something when you want it. Which is always the case. Someone commented about how they keep all those must try recipes in Pinterest. Duh! omg....THATS where I had tagged pinned the recipe....it was in Pinterest! I had completely forgotten about that handy little website. Whew......what a relief to know that I was not losing my mind (this time).

Strawberry Summer Cake 
Inspired by: Collecting the Moments
Printable Version

1 lb fresh strawberries
6 TB butter, at room temperature, plus more to grease pie plate
1 1/2 cups all purpose flour
1 1/2 tsp baking powder
1/2 tsp salt
1 cup sugar plus 2 TB for sprinkling the cake
1 egg
1/2 cup milk buttermilk
1 tsp vanilla extract

Preheat your oven to 350' F. Grease a 9" pan, with butter. You can use a cake pan, a spring form pan or a pie plate. I used a spring form pan.

First things first....take your beautiful strawberries


Hull them (ie: remove the stems) and cut them in half, length wise

In a small bowl, whisk together the flour, baking powder and salt.

In a medium bowl, beat together 1 cup of sugar and 6 TB of butter, until creamy and pale. Add the eggs, buttermilk and vanilla and continue beating until combined.

Add the dry ingredients to the wet ingredients and mix together just until its smooth.

Pour into your prepared pan. Place your strawberry halves on top of your batter, arranging as pretty as you can, cut side down.


Sprinkle 2 TB of sugar over the strawberries.

Bake for 10 minutes then turn the oven down to 325' and bake for an additional 50 - 60 minutes or until a toothpick comes out batter free. Cool in the pan, on a rack.

Now....grab a fork...quick before it's all gone.


If you have time...and it's not eaten up already, make a little whipped cream to serve on top. As  you can see....that didn't happen in my case.

Note: cake batter from a box does not have the same end result as this recipe. (been there, done that)

Sunday, January 8, 2012

Mini Strawberry Pies with Chocolate


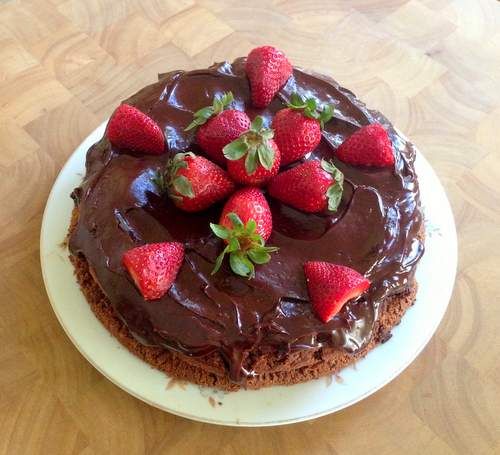
Strawberries and chocolate go together like.... ham and eggs, peanut butter and jelly, pork chops and apple sauce (The Brady Bunch anyone?) or...cheese and wine. Both are wonderful on their own but when you put them together it's a whole new level and deliciousness.

In my mission to make mini pies, I searched high and low for mini pie pans. I couldn't find any. I know they're out there. I've seen them since making these but in my impatiences, I didn't want to order them online or wait another week for me to have a whole weekend to search another set of stores. Sooooo I decided to use my muffin pan. Which made perfectly sized little individual servings of pie. I thought about using my ramekins but they don't have an edge on them to be able to make the little crust edge designs. Not that my crust design is great but it has one at least. Which makes them truly look like mini pies.

Before I go into detail here, I want to explain something. I made the pie crust with cocoa powder in it. My intention of course was to create a chocolate flavored crust. It looks chocolaty....all brown and everything.


But the flavor isn't there. It ended up just tasting like any ol' crust. (but there's a fun surprise inside that makes everything wonderful so it wasn't a fail). I'm hesitant to add more cocoa to the my crust recipe in fear of breaking down the flakiness and making it more doughy. I could've used a chocolate cookie crust but then it would be a totally different kind of pie, wouldn't it? Any hints, tips or clues out there on how to make a flaky chocolate pie crust that actually tastes chocolaty?

With all that said.......(crap....I forget where I was going with this)

Well, never mind. Lets just get to it

For the pie crust...you can use your favorite recipe. If you want to try the chocolate version, rule of thumb...for every cup of flour, add 4 tsp cocoa powder and 4 tsp sugar. The recipe I used was from Mastering the Art of French Cooking:

This recipe makes 8 mini pies.

2 cups all purpose flour
1 tsp salt
1/4 tsp sugar
6 oz chilled butter, but into 1/2" bits
4 TB chilled shortening
a scant 1/2 cup of iced water (plus more if needed)

then I added:
8 tsp (2 TB plus 2 tsp) cocoa powder
8 tsp (2 TB plus 2 tsp) sugar

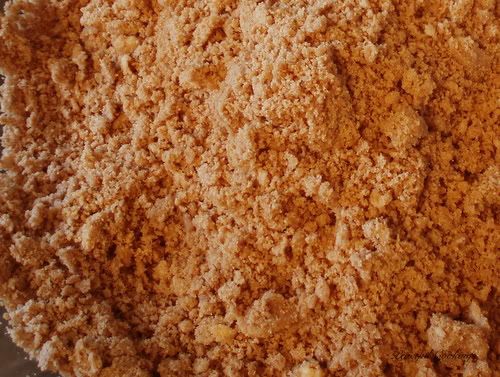
In a chilled mixing bowl, add flour, salt, sugar, cocoa powder, butter and shortening.


Using a pastry blender (or the tips of your fingers....working very quickly) work the butter and shortening into the flour mixture until you have pea sized crumbs.


Don't get too mental on this one. It doesn't have to be perfect. Everything will be worked in more thoroughly later.

Add the water and blend quickly with a fork, or your fingers slightly cupped and gather everything together into a mass. If needed, sprinkle more water by the droplets over anything that's not combining with the rest of the dough. Be careful. You want the dough to hold together and be pliable but not sticky. Press together into a rough ball.


Place onto a floured surface. Now...I tried a new method here. One I had never heard of until reading Julia Child's instructions. With the heel of your hand (not the palm, which is the warmest part of your hand) press the pastry, bit by bit away from you in a firm, quick smear of about 6 inches


until you've worked through the whole ball of dough. Scrape up the dough with a spatula and gather it into a mass. Knead it for a second into a smooth round ball. Lightly sprinkle it with flour, wrap it in plastic wrap and place in the refrigerator or about 2 hrs or over night.

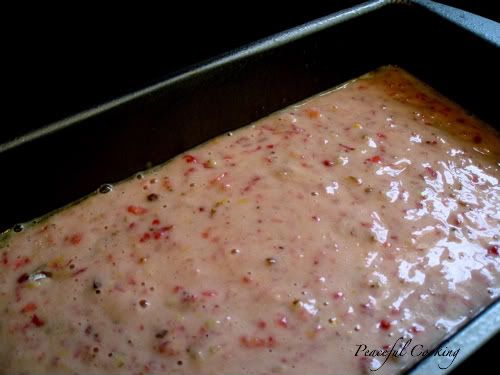
While the dough was chilling, I prepared my strawberry pie filling.

2 cups of strawberries
1/2 cup sugar (plus more to garnish if desired)
2 TB balsamic vinegar
1 TB flour
3 TB butter, diced
2 oz dark chocolate divided into 8 - 1/4 oz pieces

I washed, hulled and sliced the strawberries. Stirred in the sugar and balsamic vinegar and let sit in the refrigerator, covered, until ready to use.

When the dough is ready, divide into 8 equal balls. As I worked with 1 ball, the remaining were stored in the fridge to keep cold.

Preheat the oven to 400' F

On a lightly floured surface, I divided 1 ball in half. Each half was rolled out into a circle. Use a 3" cookie cutter to cut the dough into uniform crusts. Place the circles in plastic wrap and stored them back in the fridge.


Once all the dough was rolled out and cut (you should have 16 dough rounds), line 8 muffin tins with half of the dough rounds. Carefully trim the edges of any excess dough, sprinkle the bottoms with a little flour.

Drain off any excess balsamic vinegar from the strawberries then divide them evenly between all 8 dough lined tins.


I had some wonderful sample sized pieces of dark chocolate from Scharffen Berger that were perfect for this! Take a piece of chocolate and bury it in the center of the strawberries, 1 piece per pie. Drop 2 pieces of diced butter on top of each strawberry mound.

Take the remaining rolled out dough rounds and cover each pie. With a fork, carefully press the edges of the pie crusts together to seal the tops to the bottoms. With a knife, slice  two little 1/2 inch vents on top of each pie. Sprinkle the tops with a little sugar.

Place an empty cookie sheet on the bottom rack of the oven to catch any drips (there will probably be drips). Bake for about 30 minutes or into crust is brown and the filling is bubbly.

Let cool, then carefully remove each pie from the muffin tins. You may need a blunt knife to help loosen the edges of the crust.


Now, like I mentioned earlier, the crusts lacked the cocoa flavor completely. But....the little jewels of chocolate on the inside.....


Well, the chocolate melted all over those rich strawberries and mixed in with the filling.


So I think maybe the crust was just a tease....pretending to be chocolaty when in reality, the chocolate was hiding inside.

Monday, April 4, 2011

Strawberry Banana Bundt


Have you ever adapted a recipe from somewhere, albeit a cookbook, hand me down, internet, magazine....made your adjustments and then lost the recipe?

Ya...that's real fun!

I searched for almost 2 hours through the history on my computer....checked photo dates to make sure I was looking at the right history date....I googled what I thought I may have googled when I first thought of this recipe.

No where.

I started looking through magazines and cookbooks.

Fail.

Then one morning as I was cleaning up my kitchen and removed the bread cookbook from the stand, I found some papers behind the book. TA DA!!!! There it was! Plain as day. Printed. I had found my recipe with my notes of what I had altered!!!

Whew!

Although I feel awful because I have NO idea where I found the recipe, originally. Or even when I printed it out. Kudos are due to someone out there......somewhere. Someone out there went to some trouble to type up this recipe and share it. And I have no idea who.

Well....let's just give kudos to everyone one of you! (that way I've covered all my bases)

You know this has got to be good. If it hadn't turned out so delicious, I wouldn't have spent so much time looking for the lost recipe. It's a cross between a quick bread and a cake. It's not as light as cake but it's not as dense as quick bread. The original recipe called it a pound cake but I don't think it belongs in that category either.

Strawberry Banana Bundt
Printable Version

1 cup softened butter
1 1/2 cups sugar
4 eggs
1/2 cup mashed, overly ripe (aka brown) bananas
1/2 cup mashed strawberries
2 1/2 cups flour
1 1/2 teaspoons baking powder
1/4 teaspoons salt
1/4 teaspoon ground nutmeg
1 teaspoon vanilla
1/2 cup buttermilk
2 teaspoons lemon zest

Preheat the oven to 350' F. Grease a 12 cup bundt pan.

Cream the butter in a large bowl with your electric mixer. Gradually add the sugar, beating at low speed. Once the sugar has been fully incorporated, increase the speed to high and beat until pale and fluffy.

Add the eggs one at time, beating well and scraping down the bowl after each egg. Once all the eggs have been added, continue beating until smooth and even more pale.

Beat in the strawberries and bananas.

Sift together the flour and baking powder and nutmeg. Combine the buttermilk and vanilla. Turn the electric mixer down to low. Alternating between the flour and the buttermilk, add 1/3 flour, then 1/3 buttermilk until all the flour and buttermilk are fully incorporated.

Stir in the lemon zest.

Pour the batter into the prepared bundt pan. Bake for 80 minutes or until a toothpick inserted, comes out clean.

Allow to cool on a rack for 20 minutes. Remove from pan and allow to continue to cool completely.

While your bundt is cooling, make your favorite glaze to pour over the top. I chose a chocolate glaze.


There's something extremely satisfying about a strawberry, banana, chocolate combo.

If you want to really take this baby over the top....get out some frozen strawberries.

Yes!!! I said frozen strawberries. There is a time and place for them. Like...now. When you want all those yummy juices to be soaked up by something sweet....pound cake, angel food cake, shortbread. This is the perfect time and place for frozen strawberries.

And....wait for it.....

Wait for it.....

WAIT for IT..................


Whipped Cream!


Now you're talkin' MY language!!

This is my entry for this weeks Hearth and Soul Hop-Volume 42!


Monday, March 14, 2011

Strawberry Bread with Lemon Honey Butter


Guess what?!

Strawberry season (at least in SoCal) is officially upon me us! Do you know what that means? It means that I have access to my most favoritest fruit ever.....FRESH STRAWBERRIES!!!

Just last week a buddy of mine who happens to have a strawberry field in the family, brought me a flat of some big fat juicy ones....


Just so ya know....those aren't even the big ones (the big ones were consumed waaaaaay before they even made it home)
Well....with a whole flat of strawberries...you bet your patootie that I have some serious strawberry plans. 

Hey...did you know that there's such a  thing as strawberry bread? As in....quick bread? You know, like banana bread. I had Nooooooo idea. All these years of having a sensuous, titillating, prominently organic (I'm not a fan of anything strawberry "flavored") love affair with these tarty sweet fleshy fruits....and I had never in my life heard of strawberry bread. I feel....betrayed in a sense. Why the secret? What's the big deal? It's only bread...it's not like a whole cake...or ice cream.....or anything of that magnitude. I thought I knew my strawberry! What else haven't I been told? Oh no, I don't think so. A strawberry margarita isn't gonna make up for it this time, my little berry babe (although it won't hurt).

But thats ok, don't worry....I'm a forgiving person. Especially after experiencing this lovely "new" quick bread (ooooh, if only I knew then....the things I know now...the places I could've gone with this. Believe me it won't stop here).


Oops...forgot to include the buttermilk in that picture....(which by the way is my alteration. 
The original recipe I was working with had oil)

Strawberry Quick Bread (adapted from King Arthur Flour Cookbook)

1/2 cup chopped pecans
1 1/2 cups (6 1/4 oz) all purpose flour
1 cup (7 oz) sugar
1/2 tsp baking soda
14 tsp salt
1/4 tsp nutmeg
1 TB lemon zest
2 large eggs
1 1/4 cups (10 oz) mashed strawberries
1/4 cup buttermilk

Preheat your oven to 350' F
Grease and flour 9x5 loaf pan

One thing before I continue. Not long ago I decided to invest in a digital food scale.


This thing is sooo worth it's weight in gold. I can add an ingredient to a bowl....hit a button and it takes the measurement back to zero and then I get to weigh the next ingredient.

LOVE IT!!

Ok....Here's how it works....

In a medium bowl, combine the flour, sugar, baking soda, salt nutmeg, and nuts.

In another bowl, whisk together the egg, lemon zest, strawberries, and buttermilk. Pour into dry ingredients and stir until just combined.

Pour into prepared loaf pan.


Bake for 55 - 60 minutes or until toothpick

Allow to cool in the pan for 15 minutes. Remove from pan and allow to cool completely.


It's ready to eat! I have to say...it's dense...but how many quick breads out there aren't? Although I might see what I can do about it a bit. If you wrap it up in plastic wrap and let it chill in the fridge overnight, the flavors come out more...and it's easier to cut.

So...after smelling and tasting my sweet little strawberry bread..I knew it needed something special. I love butter just as much as (and probably more than) the next guy. But we're talking about strawberries here people. And they deserve something gentle and sweet and something a bit coaxing....

Lemon Honey Butter!!! 
1/2 cup softened butter
2 tablespoons honey
1 tsp lemon zest

Combine and roll up in plastic wrap. Refrigerate until firm


Sweet harmony makes for a happy pallet....and I love to see my strawberries sing.

This is my entry this week for Hearth and Soul

hearthandsoulhop