Tuesday, July 31, 2012
Limoncello and a Strawberry Lemon Drop to pass the time
Limoncello is one of my favorite liqueurs. But it's a little pricey depending on the brand you buy. And let me tell you....brand makes a huge difference. I've tried a few. One of them was just awful. If I had tried it the first time I ever had limoncello, I would never try it again. Ya, it was that bad.
Anyway...I'm not here to recommend what brand you drink or like...I'm here to show you how to make it yourself. It's not difficult. The most challenging part is getting the skin off the lemon without getting any of the pith (the white stuff) and of course waiting for the end results. Yes...it is time intensive. It's not cheap either. But it is less expensive than buying it from the store. I figure approximately 2/3 the cost (kinda like a "buy 2 get 1 free" sorta thing). Although I did get my lemons for free, which helped.
I've heard a lot of talk over the years about various methods and scientific measuring based on the alcohol used vs the simple syrup added. Rather than letting it intimidate me...I just went ahead and did it. One of my best foodie friends, DeeDee showed me a website that has great information, which is where I went to for all the how-to's and what-for's: Limoncello Quest They have enough information to keep me out of trouble but not too much as to make me shy away from the experience. I have to admit here....they recommended straining the alcohol before beginning the process. I didn't do it.
Here's a little basic info on the two main ingredients:
Lemons:
Smooth skinned lemons are recommended. Thick skins help. Organic is best (less time spent scrubbing the pesticides and wax off and most likely having some still end up in your alcohol). For me, I chose to zest the lemons rather than peeling them. I'm not good enough at peeling without ending up with a lot of pith on there. Besides, peeling is very time consuming. Whats the issue with pith? Bitter. You do not want to end up with bitter results and pith will do that.
Everclear:
There are two proofs out there: 151 (75.5% ethanol) and 190 (95% ethanol). California only sells the 151 proof so I went with that. Just an FYI...Vodka is 80 proof (40% ethanol). There are those out there that think they'll just use Vodka. I wouldn't. If you can get Everclear...do it. For
more info look it up on Wikipedia: Everclear
To start off, you will need:
1 gallon jar with a tight fitting lid
2 - 750ml bottles of Everclear (pure grain alcohol)
17 lemons
Thoroughly scrub your lemons in warm water with a vegetable scrubber. Carefully zest them, making sure you do not zest down to the pith.
Combine the lemon zest and the alcohol in your 1 gallon jar.
Put the jar away in a cool dark place for 45 days. You don't need to do anything. Leave it alone. Forget about it. It might be helpful to put a sticker on the jar with the date you started to help you keep track of time.
Now you have a whole bunch of lemons that are going to dry out in no time. All that lemon juice. Time to start squeezing and freezing
You won't need it for the Limoncello, but you don't want to waste it either. Make lemonade. Or even better, make a drink
Strawberry Lemon Drop
2 parts vodka
1 part lemon juice
1 part simple syrup
a few strawberries
Combine all ingredients, shake with ice and strain into a chilled glass. Garnish the edges of your glass with a little sugar and a strawberry. DELICIOUS!!!
Back to the Limoncello....fast forward 45 days (and lots of Strawberry Lemon Drops later) you will need:
3 1/2 cups white sugar (do not use brown)
5 cups of water
Combine sugar and water in a pot and bring to boil. Allow to boil, stirring once or twice for 5 minutes or until the sugar has dissolved. Allow to cool completely then add to your lemon zest and Everclear mixture. Stir
Aaaaand put it away. Again. For 45 more days.
Shhhhh....don't whine and complain. It's worth it. Use the time to find a few cool bottles to put your freshly made liqueur into.
Once the final (yes, I said final) 45 days are up....it's time to get busy. Using a strainer, strain out the zest.
Then line the strainer with a coffee filter and strain again (you can strain it a few more times if you'd like...I was too lazy that day and only did it once through the coffee filter.)
Pour into bottles and store in the freezer. Not because it has to be in the freezer...but because Limoncello tastes best extremely chilled.
I had bought my favorite store brand to compare
On the left is mine...the right is from the store. The big test.....the taste. There is a HUGE flavor difference. The store bought product tastes more like lemon heads (that lemon drop candy), its a lot sweeter and it appears to have some yellow dye in there. Although it is good. With the homemade version...you can taste the fresh lemons. The sweetness doesn't hit you over the head. It's smooth and refreshing. If you had to compare it in a nutshell...its like comparing homemade lemonade to powdered lemonade mix.
Yes it worth it!! Especially if you have an abundance of free lemons to play with.
Want another cocktail recipe? Check this one out:
Strawberry Limoncello
1 cup frozen or fresh strawberries
3 TB simple syrup
3 TB lemon juice
1 cup limoncello
1 cup club soda
Combine all ingredients in a blender and puree. Pour into chilled glasses. Garnish with lemon slices and strawberries.
Sunday, July 22, 2012
Dulce de Leche Banana Cream Pie
Dulce de leche, banana and peanuts.....'nuf said.
Ok, so I do have more to say (come on, you oughta know me better than that by now).
You know how when you "think up" a great combo in flavors, then you google it and of course it's already been done. A gazillion times over. Ya well....it happens to me all the time. I never get to think up anything new and original.
But that doesn't ever stop me from making it and enjoying it and loving it. Especially this pie. It's no-bake and easy peasy. Perfect for summer. Or anytime when you don't want to turn on the oven. You can even let the kids make this. Of course, you'll end up with a sticky mess in the kitchen...but hey, that's half the fun when you're a kid, right?
This particular recipe was found on FoodNetwork, courtesy of Marcela Valladolid and can be found here: Dulce de Leche Banana Cream Pie. I did make a few very slight changes and omissions. You can compare the two if you'd like and do what you want. (that's what I love about cooking....making it your own)
Dulce De Leche Banana Cream Pie
Printable Version
Crust:
5 oz graham crackers
1/2 cup roasted peanuts, plus more for garnish, (I used salted)
8 TB butter, melted
Cream Filling:
4 oz cream cheese, room temperature
4 TB butter, room temperature
2 TB powdered sugar
1 cup heavy whipping cream
1 cup of dulce de leche, plus more for garnish
3 medium bananas, sliced
Place the graham crackers in a food processor and process until coarsely ground. Add the peanuts and continue processing until finely ground. Pulse in the melted butter until well combined.
Transfer the crumbs to a 9.5" pie dish and press against the bottom and sides. Place in the refrigerator for 10 to 20 minutes.
While the crust is solidifying, whip the cream cheese and butter with a hand mixed on medium speed until fluffy and as lumpless as possible (there still may be a few but we want them to be minimal). Reduce the speed to low and add in the powdered sugar. Whip until just combined. (if you over whip, you might end up curdling the butter...not the result we're looking for). Add the cream and whip until you have soft peaks.
Take out your chilled crust and spread the dulce de leche on the bottom of the crust. If your dulce de leche is....too thick, you can warm it up a little in a pan first. Arrange your sliced bananas over the dulce de leche, overlapping as necessary.
Pour the whipped cream mixture on top of the bananas and spread evenly
(ok, so I didn't know how much filling I was making and apparently over extended my crust a bit)
Garnish with dulce de leche and chopped peanuts.
I'd show you a picture of the sliced product....but to be honest, I suck at slicing and serving pie. It was a mess. But absolutely delicious. The saltiness from the peanuts, the creamy caramel dulce de leche and of course the bananas......ok, so I kinda wanna stick my face in it and come up licking.
Sunday, July 15, 2012
Summer Squash Pickles
Its that time of year....for those gardeners out there, when you're picking more than you can eat. It's a great feeling, having an abundance of fresh vegetables. Friends and family get to benefit from our gardens generosity as well, as we hand out our 'spoils' by the bagful.
It's also a time when we're racking our brains trying to figure out exactly what we're going to do with it all. Sure, there are Squash Casseroles, Zucchini Bread, fried zucchini and squash, Zucchini Pancakes, Zucchini and Potato Pancakes and many more. But what about the future? Something that we can make now and eat....later. Maybe when we're not so....zucchini and squashed out. You know?
I made Summer Squash Pickles a few weeks ago. My first pickling experience. It's from a recipe in The Homesick Texan. It was so easy that it got me to thinking.....hmmm.....pickling and canning. Maybe I should start venturing into that arena. There's a lot of it going on right about now. Sure...I've made a few freezer jams and that was easy. But canning? Pickling? Wooo, there's a little science involved there, right? I mean..there's pickling, hot water baths, pressure cooking, ooooh lord. Kinda intimidating.
Until you talk to a few pros. Which I did over on my Facebook fan page. They took the scary out of it and encouraged me. I even bought a cookbook (that's always exciting), Ball Complete Book of Home Preserving. Oh, and Guess what? I don't need any special tools. Sure, they'll help. Someday. When I have the time to find a store that sells them. But I have a large stock pot, and thats all I need really. Besides the jars and some dish towels. And the veggies.....
Summer Squash Pickles
Printable Version
1 lb yellow squash, sliced into 1/4" rounds
1 lb zucchini, sliced into 1/4" rounds
4 garlic cloves, cut in half
2 tsp dill seeds
2 tsp cumin seeds
2 tsp celery seeds
2 tsp peppercorn
1/2 cup water
2 cups white vinegar
2 TB kosher salt
2 pint sized jars or 1 quart sized jar, with lids and bands.
You might notice that I added some things to my veggie mix. Sliced onions, a couple of poblano peppers and a banana pepper. That did alter my veggie volume. I doubled my seasonings and vinegar, water and salt and just rolled with it.
Clean and sterilize your jars and lids. Using tongs, place them on a clean surface.
Divide your veggies (squash, zucchini and garlic) and pack them into your jars.
In a saucepan, bring the vinegar, salt and water to a boil. Pour the boiling mixture into each jar, leaving a little head room. Cover with lids and fasten with bands. Set them off to the side to cool for about 4 hours.
At this time you can eat them or just place them in the fridge to pickle a bit more. They should be consumed within a month.
And that's it. I did have to run a knife around the inside of the jar before I placed the lids on. There were air bubbles in there.
They are very vinegary.....and soooo delicious. I haven't done anything with them other than eat them straight out of the jar. They'd probably be a nice addition to a pasta salad of sorts. Or even chopped up and added to a big fat juicy hot dog. hmm....maybe that's what I'll do for dinner tonight. See? Just talking to you all inspires me.
Sunday, July 8, 2012
Strawberry Summer Cake
Yep....that's all there was left by the time I was able to snap a picture. This super easy, very yummy Strawberry Summer Cake doesn't last long once it comes out of the oven.
(As always) I have a little story about this cake. You all are familiar with (or most likely have an account with) Pinterest.com I'm not as hooked on it as a lot of people seem to be. I play over there every now and then. I have a few "boards" with some "pins" hanging around. But I'm not there on a daily basis by any means.
So, with that said, I remembered a recipe I had "saved" for a strawberry cake a while back. It was time to make it but I needed to find it. I immediately went to my Google Reader and searched high and low through my tagged and starred recipes. Nothing. I knew it wasn't in a magazine or cookbook. I don't keep recipes all over the place on my computer or on the internet. Well, I try not to. I do have them stacked around my desk....but that's a different story. I went back to my Google Reader and searched again (just in case I had missed it....stranger things have happened). Still nothing. I went over to Facebook and whined about not being able to find something when you want it. Which is always the case. Someone commented about how they keep all those must try recipes in Pinterest. Duh! omg....THATS where I had
Strawberry Summer Cake
Inspired by: Collecting the Moments
Printable Version
1 lb fresh strawberries
6 TB butter, at room temperature, plus more to grease pie plate
1 1/2 cups all purpose flour
1 1/2 tsp baking powder
1/2 tsp salt
1 cup sugar plus 2 TB for sprinkling the cake
1 egg
1/2 cup
1 tsp vanilla extract
Preheat your oven to 350' F. Grease a 9" pan, with butter. You can use a cake pan, a spring form pan or a pie plate. I used a spring form pan.
First things first....take your beautiful strawberries
Hull them (ie: remove the stems) and cut them in half, length wise
In a small bowl, whisk together the flour, baking powder and salt.
In a medium bowl, beat together 1 cup of sugar and 6 TB of butter, until creamy and pale. Add the eggs, buttermilk and vanilla and continue beating until combined.
Add the dry ingredients to the wet ingredients and mix together just until its smooth.
Pour into your prepared pan. Place your strawberry halves on top of your batter, arranging as pretty as you can, cut side down.
Sprinkle 2 TB of sugar over the strawberries.
Bake for 10 minutes then turn the oven down to 325' and bake for an additional 50 - 60 minutes or until a toothpick comes out batter free. Cool in the pan, on a rack.
Now....grab a fork...quick before it's all gone.
If you have time...and it's not eaten up already, make a little whipped cream to serve on top. As you can see....that didn't happen in my case.
Note: cake batter from a box does not have the same end result as this recipe. (been there, done that)
Labels:
cake,
Dessert,
strawberries
Saturday, June 30, 2012
Carnitas and Tex-Mex Squash Casserole
Here you have some very basic, standard, simple ingredients. When you add a few spices and cooking techniques, they become exquisite.
I'm talking about two fantastic recipes from The Homesick Texan Cookbook by Lisa Fain. I swear...I just LOVE this book. It has become one of my favorites and for some reason, as the days get longer and sun gets hotter, I start cooking more Mexican and Tex-mex meals. They just seem to go with the season. I have a feeling that my new favorite cookbook will be getting a whole lot of use over the next couple of months.
Carnitas
Printable Recipe
3 lbs boneless pork shoulder, cut into 2" chunks
1/2 cup orange juice
1/4 cup lime juice
4 cloves of garlic (wait...what? only 4 for all that meat? I used the whole damn head of garlic)
1 tsp ground cumin
1 tsp kosher salt, plus more to taste
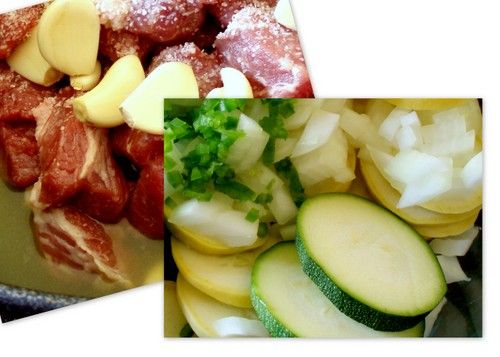
In a large heavy pot, combine all of the ingredients
Add enough water to just cover the meat. Bring to a boil and then simmer, uncovered for 2 hours.
Don't touch, don't stir. Just let it be.
Once the 2 hours have passed, turn the heat up to medium-high and continue to cook, stirring occasionally for about 45 minutes or until all of the liquid has evaporated and the fat has rendered (which means that all of the fat has left the meat and is not sitting in the pot, which by the way, will not evaporate).
You will know that the pork is done when it has browned on both sides.
Serve with tortillas, salsa and avocados.
Now...while that is cooking, lets make the Tex-Mex Squash Casserole.
Tex-Mex Squash Casserole
Printable Version
2 TB butter
1 lb yellow squash, sliced
1 lb zucchini, sliced
1 medium yellow onion, diced
2 jalapenos, seeded and stemmed, diced
2 garlic cloves, minced
1 tsp ground cumin
1 tsp chili powder
1/2 tsp cayenne pepper
Salt and Pepper to taste
2 TB all purpose flour
1 cup chicken or vegetable broth
2 cups crushed canned tomatoes
1/2 cup half and half
1/2 cup sour cream
1/2 cup cilantro, chopped (more for garnish if desired)
2 cups tortilla chips, crushed
1 cup grated pepper jack cheese
1 cup grated cheddar cheese
Preheat your oven to 350' F and lightly grease a casserole dish (13" x 9")
In a large skillet, over medium heat, melt the butter. Add the yellow squash, zucchini, onions and jalapenos.
Saute until the squash is tender. This could take about 10 minutes or more.
Add in the garlic, cumin, chili powder, and cayenne pepper. Cook for a minute and add the salt and pepper to taste.
Add the flour and stir until you have a light brown paste. This takes maybe a minute or so. Stir in the broth and crushed tomatoes, stirring until everything thickens up. Add the half and half, sour cream and cilantro. Remove from heat.
In the bottom of your prepared casserole dish, spread out the crushed tortilla chips. Pour the incredibly yummy squash mixture over the chips.
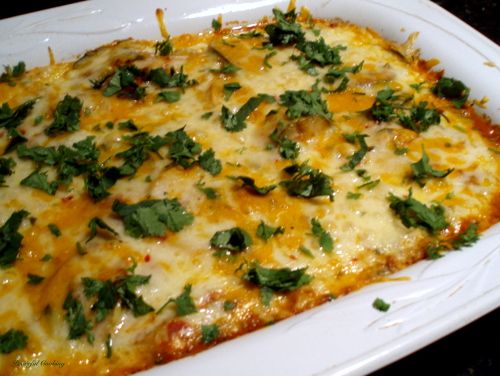
Cover the top with the grated cheese. Bake, uncovered for 30 minutes or until the top is brown and bubbly.
Garnish with more cilantro if desired
Serve along side your Carnitas
Let me tell how good this was. The meat had fantastic flavor and it was incredibly tender. The Tex-Mex Squash Casserole....wow! It reminded me of tortilla soup, only in a casserole form. Simple delicious.
I'm talking about two fantastic recipes from The Homesick Texan Cookbook by Lisa Fain. I swear...I just LOVE this book. It has become one of my favorites and for some reason, as the days get longer and sun gets hotter, I start cooking more Mexican and Tex-mex meals. They just seem to go with the season. I have a feeling that my new favorite cookbook will be getting a whole lot of use over the next couple of months.
Carnitas
Printable Recipe
3 lbs boneless pork shoulder, cut into 2" chunks
1/2 cup orange juice
1/4 cup lime juice
4 cloves of garlic (wait...what? only 4 for all that meat? I used the whole damn head of garlic)
1 tsp ground cumin
1 tsp kosher salt, plus more to taste
In a large heavy pot, combine all of the ingredients
Add enough water to just cover the meat. Bring to a boil and then simmer, uncovered for 2 hours.
Don't touch, don't stir. Just let it be.
Once the 2 hours have passed, turn the heat up to medium-high and continue to cook, stirring occasionally for about 45 minutes or until all of the liquid has evaporated and the fat has rendered (which means that all of the fat has left the meat and is not sitting in the pot, which by the way, will not evaporate).
You will know that the pork is done when it has browned on both sides.
Serve with tortillas, salsa and avocados.
Now...while that is cooking, lets make the Tex-Mex Squash Casserole.
Tex-Mex Squash Casserole
Printable Version
2 TB butter
1 lb yellow squash, sliced
1 lb zucchini, sliced
1 medium yellow onion, diced
2 jalapenos, seeded and stemmed, diced
2 garlic cloves, minced
1 tsp ground cumin
1 tsp chili powder
1/2 tsp cayenne pepper
Salt and Pepper to taste
2 TB all purpose flour
1 cup chicken or vegetable broth
2 cups crushed canned tomatoes
1/2 cup half and half
1/2 cup sour cream
1/2 cup cilantro, chopped (more for garnish if desired)
2 cups tortilla chips, crushed
1 cup grated pepper jack cheese
1 cup grated cheddar cheese
Preheat your oven to 350' F and lightly grease a casserole dish (13" x 9")
In a large skillet, over medium heat, melt the butter. Add the yellow squash, zucchini, onions and jalapenos.
Add in the garlic, cumin, chili powder, and cayenne pepper. Cook for a minute and add the salt and pepper to taste.
Add the flour and stir until you have a light brown paste. This takes maybe a minute or so. Stir in the broth and crushed tomatoes, stirring until everything thickens up. Add the half and half, sour cream and cilantro. Remove from heat.
In the bottom of your prepared casserole dish, spread out the crushed tortilla chips. Pour the incredibly yummy squash mixture over the chips.
Cover the top with the grated cheese. Bake, uncovered for 30 minutes or until the top is brown and bubbly.
Garnish with more cilantro if desired
Serve along side your Carnitas
Let me tell how good this was. The meat had fantastic flavor and it was incredibly tender. The Tex-Mex Squash Casserole....wow! It reminded me of tortilla soup, only in a casserole form. Simple delicious.
Thursday, June 28, 2012
Banana Bars with Cream Cheese Frosting
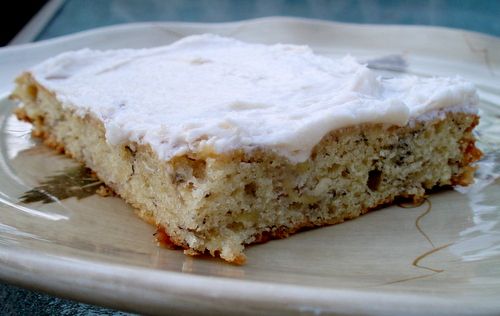
If you like Banana Bread...you're going to absolutely LOVE Banana Bars. Light, fluffy...and yes, very moist! Very much like the consistency of cake.
I saw this recipe posted on a very dear friends blog. Her name is Cathy and she is the awesome publisher of The Dutch Baker's Daughter. When I originally saw the post, I was so excited to have something else to make with those overly ripened bananas. That was about a year ago. I came across the post in my saved recipes on my feeder and was thrilled all over again. Only this time...I really made them.
And I am so glad I did. (and I'm so irritated with myself for not making them a year ago). The banana flavor in these bars really pops! I mean....there's some serious banana flavor going on. You can smell it before you even get it in your mouth. You can't stop eating them. It's a good thing that it makes enough to feed a crowd (a 15" pan is used).....otherwise no one else would ever get to see them let alone eat them. Although, had I been given the chance, I'm sure I'd have been able to consume the whole thing.
Let's put it this way.....as much as I like banana bread...I may never make it again.
Banana Bars with Cream Cheese Frosting
Printable Version
1/2 cup butter, softened
1 1/2 cups sugar
2 eggs
1/2 cup plain yogurt (I used Greek yogurt. Use what you prefer...even low fat as Cathy used)
1/2 sour cream (Cathy used light sour cream)
1 tsp vanilla extract
2 cups all purpose flour
1 tsp baking soda
1/4 tsp salt
2 medium very ripe bananas, mashed (about 1 cup)
8 oz cream cheese, softened
2 tsp vanilla
3 3/4 to 4 cups powdered sugar
Preheat your oven to 350' F. Grease a 15" x 10" jelly roll pan or line with parchment paper.
Cream together the butter and sugar until light and fluffy. Add the eggs, yogurt, sour cream and vanilla. Combine well.
In another bowl, combine the flour, baking soda and salt. Whisk together.
Gradually beat the flour mixture into the wet ingredients until all mixed together. Stir in the mashed bananas.
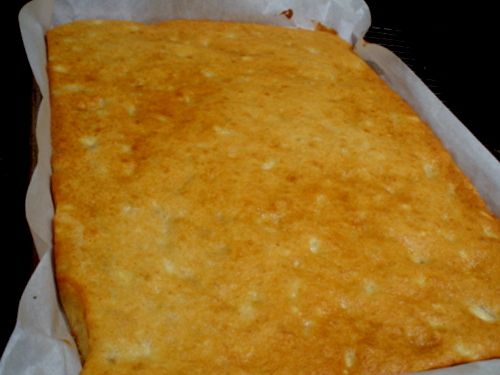
Spread into your prepared pan and bake for 20 - 25 minutes until a toothpick, inserted in the middle-ish area comes out clean and your cake is a pretty yellowish golden color
While your cake is cooling (ya I know...they're suppose to bars but honestly...its super moist like a cake), make your cream cheese frosting by beating the cream cheese, vanilla and powdered sugar together until you have the right consistency that makes you happy.
Once the cake is cooled, spread on the frosting.
Yep....there you have it. And it's ok to try some right away. I give you my permission and blessings to do so. Go ahead....take a biiiiiig bite
And tell me if you don't want to eat this for the rest of your life.
Thank you Cathy for being the wonderful person you are and for sharing this recipe! I love ya man!!
Saturday, June 23, 2012
The Perfect P.M.S. Brownie
One night last week I was craving brownies. Which is odd for me. I'm not a "brownie" person (I maybe have mentioned this before). I enjoy brownies.....there's nothing wrong with brownies. But if I had to choose between brownies, cakes, cupcakes, pies, cookies or ice cream. I'd choose cookies. (at least that's my answer today). But I think sometimes, one needs chocolate. Copious amounts of luscious chocolate. Other than a chocolate bar....the only way to really get that desire filled is with a brownie.
Back to my night of craving. It was late. I was lazy so I didn't make them. The next day one of my fellow Brujas (there are four of us Brujas at work and sometimes we like to indulge in sinfully delicious fun) sent me a link to a Betty Crocker email that had a recipe for Salted Dulce de Leche Swirl Brownies. I think it was a sign from heaven. My craving was meant to be satiated.
You're going to want to start making this batch of brownies either early in the morning, or the night before. Why???!!!!! I know....when one wants brownies, one wants them now. But there's an important step that makes them extra rich....you have to make (term used lightly) dulce de leche.
Dulce de Leche
1 14oz can of sweetened condensed milk
1 tsp salt
Remove the label from the can. Place the can (unopened) in a very large pot and fill with water until the can is completely submerged. Cover, bring to a boil and then reduce the heat down to medium-low. Cook for 3 (yes 3) hours. Check every now and then to make sure the can is still completely covered with water....adding more water if necessary. Allow the can to cool completely.
Once cooled you can open it.
This is the part that's always frustrating for me. Opening of cans. I have yet to purchase a new can opener that works consistently and for more than a few weeks. I always struggle with the darned things. Something somehow malfunctions and the gears don't seem to line up or something...I dunno....but I struggle and cuss and swear until I toss the damn can opener aside and dig out my really super old, probably made for camping, can opener.
Works every time.
btw...don't get me started on electric can openers. I have one. I got it for Christmas about 10 or more years ago. It's still in the box. I think Sir Sportsalot forgot that he needs to install it.
Soo.....you open your cooled can of sweetened condensed milk that has caramelized which is now dulce de leche
Scoop it into a small bowl and stir in the salt. Set aside.
For the bownies....use your favorite brownie recipe. Whether its from a box, or made from scratch. I often use the Baker's One Bowl Brownies recipe. Its easy...and it's good.
One Bowl Brownies
4 oz unsweetened chocolate
3/4 cup butter
2 cups sugar
3 eggs
1 tsp vanilla
1 cup flour
1 cup chopped nuts of choice (optional)
Preheat your oven to 350' F
Line a pan with parchment paper (makes for easy clean up) or grease a pan. One recipe says to use a 9" square pan....and another says to use 13 x 9. I think it might depend on your recipe and how thick you want your brownies. You might have to adjust the cooking time accordingly. Just let the toothpick be your guide. In this case...a semi clean toothpick.
In a large bowl, microwave the butter and chocolate on high for 2 minutes, or until the butter is melted. Stir until the chocolate melts.
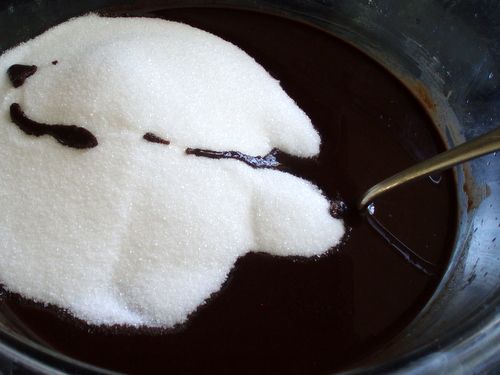
Stir in the sugar
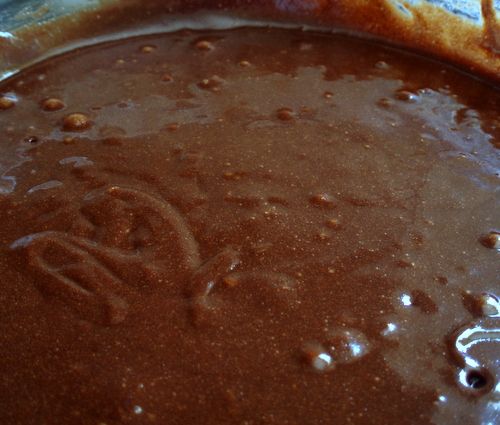
Blend in the eggs and vanilla....stir quickly at this point....so the eggs don't start to cook from the warmth of the chocolate mixture.
Add the flour and optional nuts. Mix well
It's a little tempting to just grab a spoon here and now, and dig in.
Spread half of your brownie mix into your prepared pan. Top with 1/3 of the delce de leche and swirl it around with a knife
Carefully spread the rest of your brownie mix on, and then top with the remaining dulce de leche...and swirl again.
Bake for 40 minutes or until a toothpick comes out almost...kinda, sorta clean.
With this brownie recipe...I did have to increase the baking time by about 10 minutes. If you're using a box mix....try the 40 minutes...and see how it goes from there.
Allow to cool completely.
Topping
6 oz dark chocolate, chopped
Coarse Sea Salt (I just used coarse kosher salt)
Melt the chocolate either in a double boiler, or by placing the chocolate in a bowl in the microwave and heating on high for 1 to 2 minutes, stirring every 30 seconds until melted and smooth.
Cut the brownies into squares (size is up to you). Spread the melted chocolate over each one. It helps if you just keep all the brownies together and you can just pour the chocolate over all of them with a little help from a spoon. Sprinkle with salt.
Get a nice tall glass of cold milk....and take a few minutes to enjoy these rich, extremely chocolaty, salty brownies.
In my opinion....these are perfect for....well....you know....those times when cravings must win.
Subscribe to:
Posts (Atom)