Sunday, April 29, 2012
Ancho Cream Corn
Thinking back to when I use to cook from the books on my shelf, ideas from phone conversations with family members, and jotted down recipes as they were recited....verses now.... the internet, the blogs, the social media cooking websites and all the people I've "met" and learned from. It's pretty cool. My little cooking world has expanded. I've learned so much over the years. Not only about techniques but about flavors. What goes together, what doesn't, and what does but you'd think shouldn't. I've been exposed to so many new ingredients that I would never have touched or knew what on earth to do with if it weren't for our fun little food world on the net.
And yes....ancho chile is one of them. I'm in love with the ancho chile. Which happens to be the dried version of a poblano (my other love). The addition of either of these forms of chile add such depth to Mexican dishes (or Tex-Mex in this case). It transforms a dish from (lets see...how do I say this without insulting anyone) Americanized taco bell kind of Mexican food to authentic mom and pop hole in the wall Mexican food.
Which brings me to this Ancho Cream Corn. One of many fantastic recipes found in Lisa Fain's cookbook, The Homesick Texan. I love cream corn. I love corn casserole. I love grilled corn. Corn is good. Ancho Cream Corn is better! The ancho chile addition....WOW!! It adds a wonderful smokey flavor that I just can't get enough of. It's not hot...so you other wimps out there (I say "other" because when it comes to heat...I'm a total wimp!) don't have anything to worry about. The ancho flavor just mixes itself into the cream and makes you go "mmmmmm" with every bite as you're digging your spoon in for another.
While this dish only takes a mere 15 minutes to cook....there is some prep work to be done. Not hard work. But rehydrating a dried chile takes some time....about 30 minutes.....soooo, keep this in mind when planning your cooking time line.
Ancho Cream Corn
Printable Version
1 dried ancho chile, stem and seeds removed
4 tablespoons unsalted butter
2 cloves garlic, minced (I used 3 cuz I love garlic)
5 cups of corn, fresh or frozen (It took 7 ears of shucked fresh corn for me to get 5 cups)
1 cup heavy cream
4 oz cream cheese
1/4 tsp cumin
1/8 tsp cayenne pepper
1 tablespoon lime juice (about 1 - 2 limes, depending on how juicy they are)
Salt and Pepper to taste
Cotija cheese, crumbled, to garnish (I used queso fresco ranchero cheese)
In a hot skillet, no oil....toast the ancho chile for about 10 seconds. Add enough water to cover the chili and bring to a boil. Turn the heat off and let "soak" for about 30 minutes. By this time, the chili should be soft. Rinse the chili and dice. Set aside. (toss the soaking water out)
While the chile is soaking, if you're using fresh corn, this would be a good time to shuck it and cut all those kernels off the cob.
In a large skillet, melt the butter over medium-low heat. Add the garlic and saute for about 1 minute. Add the corn, heavy cream, cream cheese, cumin, cayenne and diced ancho chile. Cook for 15 minutes, stirring occasionally. Add the lime juice and salt and pepper to taste. Garnish with cheese.
And there you have it. a delicious side dish that's easy and quick (after the prep work). You can bet that this dish will be seen this summer on my bbq menu.
Labels:
Corn,
cream corn,
Mexican,
Tex-Mex,
Vegetable
Thursday, April 19, 2012
Garlic Basil Infused Vodka
This is a different kind of dirty martini.
It's the kind you might want to drink on Vampire's Hell Day....a.k.a. National Garlic Day.
Thanks to
Heather over at Girlichef.com I was well informed of the fast
approaching National Garlic Day. In time to participate in her garlicy round-up.
I had just enough time to do a little...infusing. Let's just say, my vodka is healthier than yours. It has to be, right? I mean...a whole bulb of garlic went into this baby. With all the health benefits of garlic, how could my vodka not be healthier?
I'm not going to go into all the health benefits and history of garlic. Let's just get down to business here.
btw...I found this recipe on About.com
Garlic Basil Infused Vodka
1 bulb of garlic (bulb...not clove)
2 large sprigs of fresh basil
750 ml premium vodka
32 oz jar with a lid
Separate the cloves of garlic and remove all the skins. Combine the garlic, basil and vodka in the jar.
Cover and store in a dark place, at room temperature, for 4 days.
On the forth day...it will look something like this......
Not as pretty as the first day....but man, does it smell good!!
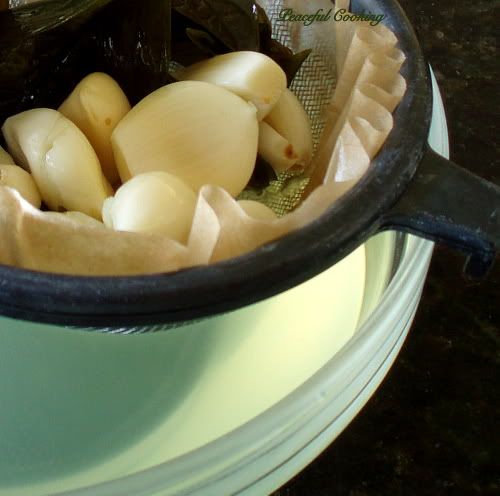
Strain it though a coffee filter
Store in a pretty little jar the same way you'd store your regular vodka
I just love that cloudy olivey green shade it has. And the aroma.....YUM!! The garlic flavor is very strong....which is a good thing in my book. The basil notes are just plain delightful. I think I want to add some to my next batch of marinara sauce. Actually, I have lots of plans for this vampire repelling alcohol.
P.S. When you strain the garlic and basil from your vodka, save all that garlic. There's still flavor there. I put mine in a little jar....placed them in the fridge and will be using them whenever I think of it. They don't taste like vodka. More like a milder garlic. I dunno...smell em, taste em...judge for yourself. I just hate the idea of tossing those little nuggets of goodness.
Let's start off with something rather common...a martini. I'll post about my other plans in the feature.
Vampire's Hell Martini
1.5 oz Garlic Basil Infused Vodka
.25 oz Dry Vermouth
Lemon Zest to garnish
Olive to garnish
Shake or stir the vodka and vermouth with ice. Strain into a martini glass. Garnish with lemon zest and an olive if desired.
Cheers and good riddance to all those blood sucking vampires out there. Unless you happen to be a friend of mine. If that's the case, just....don't tell me. And by all means...today, don't bite me.
Saturday, April 14, 2012
Pork Tenderloin Parmesan
Simple, easy, quick and delicious. Perfect for the weekdays. Now I'm not saying this is done in 5 minutes...but it's done in less than 30.
45 if you get distracted a lot.
Pork Tenderloin Parmesan
Printable Version
12 oz pork tenderloin
2 large egg whites
1/4 cup dried bread crumbs (I like to use the Italian style bread crumbs)
1/4 cup grated Parmesan cheese
salt and pepper
3 TB flour
2 TB olive oil (or more if needed)
Lemon wedges
Parsley or cilantro to garnish
Note: the recipe says 1/4 cup of the bread crumbs and Parmesan cheese. I always need more. Just adjust the amount (in 50/50 measurements) to what works for you.
Slice the tenderloin into 12 equal pieces. Place them between plastic wrap and pound them down thin...about 1/8" thick. If you don't have a mallet....use a heavy skillet.
One thing you will notice is that pork tenderloin pounds down a lot quick and easier than chicken.
Set up your station with 3 bowls.
In the first bowl, combine the salt, pepper and flour
In the second bowl, combine the egg whites with 1 tablespoon of water
In the third bowl, combine the bread crumbs and Parmesan cheese
With each piece of pounded meat, dredge in the flour, dip into the egg white mixture then coat with the bread crumb mixture.
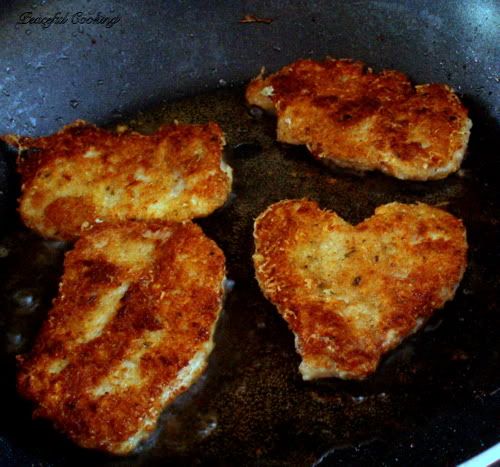
In a large skillet, heat up 1 tablespoon of olive oil. Working in batches, saute the breaded "medallions" for about a minute per side.
Ok, so I'm not that picky and didn't get all OCD about the shapes of my "medallions". Which is why I ended up with that cute little heart. <3
Repeat the cooking process, adding more olive oil as needed until all of your tenderloins are cooked.
Serve with the lemon wedges (for drizzling) and the garnishes of your choice.
This is a Martha Stewart recipe from one of her Everyday Food mini magazines that I found years ago. These little nuggets of pork are one of my favorite ways to prepare pork tenderloin.
Saturday, April 7, 2012
Chamomile Cupcakes with Honey Frosting
Last month...or maybe it was the month before when I was reviewing Joy Wilson's new cookbook, Joy the Baker, these delightful little mini cakes...aka cupcakes were one of the optional assignment recipes. I didn't have the chance to do them at the time but the thought of chamomile cupcakes just wouldn't let me go.
And boy....am I glad. I made them. Ate one. Loved it. Went back for more the next day....and they were gone. I didn't even have a chance to share them at work.
Yes, they are THAT good. They're earthy and sweet but not your typical cupcake sweet. Oh, and for the frosting...instead of using honey, I used agave syrup.
They taste like cupcakes for grown ups. Perfect for afternoon tea (does anyone really do that?)....a baby shower, wedding shower....any get together would be a great excuse to whip up a batch.
Mini Chamomile Cakes with Honey Frosting
Printable Version
Cake:
1/4 cup butter
1 cup all purpose flour
3/4 cup sugar
1 teaspoon baking powder
1/2 teaspoon baking soda
Pinch of salt
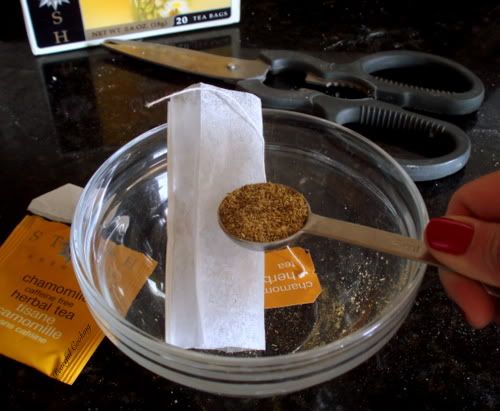
3 tablespoons dried chamomile from tea bags *
1/2 cup milk
1 teaspoon vanilla extract
Frosting:
2 cups powdered sugar, sifted
1 tablespoon honey
6 tablespoons heavy cream
pinch of salt
Preheat the oven to 325' (I had issues with this temperature. 350' seems to work better for me)
Line 12 muffin tins with cupcake liners
* Note: For the chamomile...you will need 9 teabags. Each teabag holds 1 teaspoon of tea. 3 teaspoons = 1 tablespoon
In a mixing bowl, (carefully) beat together the butter, flour, sugar, baking powder, baking soda, salt and chamomile. The mixture will be course and crumbly.
Whisk together the milk, egg and vanilla extract. Add half of the milk mixture to the crumbly mixture and beat until incorporated. Add the remaining milk and continue beating for one minute.
Evenly divide the batter between the 12 lined muffin tins. Bake for about 17 - 20 minutes or until a toothpick thats been inserted into the middle comes out clean.
Allow to cool completely before frosting.
While those babies are cooling, make the frosting by whisking together the powdered sugar, honey, cream and salt until smooth.
Once the cakes are cooled, generously spread that icing on. If desired and if you have any teabags left......sprinkle a little in the centers to garnish.
These are so good, I think they belong with the Easter menu.
Friday, March 30, 2012
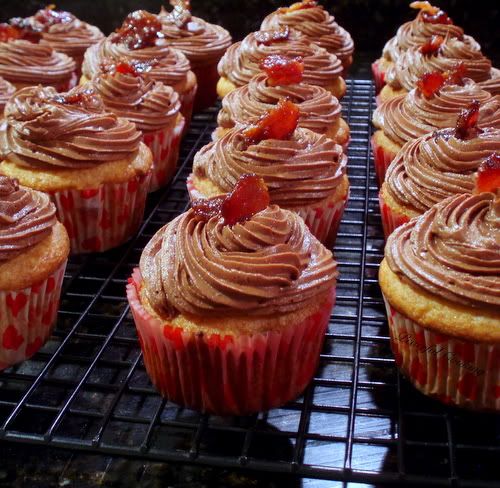
Maple Bacon Cupcakes with Beer
I while back...sometime in January, Betty Crocker posted a recipe for Beer and Bacon Mancakes. Basically pancakes for your man that contain beer and bacon. Sounds pretty good, right? If you're into pancakes. Which I'm not. I'm probably one of the few people who do not order pancakes when she eats at iHop. I prefer crepes.
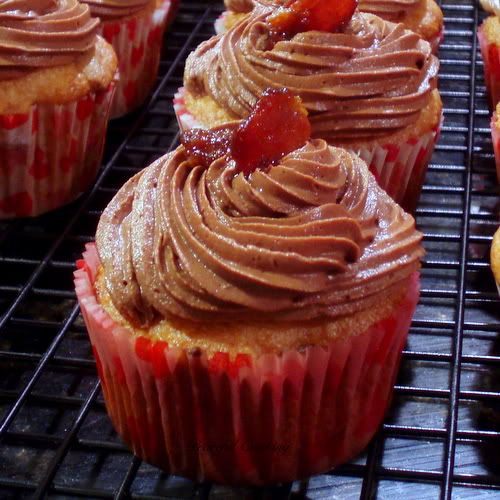
Ok, with that said...and by judging the above photo...I'm sure you can guess what came next. Super simple.....very yummy...(if you don't mind a little "meat" in your cupcake, that is)....and a lot of fun.
Maple Bacon Cupcakes with Beer
1 box of your favorite white or yellow cake mix
What ever other ingredients that are call for on the cake mix box, minus the liquid. (probably just eggs)
1 12 oz bottle of beer (you won't use it all...the remaining is for your own personal consumption)
1 lb bacon
Preheat the oven according the the instructions on the box of cake mix. Line 24 cupcake cups.
Fry 1/2 of the bacon and crumble. (tip: with your kitchen shears, cut the raw bacon into squares and fry them up....then you don't have to "crumble" them)
Follow the instructions on the cake mix box except....instead of adding the suggestion water, replace it ounce for ounce with beer. If your not familiar on how to poor beer without creating a giant "head" of froth (which could make it difficult to measure)....just tilt the bottle or can and the measuring cup towards each other...almost level, and gently pour so that the beer is running into the measuring cup, along the 'wall'. I hope that makes sense.
Once the beer is poured into the batter, you'll have some frothy fun. Mix as instructed on the box. Fold in the crumbled bacon.
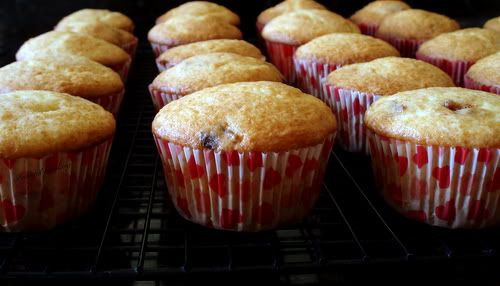
Divide the batter amongst the lined cupcake cups. Bake according the box instructions. Allow to cool completely before icing.
Meanwhile....you need to "candy" the remaining bacon.
Preheat your oven to 375'. Line a rimmed cookie sheet with foil (for easy clean up) and place a rack on it.
Get out some brown sugar...maybe 1/4 - 1/2 cup? Place the bacon on the rack and sprinkle generously with brown sugar. Place in the oven and bake for a maybe 10 mins? The time will vary depending on the thickness of your bacon. Basically, when they're halfway done and ready to turn over, you're going to sprinkle the other side with more brown sugar. Bake until done. Crumble and set aside.
Now this is where things get a little "fuzzy". I think it was Super Bowl Sunday when I made these. And I made the icing...ummm....after the game and definitely under the influence. Let's just say...I forgot to measure stuff. I know I started off with a basic icing recipe:
1 1/2 cups butter
4 ups powdered sugar, sifted
1/4 cup or more of cocoa powder
1/2 teaspoon vanilla....but wait. I didn't add vanilla. I poured in maybe 1 tsp? of maple flavoring.
Beat the butter for 2 minutes on medium-high speed. Reduce the speed to medium and add the powder sugar and cocoa powder 1/2 cup at a time. Beat until fluffy. Add the
Ice the cupcakes and top with candied bacon
I really did have fun making these. If you're not into bacon...don't bother. If the idea of sweets and meat mixed together doesn't appeal to you....don't bother. Me? I love bacon. I love maple and bacon. The cupcakes weren't overly sweet.....and the icing was to die for!
There is one thing I'd do differently. I'd candy ALL of the bacon....even the bacon that gets folded into the batter.
Friday, March 9, 2012
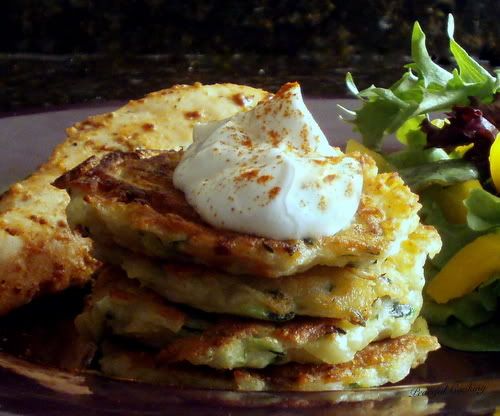
Zucchini and Potato Pancakes
Joy the Baker does it again! Yes, this is another fantastic recipe from her newly published cookbook titled Joy the Baker Cookbook with 100 Simple and Comforting Recipes.
The past few posts here have been part of the Joy the Baker Cookbook Spotlight and Cook-Off sponsored by Hyperion and hosted at girlichef
What a great time I've had playing with this cookbook. There have been several times where I couldn't decide which recipe to try next. They all look so good. And when I say "look"...I mean...wow! Joy took all the photos herself. They seriously make you want to try each and every recipe in this book. Mouthwatering, enticing, luring.....
Not only are there fantastic photos but (without trying to sound cliche-ish).....what a joy it is to read. She has her funny, quirky, witty anecdotes with each recipe. Kinda makes you feel like you know her...or at least can relate...and want to know her. And then makes the dish all the more desirable.
If you're looking for a cookbook with lots of sinfully delicious, easily made, sure to be satisfying recipes then this is your book. You wont find meat or much at all that can be served for a traditional dinner (but hey....breakfast for dinner is one of my all time favorite meals). What you will find are lots of decadent desserts and breakfast treats that will make you feel as if you're the most special person on this planet. Indulgent. I don't know what else to say....I think indulgent pretty much sums it all up.
Oh...and in the "Kitchen Tips" chapter....there's even a recipe for making your own vanilla extract. Not to mention 'how to get the bundt out' (tips on how to correctly remove a bundt from the pan without it falling apart), 'seasoning a cast-iron skillet' and my favorite....'Am I seriously Out of Brown Sugar?'.
I just love Joy!
Zucchini and Potato Pancakes
Printable Version
Makes 12-16 pancakes
4 TB olive oil
1/4 cup finely diced onion (Joy says yellow...I used what I had)
1 garlic clove, minced
2 cups grated zucchini (about 2 zucchinis, give or take)
2 cups peeled and grated potatoes (4 small? 2 large)
1 tsp salt
2 large eggs
1/3 cup all purpose flour
1/2 tsp baking powder
Sour cream for dipping
Paprika and / or cumin for garnishing
In a medium sized skillet, heat 2 TB of olive oil over medium heat. Saute the onion until it's translucent. Add the garlic and continue to saute for an additional minute. Place in a small bowl and set aside.
Combine the zucchini and potatoes along with 1/2 tsp of salt. Place in a strainer, over a medium bowl and allow to sit for 10 minutes. Press down with a clean cloth or paper towels, squeezing out the excess water.
Clean out the bowl (so you don't have too many dishes to do tonight) and whisk the eggs. Whisk in the flour, baking powder and remaining 1/2 tsp salt. Stir in the sauteed onions and garlic along with the strained zucchini and potatoes.
Heat the oven to 200' F to keep the pancakes warm as you make them in batches.
In the same skillet (yep...still keeping the dirty dishes down to a minimum), wiped clean, heat the remaining 2 TB of olive oil over medium heat. Drop in pancake batter in by rounded tablespoon. Gently flatten (shape) with a fork. Cook for 2 minutes per side, until golden brown.
Place cooked pancakes on a plate of sheet in the oven to keep warm while you finish with the rest of the batter. I used a 10" skillet and fit 5 - 6 pancakes per batch.
Serve with sour cream and a dusting of paprika and / or cumin.
YUM! YUM! YUM!
Saturday, March 3, 2012
Buttermilk Skillet Cake with Pecan Praline Topping
This week for the the Joy the Baker Cookbook Spotlight and Cook-Off sponsored by Hyperion and hosted at girlichef we got to choose what ever recipe we wanted to show you all. This recipe caught my eye on several levels........
I have a thing for cast iron skillets.
I have a thing for praline.
I have a thing for buttermilk in baking recipes.
And now...I have a very serious thing for this recipe alone. Ooh....MY....gawd! This cake is flippin' amazing. Light, fluffy....not too sweet because the praline has that roll. And it does it well! The scale is going to be yelling at me if I don't stop eating it.
If you end up purchasing Joy's cookbook....you'll find the recipe on page 113, titled Buttermilk Skillet Cake with Walnut Praline Topping. I happen not to like walnuts. So I automatically swap them for pecans whenever called for in a recipe.
Buttermilk Skillet Cake with Pecan Praline Topping
Printable Version
1 1/2 cups all purpose flour
3/4 tsp baking powder
1/4 tsp baking soda
3/4 tsp salt
6 TB unsalted butter, at room temperature
1 cup granulated sugar
1 large egg
1 large egg yolk
2 teaspoons vanilla extract
3/4 cup buttermilk
Praline Topping:
3/4 cup packed brown sugar
1/2 cup unsalted butter
1/4 cup heavy cream
good pinch of salt
1 tsp vanilla extract
1 cup coarsely chopped pecans (or walnuts if that's your thing)
Preheat your oven to 375' F. Grease and flour an 8" over safe (ie: cast iron) skillet, along the bottom and up the sides. Joy says a 9" cake pan will work as well. Don't make up your mind yet....please.
I want you to see how big...errr...small an 8" skillet is. You'll see in a minute the importance of this.
In a medium bowl whisk together the flour, baking powder, baking soda and salt. Set aside.
In another medium bowl, with a stand or hand mixer, cream together the granulated sugar and butter until fully incorporated, about 3 minutes.
Add the egg and yolk, one at a time, beating for 1 minute between the two.
Beat in the vanilla.
Now....with the mixer on low, add half of the flour. Beat until incorporated. Add the buttermilk, and beat again until incorporated. Finally, beat in the remaining flour until almost fully incorporated. Stop beating and continue with a spatula to fully incorporate the flour.
Pour / spoon the batter into your prepared pan.
Smooth the batter in the pan evenly. (clears her throat)....put a pan on the bottom rack. Just in case. Bake for 30 minutes until a toothpick inserted in the center comes out clean.
While things of unknown magnitude are going on in the oven....you should make the pralines.
Combine the brown sugar, butter, cream and salt in a medium saucepan. Bring to a soft boil and let boil for 3 minutes. Keep an eye on it. It likes to get a little rambunctious....just stir it down.
After 3 minutes, remove from heat and stir in the vanilla and nuts. Allow to set for about 20 minutes to thicken up a bit.
I don't know why....something I did maybe? Or just one of those quirks...but (clears her throat)...I had a bit of a mishap.
I'm really glad that pan was in there to catch the mess. At first I was fretting a bit. But then I decided to let it ride. I turned the oven down to 350' and let it cook a bit longer since the center wasn't set yet. And hoped that my house wouldn't be inundated with that burned sugary smell.
Once I had determined (with aforementioned toothpick test) that he cake was done, I let it cool for a minute and then placed the pan on a plate.
It needed examining. How was I going to pull this off? Scrap it and start over? I have a thing about throwing away perfectly good food. So that thought didn't linger long. I considered cutting off all the crunchy edges (oh the pain of the thought) and inverting the pan so the cake would come out. but I knew I'd mess it up even more.
I decided to....embrace the rustic. Forget the perfection and clean beauty of the intention. And just pour the praline over the whole thing....skillet and all
And then discovered the raw beauty that only a cast iron skillet can pull off with such comfort.
What happened next was pure taste-bud nirvana
I want to say....you should probably cook this cake in a 10" skillet or a cake pan. But there's a part of me that has a thing for this bad boy.....just as it is.
Subscribe to:
Posts (Atom)