Yum Peaceful Cooking

Friday, March 30, 2012

Maple Bacon Cupcakes with Beer


I while back...sometime in January, Betty Crocker posted a recipe  for Beer and Bacon Mancakes. Basically pancakes for your man that contain beer and bacon. Sounds pretty good, right? If you're into pancakes. Which I'm not. I'm probably one of the few people who do not order pancakes when she eats at iHop. I prefer crepes.

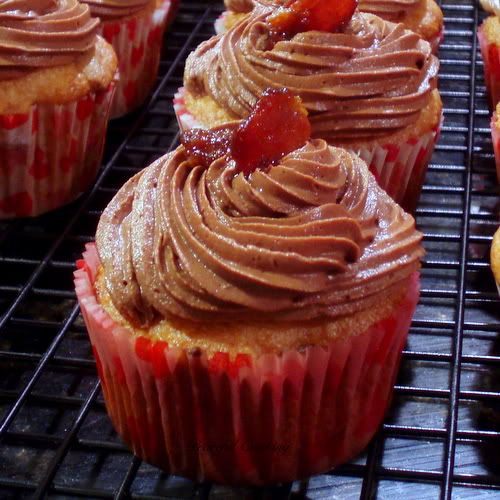
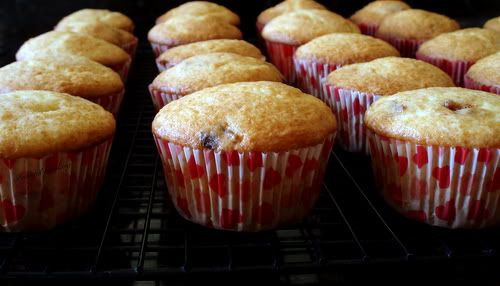
Ok, with that said...and by judging the above photo...I'm sure you can guess what came next.  Super simple.....very yummy...(if you don't mind a little "meat" in your cupcake, that is)....and a lot of fun.
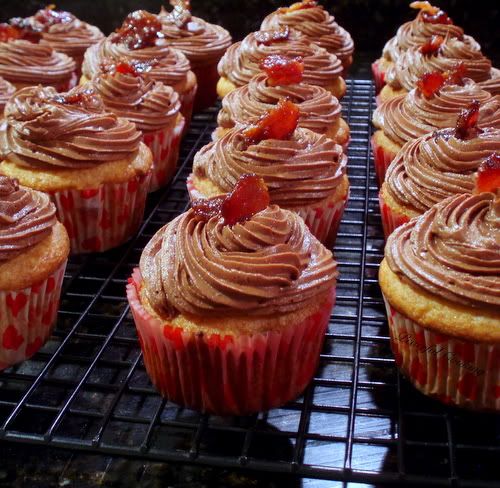


Maple Bacon Cupcakes with Beer

1 box of your favorite white or yellow cake mix
What ever other ingredients that are call for on the cake mix box, minus the liquid. (probably just eggs)
1 12 oz bottle of beer (you won't use it all...the remaining is for your own personal consumption)
1 lb bacon

Preheat the oven according the the instructions on the box of cake mix. Line 24 cupcake cups.

Fry 1/2 of the bacon and crumble. (tip: with your kitchen shears, cut the raw bacon into squares and fry them up....then you don't have to "crumble" them)


Follow the instructions on the cake mix box except....instead of adding the suggestion water, replace it ounce for ounce with beer. If your not familiar on how to poor beer without creating a giant "head" of froth (which could make it difficult to measure)....just tilt the bottle or can and the measuring cup towards each other...almost level, and gently pour so that the beer is running into the measuring cup, along the 'wall'. I hope that makes sense.
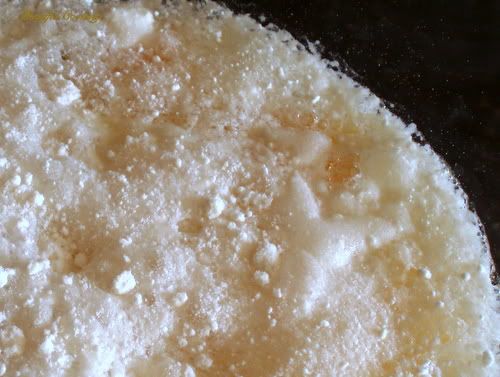

Once the beer is poured into the batter, you'll have some frothy fun. Mix as instructed on the box. Fold in the crumbled bacon.

Divide the batter amongst the lined cupcake cups. Bake according the box instructions. Allow to cool completely before icing.

Meanwhile....you need to "candy" the remaining bacon.

Preheat your oven to 375'. Line a rimmed cookie sheet with foil (for easy clean up) and place a rack on it.

Get out some brown sugar...maybe 1/4 - 1/2 cup? Place the bacon on the rack and sprinkle generously with brown sugar. Place in the oven and bake for a maybe 10 mins? The time will vary depending on the thickness of your bacon. Basically, when they're halfway done and ready to turn over, you're going to sprinkle the other side with more brown sugar. Bake until done. Crumble and set aside.

Now this is where things get a little "fuzzy". I think it was Super Bowl Sunday when I made these. And I made the icing...ummm....after the game and definitely under the influence. Let's just say...I forgot to measure stuff. I know I started off with a basic icing recipe:

1 1/2 cups butter
4 ups powdered sugar, sifted
1/4 cup or more of cocoa powder
1/2 teaspoon vanilla....but wait. I didn't add vanilla. I poured in maybe 1 tsp? of maple flavoring.

Beat the butter for 2 minutes on medium-high speed. Reduce the speed to medium and add the powder sugar and cocoa powder 1/2 cup at a time. Beat until fluffy. Add the vanilla maple flavoring (not maple syrup....maple flavoring is concentrated). Taste it and adjust the cocoa powder and maple flavoring until you love it!

Ice the cupcakes and top with candied bacon
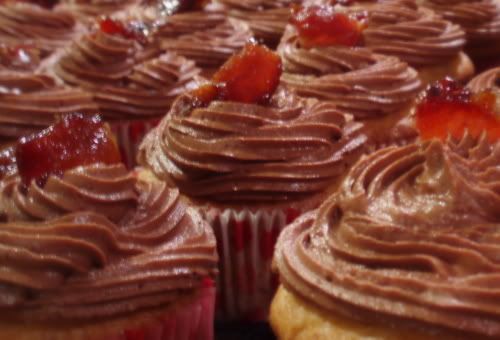

I really did have fun making these. If you're not into bacon...don't bother. If the idea of sweets and meat mixed together doesn't appeal to you....don't bother. Me? I love bacon. I love maple and bacon. The cupcakes weren't overly sweet.....and the icing was to die for!

There is one thing I'd do differently. I'd candy ALL of the bacon....even the bacon that gets folded into the batter.

Friday, March 9, 2012

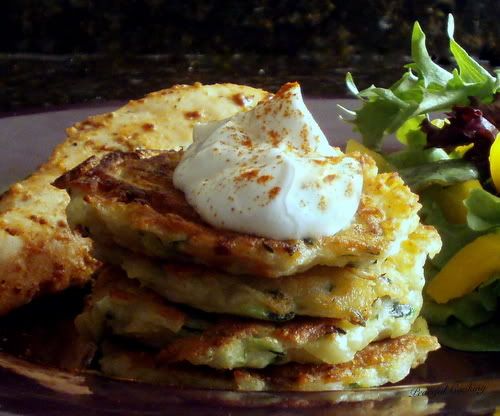
Zucchini and Potato Pancakes


Joy the Baker does it again! Yes, this is another fantastic recipe from her newly published cookbook titled Joy the Baker Cookbook with 100 Simple and Comforting Recipes.


The past few posts here have been part of the Joy the Baker Cookbook Spotlight and Cook-Off sponsored by Hyperion and hosted at girlichef

What a great time I've had playing with this cookbook. There have been several times where I couldn't decide which recipe to try next. They all look so good. And when I say "look"...I mean...wow! Joy took all the photos herself. They seriously make you want to try each and every recipe in this book. Mouthwatering, enticing, luring.....

Not only are there fantastic photos but (without trying to sound cliche-ish).....what a joy it is to read. She has her funny, quirky, witty anecdotes with each recipe. Kinda makes you feel like you know her...or at least can relate...and want to know her. And then makes the dish all the more desirable. 

If you're looking for a cookbook with lots of sinfully delicious, easily made, sure to be satisfying recipes then this is your book. You wont find meat or much at all that can be served for a traditional dinner (but hey....breakfast for dinner is one of my all time favorite meals). What you will find are lots of decadent desserts and breakfast treats that will make you feel as if you're the most special person on this planet. Indulgent. I don't know what else to say....I think indulgent pretty much sums it all up.

Oh...and in the "Kitchen Tips" chapter....there's even a recipe for making your own vanilla extract. Not to mention 'how to get the bundt out' (tips on how to correctly remove a bundt from the pan without it falling apart), 'seasoning a cast-iron skillet' and my favorite....'Am I seriously Out of Brown Sugar?'.

I just love Joy!

Zucchini and Potato Pancakes
Printable Version
Makes 12-16 pancakes

4 TB olive oil
1/4 cup finely diced onion (Joy says yellow...I used what I had)
1 garlic clove, minced
2 cups grated zucchini (about 2 zucchinis, give or take)
2 cups peeled and grated potatoes (4 small? 2 large)
1 tsp salt
2 large eggs
1/3 cup all purpose flour
1/2 tsp baking powder
Sour cream for dipping
Paprika and / or cumin for garnishing

In a medium sized skillet, heat 2 TB of olive oil over medium heat. Saute the onion until it's translucent. Add the garlic and continue to saute for an additional minute. Place in a small bowl and set aside.

Combine the zucchini and potatoes along with 1/2 tsp of salt. Place in a strainer, over a medium bowl and allow to sit for 10 minutes. Press down with a clean cloth or paper towels, squeezing out the excess water.

Clean out the bowl (so you don't have too many dishes to do tonight) and whisk the eggs. Whisk in the flour, baking powder and remaining 1/2 tsp salt. Stir in the sauteed onions and garlic along with the strained zucchini and potatoes.

Heat the oven to 200' F to keep the pancakes warm as you make them in batches.

In the same skillet (yep...still keeping the dirty dishes down to a minimum), wiped clean, heat the remaining 2 TB of olive oil over medium heat. Drop in pancake batter in by rounded tablespoon. Gently flatten (shape) with a fork. Cook for 2 minutes per side, until golden brown.

Place cooked pancakes on a plate of sheet in the oven to keep warm while you finish with the rest of the batter. I used a 10" skillet and fit 5 - 6 pancakes per batch.

Serve with sour cream and a dusting of paprika and / or cumin.

YUM! YUM! YUM!

Saturday, March 3, 2012

Buttermilk Skillet Cake with Pecan Praline Topping


This week for the the Joy the Baker Cookbook Spotlight and Cook-Off sponsored by Hyperion and hosted at girlichef we got to choose what ever recipe we wanted to show you all. This recipe caught my eye on several levels........

I have a thing for cast iron skillets.

I have a thing for praline.

I have a thing for buttermilk in baking recipes.

And now...I have a very serious thing for this recipe alone. Ooh....MY....gawd! This cake is flippin' amazing. Light, fluffy....not too sweet because the praline has that roll. And it does it well! The scale is going to be yelling at me if I don't stop eating it.

If you end up purchasing Joy's cookbook....you'll find the recipe on page 113, titled Buttermilk Skillet Cake with Walnut Praline Topping.  I happen not to like walnuts. So I automatically swap them for pecans whenever called for in a recipe.

Buttermilk Skillet Cake with Pecan Praline Topping
Printable Version

1 1/2 cups all purpose flour
3/4 tsp baking powder
1/4 tsp baking soda
3/4 tsp salt
6 TB unsalted butter, at room temperature
1 cup granulated sugar
1 large egg
1 large egg yolk
2 teaspoons vanilla extract
3/4 cup buttermilk

Praline Topping:
3/4 cup packed brown sugar
1/2 cup unsalted butter
1/4 cup heavy cream
good pinch of salt
1 tsp vanilla extract
1 cup coarsely chopped pecans (or walnuts if that's your thing)

Preheat your oven to 375' F. Grease and flour an 8" over safe (ie: cast iron) skillet, along the bottom and up the sides. Joy says a 9" cake pan will work as well. Don't make up your mind yet....please.


I want you to see how big...errr...small an 8" skillet is. You'll see in a minute the importance of this.

In a medium bowl whisk together the flour, baking powder, baking soda and salt. Set aside.

In another medium bowl, with a stand or hand mixer, cream together the granulated sugar and butter until fully incorporated, about 3 minutes.

Add the egg and yolk, one at a time, beating for 1 minute between the two.

Beat in the vanilla.

Now....with the mixer on low, add half of the flour. Beat until incorporated. Add the buttermilk, and beat again until incorporated. Finally, beat in the remaining flour until almost fully incorporated. Stop beating and continue with a spatula to fully incorporate the flour.

Pour / spoon the batter into your prepared pan.


Smooth the batter in the pan evenly. (clears her throat)....put a pan on the bottom rack. Just in case. Bake for 30 minutes until a toothpick inserted in the center comes out clean.

While things of unknown magnitude are going on in the oven....you should make the pralines.

Combine the brown sugar, butter, cream and salt in a medium saucepan. Bring to a soft boil and let boil for 3 minutes. Keep an eye on it. It likes to get a little rambunctious....just stir it down.


After 3 minutes, remove from heat and stir in the vanilla and nuts. Allow to set for about 20 minutes to thicken up a bit.

I don't know why....something I did maybe? Or just one of those quirks...but (clears her throat)...I had a bit of a mishap.

I'm really glad that pan was in there to catch the mess. At first I was fretting a bit. But then I decided to let it ride. I turned the oven down to 350' and let it cook a bit longer since the center wasn't set yet. And hoped that my house wouldn't be inundated with that burned sugary smell.

Once I had determined (with aforementioned toothpick test) that he cake was done,  I let it cool for a minute and then placed the pan on a plate.


It needed examining. How was I going to pull this off? Scrap it and start over? I have a thing about throwing away perfectly good food. So that thought didn't linger long. I considered cutting off all the crunchy edges (oh the pain of the thought) and inverting the pan so the cake would come out. but I knew I'd mess it up even more.

I decided to....embrace the rustic. Forget the perfection and clean beauty of the intention. And just pour the praline over the whole thing....skillet and all


And then discovered the raw beauty that only a cast iron skillet can pull off with such comfort.

What happened next was pure taste-bud nirvana


I want to say....you should probably cook this cake in a 10" skillet or a cake pan. But there's a part of me that has a thing for this bad boy.....just as it is.


Thursday, March 1, 2012

Whole Wheat Honey and Goat Cheese Drop Biscuits


When Joy the Baker said these biscuits are quick and easy...she wasn't exaggerating. I found them to be light and fluffy with a little tang and nuttiness and a hint of  honey sweet. Now Joy talked about these for breakfast and brunch. I had them for dinner with soup. I'd like to have some more this weekend with soft scrambled eggs and crispy bacon. I bet my girls would too. You see....this recipe makes 8 - 10 biscuits. Two were eaten last night (one by me....the other by a fly-by daughter...it was a quiet night around here). When I got home from work tonight....there was one biscuit left. I quickly laid claim to it and ate it with some leftover soup.

It wasn't enough

I want more

I want some for dessert with homemade strawberry jam. Or more honey.

Whole Wheat Honey and Goat Cheese Drop Biscuits
Printable Version

2 cups whole wheat flour
3 tsp baking powder
1/4 baking soda
1 1/2 tsp salt
1/4 cup unsalted butter, cold and cut into cubes. Plus more for the skillet
4 TB crumbled goat cheese
1 cup buttermilk
2 TB honey

With the rack in the upper 1/3 portion of your oven, preheat to 400'. You will want to place a 10" cast iron skillet on the rack so that it too can be preheated.

In a medium sized bowl, whisk together the flour, baking powder, baking soda and salt.

Using the tips of your fingers, quickly incorporate the chilled butter cubes and crumbled goat cheese into the flour mixture until you have what resembles coarse meal. You might still have some bits of the butter and cheese that are the size of small pebbles and / or oak flakes. That's to be expected.

Make a well in the middle of your flour mixture. Whisk together the buttermilk and honey and pour into the "well". Using a fork, combine the flour and buttermilk mixture until all of the flour is incorporated. Set aside.

Remove the skillet from the oven and plop a tablespoon of butter in there to melt. Rotate the pan around so that the entire bottom and sides are covered with butter.


Spoon the batter, by a "drop" full (about 1/4 cups worth) into the hot skillet, leaving about an inch between each biscuit. 6 will fit in there comfortably.


Bake for about 14 - 16 minutes or until golden brown and the tops look dry and a little firm. Let rest for 5 minutes.

Repeat

Enjoy

Joy the Baker has come out with a cookbook and I'm thrilled to have been asked to participate in the Joy the Baker Cookbook Spotlight and Cook-Off sponsored by Hyperion and hosted at girlichef*


Thursday, February 23, 2012

Flaxseed and Cracked Pepper Crackers


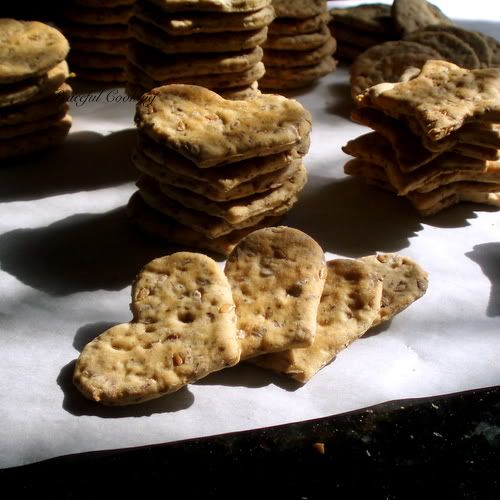
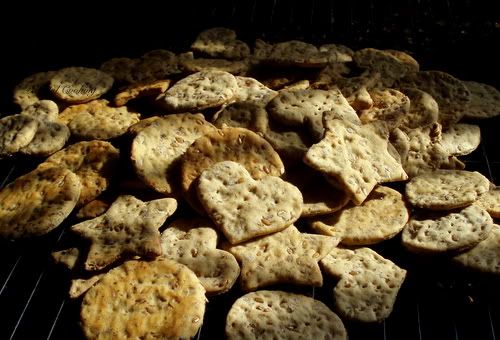
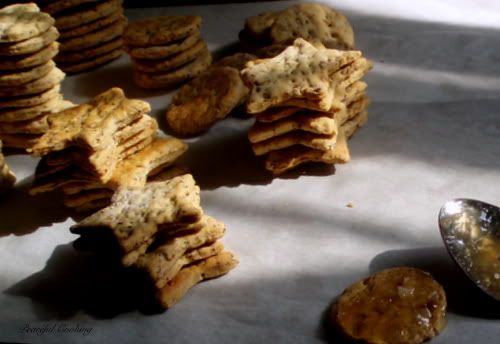
When I agreed to participate in the Joy the Baker Cookbook Spotlight and Cook-Off sponsored by Hyperion and hosted at girlichef, we were given a a selection of recipes to try out, 2 choices per week with the option to make one or both choices. I figured I'd only do one recipe each week. I didn't want to stress myself out by trying to overachieve.  For the first week, we had the choices of Chocolate Fudge Brownies with Chocolate Buttercream Frosting and Flaxseed and Cracked Pepper Cracker (say that 5 times fast). I was planning on only making one of them...and of course I went with the brownies (that's a no brainer). After seeing everyone's cracker post...I couldn't resist. I HAD to give them a try. And let me tell you....I am so happy I did. They are easy to make and taste great! You have the earthiness of the whole wheat flour, the nuttiness of the flaxseed and the slightest heat from the cracked pepper. And you can make them any shape you choose!

 (time to get out your cookie cutters and have a little fun)

One side note....if you choose to purchase the Joy the Baker Cookbook (and I highly recommend that you do) you might notice that cracked pepper is not on the list of ingredients. A mild oversight somewhere along the line. It has been determined, and confirmed by Joy, that 1/2 tsp is what should be there. (it's now there, in my copy of the book, written in my handwriting).

One more side note: Flaxseed meal. It's a bit pricey. I happened to already have some on hand from some bread I made a while back (apparently it keeps very well in a very cold fridge). But I did see it at one of my local health food stores, sold in a bin. Which is great...a buck something a pound and I'd only have to purchase as much as I needed. Hopefully you have something near you that does the same. I was able to purchase the golden flaxseed in the same manner.


Flaxseed and Cracked Pepper Crackers
Printable Version

1/4 cup golden flaxseed
1/3 ground flaxseed meal
1 cup whole wheat flour
1/2 cup all purpose flour
1/2 tsp baking soda
3/4 tsp salt
1/2 tsp cracked pepper
2 TB unsalted butter, cut into cubes and chilled
1/2 cup buttermilk

Preheat the oven to 350' F. Line 2 cookie sheets with parchment paper.

In a medium sized whisk together the flaxseed, flaxseed meal, whole wheat flour (I used white whole wheat), all purpose flour, baking soda, salt and cracked pepper.

Add the butter and work it into the flour mixture, quickly, using the tips of your fingers.

Make a well in the center and add the buttermilk. With a fork, work everything together until all of the flour mixture has been incorporated with the buttermilk, making sure every bit of the flour is moistened. You will have a shaggy dough but no worries....it'll come together very nicely in a minute.

Turn the dough out onto a lightly floured surface and knead the dough about 10 times to bring everything together. Wrap in plastic wrap and chill in the fridge for about 10 minutes.

Once chilled, cut the dough in half (place one half, wrapped in plastic) back into the fridge. With the remaining half, roll out until it's about 1/8 of an inch thick. Which basically means...as much as you possibly can. You don't want the dough to be thick otherwise your crackers will have more of a biscuit texture than a nice crisp cracker.

Cut the crackers into 1 1/2" rounds, or use a pizza cutter to make squares...or use your favorite small cookie cutter. If the crackers are much bigger than 1 1/2", you will need to increase the cooking time accordingly.

Place on a cookie sheet and prick each one a few times with a fork


Bake for 15 to 18 minutes or until just golden brown around the edges. Allow to cool before storing them in an airtight container.
Store at room temperature for up to 4 days.

And there you have a whole crud load of delicious, healthy crackers that you've made yourself!


Serve with your favorite cracker topping....cheese, savory spread such as Garlic Jelly


But to be honest with you....I preferred them as is....plain and simple, straight out of the handy dandy zip lock baggy on my desk....waiting to be snacked on throughout the day. Or as a nice little side while enjoying my Merlot night cap.

However you decide to eat these tasty little morsels....make sure you share with a friend and here the awe in their voice as they say..."You made these?!"

(I'm sad to say that I just popped the last cracker in my mouth. Gee darn...I might have to make some more)

Saturday, February 18, 2012

Chocolate Fudge Brownies with Chocolate Buttercream Frosting


Until recently, I never paid much attention to brownies. I rarely made them. I rarely ate them. Not that I didn't like them. They just didn't pop into my mind when I wanted dessert. I don't even remember eating brownies when I was a child. Cookies were my thing. Sugar cookies, chocolate chip cookies, peanut butter cookies. I liked cookies. Anyways....my point is....I didn't realize that there were so many different "kinds" of brownies. Cakey, soft, fudgie. And not all brownies are created equally. Boxed, one bowl, several bowls. Cocoa powder, melted chocolate....etc etc.


Apparently I'm the kind of person who likes soft chewy brownies with crispy edges. Then I discovered that I like them with frosting! Who knew? At my age....I'm just now eating a brownie with frosting for the first time? I'd feel very deprived...but I wouldn't want to seem ungrateful to all those wonderful cookies I enjoyed, growing up.

If I were to confess that these brownies are better than any cookie I've ever had...would you promise not to tell? (My peanut butter cookie recipe might feel slighted)

Chocolate Fudge Brownies
Printable Version

3/4 cup all-purpose flour
1 tsp baking powder
1/2 tsp salt
1/2 cup unsalted butter
3 oz unsweetened chocolate
1/2 cup packed brown sugar
1/2 cup granulated sugar
2 large eggs
1 large egg yolk
1 tsp pure vanilla extract
1/2 cup semisweet chocolate chips

Preheat your oven to 350' F. Grease and flour a n 8" x 8" baking dish.

In a medium bowl, whisk together the flour, baking powder and salt.

Melt the unsweetened chocolate and butter together, in a medium bowl. You can either do it in the microwave if that's your thing...or you can melt it in the bowl, over a pot with boiling water (double boiler style).

Once melted, whisk in the sugars (brown and granulated) and then whisk in the eggs, egg yolk, and vanilla.

Add the flour and fold into the chocolate mixture until well incorporated then fold in the chocolate chips.

Pour your batter into your prepared baking dish and bake for 25-30 minutes or until you have a fairly clean toothpick when inserted into the middle. I say "fairly" clean....because...if you skewer a melty chocolate chip, there's no way the toothpick is coming out clean.


Allow to cool completely before adding the following frosting...

The Best Chocolate Buttercream Frosting
Printable Version

3/4 cup unsalted butter, room temperature
1/2 cup cocoa powder
1/2 tsp salt
2 1/2 - 3 cups powdered sugar, sifted
2 TB milk
1 tsp vanilla extract
Scant 1/2 cup heavy cream
1/3 cup Ovaltine powder

The instructions say to use a stand mixer with a paddle attachment. I have a mixer with a stand. It's 20 yrs old. Basically its a hand mixer that slides onto the stand for convenience. I don't have paddles or any other special attachments. If you're in the same boat as me, don't worry. It works out just fine. 

Cream together the butter, cocoa powder and salt.

Note: Ummm....I had a cocoa powder dust cloud going here. Next time I think I'll cream the butter first and then add the cocoa powder and salt a little at a time. Just for the sake of having less of a mess to clean up.

Continue to mix for another 3 minutes....which at this point you should have a nice creamy chocolaty mix.

Scrape down the sides and add the powdered sugar, while the mixer is on low speed.

Note: After my cocoa powder dust cloud...I added the powdered sugar 1/2 cup at a time, along with the milk and vanilla.

As the sugar incorporates, increase the mixer speed gradually to medium high, scraping down the sides as needed, until everything's nice and smooth.

Mix together the heavy cream and Ovaltine.

Note: Believe it or not...this was the first time I had ever bought Ovaltine. I may have had some as a child but I honestly can't remember. I know my mom never bought it. Apparently there are a few flavors to choose from. I used the rich chocolate Ovaltine. You can use whichever you prefer.

Turn the mixer to medium and add the cream slowly. Beat until you have a delicious frosting that's your desired consistency. Joy the Baker says to add more powdered sugar to adjust the consistency to your liking. You want something that is smooth, creamy and spreadable.

For the brownies, you're only going to use only half of the frosting.


 Save the rest for something else yummy....like finger dipping (or cupcakes).

Cut this one large brownie into more managable sized pieces (cuz no matter how much you want to keep it all to yourself and eat the whole thing as is, cuz if it's not cut up, you can say you only ate ONE brownie....you'll want to see the faces of those who enjoy this and hear them say...mmmmmm.)

I did take the brownies to work so I could share the joy. After a long week, and as Friday came to an end....a rich, chocolately brownie was just what we needed. (Only cuz we're not allowed to have margaritas at work).

But I got to bring a couple home for the weekend. For breakfast. Cuz what could be better than a brownie with your morning coffee on a pretty little plate on a beautiful Saturday morning? (before you go to the gym)


For the next couple of weeks you're going to hear a lot about Joy the Baker around here. She's come out with a cookbook and I'm thrilled to have been asked to participate in the Joy the Baker Cookbook Spotlight and Cook-Off sponsored by Hyperion and hosted at girlichef*


These brownies and frosting are one of the many sinfully delicioius recipes in her cookbook.

I've just realized that she lives here in L.A. I feel like we should be neighbors or something but with traffic and all....it could take hours to get to her end of town (which ever ends that happens to be). Wouldn't it be cool to bump into her at the grocery store? 

Then I could invite her over to help me bake all the goodies in my shopping cart.

Sunday, January 29, 2012

Drunken Cows Milk


Two weeks ago, my friend Jodie from Pairings (I told you about this upcoming webseries last weekend) sent me a message with a link titled How to Make Milk That'll get you Hammered. Apparently she knows me well...saying that I needed to try it (of course I do!). I was so intrigued that I started the process that very day.

The ingredients are simple enough. The only thing I needed to purchase was some vodka (and a pretty little bottle to store the finished product in. Which I have to say, I found at a local thrift shop for under $2.00)


Drunken Cows Milk
Printable Version

2 cups vodka
2 cups whole milk
2 cups sugar
2 oranges, cut into chunks
1 lemon, cut into chunks

Combine all of the ingredients in a large jar (1/2 gallon)


My jar was just shy of 1/2 gallon but it all fit in there. Barely

Screw on the lid....

 
and keep in a cool dark cupboard for 10 days. Every day, take the bottle out and give it a good shake or stir. Return to it's place of hibernation.

The first day....it looked like this:


Aint that peerty. Ya...a little scary. But science projects in the kitchen are always fun.

After that...it mostly looked like this:


I'd just shake it up and put it back. Although I have to admit there were a couple of days that I forgot about it. And when the 10 days was up, I just didn't have the time to strain it. During the week....it's just too late to mess with so I waited until the 14th day (mostly out of convenience...partly cuz I figured that I missed a day or two of the shaking up process, that it would be a good thing.)

Yesterday morning, I got out the strainers and bowls and got busy.


Let's take a look inside and see what was created:


Hmmm....for some reason, I expected to see something a lot more offensive. Milk chunks maybe? Guess all that vodka kept the milk and citrus under control. I don't see any curds. Ok...lets continue

I strained it through a colander with large wholes first...to catch the big stuff without blocking everything up


I then put it through a mesh colander


Hard to believe that this creamy stuff becomes clear yellow as shown at the top, right? You'll see. Btw...at this point, if you are totally into creamsicles....this is your drink. It's totally fine to drink as is. I personally have never been a fan of creamsicles. The combination of ice cream and popsicles never appealed to me. So I kept going...and strained it even further by lining my mesh strainer with a coffee filter. (I think my mesh strainer needs to be replaced, don't you? Kinda frustrating cuz it's not that old)


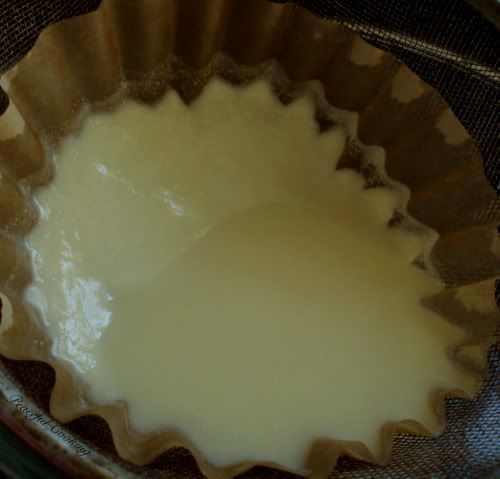
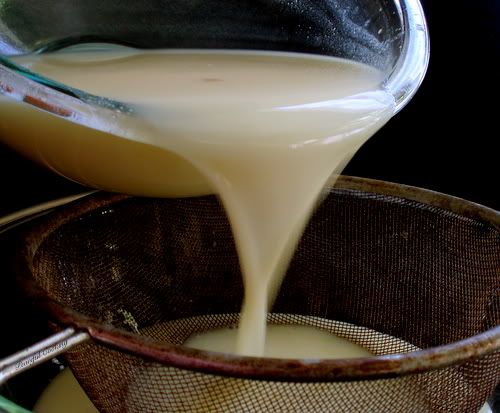
This is where it got time consuming. All those milk solids kinda clog up the filter and you get this slow stream that quickly becomes a slow drip. But check it out....its CLEAR!!


As the dripping became painfully slow, I found myself changing the filters often


I don't even know how many I went through....6 or more? Once those solids clung to the filter...there was no way the liquid was escaping.

Eventually, I ended up with 3 cups (plus a shot) of clear yellow Drunken Cows Milk.


Even with the milk solids gone, there's a hint if creaminess. It's very sweet. Almost syrupy but not quite. It has nice light citrusy flavor. Did I mention how smooth it is going down? Ya...smooth as silk. It can be stored at room temperature for up to 6 months. However, I think I'll be keeping mine in the fridge. I find that it's best when it's chilled.

There are variations of this drink. Things that can be altered. The sugar can be reduced. You can add vanilla. You can also leave out the citrus all together. Or use 2 oz of grated 70% bittersweet chocolate and 1/2 lemon (no oranges)....which I believe I will be trying next (did someone say Malt Balls?).

Thank you Jodie for turning me on to this!! You need to come by and give it a try :)

One more thing....there's a fun little recipe contest over at Pairings....

"The winner of the recipe contest will have their recipe added to the script of an episode of Pairings. Have your recipe prepared by the characters in the show! We will also list your winning recipe on the Pairings website with your name and include it in our Pairings digital cookbook for season 1 and you'll receive a free copy."

Entry deadline: 2/25/2012

For details, it's Entry #6: Recipe Contest : http://www.kickstarter.com/projects/834231336/pairings-the-series/posts