Yum Peaceful Cooking

Sunday, January 8, 2012

Mini Strawberry Pies with Chocolate


Strawberries and chocolate go together like.... ham and eggs, peanut butter and jelly, pork chops and apple sauce (The Brady Bunch anyone?) or...cheese and wine. Both are wonderful on their own but when you put them together it's a whole new level and deliciousness.

In my mission to make mini pies, I searched high and low for mini pie pans. I couldn't find any. I know they're out there. I've seen them since making these but in my impatiences, I didn't want to order them online or wait another week for me to have a whole weekend to search another set of stores. Sooooo I decided to use my muffin pan. Which made perfectly sized little individual servings of pie. I thought about using my ramekins but they don't have an edge on them to be able to make the little crust edge designs. Not that my crust design is great but it has one at least. Which makes them truly look like mini pies.

Before I go into detail here, I want to explain something. I made the pie crust with cocoa powder in it. My intention of course was to create a chocolate flavored crust. It looks chocolaty....all brown and everything.


But the flavor isn't there. It ended up just tasting like any ol' crust. (but there's a fun surprise inside that makes everything wonderful so it wasn't a fail). I'm hesitant to add more cocoa to the my crust recipe in fear of breaking down the flakiness and making it more doughy. I could've used a chocolate cookie crust but then it would be a totally different kind of pie, wouldn't it? Any hints, tips or clues out there on how to make a flaky chocolate pie crust that actually tastes chocolaty?

With all that said.......(crap....I forget where I was going with this)

Well, never mind. Lets just get to it

For the pie crust...you can use your favorite recipe. If you want to try the chocolate version, rule of thumb...for every cup of flour, add 4 tsp cocoa powder and 4 tsp sugar. The recipe I used was from Mastering the Art of French Cooking:

This recipe makes 8 mini pies.

2 cups all purpose flour
1 tsp salt
1/4 tsp sugar
6 oz chilled butter, but into 1/2" bits
4 TB chilled shortening
a scant 1/2 cup of iced water (plus more if needed)

then I added:
8 tsp (2 TB plus 2 tsp) cocoa powder
8 tsp (2 TB plus 2 tsp) sugar

In a chilled mixing bowl, add flour, salt, sugar, cocoa powder, butter and shortening.


Using a pastry blender (or the tips of your fingers....working very quickly) work the butter and shortening into the flour mixture until you have pea sized crumbs.
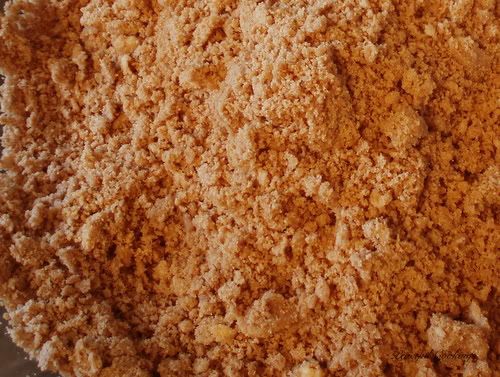

Don't get too mental on this one. It doesn't have to be perfect. Everything will be worked in more thoroughly later.

Add the water and blend quickly with a fork, or your fingers slightly cupped and gather everything together into a mass. If needed, sprinkle more water by the droplets over anything that's not combining with the rest of the dough. Be careful. You want the dough to hold together and be pliable but not sticky. Press together into a rough ball.


Place onto a floured surface. Now...I tried a new method here. One I had never heard of until reading Julia Child's instructions. With the heel of your hand (not the palm, which is the warmest part of your hand) press the pastry, bit by bit away from you in a firm, quick smear of about 6 inches


until you've worked through the whole ball of dough. Scrape up the dough with a spatula and gather it into a mass. Knead it for a second into a smooth round ball. Lightly sprinkle it with flour, wrap it in plastic wrap and place in the refrigerator or about 2 hrs or over night.

While the dough was chilling, I prepared my strawberry pie filling.

2 cups of strawberries
1/2 cup sugar (plus more to garnish if desired)
2 TB balsamic vinegar
1 TB flour
3 TB butter, diced
2 oz dark chocolate divided into 8 - 1/4 oz pieces

I washed, hulled and sliced the strawberries. Stirred in the sugar and balsamic vinegar and let sit in the refrigerator, covered, until ready to use.

When the dough is ready, divide into 8 equal balls. As I worked with 1 ball, the remaining were stored in the fridge to keep cold.

Preheat the oven to 400' F

On a lightly floured surface, I divided 1 ball in half. Each half was rolled out into a circle. Use a 3" cookie cutter to cut the dough into uniform crusts. Place the circles in plastic wrap and stored them back in the fridge.


Once all the dough was rolled out and cut (you should have 16 dough rounds), line 8 muffin tins with half of the dough rounds. Carefully trim the edges of any excess dough, sprinkle the bottoms with a little flour.

Drain off any excess balsamic vinegar from the strawberries then divide them evenly between all 8 dough lined tins.


I had some wonderful sample sized pieces of dark chocolate from Scharffen Berger that were perfect for this! Take a piece of chocolate and bury it in the center of the strawberries, 1 piece per pie. Drop 2 pieces of diced butter on top of each strawberry mound.

Take the remaining rolled out dough rounds and cover each pie. With a fork, carefully press the edges of the pie crusts together to seal the tops to the bottoms. With a knife, slice  two little 1/2 inch vents on top of each pie. Sprinkle the tops with a little sugar.

Place an empty cookie sheet on the bottom rack of the oven to catch any drips (there will probably be drips). Bake for about 30 minutes or into crust is brown and the filling is bubbly.

Let cool, then carefully remove each pie from the muffin tins. You may need a blunt knife to help loosen the edges of the crust.


Now, like I mentioned earlier, the crusts lacked the cocoa flavor completely. But....the little jewels of chocolate on the inside.....


Well, the chocolate melted all over those rich strawberries and mixed in with the filling.


So I think maybe the crust was just a tease....pretending to be chocolaty when in reality, the chocolate was hiding inside.

Monday, January 2, 2012

Savory Jellies: Garlic Jelly and Pepper Jelly

As I was browsing through an old cookbook, I discovered a recipe in the "gift" section of the book. The section includes marinades, flavored mustard, breads, brittle, cakes and jellies, just to name a few. This old cookbook, which I've had for over 15 years I'm sure....is a Leisure Arts Publication called The Spirit of Christmas Cookbook. I have a lot of their books. Most are about arts and crafts, which is what I was into at the time I subscribed to this monthly publication. So I s'pose I shouldn't be too surprised with myself when I realize that I never cooked a single thing from the cookbook editions back when I got them. Which means....now...it seems like I have a new cookbook with new recipes to discover. I'm so excited! This is the second recipe that I've found and made in the past 30 days..and both have been great. The first one I made was for Apple Crisps.

Ok, back to the recipe I discovered....Garlic Jelly! Omg...the minuted I saw it, I knew I had to make it. which I did...that very day. Or was it the next day? No..I think it was that very day. The weekend before Christmas. I decided then and there that I would make a cheese and cracker plate for our Christmas Eve Party and include some savory jellies on the side. Which meant...I needed to find an old recipe that my dear 93 year old neighbor shared with me some 20 years ago....Pepper Jelly. Oh, and did I mention that I found a jar of Balsamic and Sweet Onion Jelly at Cost Plus the week before? I was ready to roll out the savory jellies. (Now that I think of it, I forgot to include the Margarita Jelly that I found at Sprouts last month. And yes....there is tequila in that jelly.)

If the idea of making jelly intimidates you...don't worry. These are freezers jellies. You do not need any special canning materials or knowledge. Easy peasy.

Garlic Jelly
Printable Version
Yields about 3 cups (more like 4)

2 TB butter or margarine
1 head of garlic, minced
3 cups granulated sugar
3/4 cup apple cider vinegar
3/4 cups water
3 oz liquid fruit pectin

In a good sized saucepan add the butter and garlic. Over medium heat, while stirring constantly (garlic burns easily.....so make sure you stir!) cook until the garlic is golden brown. This should take a couple of minutes....3 - 4? maybe more...just keep an eye on it, which shouldn't be too hard to do since you're standing there stirring it the whole time.

Add the sugar, vinegar (and the odor increases) and water. Keep cooking and stirring until the mixture comes to a rolling boil. Add the pectin and bring the mixture back to a rolling boil....and yes...you are still stirring. Stir and boil for 1 minute.

Remove your jelly from the heat. If there is any foam on top...skim it off. Carefully pour the jelly into heat resistant jars with lids.


Store in the refrigerator or freezer. It takes a bit of time to set....up to a week.

Note: This is a very fragrant jelly to make (and to eat).  Your house will smell like garlic......a LOT, during this process, and you may get a few extremely vocal complaints from other occupants. When the jelly is still "young" (the first week of "setting") you will notice the vinegar flavor quit a bit. Once it has set, and....aged a bit (I guess that's the best way to define it) the vinegar will mellow a bit, but it will still be there, which happens to compliment the garlic flavor rather nicely. I think this jelly would be a wonderful marinade and / or glaze for meat. The vinegar will aid in tenderizing as well. But I do have to say that I loved it on crackers and cream cheese. Oh...did I mention that you have to be a major garlic lover to enjoy this jelly? Another little side note....be mindful of those around you. They may not want to smell you.

Pepper Jelly
Printable Version
Yields about 8 cups

3 - 4 bell peppers (I used red) roughly chopped
1 1/2 cups white vinegar
4 TB crushed red pepper flakes (or to taste)
6 1/2 cups sugar
6 oz liquid fruit pectin

In a blender, puree the bell peppers, vinegar, and pepper flakes. Pour into a saucepan and add the sugar.


Bring to a boil, stirring often. Boil hard for 5 minutes, stirring often. Add the fruit pectin and boil for 1 minute. All the while, you need to keep an eye on this. It likes to sneak up to the top of the pan and you don't want it to boil over. 


Skim off any foam. Carefully pour into heat resistant jars with a lid. Store in the refrigerator or freezer. Will take up to a week to set. 


Note: I find this jelly to be very spicy. My girls beg to differ. You have control over how much heat you want by adjusting the amount of red pepper flakes you add. My favorite way to eat this is on crackers with cream cheese. Like the Garlic Jelly, it too would be a wonderful marinade and / or glaze. 

There's just something so good when sweet and savory are combined. Something that makes you wanna come back for more. You try to walk away, but find yourself inevitably migrating back. It's almost like a never ending cycle. When eating these jellies, the first thing you notice is the sweet...then the flavor kicks in, whether its the garlic or the pepper heat. When served with the cream cheese, you are left with the coolness of the cheese. You walk away feeling satisfied. 

For a minute


Then the need to start all over kicks in....and the cycle continues. Until somehow you've made a whole meal out of just this.


Thursday, December 29, 2011

Whole Wheat Oatmeal Raisin Muffins


Not long ago I was challenged.....to make a "healthy muffin". I thought about it for a minute. Asked..."you mean, as in...good for you? Whole wheat? Applesauce? Low fat? That sort of thing?!" And all the while, wondering...why would I want to do that? Next thing I knew.....I heard myself saying..."sure" (in a small, doubtful voice). When I think of "healthy muffins"....I think of earthy, lacking in flavor...cardboard tasting muffins. Probably because that's what the ones I've had at those coffee shops tasted like. Even the not so healthy ones aren't all that great. I usually end up eating the tops off of them and tossing out the rest. (Is that why I have a muffin top?)

I took up the challenge and got started right away. I looked up several recipes. Came across a few that claimed to be healthy but contained things like corn syrup and white flour. I'm sure there are several recipes out there that are wonderful and perfectly healthy. I just didn't come across them and my attention span was waning.

After some research (watching Good Eats) and making some major alterations to a few recipes combined, I came up with a wonderful recipe. The muffins were moist, light and very flavorful. I did some calculations and found out that each muffin is about 163 cal (most those coffee shop  muffins are over double in cals. (at least)....holy cow!!) and they didn't taste anything like cardboard. You wouldn't even know they're whole wheat AND contain wheat bran. Actually....these beauties taste like those famous Vanishing Oatmeal Cookies. If your News Years resolution this year has anything to do with changing some of your eating habits, this would be perfect. 

Say you're not into raisins? Just add some berries instead (or nothing). Want a little crunch? Add some nuts. I think if you take the basics of this recipe and just swap out the cinnamon and/or raisins...you can make it anything you want.

Whole Wheat Oatmeal Raisin Muffins
Printable Version

1 1/4 cups whole wheat flour, sifted
1 cup quick cooking oats
3/4 cup wheat bran
1/2 cup brown sugar
1 tsp baking powder
1 tsp ground cinnamon
3/4 tsp baking soda
1/4 tsp salt
1/2 cup raisins
1 cup applesauce
1/2 cup fat free Greek yogurt
1 TB vegetable oil
1 TB honey (optional)
1 large egg
1 tsp vanilla
2 TB or so of raw sugar (optional)
Cooking spray

Preheat your oven to 375' F
Spray 12 muffin tins with the cooking spray

In a large bowl, combine the flour, oats, bran, brown sugar, baking powder, cinnamon, baking soda and salt. In a small bowl, combine the applesauce, yogurt, oil, honey, egg and vanilla.

Make a well in the dry ingredients. Add the applesauce mixture to the dry ingredients and stir until just combined. You don't want to over stir or you'll end up with a dense muffin. (These aren't like cupcakes which require lots of beating).

Spoon the mixture into the prepared muffin tins. Sprinkle the tops of each muffin with the raw sugar.

Bake for 18 minutes or until the muffins spring back when touched in the center.

Immediately remove from the tins and let cool a tiny bit before eating.


And there you have it....muffins that are so good you won't believe they're healthy. 

I think I would consider this challenge a victory.

If I don't see you until next year....have a happy, safe and prosperous New Year!

Monday, December 19, 2011

Playing with Godiva Limited Edition Coffees


Yes...I know it's winter. I know it's cold out there...and I know that's ice cream. Sometimes it's just the thing a gal needs. Especially when it's doused in Godiva's Limited Edition Caramel Pecan Bark Coffee...made into an extract.

Once again....I'm late.

On my blog posting!!! (ya I know, there's a different kind of "late" that's associated with ice cream. That ain't it.) A while back, through the Foodbuzz Tastemakers Program I received two bags of Godiva Chocolatier Coffee. One bag was Pumpkin Spice and the other bag was Caramel Pecan Bark. I should've posted about my experience a month ago....but like I said. I'm late. I apologize to both Foodbuzz and Godiva.

I have to say this....of all the flavored coffees out there...Godiva makes THE best! Rich, deep, and well blended. The flavor combinations are just fantastic. I'm particularly in love with the Caramel Pecan Bark. I've run out and am in need of more!!

So....what did I do with these coffees? Well...I attempted a latte. At home. Without a latte maker thingy bob. It wasn't difficult. It was a bit fun. Don't compare my attempts to what you'd get at any of those fancy coffee shops by any means.

I used the Pumpkin Spice coffee for my latte. You see, I'd found a bottle of Pumpkin Pie Cream Liqueur and thought the two had to go together. A no brainer. Which is a good thing because in the morning...I can only deal with no brainers. And yes....I did drink a spiked latte in the morning. And loved every moment.

I started off by making a very strong pot of Pumpkin Spice coffee. Then I heated up some half and half. Got out my handy dandy immersion blender and whipped that half and half into a foaming frenzy


It never did get as foamy as the coffee shops....but it was fun anyway. I then filled my mug half way with coffee. Now for the fun part.....that shot of Pumpkin Pie Cream liqueur.


Pour one shot in with the coffee. Yes...only 1 shot. It was morning....remember? Next I added the frenzied foamy half and half.


I tried to garnish it with a bit of cinnamon. All it did was agitate the foam. There actually was a lot more foam on that baby before the cinnamon arrived.

It was a very nice way to start the day. Fun and easy. I don't have exact measurements for the ratio between coffee and foam. I think thats a personal taste thing. I'm looking forward to having another go at it on Christmas morning.

Now for my favorite flavor.....the Caramel Pecan Bark. YUM!!! It's on my grocery list....I need more! It's that good.

I did make something rather fun with it though.....

Coffee Extract
Printable Version
1 1/3 cups fresh ground coffee
1 cup cold water

Place the coffee grounds in a glass jar. Pour the water over the grounds. Close the jar and keep it in a dark place for 3 days.


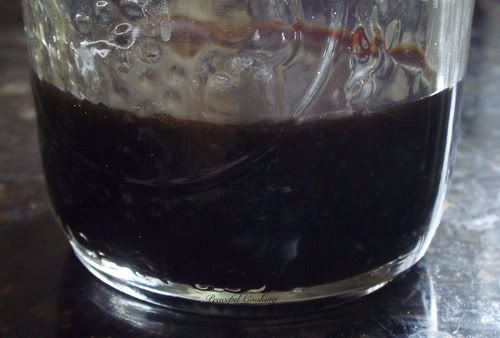
After the 3 days are up....line a strainer with cheesecloth and strain the "mud". It doesn't make much....but its wonderfully.....strong....coffee extract.


Store in a little bottle and keep in the refrigerator. I don't know what the shelf life is. I've had mine a couple of weeks...and it's still fine. Just know one thing....it can't take the place of vanilla extract. I tried. It doesn't do anything for the flavor of the dessert. So sad.

But....it does taste fantastic on vanilla ice cream

Saturday, December 17, 2011

Almond Crisp Cookies


A loooooong time ago....when I was a young wife and mother (early 90's?), I use to subscribe to a series of "Leisure Arts Publication" books. The books arrived monthly and had a different theme each month. Then they came out with a Christmas series and I was all over those babies. I loved looking through the books and "planning" on making something....sometime. The books had, not only recipes....but cute little crafty things as well. Now that I think of it though...I don't remember making a single thing from any of the books. But one can't always rely on my memory...so don't hold me to it.

Last weekend while I was pulling out my boxes of Christmas decorations, I came across a couple of the Christmas books...specifically....The Spirit of Christmas Cookbook....how fun does that sound?! So of course I sat down right away....I mean...I did need a rest after futzing around in the garage, right? I came across the Almond Crisps recipe and saw how easy they seemed...with only 5 ingredients! I can do that!!


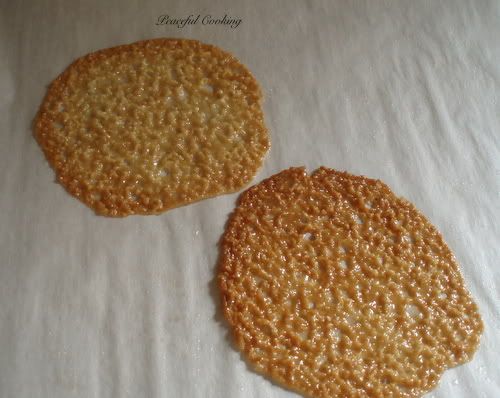
I think what really caught my eye though...was thier lacy appearance and the promise of sweet, crisp yumminess. And that's exactly what I got. Very caramelly....delicate and delicious!

This recipe calls for ground, blanched almonds. I had a bag of raw whole almonds in my freezer (I keep all my nuts in the freezer) and I really didn't want to spend the money on already ground blanched ones.....so I did a little research and found out how to do it on my own.

How to blanch almonds: bring some water to a boil (enough to cover the amount of almonds you're going to blanche), remove the pan from the heat, toss in the almonds and let them sit there for a bit....until the water is cool enough to be able to place your hand in it without burning yourself. Then gently squeeze one almond at a time between your thumb and forefinger....causing the almond to simply slip right out of it's own skin. Lay them out to dry on a towel.

Once dry...the almonds are ready to grind.

How to grind almonds: Place 1 cup of almonds at a time into a food processor along with a few tablespoons of sugar and grind away. If you're using a blender, grind 1/2 cup at a time. The sugar is necessary when grinding nuts. It prevents the ground nuts from becoming oily and lumpy which would make it near impossible to add to other dry ingredients. (at least that's what Julia Child says...and I will take her word for it).

If you don't want to go through all of that...then by all means....buy yourself a bag, already done. I'm too much of a cheapskate.

Almond Crisps
Printable Version

2/3 cup plus 2 tablespoons finely ground blanched almonds
1/2 cup granulated sugar
1/2 cup butter or margarine
2 tablespoons whipping cream
1 tablespoon all purpose flour

Preheat oven to 350'. Line your cookie sheet with parchment paper or grease it. You will be baking only 4 crisps at a time. They need lots of room to spread (hey!! I resemble that remark!!). Plus...when it comes time to "roll" them....they'll cool off too much by the time you get to the last one if you're working with more than 4 at a time. (That'll make sense in a minute)

Combine all of the ingredients into a nice big 10" skillet. Cook over a low heat, stirring constantly until the butter has completely melted and the mixture is well combined. It'll kinda resemble a grainy type gravy.


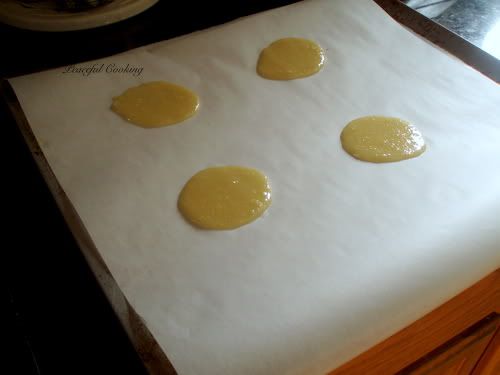
Turn the heat down to very low, to keep your mixture warm (stir occasionally) . Drop mixture by heaping tablespoonfuls onto the prepared baking sheet....4 cookies...at least 2 inches apart. More if you have room....I think I had 4" in between the little blobs.


The book says to bake for 5 minutes. That was not the case for me....at all. I don't know if my "heaping tablespoonfuls" were more than theirs....but I ended up cooking mine for 8 - 10 minutes. Keep an eye on them. They're done when they're nice and golden brown.


Let them cool for just a second! Gently loosen the cookie with a spatula and turn it over.


As you can see, the bottoms are nice and smooth. Quickly roll each one around the handle of a wooden spoon. 


Place on a rack and allow to  cool completely.

Here are a few hints and tips. I found that it worked best when I did one cookie at a time....flip, roll....then moved on to next. What this did was allow the other cookies to remain warm on the sheet. Once the cookie cools, it becomes too delicate and crispy to roll. But!!! If a cookie does become too firm to roll just stick it back in the oven for a minute until it softens up, then proceed.

They're fun, delicious and so pretty!


I'm definitely adding this recipe to my yearly Christmas Cookie baking list. Here are my other favorites that have become a tradition in my household:

Ginger Cookies: Soft, chewy, spicy and very addictive. Perfect with a cup of tea. If you want to make Gingerbread Man Cookies....just add an additional 1/4 cup of flour to recipe. I haven't tried it yet so I can't guarantee the results.


Eggnog Kringla: Soft, light and delicately sweet with just a hint of eggnog flavor.


Linzer Sandwich Cookies: These are probably the most festive Christmas Cookie I bake....buttery and nutty and are sure to impress your guests.


Merry Christmas and Happy Holidays

Saturday, December 10, 2011

Berry Medley Muffins


I knooooow! They're doing that weird thing in the middle. But, ya know what? That's what happens when you put yummy gooey goodness inside.

It's all under control. No worries. Except for the fact that I can't decide if these are for breakfast or dessert. (as if that's going to dictate when I eat them!)

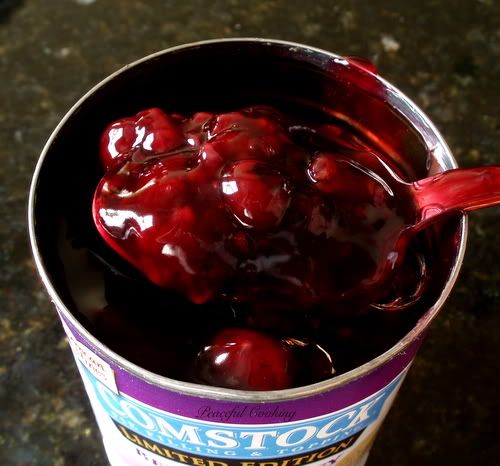
Not too long ago I was given a whole little pile of coupons for free Duncan Hines and Comstock-Wilderness Fruit Filling stuffs as part of the Foodbuzz Tastemakers program. Perfect timing with the holidays coming up. A girlfriend of mine found cans of Comstock Fruit Filling....Limited Edition Berry Medley. Limited Edition? I've never experienced limited edition food.....kinda makes ya feel a little special or something.

Limited Edition.

Why limited? Why not always? Are they testing the market....to see how much we like the combination of Strawberries, Raspberries and Blueberries? Come on....no test needed guys. It's wonderful! Let's remove the "limited" and make it a permanent "New" Edition to the Comstock family line. Seriously.....out of all the pie fillings I've tried, this is my favorite. There's something about those particular berries that work so well together.


Although...I didn't use mine in a pie. You see, after my little Duncan Hines shopping spree (you should see my cupboard!!! I've got some fun things in there to play with), I grabbed the box of 100% Whole Grain Blueberry Streusel Muffin Mix and the can of Limited Edition Berry Medley and went to work on a combination of my own.


Berry Medley Muffins
Printable Version

1 box of Duncan Hines 100% Whole Grain Blueberry Streusel Muffin Mix
2 eggs
1/2 cup water
1/4 cup vegetable oil

Filling:
1/2 can Berry Medley, Comstock Pie Filling & Topping
4 oz cream cheese, room temperature
1 1/2 tablespoons of a beaten egg
1/3 cup sugar
1/4 teaspoon vanilla extract

Preheat the oven to 375' F. Line 12 muffin tins with cupcake liners. 

For the filling, combine the cream cheese, 1 1/2 TB egg, sugar and vanilla. Mix with a spoon until mostly smooth. Lumps will happen. But if you use a mixer, all the filling will end up stuck on the beaters. Set the filling aside, but do not chill, while we get the muffins going.

Follow the instructions on the back of the box. Easy stuff really...combine the stuff in the box with the eggs, water and oil....but being careful not to over stir. Lumps.....no worries. Rinse the can of blueberries that came in the box with the muffin mix and fold them into the batter.

Now for the fun part. Not the "funnest" part....but just fun. (the funnest part comes at the end when you get to eat them!)

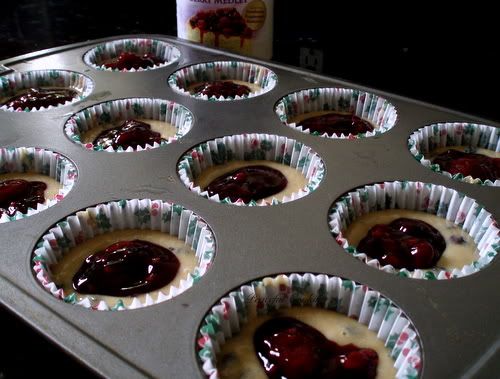
Fill each muffin cup about 1/2 full with the batter, reserving the remainder of the batter. Then put a dollop (about a tablespoon) of pie filling in the middle


Now get that filling that we set aside earlier and put a dollop on top of the berries.


I think its about a tablespoons worth as well. Just eyeball it as you try to evenly divide the filling amongst all 12 muffins.

Get the remainder of the batter and evenly divide it between the muffins to cover up the filling. If it's not perfect....don't stress. It'll all be fine in the end. I had a few that weren't completely covered with batter. Once you have distributed the remainder of the batter, top with the streusel that's provided in the box of muffin mix.


Place in the oven and bake for about 20 - 23 minutes. Or until the tops are golden brown and the crumb mix is lightly brown. You can't do the toothpick test....the inside is just too darned gooey.

Gee, darn.

Let it cool for about 5 - 10 minutes


But wait!!!

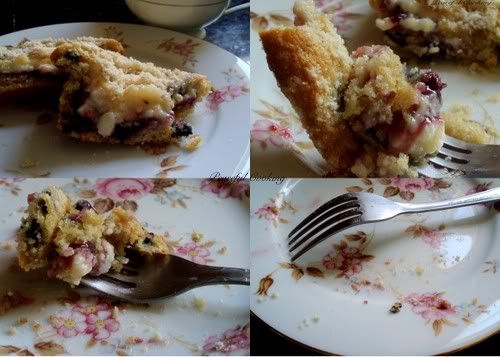
You need a fork! Trust me on this one. This is one muffin you can not eat without some sort of utensil


You know what happens when you take a photo like that? It ends up in your mouth. So then you take another photo, just in case...different angle and pose.....and poof! That one ends up in your mouth. After a few more shots......


Ya...thats what happens. True story.

Saturday, December 3, 2011

Classico Alfredo Sauce.....LIGHT!


I must start off by apologizing to both the Foodbuzz Tastemaker program and to Classico.

A while back, I received a jar of Classico Light Creamy Alfredo Pasta Sauce as part of the Foodbuzz Tastemaker program. I was suppose to write about my experience by November 15th. Well, as you can see, that date has come and gone. All of a sudden it's December!

How did that happen?!

It's almost next year! The holiday season is upon us (I attended my work holiday party last night.....so it's official). All of a sudden I find myself smack dab in the middle of the busiest time of year. In the next 30 days not only do I have to get ready for Christmas (haven't even thought about shopping yet), but there are 3 birthdays in my household to celebrate.

And let's not forget about.......the dark side of the holidays. The side that no one wants to experience but most of us do. The side that we all joke about.....but deep down, we're cringing. The side that invokes numerous resolutions for the new year.

The ever dreaded gaining of weight! (noooooooooooooooooooooooooo!!!!!!)

And...that's where Classico's Light Creamy Alfredo Pasta Sauce comes in. Not only is it perfect for a hectic night when you have zero time to cook dinner, but it's light! 60 calories per 1/4 cup serving (5 grams of fat....ya, i know....most of those calories are fat calories but it's better than the non-light stuff).

Ok...now let me just say something here. I stay away from canned, boxed and jarred foods as much as possible. Not always....but I do what I can. I'm not going to say that I make everything we eat in this house from scratch. I'm not going to say that I don't stock up on processed foods. I have plenty in my cupboard because there are nights when time is limited and what's in my cupboard is better than fast food (although a Big Mac now and then sure does hit the spot).

With that said....I have never been a fan of alfredo sauce in a jar. Even "doctored up" it's never impressed me. So I was a bit leery about what to expect from my little jar sitting on the counter. And even more leery because of the scary word on the label. That word that messes with flavor on so many levels. LIGHT! Oh man.


So it sat there for a couple of weeks. Reminding me. Daily. That I had to give this jar a shot.  I had to let it have its "say". Even while the memories of past experiences (taste buds never forget) still lingered in the back of my mind. To the point where...when the night finally came...I was prepared to doctor it up. I had my garlic ready. Salt and pepper were on the side lines. I even had some cream willing to come to the rescue if needed. Lets not forget to mention Parmesan cheese....who was begging to be the hero.

With all that at my beck and call...I set out to cook dinner. I had picked up from the deli, a bag of ravioli filled with chicken and cheese or maybe it was mushroom...I forget. I boiled it as directed then decided to saute it with some garlic


I then sauteed some mushrooms and onions and set those off to the side. All this going on while the sauce was heating up in a pan.
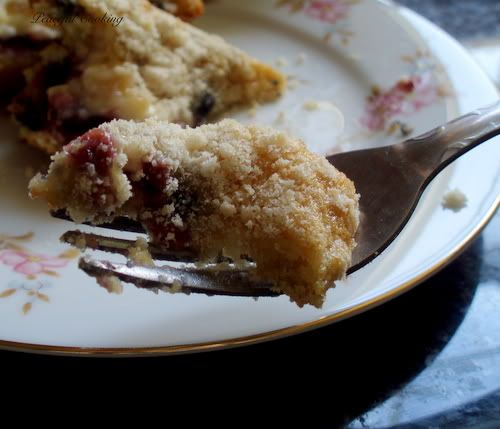
Then came big moment. Spoon in hand....thoughts of whether or not I'd need the gang to come in and save my dinner. I could just hear the garlic chomping at the bit......Parmesan was trembling with anticipation as I raised the spoon to my mouth.....

And tasted

My eyebrows raised....

The expression of pleasant surprise came over my face. I tasted again....just to be sure I was right. And yes! It was good. Nothing else was needed. Dinner was ready to serve...as is!

Classico Light Creamy Alfredo Pasta Sauce was a hit! Served over a plate of ravioli and topped with a few sauteed onions and mushrooms, this thick and creamy...and yes, LIGHT sauce was good. 


Let me end this by saying...if I am ever in a pinch and need a quick fix for alfredo sauce...I will not hesitate to use this again. 

Thank you Classico for allowing me to try your Light Creamy Alfredo Sauce.