Yum Peaceful Cooking

Saturday, October 15, 2011

Kahlua Mousse


This is one of those recipes that is sooo good that no matter how bad the pictures are, you just HAVE to share it.

It took me a while to work through that. I mean...I made this over a month ago. I was really irritated that I just couldn't get a good pic. Timing was horrible.... I was rushed. Then there wasn't anything left to photograph. The mousse was aaaaall gone.

I hate that.

But you know what? This mousse is too dang good not to share with you all.

It all started when I discovered an amazing book at the bookstore! If you love chocolate, then you NEED this book....

The Golden Book of Chocolate. There are over 650 (closer to 700) pages of mouth watering, delicious, dream inducing recipes that will make you wish, more than ever, that chocolate desserts were diet and figure friendly. You'll have a difficult time deciding which recipe to try first...I mean this book has everything....cookies, brownies, pies, cakes, candies, muffins...and savory dishes. Even the introduction is seductive..it's called "Introduction to The Sublime". (yes! please, introduce me to the sublime...) Oh!! And did I mention drinks? Ya....pages and pages of beverages...all with chocolate! (and some with alcohol...can't wait to try a Chocolate Monkey). This is like the bible of chocolate! It's so big, thick and heavy and the page edges are gold. (no this is not a review...I was not given this book. I bought it myself and have fallen in love with it. It was a bit of a splurge but so very worth it!)

Now, the Kahlua flavor in this mousse isn't strong or intense. The mousse is thick and creamy, not too sweet....and so very chocolaty. And the whipped cream....no vanilla in that baby. Kahlua was used instead. Simply wonderful.

Kahlua Mousse
Printable Version
Makes 8 servings

1 lb bittersweet chocolate, chopped
3 oz butter
3 large eggs, separated
1/3 cup confectioner's sugar (powdered sugar)
1/4 cup Kahlua (coffee liqueur) (gotta figure out a way to increase that amount)
1 tsp instant coffee granules
2 cups heavy cream

In a double boiler (or a sauce pan and a bowl as I do since I don't own a double boiler and have discovered I don't really need to buy one) melt the chocolate, butter and egg yolks. Wait!!!...those instructions scared me. I mean..I had a lot of chocolate in that bowl and the idea that the egg yolks could quite possibly "scramble" which would ruin my chocolate....well....I did it a bit differently.

Let's start over.....

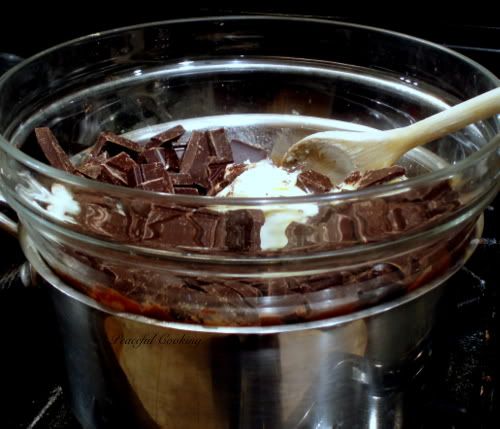
In a double boiler, melt the chocolate and butter over a low heated simmer. Once melted, remove from heat

In a small bowl, beat the egg yolks. While beating, gradually add about 1/4 cup of the melted chocolate.
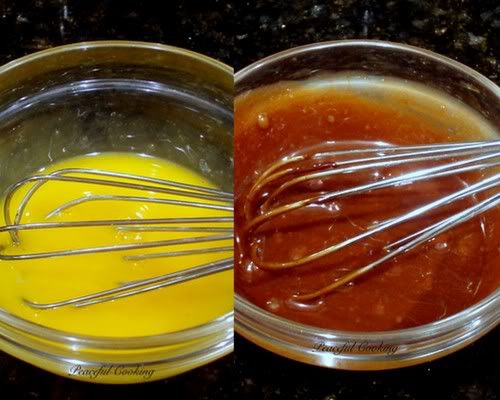

By doing this, you are tempering the egg....bringing the temperature up slowly while mixing in the chocolate....so that the egg doesn't scramble.

Slowly beat the tempered egg mixture into the chocolate mixture


In a large bowl, combine the confectioners sugar, Kahlua and coffee granules. Stir the chocolate mixture into the Kahlua mixture.

In yet another bowl (ya....you're gonna be using a lot of bowls) whip the cream until you have stiff peaks (being careful not to turn it into butter). Fold the whipped cream into the Kahlua and chocolate mixture. Beat the egg whites until stiff (once again, do not over beat) and fold into the mixture.


Spoon into serving bowls and chill for at least 4 hours before serving.
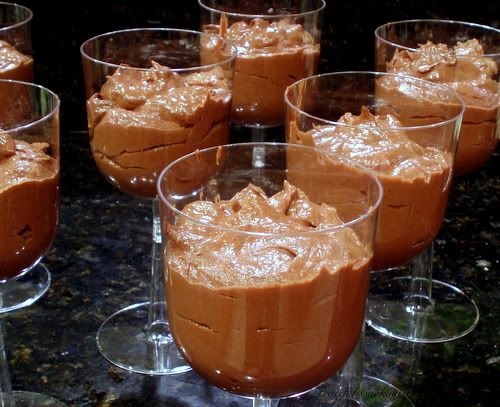

Top with additional whipped cream and cocoa powder. But instead of adding vanilla to the whipped cream....try a little Kahlua. You might possibly never go back to vanilla in a whipped cream again! (unless you're serving it to kids of course).
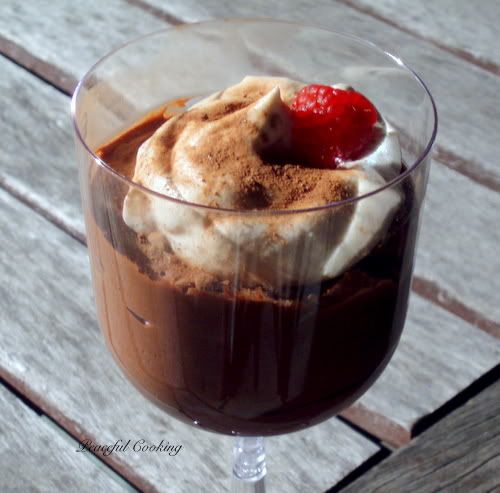


Now treat yourself to a little bit of sublimity.

Sunday, October 2, 2011

Light Wheat Sandwich Bread


I'm not a big fan of the flavor of whole wheat. I know, I know...white flour is so bad for you. I can't help it. I've tried. I've especially put forth a strong effort these past 2 years as I baked with the HBin5 bread baking group. If you look along the right side of my blog, scrolling down to the "Labels" section, you will see HBin5 where I have linked all the bread posts I baked with the group (over 30 posts). Not all are whole wheat. But there's a whole heck of a lot of them. (BTW...HBin5 is short of Healthy Bread in Five Minutes a Day).

But I still don't enjoy the taste of whole wheat bread. 

This does not mean that I didn't gain anything from this cozy little HBin5 adventure. In fact...I learned more than I can express in this one little post. I met fantastic people whom I will never forget. I gained an enormous amount of knowledge and 'yeast confidence'.  And I have grown to love baking bread. I've stepped way beyond my comfort zone and discovered that it's comfortable out there as well.

Somewhere along the line, it became a goal of mine to find a whole wheat sandwich bread that Sir Sportsalot would like. He's a Roman Meal kinda guy and it would make my day if I could trump the store bought stuff.


This recipe is probably as close as I've been able to come, so far. It's not an HBin5 recipe. It's not even a no-knead recipe. It's just a good recipe that I found over at SmittenKitchen
 
With minor alterations.

I do know one thing....without HBin5, I would not have attempted to make this loaf of bread.

The crust is firm without being "crusty" or chewy.  The crumb is soft and airy with just the right amount of firmness. Its not going to fall apart on you from the weight of the tiniest amounts of sandwich makings. It's substantial without being dense. It has that wheat-ie flavor but it's light enough (and gentlemanly enough) to step aside and allow the others to shine. You want to be able to taste the meat. You want to experience the full bodied flavor of your freshly sliced tomato straight out your garden. This bread knows its not the center of attention....but more of a supporting cast, and does it's job with grace.


Light Wheat Sandwich Bread
Printable Version

2 1/2 cups unbleached bread flour
1 1/2 cups white whole wheat flour
1 1/2 TB sugar
1 1/2 tsp salt
3 TB powdered milk
1 1/2 tsp yeast
2 tsp barley malt syrup
1 1/4 cups lukewarm water
2 TB shortening

In a large bowl, combine the flours, sugar, salt, powdered milk and yeast. Dissolve the barley malt syrup in the water. Add the water mixture and the shortening to the flour mixture. Stir until thoroughly combined and the dough forms into a ball. (I started off using a spatula or spoon and ended up just using my hands).

If by chance after you've tried working it all together with your hands, you still cannot incorporate all of the flour in the bowl, add a little more water. (tsp at a time). You want the dough to be soft and supple but not a shaggy mess.

Sprinkle your counter with flour and turn the dough out. Knead away, adding a little flour if needed. Knead for at least 10 minutes (by hand). I kneaded for 15 minutes. The dough will be ready when you can gently stretch it without it tearing apart.

I learned something yesterday as I watched one of those cooking shows out there. It is very unlikely that you'd over knead your dough if kneading by hand. (If you're using a machine...then yes....it can happen. Make sure you obey the time frames specified in a recipe) So....knead away. Fold, push, pull, rotate....repeat. Or whatever way you find yourself kneading. Some say that all you have to do is fold and flatten, rotate. No muscle work involved at all. Your main goal, however you achieve it,  is to get the gluten working.

I wish I had known that a long time ago. It would've really alleviated a lot of my yeast based fears.

Lightly oil a large bowl. Put your dough into the bowl, rotating so that the surface gets coated with the oil. Cover the bowl with plastic wrap and allow to rise for 1 1/2 to 2 hrs. The dough should be doubled in size (which is difficult to gauge exactly. Don't stress. You'll notice it has gotten really big.)

Remove the dough from the bowl and shape it into a 6" x 10"rectangle by pressing it with your hand on the counter.

Starting at the short end, roll the dough up the length a little at a time. With each "roll" pinch the crease with your fingers to secure the dough in place and strengthen the tension. Once you get to the end, pinch the final seam closed (using your hand or the thumbs...you don't really want "pinch" marks on your bread).

Lightly oil an 8.5 x 4.5" bread pan. Place the dough into the pan. The ends of the loaf should reach ends of the pan. This will aid in an even rise.

Mist the top of the dough with cooking spray and cover with plastic wrap. Allow to rise, at room temperature for about 90 minutes. Could be shorter. Could be longer. You'll know it's ready when you poke the dough with your finger and it does not spring back at you very quickly (or at all).

Preheat your oven to 350' F. Make sure your rack is in the middle of the oven.

Bake for 30 minutes. Rotate 180' and continue baking for another 20 - 30 minutes. If you have an instant read thermometer, the inside temperature should be about 190' F. The top and sides will be a nice golden brown.

Immediately remove the loaf from the pan and allow to cool on a rack for at least an hour (or more). This is VERY important. I know...it's hard. You can smell that warm bread and it's begging to be smothered in butter. But...

NO!

You have to wait. The dough is going to continue to do its thing for a bit. You don't want all the inside steam to escape. Just let it be. Let it settle. Allow the crumb to come into it's own. That's the only way you will achieve that light, airy crumb. Otherwise, it'll be a bit doughy and almost sticky. You'll know immediately you've done wrong. The bread will leave a smear mark along the knife. A tale-tale sign that the bread wasn't allowed to fully cool. So do yourself a favor. Just walk away.

I promise, it will be worth the wait. And then you can do anything you want. Slice, dice, rip, break....toast, butter, grilled cheese. It's all good.


I will have more HBin5 and ABin5 recipe posts in the future. (one coming up pretty soon in fact). It doesn't seem like it's been 2 yrs already but the HBin5 Bread Braid is officially done. I have a feeling that we'll all stay in touch and it will seem as if it's still in progress. I can't imagine not sharing my bread with the group...or reading what they have to share. I can't imagine the group not being there to support each other as we work through our bread issues and questions. Thank you all in the HBin5 Bread Braid group!! It's been a wonderful adventure. Sooooo.....whats next?

I want to take a minute to give a special thank you and hug to {{{{Michelle}}}} over at BigBlackDogs.net  You are an amazing woman. I will never make bread without thinking of you, your courage and your strength. This is not good-bye by any means...but a segue to the next stage.

Saturday, September 24, 2011

Migas and The Homesick Texan Cookbook Review

It's that time....we've been playing around with The Homesick Texan for a few weeks now. I've shared a few recipes and tidbits here and there. And now....it's time to lay it all out on the table. Tell it like it is....give you the skinny. Express my honest opinion. Give you the scoop on whats between the covers.  I'm going to tell you the lowdown on the hoedown.

Before last month I had never heard of Lisa Fain. After reading through her cookbook, I feel like we would totally mesh! There's something about her that echos within my soul. Although I have never lived in Alabama, I feel deeply connected and very rooted to my family, the way of life and the food there. Being in the city, you just don't get that "down home" connection. One of the ways I cross all those state lines between me and my family is by cooking foods that feed my soul. Which is what Fain did when she started her blog and wrote this cookbook. She fed by her need to connect to her home while living in New York. 

Now....I have never "really" reviewed a cookbook before. It's rather intimidating. I mean, you want to be accurate and informative as well as sounding like you know what you're talking about. That's when I turned to my peeps over on Facebook and asked them what they're looking for when searching for a cookbook. What points they'd like me to touch on in my review. I got some awesome responses. You people are the best! Thank you so much for your guidance. 

With that said, let's get down and dirty....and into the nitty gritty of it all (ok, are you soooo over the idioms? me too)

When I look at a cookbook, the first thing I do is flip through the pages. I hate to sound so "shallow" but honestly, photos are very important. I have a hard time buying a cookbook that doesn't have a single photograph (besides Mastering the Art of French Cooking....HUGE exception). The Homesick Texan has a ton of fabulous photos. Not only of mouthwatering food but also a few nostalgic, pure Texas shots that are scattered about strategically.

Next...contents. Theme. Tex-Mex is totally up my ally. I love Mexican food. I love southern food. When you combine the two.....you have something uniquely Texan. The Homesick Texan has a fabulously diverse content which is brilliantly divided. How often do you open a cookbook and see a chapter called "The Larder: The Homesick Texan's Pantry"? This is probably my favorite chapter. In it Lisa acknowledges and addresses the fact that not every city has the ingredients for a good Tex-Mex meal. She discovered this while shopping in New York City. You will see a solid 8 pages of ingredients and kitchen equipment that you should have, with descriptions and alternatives. In the back of the book you'll find a "Resource" page that tells you where you can order items and ingredients if you can't find them in your local market or Mexican grocer.

Not only does she have your typical chapters for Appetizers, Seafood, Sweets but there are whole chapters dedicated to Pickles and Preserves....Salsa, Sauces, And Gravies and Tex-Mex Classics (not to mention Morning Foods; Chilis, Soups, and Stews; Beef, Pork, and Fowl; Sides, Hot and Cold and last but not least, Breads). That pretty much covers it all. And if you can't find what you need based on the chapters....all you have to do is look in the Index where you will find recipes listed not only by name, but by ingredient.

One important factor that was brought up on Facebook was the desire to see the level of cooking experience needed as well as the length of time it takes. Neither of these are addressed in The Homesick Texan. I have found though, that most of the recipes range from very basic to requiring a bit more "how-to" knowledge. But to be honest, this is all good, down-home food that can be cooked and enjoyed by anyone with any level of cooking experience. Each recipe includes a great little intro that makes you wish you were in Texas having it the way it was originally experienced. As for the "how long" portion. You'll have to gauge this a bit. If you browse through the instructions...mentally adding up the cooking time frames...you should get a pretty good idea on what's required. I will say that the instructions are easy to follow.

If you haven't been following along during The Homesick Texan journey I've been on, you can view the recipes I've cooked below:


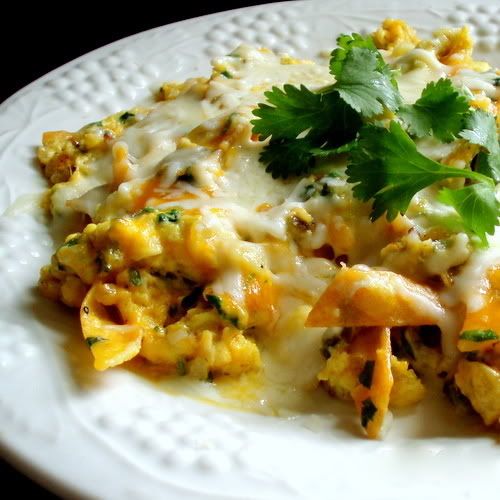
And now I have one more recipe to share. This is an easy one. Not as quick as your typical scrambled eggs....but when you're getting ready to experience something fabulous.....prep is never as quick as ready set, ready go. But it can be effortless.

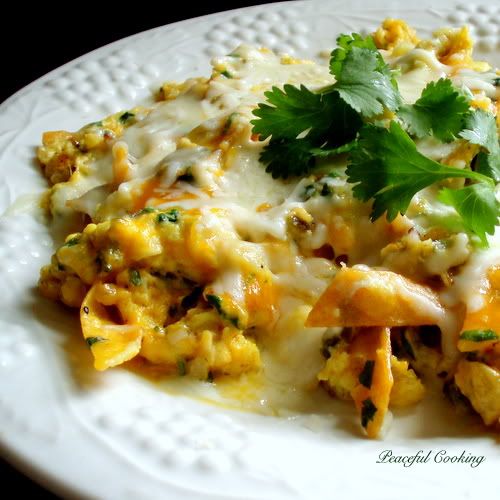
Migas

Oil for frying
4 corn tortillas cut into strips
1/2 medium onion, diced
4 jalapeno chiles, seeded, stemmed and diced (I didn't have fresh jalapenos so I used the kind in a jar)
8 eggs
1/4 cup milk
1/2 tsp salt
1/2 tsp pepper 
1/2 tsp cumin
1/4 cup cilantro, chopped
2 cloves garlic, minced
1 cup (4 oz) grated cheddar cheese, jack cheese or maybe a combo

 
Usually I show you a nice display of ingredients all arranged on a cutting board or something. This time I decided to be real. I do gather all of the ingredients before starting on a recipe. But it's always "everywhere" on the counter....and that's how I really cook.

In a large skillet, heat about 1/2 inch of oil over a medium-high heat. Put the tortilla strips in the hot oil and let cook until nice and crispy...about 3 minutes. Remove and drain on a paper towel lined plate.

Drain out the oil, leaving about 2 TB. Turn the heat down a bit and add the onions and jalapenos. Cook, stirring occasionally until the onion is translucent. While that's going on, whisk together the egg, milk, salt, pepper, cumin and cilantro in a bowl.

Once the onions are translucent, add the garlic and cook for about 30 seconds.


Add the egg mixture to the skillet along with the tortilla strips. Let the egg cook for a minute so the bottom sets a bit. Stir gently and then add the cheese


I have a confession to make here. I did a few things out of order. When I measured the cumin, instead of tossing it into the egg mixture, I tossed it into the pan with the onions and garlic. (silly me). Then I forgot to add the cilantro to the egg...so it went in along with the cheese. But you know what? It didn't matter. This is such a free-form recipe and very forgiving as it also allows for adjustments to accommodate your own personal tastes. More cheese? Less cheese? No onions? More heat? Just do it. We're talking about eggs here. Make it so you like it. 

Once the cheese has been added, gently stir until the cheese has melted. Add more salt and pepper to taste (if needed). 

Lisa Fain recommends that you serve Migas with salsa and tortillas. I personally found it very filling and satisfying. Not to mention simple. I didn't need the extras. (BTW...I halved the recipe and this plate served 2). All I did was sprinkle some jack cheese over the top and let it melt. (love me some melted cheese).


This is the perfect example of many of the recipes in The Homesick Texan. Complex in flavor yet simple enough for any level of cook to make. I loved the corn flavor that the tortilla strips added to the eggs. The jalapenos were a great addition of some slight heat. The smokey flavor from the cumin was wonderful. If I wanted to beef it up a bit....I could've added some chorizo or sausage. If I wanted more veggies...some diced tomatoes would've been a wonderful addition.

Let me wrap this up with a simple 5 star rating for a fabulous cookbook. It has been a sheer pleasure being part of the The Homesick Texan Cookbook Spotlight and Cook-Off that was sponsored by Hyperion and hosted at Girlichef*, (where you will find others who have cooked from and reviewed this cookbook. I recommend that you mosey on over there and see what the rest of us have to say).

If you love Mexican and / or Tex-Mex food....I highly recommend that you not pass this one up. It's a keeper and bound to become a favorite in your collection, as it is mine.

Thank you Hyperion and Girlichef* for including me in such a fun adventure.

Friday, September 16, 2011

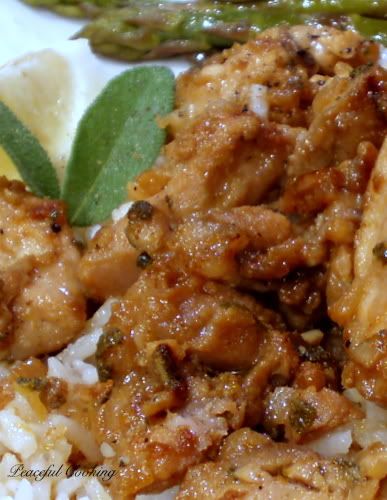
Citrus Chicken


A couple of weeks ago I was hunting for a new chicken recipe. Nothing in particular in mind....just something I hadn't done before. I came across Grilled Citrus Chicken over at Spryte's Place and the freshness of it...zest and juice from lemon, lime and orange....really got my attention. As I read her post, I noticed that Spryte had gotten the recipe from a fellow BakeSpace member...AND she included the link to the forum thread that lead to the sharing of the recipe. I clicked on the link to see if I would remember the conversation...but of course I didn't. It occurred over 2 yrs ago...but it was fun to reminisce.

The good ole days.

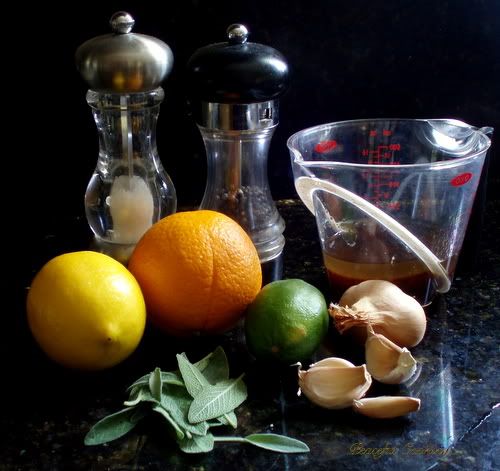
Well...I made a couple of changes in the recipe. Not because it "needed" it by any means...but we weren't grilled and I was in the mood for little bite sized chicken. And I was planning on making rice. The original recipe had Dijon mustard in it. Spryte replaced it with soy sauce. I used both. I'm not a fan of thyme...which was in the recipe. I replaced it with sage. I then made a sauce so go over the chicken and rice.

Let's just say....it was fabulous! A new favorite around here for sure! I wish I had made it 2 yrs ago when it was first shared with all us lucky BakeSpace peeps.

I have to warn ya here...I didn't jot down exact time frames on cooking this dish...you just have to kinda keep and eye on it and go with your gut.


Citrus Chicken
Printable Version

6 boneless skinless chicken thighs or a couple of boneless skinless chicken breasts (I used the prepackaged chicken thighs from Costco) cut into chunks
1 TB each lemon, lime and orange zest
1 TB each lemon, lime and orange juice
2 shallot, chopped
2 garlic cloves minced
1 TB Dijon mustard
1 TB soy sauce
1/3 cup vegetable oil plus extra for the pan
1 1/2 TB honey
2 TB fresh sage, finely chopped
Salt and Pepper to taste
1/4 cup dry vermouth
1 1/2 cups chicken broth

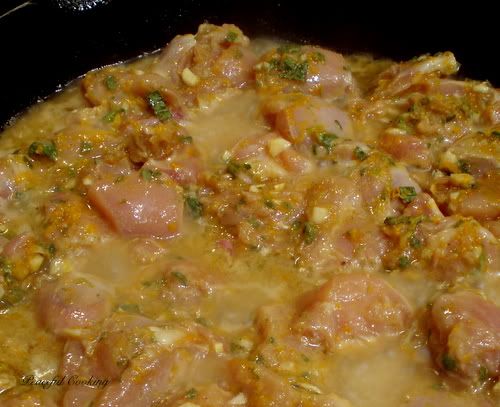
In a sealable baggy, combine the citrus zests and juice along with the shallots, garlic, Dijon, soy sauce, veggie oil, honey, sage, salt and pepper. Squish around to combine. Add in the chicken. Place in the fridge and allow to marinate for a few hours. I wouldn't do it overnight though. Citrus is a fantastic tenderizer but if left too long, it starts to break down the meat. I've even heard that it will begin to "cook" fish. I don't do fish (due to allergies) so I haven't investigated how and why this happens. Or how technically true it is.....anyways....2 - 6 hours is fine.

Add enough oil in a hot skillet to cover the bottom. Pour everything, chicken and marinade, into the heated skillet.


Cook on medium low, stirring often, until liquid is pretty much cooked down. This is were you have to be careful. If the heat is too high or you cook it too long, you could scorch the marinade residue.

Remove the chicken and set aside


Add the vermouth to the hot skillet and deglaze the pan, stirring up all those crispified bits that might be stuck to the bottom...mmmm....lots of flavor in those babies. Add the chicken broth


Allow to simmer until reduced a bit. Not too much cuz you want enough sauce to pour over the chicken and soak into the rice...ya know? Because once the sauce is done, you add the chicken back into the pan and serve it over some nice fluffy rice

Wednesday, September 14, 2011

Pan De Campo


Breakfast for dinner. It's one of my most favoritest dinners. And I almost always do the bacon and eggs with biscuits and gravy thing. Which happens to be one of my most favoritest breakfasts too.

This week for our Cook-off and Spotlight of The Homesick Texan Cookbook we got to choose whatever recipe we wanted to showcase. There were so many to pick from. I could've gone with the Blueberries with Cornmeal Shortcake, or the Hush Puppies...I really considered the Tamales. I mean there are just so many wonderfully mouthwatering recipes to choose from and you just KNOW you're going to love whatever it is you decide to make.

And here I am.....with one of the most simple recipes in the whole dang book. The Pan De Campo. Lisa Fain proceeds the recipe with a bit of history telling. It's just so cute how she has a story behind every recipe in the book.  The Pan De Campo is Texas' state bread. (I wonder if California has a state bread...it should....and I think it should be Sourdough Bread). Apparently this is the bread of cowboys. It's kinda like the biscuit version of cornbread....made in a cast-iron skillet and all. If you're a cowboy out on the range, you'd be making this over an open fire. Us citified people will have to put up with using a stove and oven and just deal with it. 


Pan De Campo
Printable Version

2 cups all purpose flour
1/2 TB (aka 1 1/2 tsp) baking powder
1/2 tsp sugar
1/4 tsp salt
6 TB lard or shortening, at room temperature
3/4 cup buttermilk

Preheat the oven to 400' F and grease a large (10") cast-iron skillet

Combine the dry ingredients. Stir in the shortening and blend (use a fork or pastry blender) until you have fine crumbs. Add the buttermilk and blend until smooth.

Heat up your skillet on the stove. While that's going on....on a floured surface, roll out the dough into a circle, about 9" wide (a bit smaller than your skillet)


Place into your hot, greased skillet and cook for about 5 minutes per side over a medium low heat


Then put the whole thing in the oven, skillet and all, and bake for about 15 minutes

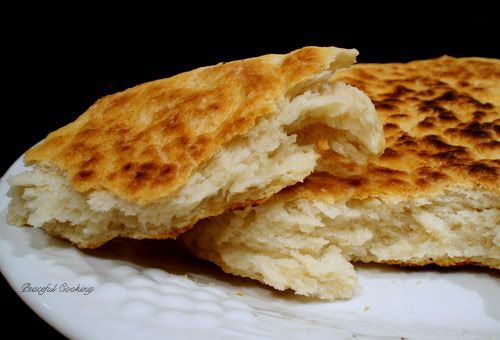
And there you have it....Pan De Campo. You can slice it like a pizza or tear it off into pieces


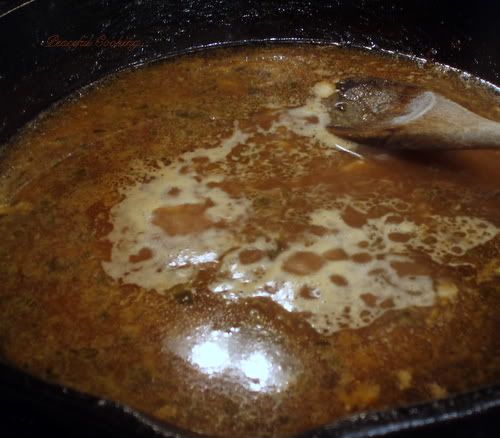
What do you do with a giant biscuit? Well...you can do what I did and treat it like a regular biscuit by pouring luscious, creamy breakfast gravy all over it.


You can do as the cowboys do and dip it into beans. Or you can have it for dessert with some honey or homemade jam.

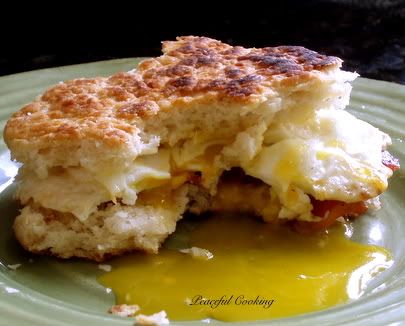
And if you have any leftover the next day slice it length-wise and make yourself an egg sandwich.


Whatever you do...I'm sure you'll have fun with it as much as you enjoy it. And maybe, just maybe.... you'll feel a little bit like a cowboy while you're doing it.

*This post is part of The Homesick Texan Cookbook Spotlight and Cook-Off sponsored by Hyperion and hosted at Girlichef*

Monday, September 12, 2011

Mac & Cheese and natural Sargento cheese


I can count on 1 hand how many times I've made macaroni and cheese....from scratch. The first time I tried it, (about 20 yrs ago)...I made it using American Cheese. Aaack. I don't know why I even tried that. The only time I eat American Cheese is when it's on a cheeseburger or inside a grilled cheese sandwich. But in my defense, I was young and stupid ignorant.  I tried other various recipes...even one that used velveeta cheese. I think what I was ultimately trying to do was make something that tasted like mac & cheese in the little blue box cuz that's what I grew up on.

Not long ago, my girlfriend showed up for a bbq with homemade mac and cheese and it was wonderful! The first homemade version that I actually enjoyed. Then recently I made the Poblano Mac & Cheese which was a great alternative to the norm.

Through the Foodbuzz Tastemaker program with Sargento, I was able to get some Sargento cheese and pairings.


I love cheese (mild to medium....nutty, buttery kinds. I can't do the stinky cheeses) and I was excited to have the chance to give Sargento the test.

The macaroni and cheese test.

First I had to "cultivate my experience". With the help of the tasting guide that Sargento sent me...I became familiar with the differences between natural cheese and processed cheese through the 4 points explained to me...

1. Look


Sargento's real cheese (medium cheddar) on the left and the processed cheese on the right. You can see the sheen and rubbery appearance of the processed cheese. The sliced Sargento cheddar cheese looks as it would if you had sliced it yourself, not to mention the deep rich color.

2. Touch

I'm sure by looking at the photo above you can imagine how they feel. Now notice in the photo below.....


The processed cheese (now on the left) tore into smooth rubbery pieces while the Sargento cheese broke more than tore.

3. Smell

Have you ever smelled processed cheese? The first thing I smelled was salt. Then nothing. Of course the Sargento natural cheese smelled like....cheese! I mean...it smelled like cheddar cheese. You knew what you were going to experience once it hit your palate. Which leads me to the 4th point...

4. Taste

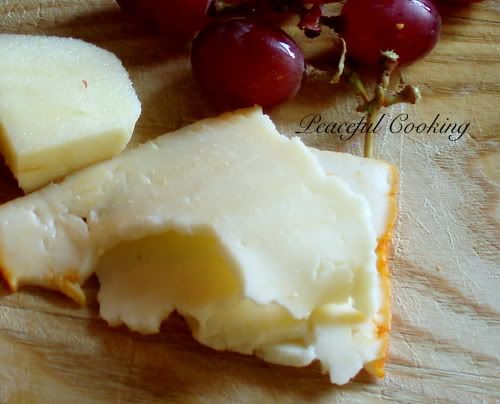
I tried both cheeses.... alone, with fruit and with wine. Actually....I only tried the processed cheese alone and with wine. Then stopped. No flavor. Bland. Ack. I'm beginning to wonder what it is I like about it on even a cheeseburger. Surely it can't be contributing to the flavor. The Sargento cheese on the other hand was so flavorful that I finished the slice of cheddar and started in on the muenster


I could've just made this my dinner. The smooth salty buttery-ness of the muenster and the nutty, full bodied flavor of the medium cheddar. Even after you finished with the bite...the flavors danced in your mouth...creating the urge for a second (and 3rd) round.

And then came the real test. I mean...what better way to test cheese than to make America's #1 side dish....Macaroni and Cheese

I used a very basic recipe and I reduced it down tremendously. I didn't need a huge casserole dish lying around, threatening my mid-section, if you know what I mean. I ended up with some sauce left over, which I will be saving for later this week to use on some veggies or maybe to pour over a baked potato (cuz I don't feel so threatened by cheese soaked potatoes? Who the hell am I kidding!)

Btw...my girlfriend...Dianna, who brought the mac and cheese to the bbq sent me her recipe. She cracks me up. She warned me..."I don't use a recipe with measurements".  And then proceeds to write:

'Mac N Cheese - Macaroni - Butter, Cheese, Half & Half, flour, salt, pepper. Cook the noodles drain and set aside. Melt butter in a pan and add the flour, salt and pepper to make it like a paste and cook it, add the half and half slowly (and use a whisk so it doesn't lump) till it's like a thick cream sauce. Mix the sauce and cheese with the noodles - Top with cheese and bake until it's golden.'

I just love that woman!

Anyway.... if you can make a basic roux, you can make this dish without measurements. The rule of thumb is...equal amounts of fat (ie: butter) and flour. And enough liquid (ie: milk) until you've reached your desired consistency. If you're not comfortable with a roux...I suggest you practice and get comfortable. It's the basis for so many good things....white sauce, cheese sauce, gravy, etc.

Basic Mac and Cheese (serves 2 - 4...depending on your piggy-ness)

4 oz elbow macaroni, cooked and drained
2 TB butter
2 TB flour
1 1/2 cups half and half (or milk)
Salt and Pepper to taste
5 slices Sargento Medium Cheddar Cheese
5 slices Sargento Muenster Cheese
handful Sargento Mozzarella Cheese
handful cracker crumbs

Preheat the oven to 375' F. Spray a little 7 x 7 oven safe dish with cooking spray. Pour the cooked pasta into the dish and set aside.

In a sauce pan, melt the butter over a medium low heat. Whisk in the flour and continue whisking for a few minutes. Don't let the flour get too brown. Slowly whisk in the half and half (or milk if thats what you have). Continue to whisk until the sauce thickens. Don't let this happen too quickly...you want to cook out the flour taste. Season with salt and pepper to taste. Add the cheddar and muenster cheeses and stir until melted.


Pour the sauce over your pasta. Top with mozzarella cheese and crackers.


Bake for about 30 minutes or until bubbly and browned on top.


And there you have it. For me.....the best homemade, basic macaroni and cheese I've ever made. Sargento, with its great tasting natural cheese that melts wonderfully, definitely passed the mac and cheese test. I can only imagine how good it would be in a sandwich or on a burger. No more processed tastelessness for me.

Sunday, September 11, 2011

BBQ Oven Fried Chicken


Barbecue sauce isn't just for the grill. Actually....I rarely use it on the grill. Mostly because one of my kids doesn't like barbecue sauce. She also doesn't like cheese (unless it's on pizza. but never 'extra cheese'), bacon (omg!!!....really?!) mayo, potatoes, rice, pasta, syrup, and most nuts. Seriously....she's nuts!! But....in her defense...out of all of us in the family....she eats the healthiest (except for her sweet tooth. At least she got ONE of my food genes). I don't remember her being all that picky when she was little (except when it came to peas....her whole little body shivered, all the way down to her toes (literally) in revolt to the taste of peas). I s'pose she grew into this neat little picky eater trait of hers. It can be challenging sometimes...making dinner. One loves cheese, one doesn't. One loves chocolate, the other can take it or leave it (have you ever in your life heard a girl...yes, a girl....say these words..."it's too chocolatey").  Try making lasagna in my house....one child loves it really saucy with barely any cheese and the other is the exact opposite. Sir Sportsalot has his likes and dislikes too. He's easy to please as long as it's not too fancy or unusual. American, Mexican, Italian...and Amercanized Asian are usually safe. As long as I don't twist up the recipes too much. (I think I've crossed that line in abundance these recent years.).

Thank God we all like chicken.

But sometimes....I just have to cook for me. (which is best done on nights when no one's home). As the girls get older and Sir Sportsalot gets busier with his sports stuff...that seems to be happening more often. And here's the double-edged sword. I don't know how to cook for one. Fine....we have leftovers. Sir Sportsalot won't eat leftovers (I've even tried telling him...'if you didn't eat it when I made it last night....technically, for you, it's NOT leftovers!'). The girls....they will if they think to look in the fridge. That leaves at least 3 servings for me to devour before the food has passed it's 'time'. Not to mention the fact that...honestly....it gets rather boring eating the same leftovers for a couple of days. Thank God the girls bring their friends around and I can usually count on things getting eatin up.

Once in a while....there's that really good dish that you make and you want to eat it the next day...and the next. It's that good. You can't get enough. (for some reason, this most often happens with those really good, cheesy, fattening dips). Anyway....the BBQ Fried Chicken was just as much of a delight to eat the next day as it was the night I made it. It remained juicy and tender. And even though it may not have been as "crispy" (which it wasn't all that crispy to begin with because I chose to use skinless meat)....the caramelization of the sauce is what made it so darned good.

Let's back up a minute. Not long ago, I came home from work to find a box. For me. (it's like getting a present...even though you know it's coming.) Inside was a bottle of KC Masterpiece Southern Style Barbecue Sauce (you know me...I'm all over anything "southern") shipped to me through the Foodbuzz Tastemakers Program.

 (Yes, the bottle is 1/3 of the way empty. I swear, that's not how it arrived, all snug in the box. I just didn't think to take a picture of it until after I'd started on my fried chicken adventure.)

I started thinking about what to do with it. BBQ ribs briefly came to mind. As did bbq burger patties. I could've done the typical bbq chicken. But I feel the need to do something more unusual when I'm trying a new product. I feel the need to be more creative. To try something new. So I let the bbq sauce ideas simmer in my mind for a few days. (One thing was for sure....when I made whatever it was I was going to make, it was going to be a night when my youngest child wasn't going to be eating dinner at home).

And the night came (unexpectedly as usual). One by one, they all left...I had boneless skinless chicken thighs defrosted with no idea what I was going to make. It was 7:00 at night and still...not a clue. I saw something on TV, boneless chicken wings or something....being dipped in buffalo wing sauce. The image merged with my simmering bbq sauce thoughts. They danced around for a few minutes...getting a bit excited as the realization that what was happening was going to be nothing short of deliciousness. But as is with all things new....nerves set in. Is it really going to work? Is it too good to be true? But the thrill was already there and it was going to happen.

BBQ Oven Fried Chicken
Printable Version


Amounts for this recipe are not exact. I didn't measure a single thing.

5 - 6 pieces of chicken. I used boneless, skinless chicken thighs. If you want crispy....keep the skin on.
2/3 bottle of KC Masterpiece Southern-Style Barbecue Sauce (divided)
1 cup or so (as needed) of flour
Seasonings for the flour (use whatever you normally use when making fried chicken. I use salt and pepper, garlic powder, paprika and poultry seasoning)
about a cup of buttermilk
1/4 cup butter or margerine
1/4 cup shortening (do not substitute oil for this)

Preheat the oven to 425'. Line a baking sheet with foil (easy clean up). Melt the butter and shortening on the sheet. Being careful not to burn it. Cuz then you'll have to start over (been there, done that).

Get out 3 dishes (pie plates or round cake pans work great). Pour about 1/3 of the bottle of barbecue sauce in one dish. Because KC Masterpiece's Southern-Style Barbecue Sauce is thin-bodied it's perfect for dipping. In another dish combine the flour and seasonings. In the 3rd dish, pour in your buttermilk.

One at a time....dip the chicken into the buttermilk, then into the flour. Then dip it into the bbq sauce and then back into the flour. Carefully place the chicken (skin side down if applicable) onto the prepared baking sheet. I say 'carefully' because you don't want to disturb all your hard work by inadvertently removing the coating. Repeat with remaining chicken.

Place in the oven and bake for 15 - 30 minutes. The time frame will depend on the chicken. If using bone-in....30 minutes for sure. I did my boneless thighs for 20 - 25 (boneless breasts will be less). Then carefully turn the chicken over (trying not to leave any of the coating behind) and continue baking for the same amount of time. During the last 10 to 15 minutes, pour the other 3rd of the bbq sauce over the chicken.

Remove and let sit for about 5 - 10 minutes before serving.


What did I serve with these juicy, tender, caramelized beauties?

Leftovers!

Yes....I served leftover Poblano Macaroni and Cheese and corn casserole.

And it was good!

KC Masterpiece's Southern-Style BBQ Sauce is perfect for this recipe. Its tangy, sweet and has a bit of heat that catches your attention without making you worried. I have a fear of things that are too spicy. Of not knowing when the heat is going to end. With this sauce....no worries. It's all good.