Yum Peaceful Cooking

Monday, November 8, 2010

Chocolate Syrup and HBin5 Turkish Pear Coffee Bread


"Pear and coffee in the same bread?!" you ask? Ya, I said the same thing. But it's not like it sounds. I mean....it's not what you think. Well, it's not. (do I sound like a guilty teenager?)

Neither flavor is dominant. It's rather interesting. If I handed you a slice and asked you to taste it, I doubt you could detect what's in it, but you'd like it and you wouldn't even know why.

So, why did I make this bread? Because it was one of the assignments from the online HBin5 Bread Braid that I participate in where we're baking our way through Healthy Bread in Five Minutes a Day.


If it weren't for this group, I don't think I would've felt the need or desire to make this dough at all. But I would've been missing out. There's a texture...moist, soft...and you can almost "feel" that pear grit but not quite. The coffee seems to add almost a nuttiness to it but again, not quite. And it's so pretty with it's little speckles.


Yep....those are actual coffee grounds. From fresh ground coffee beans. They almost look like poppy seeds, don't you think? And can you see the little bits of pear skin? I forget what kind of pear I used....but it's brown and firm. I figured since it was being baked, the firmer variety would be best. Especially since these doughs are almost always on the wet side. But...once you puree a pear, regardless of it's variety....it's pretty wet, so maybe that didn't make much of a difference.

If you're interested in the recipe, it can be found on page 185 in the Healthy Bread in Five Minutes a Day cookbook. It's a fantastic book. I highly recommend it. In the year that I've been messing around with the recipes, I have grown leaps and bounds. Not to mention all the advice and tips from the other members in the group. If this sounds like something you'd like to do...you can always join us. We have another year of baking ahead of us. Head on over to Michelle's blog, BigBlackDogs.net and see what we're all up to.

The bread baked up beautifully. I did forget to create the steam in the oven. Instead of a firm artisan crust, it came out soft. Which is actually fine with me. And I think we were suppose to sprinkle some raw sugar on top, which I totally forgot about until just now. That would've been nice.


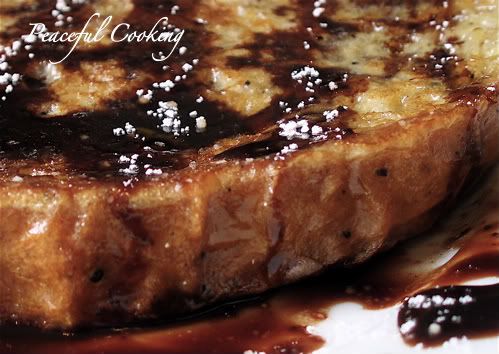
Besides eating it as is, or toasted....I wanted to do something fun. So I made french toast. Instead of using maple syrup....I made chocolate syrup. 

Do you know how easy it is to make chocolate syrup?! OMG!!! And it tastes just like the stuff in those squeezy bottles that you buy at  the grocery stores. I found the recipe on FoodNetwork.com. It's one of Alton Browns recipes...and it totally works! If you have kids...they won't even know that it's not the "other" stuff. I swear. 

The process was so easy and basic, that I didn't even take step by step pictures. There really isn't that much to it.

Chocolate Syrup

1 1/2 cups water
3 cups sugar
1 1/2 cups cocoa powder (dutch processed is recommended)
1 tablespoons vanilla extract
1/4 teaspoon salt
2 tablespoons light corn syrup
Mix the water and sugar together in a small sauce pan, bring to a boil. Whisk in the remaining ingredients....continue whisking until everything has dissolved together. Turn the heat down to low and continue cooking until the sauce has reduced a little and is slightly thickened. Stir occasionally so that the chocolate doesn't burn on the bottom. 

Strain the chocolate and allow to cool to room temperature. (If you have a squeezy bottle, poor it in and fake the kids out!)

And there you have it.....
Rich, dark, homemade chocolate syrup! This recipe makes a lot more than what's shown in this picture. I cut the recipe in half but the actual full fledged recipe makes about 5 cups. 

And you know what else? This makes the most awesome chocolate milk!!!


If I had mini marshmallows, I would've made a nice big mug of hot cocoa but to be honest with you...until today, it hasn't really been all that cold. What I'm really wishing for though....yep, you guessed it....a bottle of Kahlua to spice things up a bit. Now that's chocolate milk at its finest.

This is my submission for The Hearth and Soul Blog Hop this week. Click on the badge below to hope on over and see what else is being shared :)

hearthandsoulgirlichef

Thursday, November 4, 2010

Lemon, Basil and Egg in a Baguette


Doesn't that look interesting? It's really good! And it was my dinner. Mine alone. Just for me. Do you know how challenging it can be to cook for one person? Totally not my thing but I was hungry and no one else was home. I looked at a bowl of lemons and wanted something with lemon. But I didn't have any meat defrosted. Egg popped into my mind and there my search began. A rather quick search with a quick solution. Just for me.


I'll tell you all about it in a minute. First, let's talk about challenges. I enjoy a good challenge. Maybe not stress that comes with some challenges, but the fun kind. The kind that makes you think outside your box and makes you grow, in a fun way (read food way). If I haven't done it before, I wanna try it. If I have done it, I wanna do it differently. That's where Marx Food's Iron Foodie 2010 comes in.


            Iron Foodie 2010 | Here's Why that will be me:         
MarxFoods.com -- Fine Bulk Foods         The Foodie BlogRoll

Marx Foods is the company where I got 2 pounds of incredibly yummy morel mushrooms from and some really fun palm leaf bowls and plates. Well, now they're hosting a challenge, complete with some ingredients. Secret ingredient. How cool is that?! You see...Marx Foods doesn't just sell mushrooms and biodegradable plates and bowls. They sell a whole line of gourmet ingredients. Sooo...in order to be considered as a participant in their Iron Foodie 2010 contest, I need to answer a few questions...one of which was just answered above regarding why I want to compete in the challenge. In case I didn't make myself clear....the cut and dry answer is....the shear fun of expanding my "box", growing and learning!

Have you ever dreamed of spending time with one particular person in the kitchen? It has crossed my mind several times over the years. I wish that I had lived closer to my grandmother, Elvie. I would've loved learning all that she knew about cooking. She could pull together a spread for the whole family and everyone was satisfied and full of good, home cooked food. Then I think how awesome it would be to laugh and play with butter in the kitchen with Paula Deen. She just looks like she has a great time playing with food, and of course eating it and sharing the love with those around her. But if I had to pick one person, I think I'd have to say, Julia Child. We could drink wine and make a huge mess and come out with a fabulous dish. I have a feeling I'd learn the most from her....I'd really have to pick her brain on all that she learned in France. I'd probably end up learning more than just food stuffs. She was a go getter and conqueror, not only in the kitchen, but in life.

I love french fries. (I mean...honestly....who doesn't? Well, besides my virtual twin sister, Joy) A little greasy....crispy on the outside and soft and hot on the inside. I particularly enjoy dipping them in ranch dressing. On occasion, well, on a lot of occasions, I finish my fries before anyone else does. If you value your fries, do not leave them unattended during my watch. You just might find yourself a few fries short of a serving. I can't tell you how many times I've gone to get burgers and fries on a Sunday afternoon for the family, only to arrive home with a bunch of half empty bags. I got away with blaming the burger joint employee's for being stingy with the fries a couple of times. Eventually....they caught on. I no longer am allowed to do the burger runs on my own.

(only 2 more...then we'll get to the recipe)

Thanksgiving Dinner! Now we're talking!!! When I think back to all the family meals we had together during my childhood....Thanksgiving is my favorite. We all got together, we all helped in some way (I usually had to set the table.....sigh) and we all ate like pigs. One of my aunts and I would fight over the crispy skin. Hands were often slapped (very often mine) for "testing" the food before it was served. Thanksgiving is the perfect holiday with the perfect meal. You get all the good food and quality, memorable family time without the stress of buying presents.

We all have a food we cannot, will not, flat out refuse to eat. I can't stand eggplant. I have tried. It has even been secretly included in my meal, but not unnoticed. There are other foods I'm not fond of, such as beats, and brussel sprouts....but eggplant tops that list. Beats run a very close second. Fish....isn't by choice, it's an allergy thing. But if you want to see me gag, shiver and look completely ridiculous....make me eat an eggplant. Don't say I didn't warn you.

And, that's me. In one of my many nutshells. Now I just wait and see if I am chosen as one of the 25 contestants. (cross your fingers)

Back to my single serving dinner. I really enjoyed the lemon and basil combo with the egg, (of course cheese is always a welcome ingredient but it wasn't the king of this dish) all in a crispy baguette. Way simple to make with only a few ingredients needed. This dish is meant as a much larger meal, made with a foccacia, but I scaled it down, just for me. Giada really has some very wonderful recipes. If you want the original, full blown, feed several people reciep....click ---->HERE<----

This is a loose recipe....the quantities are adjustable and changeable. Do what sounds good for you.


Lemon, Basil and Egg in a Baguette
Printable Version

4" section of a baguette
1 tablespoon olive oil
1/2 teaspoon lemon juice
1 egg
2 tablespoons or so of shredded parmesan cheese
1 teaspoon or so of chopped fresh basil
Salt & Pepper to taste

Preheat your oven to 350' F

Hollow out the bread. Cut the bread up, or tear it, into bite sized pieces and set it aside. In a small bowl, lightly whisk together the lemon juice and olive oil. Brush the inside of the baguette with the lemon oil.


Stick the bread in the oven to toast. If you are one of the lucky ones who happen to have a toaster oven...go for it!! I don't have one. Never have. First time I ever used one was when I started my current job, about 2 yrs ago. I left my bread in the oven for about 15 - 20 minutes....I wanted it crispy.

While that's going on, in a small bowl, beat the egg, some of the cheese, and basil together. Add salt and pepper to taste. Add most of the bread crumbs to the egg mixture. When your bread is toasted to your desire, fill it up with the bread/egg mixture. Top with more cheese


Bake in the oven for about 15 minutes, (roughly...I wasn't looking at the clock exactly) until the egg is cooked.


Good stuff, simple fresh flavors and ingredients that come together in a big way. And you know what? I didn't even miss not having any meat for dinner (thats a biggy for me....I like my meat). I think the whole wheat baguette that I used was earthy enough to almost make me think I was tasting meat. (weird, huh?) But if you'd like, you could totally add some bacon or sausage to this baby. Oooh...and maybe a handful of spinach. Ya....there definitely is room for personal growth with this dish.

Monday, November 1, 2010

Turkey Cupcakes or Meatloaf Muffins?


What does a food blogger, obsessed with baking and cooking person do when the kitchen is out of commission?

She goes insane.

Thank God it was temporary. (both the out of commission kitchen and the insanity)

My sink had a leak. Well, more like a gush. A pipe under the sink separated and instead of going out to the main drain and off to the water plant, all that water just ended up on the floor. Did I mention that I had a kitchen full of dirty dishes when this happened? This was Friday night and the plumber didn't consider it an emergency (ya, I know it's not a toilet....but it's my SINK!! I can't cook without the use of my sink, don't you understand? This is what my weekends are all about.....what am I going to do?) and wasn't coming out until Monday.

No cooking. No baking. No playing in the kitchen. No playing with my food. Which leads to said temporary insanity.

So I went to Trader Joes (and Santoro's Subs, and Steve's Charbroil Burgers, and Starbucks) for some food. One of the items that caught my eye in the freezer section was a box of ground turkey patties, topped with spinach and mashed potatoes. It looked really good so I bought it. I haven't re-heated cooked them yet and probably won't at this point (I'll leave them for the kids....I'm not much into spinach. So why did I get them? Good photography on the box.) but they left such an impression on my little semi-culinary mind.

I came home today from work and what did I find? A fixed sink and almost all of the dishes had been clean!! Omg...Sir Sportsalot made up for some of other things that happened over the weekend that I won't go into....yep...he does dishes. (more than I do, if you want to know the truth)

Woooo Hooooo.....I started doing the happy dance!! Defrosted some ground turkey, poured myself a glass of chardonnay and started on my own version of Trader Joe's Turkey Meatloaf Muffins.

It's really simple. I'm not giving out recipes here....just a few links and a really awesome idea on what to do with some already existing recipes.

Mix up a batch of turkey meatloaf....or what ever you're favorite recipe is for meatloak....beef, turkey...whatever. I basically used the same recipe for Turkey Meatballs

Preheat your oven to 375', and grease 12 muffins tins. Divide the turkey mixture  evenly among the tins. Sprinkle with some extra seasoning; black pepper and paprika


Bake for about 25 - 30 minutes, or until thoroughly cooked.

Get some Pesto. I had picked up a bunch of basil at the store yesterday so I made some fresh Garlic and Basil Pesto.

Make your favorite mashed potatoes. And start layering, and garnishing.


This is some seriously good stuff. It's like comfort food on another level....all in one bite.

And the veggie on the side? I peeled a zucchini with a wide potato peeler and did a quick saute in some butter, olive oil and garlic....with a little dash of black pepper.


Don't you just love playing in the kitchen? Especially when you've been deprived for 3 days!!!

Btw, I happen to have cupcakes on the brain. In a big way. You see...there's this really cool event happening here in Los Angeles on November 20 called Cupcake Camp LA and I'm going to be there. It's a charity event and I'm bringing cupcakes. Lots of cupcakes. 100 or more to be exact, more or less. Yep, I've signed up as an amateur baker participant and am so very excited!


The event is sponsored by BakeSpace.com. If you're going to be in the area and you like cupcakes, or you like supporting non profits, then stop on by and say hello!

This is my entry this week into the Hearth and Soul Blog Hop....what isn't more yum for the soul than comfort made fun

hearthandsoulgirlichef


Thursday, October 28, 2010

Spicy Chai Latte Cakes


 This isn't want I intended to make. At all. I didn't want cake. I didn't want cupcakes. I wanted a pretty holiday roll. But sometimes things don't work out the way you planned. Then you have to think on your feet and figure something else out. Figure out a plan B. (man, it's hard enough to think of a plan A let alone a plan B) Especially when the results are as wonderfully flavorful as these Spicy Chai Latte Cakes. 

It all started a few months back when a gal at work asked if I could make a chai tea cake for her. I said sure....but had no idea what I was going to do since I'd never had one. Another gal at work gave me a box of chai tea to help me out. But I still wasn't quite sure what I was going to do. Then another gal at work pulled out a tub of a powder mix from Trader Joes called Spicy Chai Latte that gets mixed with some hot water and apparently makes a wonderful drink. It didn't take me long to head over to Trader Joes to purchase some of this mix since an idea was blooming in my head. 

The result, although the presentation wasn't as planned, was....a moist, simple, delicious dessert that's not too sweet yet waaaay satisfying. 

When I got home and opened the tub of Spicy Chai Latte mix.....I took a whiff and WOW!!! It was like autumn....all the flavors and scents that mean fall is here and winter is just around the corner. Holidays with family and friends, sharing and enjoying good company, good food and good times. 

All this from one little tub. Ya, it's that good!!


Spicy Chai Latte Mini Cakes (or make it into cupcakes or a full blown cake)
Printable Version

1 box yellow cake mix (I used a butter recipe yellow mix)
1 1/4 cups hot water
1 stick butter, room temperature
3 eggs
1/2 cup instant spicy chai latter mix

Spicy Chai Latte Frosting
Printable Version

8oz cream cheese, room temperature
4 tablespoons butter, room temperature
1 cup powdered sugar
1/2 teaspoon vanilla extract
3 tablespoons instant spicy chai latte mix
Cinnamon for garnish


Don't you wish you could smell this? There's a combo of cinnamon, clove, cardamon, anise, ginger. Heaven, I'm tellin' you.

Preheat the oven to 350'. Prepare your cake pan or cupcake stuff. Me? Since I was planning on making this into a roll....I greased a jelly roll pan and covered it with a sheet of parchment paper.

Mix together the hot water and spicy chai latte mix. Beat together the cake mix, latte/water mixture and butter. Add the eggs and beat on low speed for 30 seconds than turn the speed up to medium and continue beating for an additional 2 minutes. Pour into you pan or cupcake tin and bake as directed on the box:

2 - 8" rounds: 33-38 minutes
2 - 9" rounds: 28-33 minutes
24 cupcakes: 20-25 minutes
bundt pan: 47-52 minutes

I baked mine for about 20-25 minutes in the jelly roll pan


Poke it in the middle with a toothpick...if it comes out clean, it's done.

`While it's cooling, make your icing. Cream together the cream cheese and butter until smooth. Add the powdered sugar, vanilla and spicy chai latte mix and stir until well combined and smooth. Set aside to let the flavors get all comfy and personal with each other.

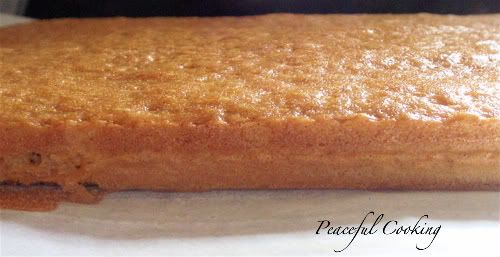
Once the cake is completely cooled, you can start with the icing. Umm....just an FYI: this is so nice and moist that if you place your hand on the cake to test for coolness.....


You just might end up with a little something to lick off your hand

Once I removed my cake from my jelly roll pan, I realized something wasn't right. It was just a bit too thick for rolling


It was too wide for a sheet cake and too good to scrap. That's when got out my cookie cutter and went to town

Although it left a bit of "waste"...which I will use for a triffle :)

I turned these little round cakes into double layered mini cakes.

Perfect in size and fun to eat


Monday, October 25, 2010

Gigi's Creamy Tomato Soup and HBin5 Garlic Baguette


Fall is here! Even in SoCal! Yep....it's been cold (for our standards) and rainy and just plain wonderful. I love weather. Probably because we hardly ever get any other than hot and hotter. When it rains, it lifts my spirits. When we have a good downpour or thunderstorm, I'm as giddy as a school girl (not sure what that means). And I love all the yummy comfort foods that come with cold weather. Roasts, stews, soups, hearty casseroles. It's all good. Top any of that with a homemade loaf of bread and it's heaven! Especially when paired with a fabulous bowl of creamy tomato soup.

As a child, tomato soup was one of my favorites. Even though it was canned....it was still wonderful to my little kid palette. I'd get my bowl of hot soup, grab a stack of saltine crackers and go to town. Dipping some of the crackers and crumbling the others right into the soup. Good stuff, let me tell ya.

Now that I've grown up (for the most part....well, kinda) the canned stuff doesn't appeal to me anymore. I don't remember my mom or grandmother ever making homemade tomato soup, so when I had heard about Karen's recipe....I was all over it. Karen is just one of the nicest, giving ladies I've met....at Bakespace.com.  I've made a few of her recipes and have loved them all. (this is like deja vu....have I said this before?). All us BS'ers (bakespacers) a.k.a. beeps (bakespace peeps....ya, we're all for the corny stuff) know Karen as Gigi. Hmm...not sure where Gigi comes from...but anyways.....this is her recipe and I have to say, it is fabulous! Its quick. It's easy and the flavor is amazing. You take a bite and taste the rotation of ingredients make their way across your palette.... just sit back as your tongue goes through the emotions...ooh, ahh....Wow....YUM!

Karen's Creamy Tomato Soup
Printable Version (I would've given a link to the recipe in Karen's BakeSpace kitchen, but I couldn't find the recipe there...so this is a link to mine. If I find hers, I'll fix it)

Prep time: 10 minutes
Cook time: 50 minutes
Servings: 4


2 tablespoons olive oil
1 medium onion, finely chopped
1 medium leek (white part only) finely chopped (I didn't have any so I added 1/2 yellow bell pepper instead...not that its the same or close, but it worked)
2 cloves of garlic, minced (my addition)
1 medium carrot, peeled and finely chopped
1 medium celery stalk, finely chopped
2 tablespoons fresh basil
2 cups fresh tomatoes, diced or 2 - 16 oz cans diced tomatoes (I used the cans)
3 tablespoons tomato paste
2 tablespoons all purpose flour
2 1/2 cups vegetable stock (I used a homemade stock that I had in the freezer)
1/2 cup light cream (I had Mexican crema on hand, so I used it)
salt and pepper to taste

Heat the oil in a medium to large saucepan and saute the onions, leeks (and / or bell pepper), carrot, and celery until the onion is transparent. Toss in the garlic and saute for another minute

Add the tomatoes and tomato paste and cook, stirring occasionally for about 5 minutes.

Stir in the flour until incorporated and then add the stock and basil. Bring to a boil. Reduce heat and simmer, covered for about 20 minutes. Remove from heat.

In a blender or with an immersion blender, puree the mixture until smooth. If you use a blender, you will need to do this in batches or else you will have tomato soup splattered all over your kitchen.


Return to the pan and bring to a boil again. Reduce heat and simmer for a couple of minutes...3 - 4. Turn off the heat, stir in the cream and season with salt and pepper to taste.


If you happen to have some dough lying around, form it into a baguette (mine always turn out too big and fat, but it's still good)....let it rise its final rise, brush the top with an egg wash, then take the handle of a wooden spoon and make an indent along the top. Take a few cloves of garlic, sliced in half and press them securely into the indent...


I used the Healthy Bread in Five Minutes a day recipe for Whole Wheat Bread, only I halved the wheat flour and subbed in more all purpose flour (as is my typical way of doing it), I used whey left over from cheese making instead of plain water and I added 1/2 teaspoon of barley malt syrup for each cup of flour. I really love this combination. This was the assignment for October 15th for the HBin5 bread braid


Michelle over at BigBlackDogs.net is our fearless leader, mentor and organizer. Without her and the group and all that I've learned this year, there's no way I would've ever attempted anything like this. It's not bakery perfect in looks, but it's wonderful in flavor....


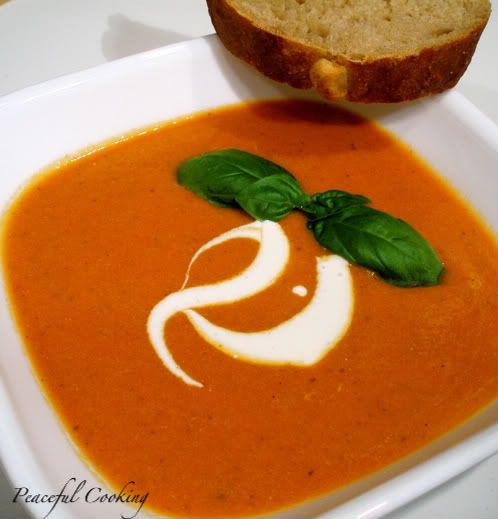
Get a little slice with some butter and serve with your fresh, homemade Creamy Tomato soup that you've garnished with cream, sour cream or yogurt and some fresh basil


Feel the comfort, feel the love and enjoy a grown-up version of a childhood favorite.
This is my submission this week for the Hearth and Soul Blog Hop. Click on the badge below to begin a tour of some fabulous foods.

hearthandsoulgirlichef

Later that week: I loved this bread so much that I made a second loaf. Only this time I remembered a trick I had seen another member of the HBin5 group do...and I thought I'd give it a try. You see, the HBin5 doughs tend to spread....so I built a make-shift retainer along each side of the dough for the second rise to hold it in place:


I wish I had a couple of 2x4's instead...but the dishes worked wonderfully....as you can see from the result below. It still did a bit of spreading in the oven, but not bad


Apparently I didn't press the garlic in deep enough this time cuz they sorta wanted to (and did) pop off but at least it looked a bit more like a baguette :). I'm sorry I don't remember who gave the group this tip (and I know I saw it on your blog)....but if you read this and you know who you are....THANK YOU!!! 


Saturday, October 23, 2010

Pace Picante Sauce and Huevos Rancheros


Whenever I receive something for free, it's like getting a present. And I love getting presents! (who doesn't?!) My most recent present was through the Tastemakers program with Foodbuzz. I was sent 2 bottles of All Natural Pace Original Picante Sauce (medium heat).


In case you haven't noticed....I'm all over Mexican food in a big way. Of course I enjoy making stuff from scratch but if I'm short on time (or just feeling lazy), Pace has  been the brand I grab off the store shelf more often than not. (that old Pace commercial keeps running through my head...."New York CITY!?"). It happens to be a brand I know and trust and have used for years.

Salsa isn't just for dips (errr.....no, I'm not calling ya'll a bunch of dips), it livens up a whole bunch of stuff besides chips, tacos and burritos. It was really good in my Southwestern Lasagna for example. Wanna see how good it is with my homemade Beef Chorizo and eggs and stuff for breakfast?


Huevos Rancheros

Now....this isn't so much a recipe with measurements as it is a putting together of ingredients. Quantities are going to depend on tastes and levels of hunger. You know? I mean....unless you're working in a restaurant, no ones telling you how much of what stuff to put in your burrito. You just do it the way you like it. That's how this is. But I will give you a list of stuff to use to get you started...you take it from here and run.... do it the way that'll make you and yours happy.

Mexican chorizo (this is not a cured chorizo like the Spanish and Puerto Rican chorizos are. Once you remove it from the casing (or when home made, the plastic bag) it's a lovely mass of fine crumbly meet and spices)
Eggs
Refried Beans
Garlic
Pace Picante Sauce
Corn tortillas
Mexican Crema (or sour cream)
Cheese (queso fresco, jack, mexican blend...whatever floats your boat) shredded or crumbled
Green Onions, chopped
Tomato, diced
Avocado, sliced
Cilantro, roughly chopped

Cook your chozio in a medium-hot skillet. It doesn't take long.


In a small sauce pan over low heat, heat up your refried beans with some garlic added. I say about 3 cloves of garlic per can of beans. It just adds a nice little sumpin sumpin....you know? I got this idea from a pal over at BakeSpace.com


In another little saucepan (yes....you're going to be usin' up a lot of pots and pans LOL) heat up your salsa over medium low heat.

In yet another sauce pan (this part is optional) heat up some oil and fry your tortillas. Drain the tortillas on a paper towel lined plate, then dip them in the warmed salsa


Fry up your eggs and start layering, baby.....


Start with the garlicy beans and chorizo


And top that with your choice of the other googies you've laid out including more salsa


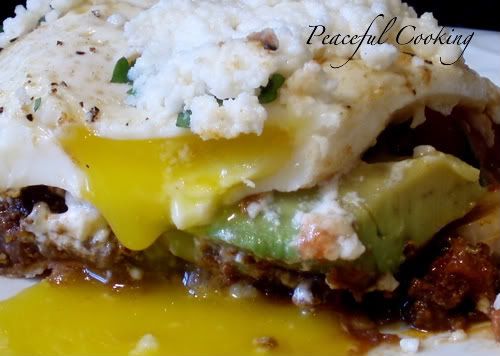
And there you have a filling, flavorful, wonderfully delicious breakfast that's sure to please each and every member of your family or guests


Who's mouth isn't going to water when presented with a dish like this?


Thank you Pace for my jars of Picante Sauce!