Yum Peaceful Cooking

Sunday, September 12, 2010

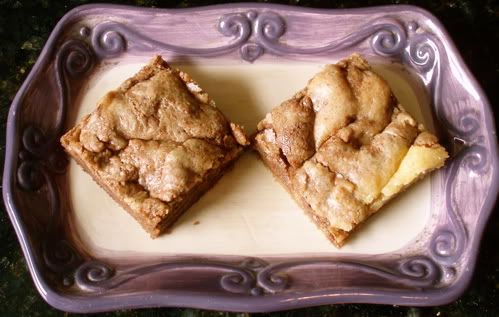
Hazelnut Brownies


A brownie....a member of the Girl Scouts. (nooo not that brownie)

A tiny, fanciful, good-natured brown elf who secretly helps at night with household chores. (not that kind either but we can come back to this one later)

A small, chewy, cake-like cookie, usually made with chocolate. YES...thats what I needed to hear.

Why?

Because this recipe calls for a cake mix. And it calls itself a Brownie. And I wanted to make sure it really is a brownie before I spread the word. Cuz these are sooo yummy. And waaaay easy.

I once met a gal in BakeSpace named Mary, and we continued our friendship into Facebook. She's a funny gal, witty and outrageous and for some reason keeps proclaiming that she can't cook. Or something to that affect. I dunno...she's nuts.

My point is, she shared a recipe called Peanut Butter Brownies. And of course that got my attention. I have this weakness love for peanut butter and chocolate. (and it really bums me out that reeses pieces gives me a tummy ache if I eat more than like.....5 of them. Does that happen to anyone else?). Now you might be wondering why these are Hazelnut Brownies if my love is in the peanut butter and chocolate arena. Just hang....it'll make sense in a minute.

I needed an excuse, a reason, a justification. Well crap....I just needed to feel better about making them cuz my girls, even though they'd chow down on them in minutes, would give me crap about making stuff "that's not healthy" (eye roll). And I only wanted to taste them. I didn't want to..... taunt myself with them and end up eating bunches of them. I didn't really need to make them. But I really wanted to.

Thus comes the sought after reason.

A gal at work (ya...we'll blame the working gal). She was leaving the company and moving on to other pastures.

So sad. :(

But here it is....my REASON! I'll make her some "Going Away Brownies".

::::::::::Happy Dance::::::::::

Then for some odd, out of the blue, unknown reason, I asked her. "Do you like peanut butter?" Her reply, "No."

oooooh.

But by now, my head is in full gear....I am mentally committed to this recipe. There's no stopping me now. But I have to go to plan B.

Of course, I have to think of a plan B before I go there.

Well, the original recipe calls for peanut butter and Nutella, or some peanut butter chocolate thing. Ok. We can keep the Nutella for sure. Maybe I can find some sort of chocolate spread thing that can replace the peanut butter. Chocolate syrup....eeeehhhh, not so sure.

With that floating around in my head, I set off to do my weekend shopping. My firsts stop was the "international" market. I usually stick to the meat counter, the produce section and the spice isle. This day I went down all the isles. I saw the Nutella and plopped it into my cart, when something creamy and interesting lured my eyes over to the left just a little.....Armella. A creamy hazelnut spread.
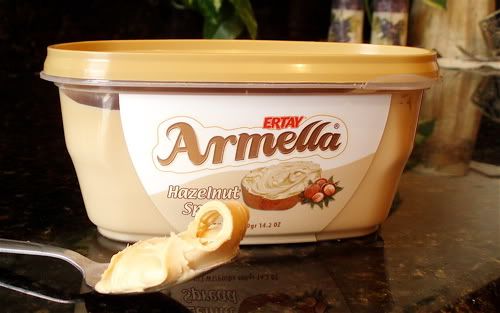


Whoooaaa!!! Does anyone else know about this stuff?! (and you haven't told me? whats the matter with you!) It's Nutella without the chocolate.  It's amazing. It's exactly what I need for these non-peanut butter brownies

And now we can discuss the recipe for Hazelnut Brownies. (rest assured, I will one day soon, make the coveted Peanut Butter Brownies)


Hazelnut Brownies

1 box of yellow or white cake mix
2 eggs
1/3 cup of oil
2/3 cup Nutella
1/4 cup Armella

Preheat the oven to 350' F

Combine the cake mix, eggs and oil until thoroughly mixed. 

Lemme just show you again how creamy this Armella is before we add it to the recipe


Don't you just want to stick your finger in there and taste it's creaminess? (and who said food isn't sexy?)

Add the Nutella and Armella to the cake mixture. 
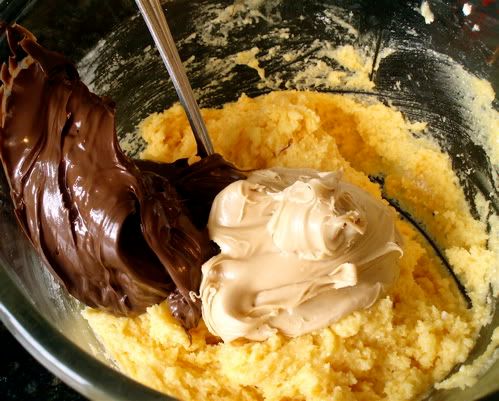


Mix until incorporated. But I didn't mix it thoroughly (because Mary said she didn't either)....giving it a "marbled" effect. 

Scoop it into a greased or parchment paper lined 9 x13 dish...and smoosh and spread (I use the term "spread" lightly cuz you'll have to smoosh and push more than spread) the very thick batter to the edges


Bake in a 350' F oven for about 20 minutes. 

Allow to cool before removing from the pan


Cut into squares, eat a few, especially the "messy" looking ones along the edges and send the rest to a co-worker who is leaving, whom you will miss cuz she's so sweet and has a wonderful smile and you always want to keep those kinds of people in your life.
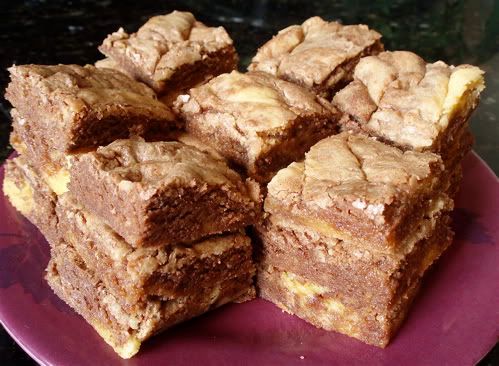

Oh ya...and as for the elfin type brownie.... anyone know how to go about getting one? I'm sure I could keep him busy for years to come.


Thursday, September 9, 2010

Grandmothers Baked Beans


I'm writing this post in honor of a great woman. A true "southern woman", in every sense of the phrase.

My grandmother.

I never spent as much time with her as I wanted; her being in Alabama and me, California. But she is responsible for everything that feels "southern" inside of me. I never lived anywhere but California but I feel a deep connection to all things southern. I may be a city girl, but my soul is country.
Grandmother taught me so much. Simple things. Things that are treasured and clung to throughout life.
Things you want your children to learn and appreciate as well.

I learned how to needlepoint at the young age of 8. When I was 11, grandmother taught me how to crochet. I shucked my first ears of corn sitting in her living room along with my aunt and was told..."try not to leave any strings in there....granddaddy won't like it". I popped peas in that same living room. I ate my first ever raw peanut, fresh from the garden on her back porch. Nothing says "home" like hand churned peach ice cream on a hot, humid day....where everyone takes turns cranking it until its done. And what about those yellow watermelons? Fireflies at dusk. Frogs croaking and jumping in the branch that runs behind the house. Strawberry jam, fried okra, creamed corn. Have you ever had a peanut butter and jelly sandwich where you mix the pb&j together before spreading it on the bread? My cousin and I use to gather those little gold safety pins out of the sewing room to tie on a thread at the end of stick and try to catch those tiny little fish in the branch. (Btw...little girls use peas as bate instead of worms.)

These are just a few of the memories I have from my many trips to Alabama, growing up. All having a huge impact on who I am today.

Last month I visited my family in Alabama. Besides the fact that it had been way too long since I had last been back there....the main reason I went was to see my grandmother. I needed to say good-bye. A week after I returned home, she left this world to be where her heart longed for.

Even though it was expected....the finality of it doesn't fail to hit hard.

On the day of her funeral, (since I had just been there, I didn't fly back for the funeral) I went online to see if a local paper had written anything about her. What I found instead was one of her recipes!!

How ironic is that?

The article is titled: Some hand-me downs are quite delicious

My cousin had given one of grandmother's recipes to her mother in-law, who in turn had sent it to her local newspaper a while back. It happened to publish on the day of the funeral.

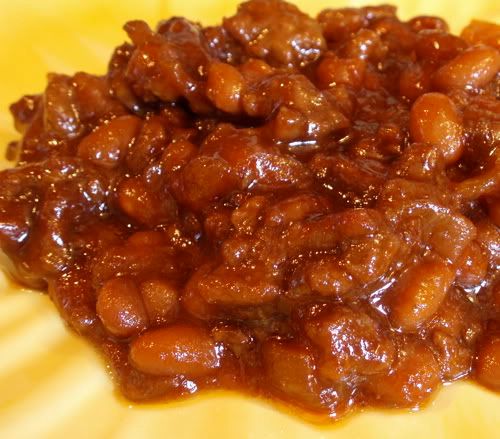
In grandmother's honor, I made her baked beans for Labor Day, and it was raved over. I was told that "this is the way baked beans are suppose to taste", by a fellow 'city girl with a country soul' friend of mine. People who don't normally eat baked beans enjoyed them. I hope you will too.

Miss Elva's Baked Beans
Printable Version


1 onion, chopped
1 bell pepper, chopped (I used a yellow bell pepper since I don't really like green ones)
Oil to saute

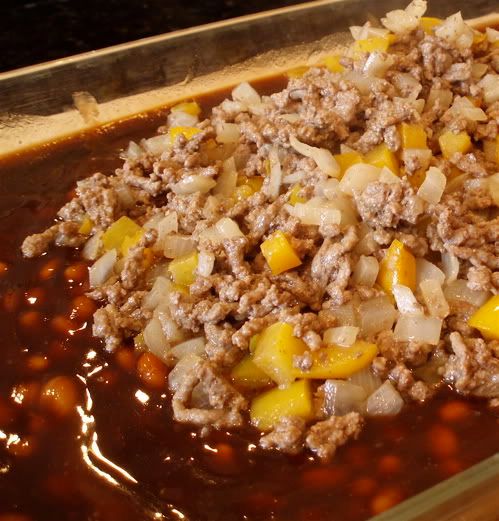
1 lb ground chuck (if you use a fattier ground beef, you'll need to drain it)
1 - 28 oz can of baked beans (the recipe called for 2-15oz cans of pork and beans)
1/2 cup Golden Eagle Syrup (we don't have that in So Cal so I used 2 parts corn syrup to 1 part molasses as suggested somewhere)
3 tablespoons light brown sugar
1 tablespoon lemon juice
1 tablespoon Worcestershire sauce
1 cup ketchup

Preheat the oven to 350' F.

In a good sized skillet, heat about a tablespoon of oil. Saute the onions and bell pepper until tender. Add the ground beef and brown, stirring occasionally.

In a 13x9 casserole dish, combine the remaining ingredients. Stir in the meat mixture.


Gently stir until combined


Bake at 350' F for about an hour.

If you want to make a small batch, it's easily halved and baked in an 8x8 dish, baked for maybe 30 - 45 minutes?

Anyways....for all you grandmother's out there....just do what you do and be who you are. Your grandchildren will pick up what they need and cherish what they learn from you, even if they don't know it yet. Life lessons are best taught just by living and sharing your life with those you love.

Btw....have I ever mentioned that ever since I was a child, I've always looked forward to being a grandmother? I may have mentioned it to y' all a time or two....but now you know why.

I love you grandmother! You are missed but a part of you will always live through your family.

Monday, September 6, 2010

Combo Plate.....


Dinner was the result of several things all coming together.

1. I received some samples of these incredible eco friendly disposable Palm Leaf Plates from MarxFoods.com
2. I finely got the chance to use my Emerilware Cast Iron 20" Reversible Grill/Griddle that I used part of the CSNStores.com $100 Gift Certificate on when I won the GiveAway over at BigBlackDogs.net (Thank you Michelle!!!!)
3. Thin cut flank steak was on sale at Vallarta (our local mexican market)
4. Tortillas are so easy and fun to make

The combination of all those things made for a delicious dinner that was extra fun to make. You know what its like when you get to use new stuff, right?

Lets start from the beginning....

Flank steak. (or skirt steak can be used. They are very similar and come from the same area of the cow. I believe I've used both when making fajitas). You gotta love a a sale. So I picked up about 3 lbs of meat and instantly put that baby in a baggy with some incredible seasoning that I have (also from the mexican market).


When making fajitas, this is the best seasoning out there (that this gringo knows of). The only bummer is that it's loaded with MSG so I don't use it often. But I put 2 teaspoons per pound of meat along with the juice of 1/2 an orange per pound.....some sliced onion, and a handful of cilantro in a zip lock baggy and let it slosh around and get all soaked and happy for several hours (or even a couple of days).

I mixed up a small batch of corn tortillas and got to cook them on my new grill/griddle. Check this monster out


I love how big it is. I love how sturdy it is. (it is heavy but what cast iron "anything", isn't?). And do you see the space between the "grills"? Makes for easy cleaning...let me tell you! Helps to be able to fit your finger and sponge in between....you know?

And I could grill 2 tortillas at once...so it only took a few minutes to make 8 tortillas


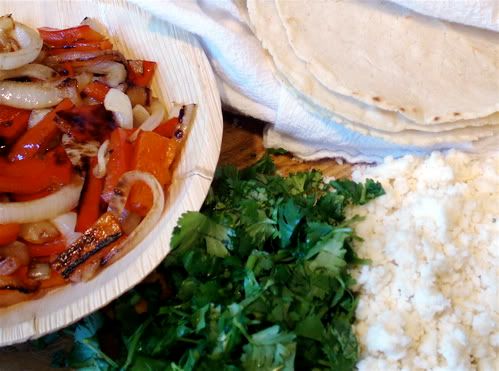
Once those were done, I sauteed some onions and bell peppers, (keeping the tortillas warm in a cotton towel), crumbled my queso fresco ranchero cheese and chopped up the cilantro


I flipped over my handy dandy griddle and used the grill side for my fajita meat


I've got grill marks baby!!!!


I love this meat. I could (and have been known to) stand in the kitchen just tearing off pieces of carne asada, and eating. All by itself. Nothing else for dinner...just these tasty bits of yumminess.

Now....a while back, I received a set of 5 disposable bowls and plates made from palm leaves by MarxFoods.com.


I had seen them advertised and thought they were pretty darn cool in a funky way, yet at the same time....classy.


Because they're made with palm leaves, each plate is different.  They're so..."island" like. Makes you want to have a Luau. And thats exactly what I wanted to do to show them off....only it didn't happen (life stuff sometimes messes with foodie plans). They're sturdy and durable. When I first got them I had used the bowls for a salad...and drowned my salad in dressing just to "test" the bowl. It passed with flying colors (see my HBin5 Gluten Free Cheddar Sesame Bread and Palm Plates post). No leaks, no bending or folding....no mess.

Marx Foods has a huge variety of Palm Plates (and cutlery) to choose from...various sizes, shapes, etc. Only they're a bit pricey for my pocketbook. But that's the only thing keeping me from placing an order. They appeal to me on so many different levels. Not just the aesthetic appeal, but the eco friendly benefits. Palm leaves. Ones that have fallen naturally from the palm trees. Not paper from chopped down trees. Or plastic...(we won't even go there with that mess). And....these are biodegradable. Mine are now in my compost bin. That makes me feel really good!

Oh, but I have to say one thing.....I don't think they really like going in the microwave. My bowl grew a bubble...a big huge bubble. Then it disappear real quick.....as soon as I opened the microwave door. Almost like it had been caught and was trying hide what it was doing. (the little stinker). In the bowls defense....it had been sitting in the fridge over night with veggies on it...so maybe it was a reaction to being "moist"?
Anyways....tortillas are made, carne asada has been grilled, fun fancy schmancy disposable plates are out....

And dinner is served.....


Chow down. Feel good about what you're eating and what you're eating it on.

Friday, September 3, 2010

Soul Casserole


I woke up in the middle of the night and couldn't go back to sleep. (don't you just hate when that happens?) It was around 3:00 am and I tossed and turned. Couldn't get comfortable. Couldn't shut my mind off. Not to mention that Sir Sportsalot was happily snoring away.

After over an hour of this nonsense, I decided to revert to my childhood. It seemed that whenever I said my prayers, I'd fall asleep in the middle of them. So there I lay...saying my prayers in my head at 4 something. When all of a sudden the word CASSEROLE yelled in my head.

What??!! I don't even LIKE casserole. What's that suppose to mean? Casserole? Well, some casseroles are good. But they aren't my favorite. So why did my mind yell casserole to me in the middle of my "help me fall asleep prayer"?

So of course....instead of falling asleep, I was then thinking about casseroles.

Now here's where I let you have a sneak peak into a part of who I am. I like analogies. It's the way my brain works. Helps me to have a deeper understanding of things. Helps me to connect. So I started wondering what casseroles had to do with prayers.

The dissection process started....casseroles are a one-dish meal. Everything combined together into one. Prayers are soul related. A belief (should you so believe). Souls are windows into who you are.

Ok...so how are casseroles and souls related.....

I posed the question to some friends to see what connection they'd make. I'll share their views before I share mine.

Here's the question....(feel free to leave your version of an answer, if you'd like)

Food for thought.....how are souls like casseroles?

"they rhyme" (giggling)
"....because a good soul, like a good casserole, brings comfort in times of difficulty" (nice)
"thank God I haven't burned any lately" (hahaha)
"I guess that makes me a cheesy turkey" (LMAO)

You gotta love how people think!

I think the connection lies in the "ingredients". Every ingredient in a casserole affects the whole thing. For the good or the bad. Just like every action, choice, life experience affects our soul...who we are.

After I solved that little analogy, I happily drifted off to a dreamless sleep. But woke up still thinking about casseroles. So I figured I'd better make one for dinner.

This is a simple recipe I came up with during my afternoon break at work. I love alfredo sauce. I wanted the sauce to shine, so there aren't any other strong flavors in this recipe. I chose chicken (cuz well...how often do I not choose chicken?). Zucchini is mild and replaced my initial thought to use broccoli. Then followed the tomatoes. For the fresh, delicately sweet flavor they'd add.

I LOVE this casserole. I love the cheesy alfredo sauce. I love the mildly sweet flavor of the tomatoes. I love that it wasn't loaded down with a gazillion spices. I also love that this was a small casserole, that can be easily doubled to make a "regular" sized casserole.


Soul Casserole

1 heaping cup of pre-cooked chicken (I used a store bought rotisserie chicken)
1 heaping cup of egg noodles
1 heaping cup of sliced zucchini, quartered (about 1 smallish zucchini)
1 heaping cup of bite sized tomato cups (about 1 medium tomato)
3/4 cup grated parmesan cheese, divided
1/2 cup butter, divided
1/4 cup or so, pasta water
1/2 cup Italian seasoned bread crumbs
1 teaspoon garlic powder
Salt and Pepper to taste

Preheat your oven to 350' F
Spray an 8x8 casserole dish with cooking spray (more of a precautionary thing than a necessity)

Cook the egg noodles according to package instructions. Drain, saving the pasta water. Do not rinse the pasta (you want the starch. It helps to thicken the sauce)

While the pasta is cooking, cook your zucchini. Any way want. You can boil 'em, steam 'em, saute em. I boiled mine. I thought about sauteing but I didn't want to dirty up another pan, so I actually boiled the zucchini with the pasta....only I had to scoop them out after a few minutes so they didn't get mushy cuz it doesn't take as long to cook zucchini as it does for pasta to boil.

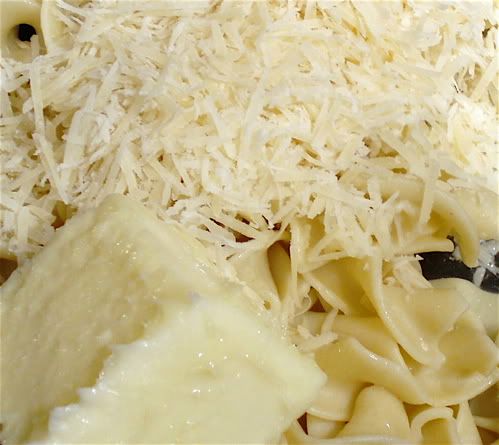
In a medium bowl, while the pasta is still hot, combine the pasta, 1/2 cup of parmesan cheese and 1/4 cup of butter. Stir until butter is melted. Stir in the pasta water along with the garlic powder, salt and pepper until you have a "runny" sauce. The pasta will probably soak up some of the sauce and it will thicken as the dish cools after cooking.


Toss in the chicken, cooked zucchini, and the tomatoes and toss


The picture shows garlic powder added at this time but I think if you add it while making the sauce, you're guaranteed that the sauce will be evenly garliced. (ya I know...it's not a word, but it works.)

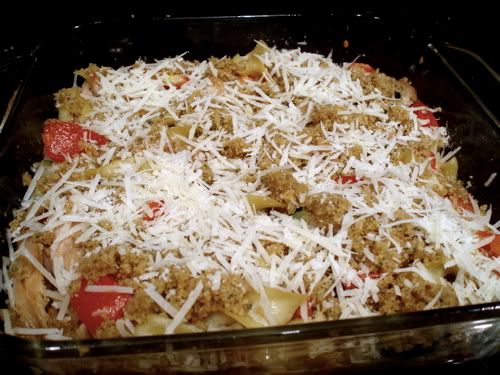
Pour into your prepared 8x8 dish. Melt the other 1/4 cup of butter and combine with the bread crumbs. Crumble them evenly over the pasta. Then sprinkle 1/4 cup of parmesan cheese on top. 


Bake for 30 minutes, until bubbly, melty and you know....yummy. Let rest for about 10 minutes before serving.


Go ahead...take a bite! Taste the cheese..the chicken...the buttery bread crumbs and then the burst of freshness from the tomatoes. 

And know that this casserole is probably better than my soul. (giggles)


Danielle on Foodista

Saturday, August 28, 2010

Chile Rub-a-dub dub


A long day, poor planning, laziness....whatever the case may be, a rub could be the answer you're needing. When you don't have time to plan a meal or marinate your meat....rub it in instead. There are so many varieties out there. I'm sure you have your favorite or will find one in no time.

One of the rubs we enjoy was inspired by a recipe I got out of the Everyday Food magazine, the July / August issue back in 2004. I only added two additional ingredients....garlic powder and onion powder. I don't understand how garlic was left out of this recipe to begin with. We're talking about GARLIC here people! Most everything (and I say most because I haven't wrapped my head around garlic as a dessert ingredient yet) is better with garlic. What was Martha thinking? As I look at several other rub recipes in the little magazine...none of them contain garlic.

I don't get it.

Anyways...this recipe is simple. Doesn't make a huge amount, so you don't have to worry about having to cook with it everyday for the next several months before the spices deteriorate. I think you can get about 2 - 4 uses out of, depending on how much you use. Me? I like to use a lot of it. And you probably have all of the ingredients in your spice rack. Can't get much better then that, can it? Of course if you want to stock up, double or triple the recipe.

Chili Rub
makes about 11 teaspoons
Printable Version

1 tablespoon plus 1 teaspoon chili powder
2 teaspoons ground cumin
2 teaspoons brown sugar
1 teaspoon dried oregano
1 teaspoon coarse salt
1 teaspoon garlic powder
1/4 teaspoon onion powder

Combine all the ingredients and mix well. Store in an airtight container for up to six months.


Feel free to adjust the spices to suit your taste. I might even add a bit more garlic next time.

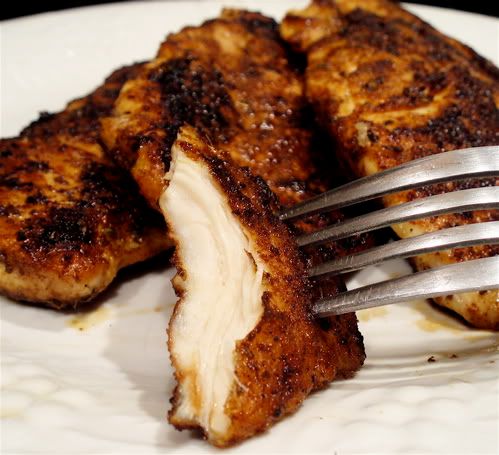
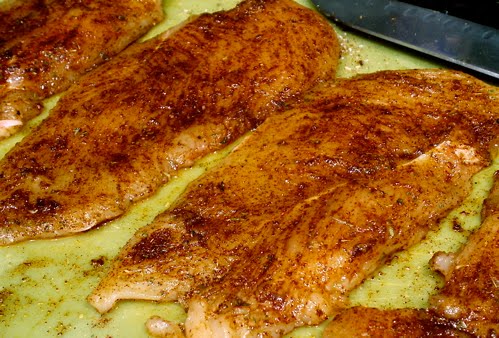
Anyway....I drizzle a tiny bit of olive oil on my chicken breast. Then I massage the rub in before cooking (you can also rub it in hours before hand).


I've found that if I don't add a bit of oil before hand (to chicken breast....thighs and beef have been no problem)....the rub tends to stay on the dry side during cooking. Just for a starting point....Martha says to use about 1 teaspoon of rub for every 3/4 lb of meat.


I like that nice caramelization that happens. Especially with the brown sugar that's in this recipe. I had butterflied these breasts before adding the rub...and they cooked wonderfully, quickly, evenly and were so flavorful! Served with a quick side of rice (made in a rice cooker of course while I was messing with the chicken) and a few veggies and / or salad, and you have a satisfying dinner that you put together in no time. For us working moms and moms of kids in school.....you gotta love a meal like this.

Monday, August 23, 2010

Purple Peas, Peachy Cobbler and Southern Hospitality


When this is what you wake up to every morning and where you spend your days and evenings....it sure does make it hard to go home and get back to work. I just got back from spending 10 wonderful days at mom and dads in the good ole hot sticky humid south. And I loved every minute of it.

Mosquito bites and all.

95% of my family lives in Alabama. Where it's always green, the food comforts the soul, and hospitality is a way of life. And my daighters and I enjoyed it all while Sir Sportsalot stayed home and held down the fort. (hmmm...I wonder who had more fun....us girls or a temporarily bachelored (is that a word???) sports nut?)

Before I give you a taste of some of the food we chowed on, let me show you some of the ways we experienced true southern living.....

A little live entertainment at a local club called Boondocks. Where the parking lot disappears into the lake, margaritas are served in plastic disposable cups, a bartender breaks horses by day, and my brother serenades a lively crowd


Where else can you be greeted like a friend and treated like a family member (nope, I'm not talking about the old man in suspenders talkin to dad....I'm talking about the 2 dogs .....carryin' on)


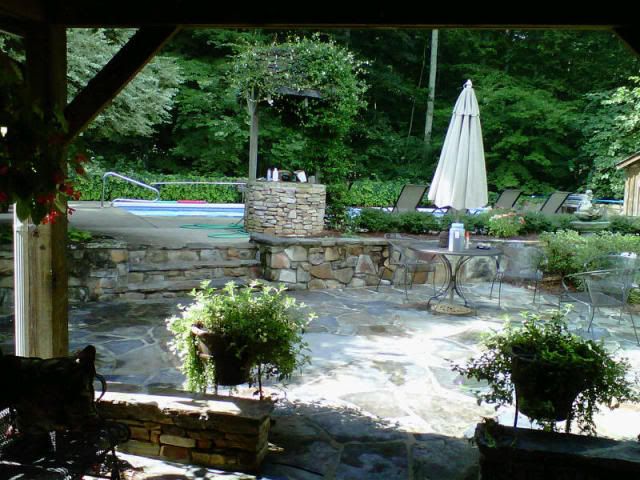
A trip to 'Bama wouldn't be the same without the wildlife. There's something comforting about sitting on the porch, listening to a forest filled with the song of the cicada


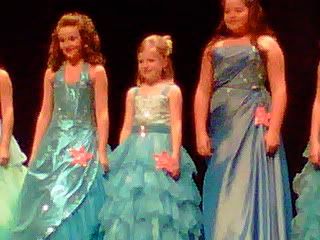
And how can you fully experience the south without a pageant? My little niece (shown in the middle) participated in her second pageant. It wasn't one of those big time, full fledge pageants. It was a fund raiser for a local high school band. She did wonderfully. All the girls did, whether they won anything or not.


And last but not least....the food! I looooove me some southern cooking! My baby sister, Nicki made us a full fledged southern meal, complete with cornbread, coleslaw, and fried okra.

She had gone to the farmers market that morning and bought a couple pounds of Purple Peas


I think this is the most beautiful bag of peas I've ever seen. So the two of us sat on the back porch with our tall glasses of sweet tea, in true southern fashion and shelled this bag of peas


They shelled easily enough so it didn't take us all that long. Thank God cuz maaaaaan, was it hot outside! But in no time at all we had ourselves a good amount of peas shelled and ready to wash and cook.


Look at how perty them peas are! I think of them as a girlie version of black eyed peas. My sister cooked them the same way she cooks black eyed peas...in a pot of water with a ham hock. The flavor was fabulous! More mild....not as earthy tasting as black eyed peas. I think out of the two kinds, I prefer the purple ones. I can't wait to hit the farmers market in Hollywood to see if I can find me a few pounds. How would you cook yours?

And for dessert, we were treated with a Peachy Peach Cobbler. Well....that's what it was suppose to be according to the directions....only a little adjustment was made. Instead of just peaches, Nicki added some raspberries.

Peachy Peach Raspberry Cobbler
Printable Version

Crust:
1 1/2 cups sifted all purpose flour
1/2 tsp salt
1/4 tsp baking powder
1/2 cup well chilled vegetable shortening, cut into small bits
3 tablespoons well chilled unsalted butter, cut into small bits
3 tablespoons ice water (or more if necessary...it usually takes my sister 5 tablespoons)

Sift flour, salt and baking powder together into a large bowl


Add the shortening and butter and toss to coat the pieces of fat with flour. With a pastry blender, cut the fats into the flour until the mixture resembles coarse meal.

Sprinkle water over crumbs and toss with a fork. Do not mash! Gradually the crumbs will form into clumps. With floured hands, form dough into a mass by pressing the mixture against the side of the bowl. All of the crumbs should adhere to the dough and clean the bowl. If not, add a few more drops of water. Form the dough into a flat rectangle if you are using an oblong dish or shape into a flat disk. Cover with plastic wrap and chill in the fridge for at least 1 hour.

Cobbler:
8 - 9 cups fresh peaches (or 2 lbs of peaches, or a combo of peaches with cherries, raspberries or blueberries)
3/4 cup plus 1 tsp sugar
1/4 cup cornstarch
1/2 tsp ground cinnamon
1 tablespoon lemon juice
2 tablespoons unsalted butter, cut into pieces

Preheat oven to 425' F. Butter your dish. (it doesn't say what size....I think something around 11x7?)

Cut the peaches into 1 inch slices. In a large bowl, combine the peaches (and raspberries if desired), 3/4 cup sugar, cornstarch and cinnamon.


Toss to coat. Empty mixture into prepared dish and spread evenly. Sprinkle fruit with lemon juice and dot with butter.

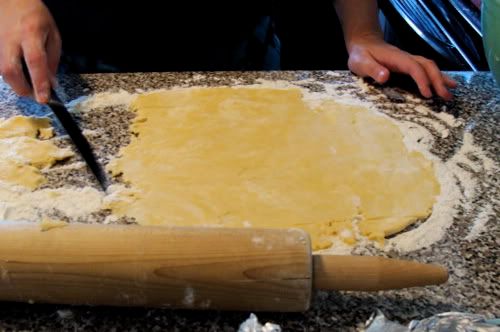
On a floured surface, roll out the pastry about an inch or 2 larger than your dish


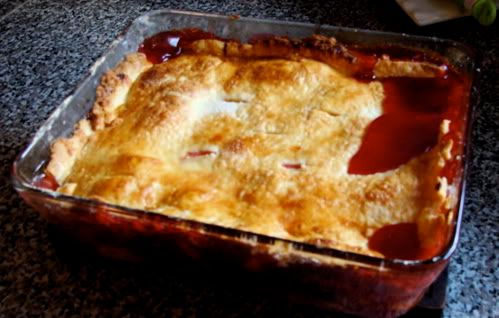
Place it loosely over your fruit. Press edges against the side of the dish with a fork or fingers. Prick the top in several places with a knife or fork to make steam vents. Sprinkle the top with the remaining 1 tsp sugar. Nicki likes to brush the top with an egg wash first.....I recommend doing the same. She knows what she's talking about.

Bake the cobbler for 40 - 45 minutes, until the juices begin to bubble and the top is golden brown. You might want to place the dish in a foil lined cookie sheet or drip pan to prevent a sticky mess in your oven.

Serve warm with ice cream.


Let me tell you...as full as I was after eating dinner, I found room for this fabulous dessert. DISLISH!!!

This is my entry into entry into this weeks Two For Tuesday Blog Hop Carnival. Check out Heather's place over at Girlichef.blogspot.com to see what that's all about

TwoforTuesdays@girlichef


Tuesday, August 10, 2010

Mesquite, Mesquite, Mesquite


Yep...you're in the right place. Yes, I've titled this post Mesquite. And yes, that is a cupcake. Stick around for a few minutes and it'll fall in place.

I promise.

In the beginning of this month, when I posted about my Four Leaf Clover Broccoli and Cheddar Buns, I mentioned that I was not able to make the assigned Mesquite Bread from HBin5 because I couldn't find the Mesquite Flour.

That night I received the nicest email ever!!!

Peter from Casa de Fruta emailed me to inform me that he was going to send me a sample of Mesquite Flour so that I could make the bread.

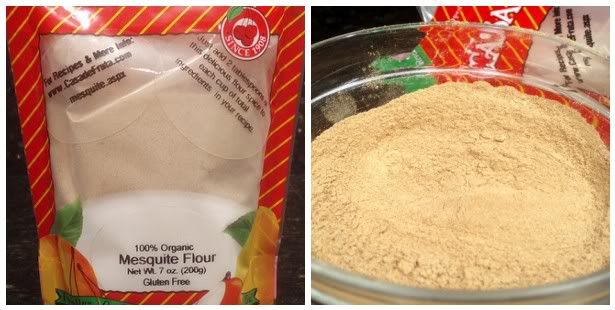
WOW!! I was ecstatic, let me tell you. Within a couple of days I had in my possession a wonderful 7oz bag of Mesquite Flour.

Fragrant, intense, flavorful, wonderfully amazing Mesquite Flour.


It was love at first sight....and taste.

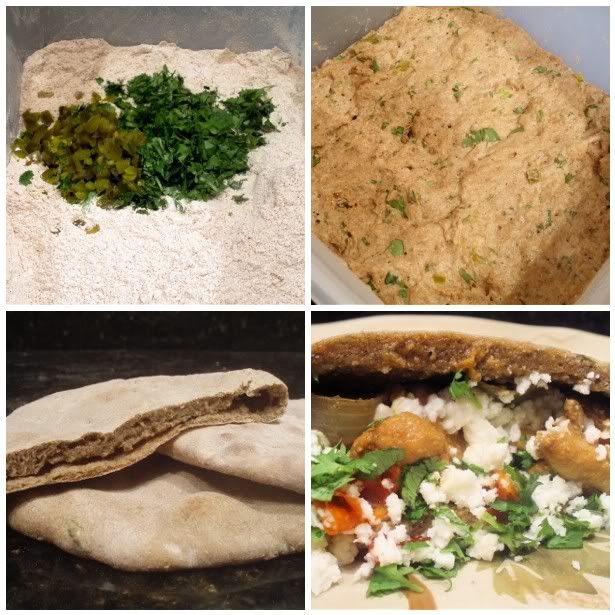
Is soon as I got home that night, I put together my HBin5 Mesquite bread dough, which included jalapenos and cilantro. (sorry, can't share the recipe. You'll have to find it elsewhere or buy the book). After allowing the dough to rest in the fridge for 24 hours, I decided to make pita bread with it and fill them with chicken fajita goodies


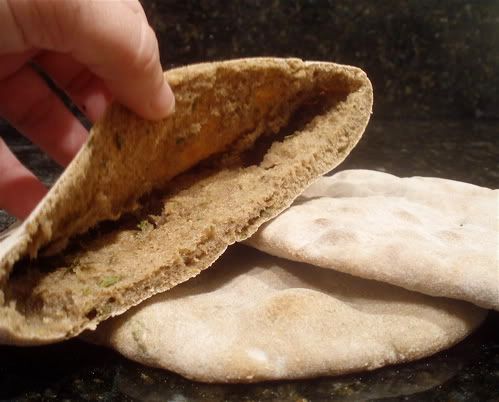
There really is something very satisfying about making pita. It's amazingly simple, quick and makes that little pocket in the middle all by itself


Look at that deep rich color the dough has. Yes, thats from the Mesquite Flour.

I have to say one thing though....this wasn't my favorite bread. I think there were too many flavors going on. At least with the fajita goodies inside. It did taste good just dipped it in the a little oil though. At this very moment, I have a loaf in the oven. I think I'm going to pick up some hummus and eat it for lunch tomorrow.


Head on over the Michelle's at BigBlackDogs.net and see what the others did with their assignments.


Let me tell you something about Mesquite Flour. When you think of Mesquite, instantly you think of the smokey flavor that you get when you bbq with mesquite wood. The flour is a whooooole different kind of animal. It's made from the been pods of the mesquite bush, not the wood. And it has a sweet spiciness about it. Reminds me of cinnamon / cayenne pepper combo without the heat. Very hispanic in nature.

Peter from Casa de Fruta had also sent me a brochure with some recipes. I noticed a lot of dessert recipes and my wheels started turning.

Allow me to introduce you to my Mocha Mesquite Cupcakes with Mesquite Frosting.

Now we're talking.

These are amazing in flavor. They're moist. They're vegetarian. No eggs even. I didn't do that on purpose. It just happened to be. Do you remember how fun it was as a kid to lick the bowl after mom made a cake? Then all this hype about salmonella started and "Oh nooo, don't lick that bowl! It has raw egg in it!!" Well, guess what? You can lick this bowl clean and not have a single worry. And to be honest, you'll probably want to. Forget giving it to the kids.....hell, you're gonna wanna keep that bowl all to yourself!

Mocha Mesquite Cupcakes
Printable Version

1/3 cup cocoa powder
1 c hot strong coffee
3/4 cup sour cream
1/4 cup mesquite flour
1 teaspoon vanilla
2 cups cake flour
1 cup sugar
1 1/4 teaspoon baking soda
1/2 teaspoon salt

Mesquite Frosting
Printable Version

1/2 cup plus 1 tablespoon butter
3/4 cup plus 2 tablespoons powdered sugar
1 tablespoon mesquite flour
1 tablespoon cocoa powder
1 1/2 teaspoons vanilla

Preheat the oven to 375' F and line 12 muffin cups with baking cups

In a bowl, whisk together the cocoa powder and coffee. Set aside and let cool completely.

In a medium bowl, mix together the sour cream, mesquite flour and vanilla until well combined. Whisk in the coffee mixture until smooth.

In a large bowl, combine cake flour, sugar, baking soda and salt. On medium speed, beat in the mesquite mixture and beat for one minute.


At this point, I pour some of the batter into a measuring cup for liquids (the one with the pour spout). This makes it sooo much easier to fill the muffin tins, which you will almost to the top


 Bake in your preheated 375'F oven for about 20 - 25 minutes, or until a toothpick inserted into the center comes out clean.

You'll probably have some batter left over. Make a few more cupcakes. Or, like I did....just lick the bowl


Allow to cool on a rack


I think those faults are becoming my signature. O'well...it's going to be covered with frosting anyway.

Mix together your frosting as follows:

Cream the butter. Add the powdered sugar, mesquite flour and cocoa powder and beat until fluffy. Add the vanilla and mix until smooth.

Bam Boom, it's done.

Frost your cupcakes....


Hopefully you'll do a much better job than I will. Maybe one of these days I can take a class or something cuz seriously....it looks like an 8 yr old did it.

But oh my goodness....are these good!! The Mesquite, chocolate and coffee flavor combo is heavenly. Thank you so much Peter for allowing me to experience and incredible product!

I think I will be ordering more of this Mesquite Flour. There are so many other things I'd like to try.

As for the cupcakes...I still have a couple left. My girls and I are heading to 'Bama for a bit of a vacation and long overdue time with the family. Am I allowed to bring food on the plane? I want to bring these babies with me to share with my sisters and their kids.

***Update on Mesquite Bread (8/24/10): With the leftover mesquite dough that I had, I made a simple loaf of bread and brought it with me when I visited my family. We simply sliced it and spread on some butter or dipped it in a butter garlic sauce....and it was fantastic!!!