Yum Peaceful Cooking

Wednesday, July 14, 2010

HBin5 Gluten-Free Cheddar & Sesame Bread, Croutons and Palm Plates


Yep...them there are gluten-free croutons.

For HBin5 we were assigned to make Gluten-Free Cheddar and Sesame Bread. I don't have celiac disease and I don't know anyone personally that does. I do know some people who eat gluten free by choice. I asked my childhood friend, now nurse, what the benefits of such a choice is. Her response was...for a "clean" diet such as when one is cleansing the system.


Anyways....Michelle at BigBlackDogs has the Bread Braid up for this assignment if you'd like to view all the various results. It's always fun to see what others have done with the dough as well as learn from their experiences and tips.

For the soy that was called for, I used Oat Flour. I know there is some concern regarding how "gluten-free" Oat Flour is, due to whether or not it was milled near wheat. However, from what I've read, there are brands out there that make gluten-free Oat Flour. Just look for the statement on the label claiming so.

For the cornstarch, I used Potato Starch. I don't know how much of a difference it made, but that's what I have and that's what I used. I had originally did so in an attempt to alter the flavor. I find that gluten-free bread has a funky aftertaste that I'm not real fond of. I had thought the copious amounts of cornstarch was the culprit.

That's not the case. Now I think it's the Xantham Gum. I'd like to try Guar Gum and see how that is. Any imput? Experience? Words of wisdom?

What I did discover was that toasting the bread almost completely eliminates that aftertaste.

I mixed the dough as instructed (along with my changes) and let it sit for 2 hours on the counter
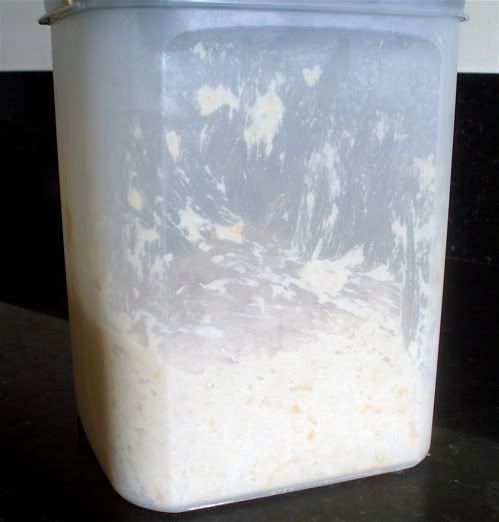

I was thrilled with the 1 rise!! Then I put it in the fridge for a couple of days. The dough is much easier to work with once it has chilled.

When I was ready to bake some bread, I grabbed a huge....cantaloupe sized handful of dough and roughly shaped it into a ball. Worked it into an oblong shape and placed it in a well greased loaf pan


A couple of things you might want to know about gluten-free dough is that it lacks elasticity. When forming the dough, you don't pull. You mold. Then you get your hands damp and smooth out the top. Very much like working with clay.

Cover with plastic and allow to rest for about an hour and a half. Preheat your oven and bread stone at 425' for 30 minutes. Blush the top of the bread with water and sprinkle some sesame seeds on top


I didn't seem to get much of a rise. If it wasn't so late, I might have let it rest for another 15-30 minutes. But...I was tired, therefore the bread was tossed into the oven....a pan underneath was filled with 1 cup of hot water and the baking began.

Once it was done, I removed it from the pan to place onto a rack. I instantly noticed that the bottom was a bit...soft. Which had me worried. I was afraid that the center might not be fully cooked so I placed the loaf back into the oven, directly onto the baking stone and cooked for a bit longer
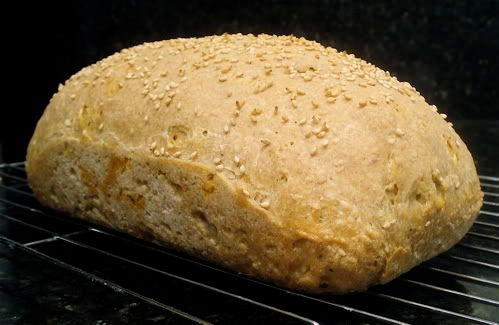

The next morning was the unveiling.....
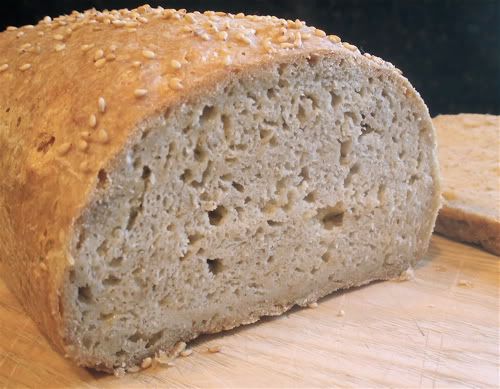

Not bad for gluten-free!! But I knew I wouldn't eat it as is. But what could I do? Grilled cheese came to mind. An open faced sandwich of some sort. A grilled panini...I dunno. Sometime during the day the light bulb finally came on...CROUTONS!!!

There are 3 ways that I know of to make croutons. Baked, grilled and panfried. I normally bake them. But when I got home, after a day of 102' weather.....the A/C wasn't working! There was NO way in hell I was going to turn on that oven. So I panfried them this time. (just letting you know...I prefer the oven method 350' for about 15 - 20 minutes)

I have discovered (from making toast with this bread) that it takes a while to crisp....especially all the way through. So I made sure the pan was over a very low heat.

I sliced the bread into cubes (size isn't much of an issue...what ever makes you happy)


I sprinkled them with some garlic powder and salt. I then heated up a pan with a little olive oil in it. Placed the bread cubes into the pan and drizzled more olive oil over them. Tossed them to make sure they were as evenly coated as I could possibly make them.


They need to be tossed occasionally during the cooking process, until they are golden brown. Normally this only takes a few minutes....but with this bread it took quite a while....maybe 20 or 30 minutes? Like I said, I was doing this over a very low heat....almost "simmer". That way they could get as crispy as possible all the way through without burning. Although some of them were still on the tender side in the middle.


Homemade croutons are so wonderful! And so easily customized to suit your pallet.

Can you guess what was for dinner tonight? Extreme heat + no air conditioning + homemade croutons = salad.

When I got home tonight, I saw a box on the table waiting for me. I opened it up and found samples of some really awesome disposable / biodegradable palm plates from MarxFoods.com  The box contained 5 bowls and 5 plates. Oooh so perfect for my salad!


I love how these look!! I remember seeing them a while back on their website and instantly thought "Island Party!!!" Well, I am lucky enough to be able to sample them and give my review. I'm not doing that tonight...but I just wanted to share my luck with you. I'll be doing a full on review of both the plates and the bowls in the near future. But I have to tell ya...so far so good. I drowned my salad (kinda on purpose) with Italian dressing....and let the salad sit in the palm leaf bowl the whole time I've been writing this post. (ya, I know....my salad is going to be soggy) And you know what?

Not a single leak. The bottom of the bowl (above picture does not reflect my review...I was just showing you what it looks liek) is not even a teeny tiny bit oily.

Oh ya...did I tell you what this bread tastes like? It's really good! I wish it had a more cheesy flavor but the nuttiness of the sesame seeds really stole the show. Aside from the aftertaste, this is a very nice bread!

Monday, July 12, 2010

Corn Tortillas and Taquitos....Does it get any better?


Taquitos. Do you remember the first time you ate a taquito? Do you remember biting into that hard corn tortilla shell and experiencing the full flavor of the soft, shredded meat on the inside? Love at first bite. And this love has never faded. If anything, it was brought to a whole new level the other night. A deeper level. Of full understanding and appreciation of something so simple yet complex all in one.

Taquito: A Mexican dish consisting of a small rolled-up tortilla and some type of filling, usually beef or chicken. The filled tortilla is then crisp fried.

Yep....leave it to Wikipedia to sum it up in a nutshell.

Back in May, my mommy was out here visiting from Alabama. I took her with me to the local Mexican market, Vallarta. While we were browsing around, we came across one of my favorite, though way to small in my opinion, section of the market....the place where they sell the fun stuff. The gadgets. The stuff to make the stuff, ya know? The mortar and pestles, the tortilla warmers...the lemon and lime squeezers.

And.....

The tortilla presses!!!!

Mom bought one for me :). How fitting is that.....she introduced me to taquitos when I was a child and she provided me with the tool to make my own taquito from scratch as an adult!

Thanks MOM!!! You're the bestest!

I could go on and on about my mommy being my inspiration in life in so many ways....but this is going to be a long post as it is. So I'll save the mommy praising for another post. Mom will understand. Moms always do ya know :)

Now that we have the mushy stuff out of the way....lets get down to business. I did a little tiny bit of research before starting my tortillas. I received a lot of very helpful information from Simply Recipes. They have a fantastic tutorial.

After a trip to the Mexican Market for the Masa Instanteanea de Maiz (Instant Corn Masa Flour), I was ready to go!


Check it out....those are all the ingredients needed to make homemade corn tortillas.

And the corn flour? As soon as I measured it out...I could smell it. It smelled like tortillas, like corn, mexican restaurants....and comforting.


Corn Tortillas

2 cups Corn Flour
1/4 teaspoon salt
1 1/4 cups water

Mix all ingredients thoroughly for about 2 minutes to form a soft dough. If the dough is too dry, add a little water. If it's too wet, add a little corn flour.


It's not a sticky dough so I didn't even need any flour for the surface.

Divide the dough into 16 equal balls


Either cover them with a damp cloth or place in a plastic bag to keep them from drying out.

Line the tortilla press with a piece of plastic. Place a ball on the press and cover with another piece of plastic.


This will prevent the tortilla from sticking to the press.

Close the lid and press together with the "arm", applying slight pressure


Open and see what you did....


Ok....this was my first attempt. See how it's pushed to the front and messed up at the edge of the press? It was at this point that I remembered watching Alton Brown make tortillas and he mentioned how the dough ball should be slightly off center to prevent this sort of thing from happening. Great episode. Love the guy!

Soo...the next dough ball was placed slightly off center, positioned more toward the press hinge


I was so thrilled with the result that I forgot to take a picture and proceed to cook it. (I also cooked the slightly messed up first one. I mean...why waste it, right?

Soo...as you press the dough, lift off the top layer of plastic wrap, place tortilla in your hand with the second piece of plastic facing up...the tortilla halfway supported by your hand and the rest of the tortilla draped over the side of your hand.  (Yes, thats from the first dough ball that I did and messed up.)


Gently lie the tortilla on an ungreased skillet that's been preheated on medium-high.


Cook tortilla for about 50 - 60 seconds on each side. Remove from skillet and keep warm in a cloth napkin or tortilla warmer while you continue to bake the rest of them


And then stand back and admire the fruits of your labor. That probably took about 45 minutes. And that was because your griddle / skillet could only cook one tortilla at a time.

Now, because they are warm, you will not need to preheat the tortillas to make them flexible enough for taquito rolling.

The meat I made for the taquitos is not authentic. It's a combo of a few recipes that I saw and liked (and some parts I discarded). I've heard of people even using canned beef hash as the taquito filling. Don't stress over it. If it tastes good....it's all good.

Simple Taquito Meat

Shredded chicken from 1 roasted chicken
1 teaspoon cumin
2 crushed garlic cloves
1 medium onion, diced
1 14oz can crushed tomatoes
1 cup chunky salsa
1/2 teaspoon paprika
Vegetable oil for frying

Heat about 1 inch of oil in a pan

Combine and heat through. Try not to have a very wet mixture. You don't want to sog out the tortilla.

Take a spoonful of meat and place down the center of a corn tortilla, slightly off center.


Roll up and hold together with a toothpick


Fry in batches, turning once as they brown


Place on a plate lined with paper towel to drain off excess fat. Remove the toothpick and serve with salsa and / or guacamole (mole, mole, mole) Sorry...I can't say guacamole without thinking of Austin Powers.


This may take a little time...but let me tell you....not only are they easy, but they taste fantastic!!

And they're real. That's why I'm going to enter this into this weeks Two for Tuesday - Real Food.


Head on over to Heather's at GirliChef's to see the other Two for Tuesday entries for this week.

Saturday, July 10, 2010

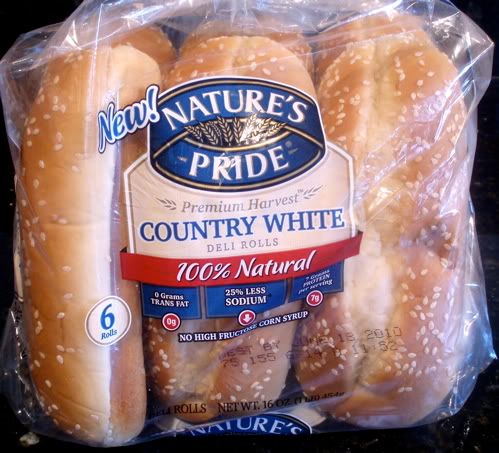
Crispy Chicken Sammy on a Natures Pride Country White Deli Roll


I was lucky enough to have received 3 packages of Nature's Pride's New line of Premium Harvest Deli Rolls and Bakery Buns as part of the Foodbuzz Tastemaker Progrom. This is my second post reviewing what I received. My first post was about a Chickepea Burger that I served on Natures Pride Premium Harvest 100% Whole Wheat Bakery Buns. It was fantastic!!


For the Country White Deli Rolls, I decided to go with meat. But not your typical deli sandwich with sliced meats. I wanted something hardy, full of flavor and appetite enhancing ingredients.

My daughter wanted something spicy. 

I found a recipe on BakeSpace.com called Double Dipped Spicy Chicken. It looked crispy and sounded great! 

The only change I made was to exclude the allspice. Oh, and I didn't have any buttermilk, so I mixed some lemon juice with milk....and that was that.

In a nut shell, combine the following:

1 1/2 cups flour
1 teaspoon paprika
1 teaspoon poultry seasoning
1/4 teaspoon cayenne pepper

Heat up some vegetable oil for frying. Probably about 1/4 inch in a heavy skillet.

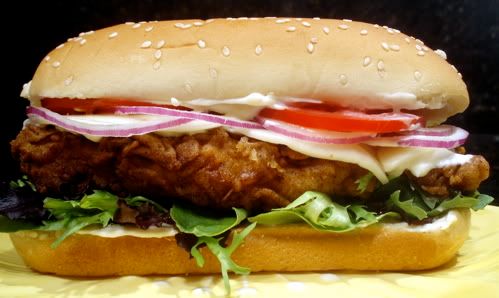
I butterflied a chicken breast and then sliced that in half for the perfectly sized, crispy chicken slices to fit on the deli rolls.

Season the chicken with some salt and pepper. Dredge each piece of chicken through the flour mixture. Dip into 1 cup of buttermilk, and back into the flour for a final coating. 

Fry the chicken until golden brown and set onto a paper towel to absorb the excess grease


I then mixed about 3/4 cup of mayo with one minced garlic. Toasted the deli rolls. Spread the mayo on each slice (I'm one of those people who really likes mayonnaise).  And add your favorite sandwich fixings. For me this was some greens from a spring salad mix (it had all sorts of stuff in it that I don't even know what they're called), thinly sliced tomatoes and red onions and a couple slices of provolone cheese. 


It was a fantastic sandwich!! The Natures Pride Premium Harvest Country White Deli Roll was wonderful! It was soft yet held together...even to the last bite! None of that ripping, crumbling or falling apart. I loved the flavor. Not sweet, not overpowering. The perfect vehicle for holding together all the yummy good stuff inside. 

As for the chicken recipe. I think next time I'll add more cayenne pepper and paprika. I didn't find it spicy. It was good, don't get me wrong...but it didn't have the spicy flavor that I was looking for. I think in my head I was envisioning something more like those spicy crispy chicken sandwiches that you find at Jack-In-The-Box. Only better of course. I mean....homemade is always better, right?


Wednesday, July 7, 2010

Star Bangled Pastry and A WEEEEEENNER!!!


Have you ever had a vision in your head of what you wanted to create? Only to have a major flop! But the flavor was so incredible that you couldn't just walk away. Just like a dog with a bone, you weren't giving this thing up....you're bound and determined to make it work.

It all started with a pile of blueberries...an old newspaper clipping from the early 80's and a very stubborn woman in the kitchen (that would be me!)

The original recipe was for pastries called Four Corner Hats, filled with dried fruits and walnuts. I thought they were so cute and wanted to use my blueberries in them....with some cheese cake style filling instead of the dried fruits and nuts.

Star Spangled Pastries Printable Version

Thus in mind, I happily prepared the pastry:

Four Corner Hats Pastry

2 cups all purpose flour
2 teaspoons baking powder
1/4 teaspoon salt
1/2 cup sugar
1/4 cup firmly packed brown sugar
1/2 cup chilled butter
1 egg
1 teaspoon vanilla
1 tablespoon lemon zest (original recipe called for orange zest)
2 tablespoons water

Stir together the flour, baking powder, salt and sugars. Cut in the butter until mixture resembles coarse meal. Add remaining ingredients and knead to form a dough. Divide into 3 portions. Flatten each to about 1/2 inch thickness. Wrap in plastic wrap and chill for at least 2 hours. (I let mine chill over night).

The next morning, I prepared my filling:

Cream Cheese Filling

8 oz cream cheese at room temperature
3 tablespoons beaten egg
2/3 cup sugar
1 teaspoon vanilla
1 tablespoon fresh lemon juice

Combine all ingredients...not worrying about any minor lumps.

Easy- peasy so far.

Preheat the oven to 400'. Remove 1/3 of the dough from the fridge and quickly roll on heavily floured surface to about 1/8 inch thickness. Cut into 3 inch circles. Place a heaping teaspoon of filling in center.

Fold 4 "sides" of the circle up to partially cover the filling. Most of the filling should be visible. Pinch sides together at corners. Plop a few blueberries on top of the visible filling.

Place on a greased baking sheet about 1 1/2 inches apart. Bake for about 12 minutes or just until golden.

And this is what you get......


Lovely little blueberry pastry pancakes. This is NOT what the picture in my head looked like. At all. Not even a little bit.

But the flavor....WOW. Ok...think....think...think.....what can I do?

Hmm...let's pre-bake the little pastries and then fill them with cream cheese and berries. Right?

Wrong!! I ended up with a pastry cookie (no picture provided...just imagine something resembling the above pancakes only not as colorful).

Sigh.

This is the point where you will find me walking in circles in my kitchen, occasionally opening a cupboard that I've opened a million times over the years...expecting the solution to jump right out. As if there's something in there that I'm not aware of.

Or that I have forgotten that I had....

Ramekins

RAMEKINS!!! Oh bless you! You sweet little ramekins. The answer to my prayers. Yes....ramekins!!

Have you ever been so excited about a set of ramekins? Ya, me neither.

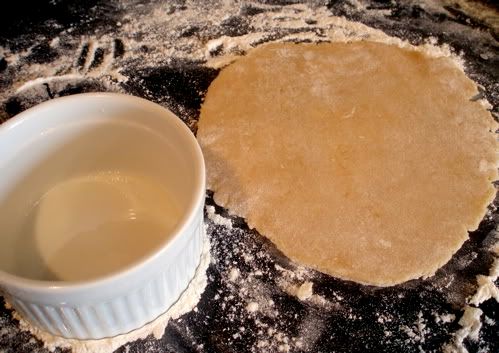
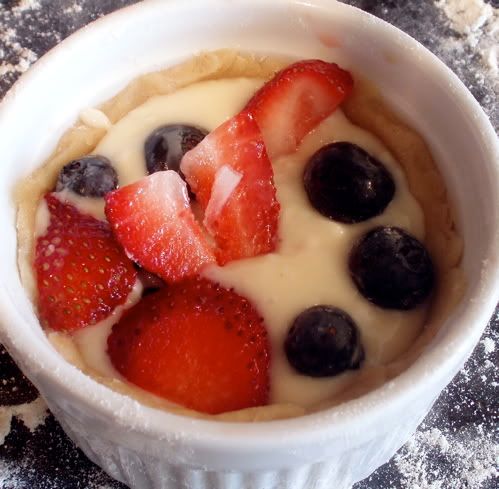
And there you have it....Place a circle of pastry dough inside a greased ramekin


At first it doesn't look real pretty


But work it in and trim off the excess. I had the pastry lined up with the little rim inside the ramekin that's about 1/2 inch from the top. The pastry will rise while baking and you don't want a mess after all this work.

Drop some berries in the bottom


Add a couple of spoonfuls of cream cheese mix in there and top with some more berries


Oh...here's a tip....keep all dough that you are not currently working with, in the fridge. Also, after assembling each ramekin, stick it in the fridge until you have them all completed. This dough loses itself as soon as it starts to warm up.

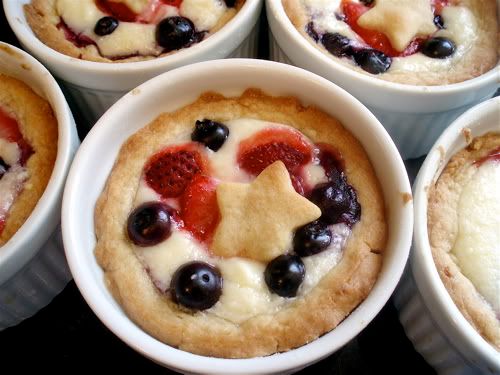
I had a little extra dough left so I cut out cute little stars and placed one on top


I wasn't sure how high these little beauties would rise so I placed all of the ramekins on a baking sheet (to catch any spills). Because there was more filling in these than there was in the "Four Corner Hats", I turned the oven temp down to...

375' F, and baked for 23-25 minutes, until golden brown.


The pastry is soft and yummy and just sooo good! And of course, anything with cream cheese or that is cheese cake like is a winner in my book.

I served these on July 4th. I think they'd also be great for Labor Day or Memorial Day or just about anytime. Just change the fruit to match the occasion.

And...if you find you STILL have some dough left....


Make a cute little rustic free-form tartlet filled with only fruit. It just might be the first thing to disappear.

Soo...is there another reason you're hanging out with me? Was there something else you wanted to know?

Who the lucky winner is maybe? The lucky individual who gets to go on an $80 shopping spree at CSNstores.com?

First of all, I want to thank everyone for participating! I wish you all could've won! (Including me!!)

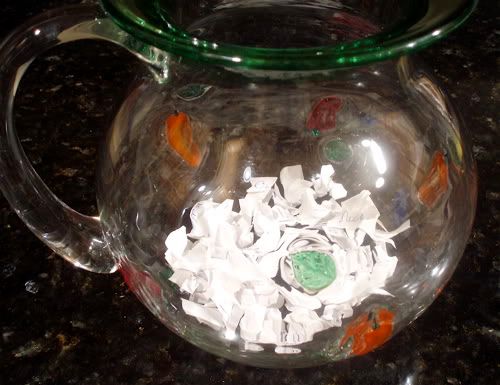
But since that couldn't happen, I had to write down all your names and place them in my lucky hat....or shall I say, my lucky margarita pitcher


mix it well, close my eyes and mix it some more...... and pull out a name

Drum roll please.....

SPRYTE!!!


(Que: confetti, balloons, music from Miss America pageant and flashing cameras) YEAH!!! Congrats girl!!! I'll be emailing you the Gift Certificate code :)


Note: Yes...I know it's suppose to be Star "Spangled" Pastry...but since this started out as a mess...I figured "Bangled" would be more apropo.


Monday, July 5, 2010

Nigella's Chocolate Pavlova


I've been trying to make this dessert for a few weeks now. But you have to leave it in the oven for a while and my oven didn't have that kind of time to spare. I don't know about you guys...but weekends are my only time to really get down and dirty with the cooking / baking. During the week, pavlova was just out of the question.

I found this lovely dessert in my newest cookbook find, Nigella Fresh, formerly published as Forever Summer. I've never had pavlova before. If someone asks you what pavlova is like, don't compare it meringue, or divinity. The consistency is very different than either of those. It looks fluffy but it's not. It's not dense either. The edges are crispy..in a fragile way and the inside melts in your mouth.

It's wonderful!

I have a nice little tip that I saw Nigella do on one of her shows: get out a plate that's about 9" and use it to trace a circle on your parchment paper. Turn the paper over and place on your baking sheet. This will give you a guide when mounding the "meringue" (which I guess it still is until it's been baked).

I don't have step by step instructions. Time did not allow. I was preparing this for a July 4th get together with some friends and I still had a ton to do. (you know the drill....cleaning, cooking, getting ready yourself...yadda yadda yadda)

Chocolate Pavlova
Printable Version

6 egg whites
1 cup sugar
3 tablespoons unsweetened cocoa powder, sifted
1 teaspoon balsamic vinegar
2 oz semisweet chocolate, finely chopped (Nigella said to use bittersweet chocolate, but I didn't have any)

Preheat your oven to 350'F
Prepare your parchment paper with your guideline (as suggested above) and line your baking sheet with it.

Beat the egg whites until shiny peaks form. Beat in the sugar a spoonful at a time until the "meringue" is stuff and shinny. My peaks were forever shinny but they took forever to become stiff. Must be my old beater.

Sift the cocoa powder onto your meringue (you really don't want lumps), add the vinegar and the chopped chocolate. Gently fold it all together until the cocoa powder is thoroughly mixed in.

Just when you think you've done that...check the bottom of the bowl. I'll bet there's some dry cocoa down there.

Scoop it all out onto your parchment paper lined baking sheet to fill in that 9" circle. Smooth the top and the edges.

Place into your preheated oven and immediately turn the temperature down to 300'F. Bake for about an hour or up to 1 hr. 15 mins. The edges will look crispy and the top will look dry. Turn the heat off, leaving the "meringue" inside....keep the oven door cracked open and allow to cool completely.

Just before serving, top with 2 1/2 cups of whipped cream and your choice of fresh berries


I chose Raspberries, Blueberries and Blackberries to give my dessert a patriotic touch.

Now a word from our sponsor......

How would you like to receive an $80.00 USD gift certificate for free? No strings attached! Yes, you heard me right....one lucky winner is about to win a shopping spree at any of the 200+ CSN Stores This could be you! Don't miss this grand opportunity! Offer good until midnight (pst) 7/6/10. For details and entry requirements, please click here ------> Morels, Soup and A Giveaway. 

and back to our regularly scheduled program.

I have some good things lined up for this week. A lovely pastry that started out one way and ended up completely different than I had imaginarily planned. I also have one more Morel Mushroom post, a corn casserole and a delicious sandwich. Oh, and I just found out that will be getting a flat of fresh strawberries from one of my co-workers. Her family owns a prize winning strawberry field in Oxnard. Can't wait for those babies. I think I'm going to try making some pound cake or angel food cake to go with some of those. Maybe some strawberry shortcake. Any other suggestions? Recommendations?


Friday, July 2, 2010

Ricotta Cheese Tart with Morel Mushrooms


Visions on loveliness filled with mouthwatering goodness. That's what came to mind when I saw this recipe over at CiaoChowLinda where she displayed her version from the recipe over at ProudItalianCook.

And now for my version.

I have to say, I think this is one of, if not the prettiest side dish I have ever made.

When I received my free Morel Mushrooms from Marxfood.com, I wanted to make something special with them. Btw...you can purchase fresh (when in season) as well as dried Morel Mushrooms (and lots of other mushroomy stuffs and spices and oils and a whole lot of fun food stuff) directly from MarxFood.com. Anyways....when I browsed through my "starred" recipes in my reader...I knew the second I saw this....that it was exactly what I was looking for.

CiaChowLinda made hers with ricotta cheese...ProudItalianCook made hers with goat cheese. I had ricotta on hand and went with that. I also added some sliced green onions and of course the morels. Fried morels that is. And the crust? You can use pie dough from the refrigerator section of the grocery store. I didn't have any so I made mine from a recipe out of my ancient (use to be my mother in-law's) Betty Crocker Cookbook. It started out as a plain pastry dough until.....

I added ....

wait for it.....

wait for it.........

grated parmesan cheese!!!

Oh man...was that good! It just added a yummy savory flavor to the crust.

Savory Parmesan Tart / Pie Crust
(for 8" or 9" double crust pie....I only needed one crust so the other half is in my fridge. How long is it good in there for, I wonder)

1 1/2 cups sifted all purpose flour
1/2 teaspoon salt
1/2 cup'ish grated parmesan cheese
1/2 cup cold butter (or shortening...I used butter)
4-5 tablespoons cold water

Sift together the flour and the salt. Cut in the butter with a pastry blender (or use a fork like I did cuz my pastry blenders always get screwed up in the drawer....all bent and stuff. Pisses me off) until you get pieces that are pea sized. Or....(and this is what I did)....Cut in half of the butter until the mixture looks like corn meal. Then cut in the rest of the butter until you have those pea sized pieces. This is suppose to make the pastry extra tender and flaky.

Toss in the parmesan cheese and mix quickly, but don't try and "blend" it in...you don't want to mess with the piece sized pieces.

Sprinkle water, a tablespoon at a time, over part of the mixture. Gently mix with a fork; push to the side of the bowl. Sprinkle next tablespoon of water over dry part, mixing lightly, push to moistened part at the side. Repeat till all is moistened. Gather up the with your fingers and form a ball. Let stand several minutes.

Divide dough in half and form each half into a ball. Flatten slightly and roll on a lightly floured surface to the desired size and thickness. For a tart, roll the dough thinner than you would for a pie.

Fit into your tart pan, trimming edges. Poke a few holes in the bottom with a fork. Bake in a 450' oven for about 8 minutes.

And now for the fantabulous filling!!

Ricotta Cheese Tart with Morel Mushrooms
Printable Version

10 oz Ricotta Cheese (I think I used full fat...I'm not one to buy low fat anything. I have proof)
3 large eggs
3 green onions, chopped
A handful of Fried Morel Mushrooms (I'll talk about that in a later post) or any mushroom of your choice
2 garlic cloves, minced
Zest from one lemon
Salt and Pepper to taste
1 tablespoon Herbs de Provence
Asparagus Stalks, blanched until until barely tender
4 cherry tomatoes, cut in half
1 slice of a medium sized tomato (the orange tomato I think made a pretty contrast in color)
1 partially cooked tart shell

Mix together the ricotta cheese, eggs, green onions, fried 'shrooms, garlic, lemon zest, herb de provence, salt and pepper

Let me mention a revelation I had. About Herbs de Provence. Prior to this recipe, I had never seen nor (knowingly) tasted Herbs de Provence. I usually just substitute it out for other stuff. I decided to look up what herbs are in this mix, figuring I'd just make my own blend. I mean, I have a cupboard FULL of herbs and spices. Surely I'd have everything needed.

Until I read that lavender is one of the herbs.

Thats when I knew I needed to splurge and buy this mix. You see, I've never cooked with lavender either.

When I open the jar...and took a wiff. Ooooooh myyyyyyyyy GOSH! I mean WOW! I fell in love. The aroma IS. TO. DIE FOR! If you have a chance to buy Herbs de Provence, do it...if I recipe calls for Herbs de Provence....I highly recommend that you use it!


I  mean...seriously....look at that lovely pile of herbs!!!

Tart...thats right...we're woking on making a tart. (focus, focus, focus)

Pour the mixture into your partially baked tart shell. Arrange your tomatoes and asparagus on top....pushing them in a little to make sure they're nice and snug, but not drowning.


Bake at 375' F for about 30 - 45 minutes.

Serve and enjoy the beauty of not only the presentation, but the aroma and flavors that blend together so nicely.

I hope everyone in the U.S. has a wonderful and safe 4th of July weekend. The rest of the world...enjoy your weekend as well :-)

Giveaway Reminder....I'm giving away an $80 online shopping gift certificate for CSNStores.com. You have until 7/6/10 to enter.

Details ------------>HERE< ------------


Wednesday, June 30, 2010

HBin5 Blueberry Bread with Lemon Ricotta Filling


One of my favorite combos is blueberries and lemon. When I had heard that this particular blueberry bread wasn't that well received (I would guess because it's not a sweet bread) I knew I would be disappointed. What could I do to make this dough really super yummy? Thats when I remembered my Whole Wheat Carrot Bread with a Cream Cheese Filling. Now that was super yummy! But I couldn't do the exact same thing now could I?

Of course not.

Lemons started dancing in my head and pulled out a jar of lemon curd...and a container of ricotta cheese and went for it.

Oh...before I get to far into this...let me tell ya, that this is the 14th Bread Braid of the HBin5 group headed by our wonderful leader, Michelle over at Big Black Dogs. Head on over there...check out what we're all up to and ya know.....you just might wanna join in on the shenanigans!


Back to blueberries. How fun does this dough look?


I made some slight changes to the original recipe. I halved the whole wheat flour (as is my preference) and replaced it with all purpose flour. I doubled the honey for sweetness... I don't think I really measured the blueberries. I figure, the more the merrier. Oh ya...did I mention that it was suppose to be mixed berries? I stuck with only blueberries, obviously.

After the first rise, I stuck it in the fridge over night. The dough is easier to handle after a good nights rest (aren't we all?)

I grabbed a good handful of dough and rolled it out into a rectangle. I spread some lemon curd in the center, trying to leave an even measurement of dough on each side.


Then I mixed up my ricotta cheese filling:

8 oz ricotta cheese
1/3 cup sugar
1/8 tsp salt (or a pinch)
1 tsp vanilla extract
1 egg
2 tablespoons softened butter
1-2 tablespoons flour

Mix all ingredients well. The flour was used to help thicken it up cuz it seemed to be a bit on the runny side. Hind site...you can probably halve this recipe and have plenty.

Spread enough mixture over the lemon curd to cover. Fold each end down about an inch.


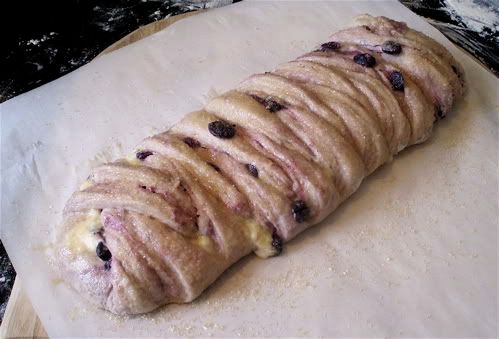
Next I sliced strips about an inch wide along each side and folded the strips across the cheese filling as if I were folding the doughy arms...


You'll end up with a  nice little dough mummy


Brush the top with an egg / water mixture and sprinkle with raw sugar. Cover with plastic wrap and allow to rise for about 2 hours.

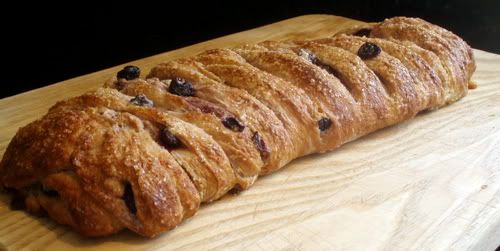
Preheat the oven to 375' F 30 minutes before the dough is going to be baked. Slide onto a preheated baking stone and bake for about 45 minutes


It was good. But I think next time I'll use the cream cheese filling instead. Apparently my girls liked it though.

By the time I got home from work the next day...it was looooong gone!

There was another assignment as well. Whole Wheat Banana Bread. I didn't change the recipe at all. Well...except for my whole wheat - all purpose switch out. I didn't get a very good rise :(


It had a very nice banana flavor even though it was a little dense. But then again, even regular quick bread banana bread is dense. But I have to tell you....this bread, sliced thickly and toasted....smothered with butter and peanut butter is wooooooooonderfuuuuuul!!!

Do you ever wonder what to do when you have a very small amount of dough left in your container?

Why not roll it out and make cinnamon rolls with it?


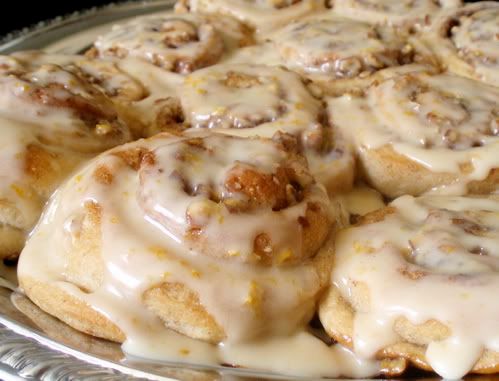
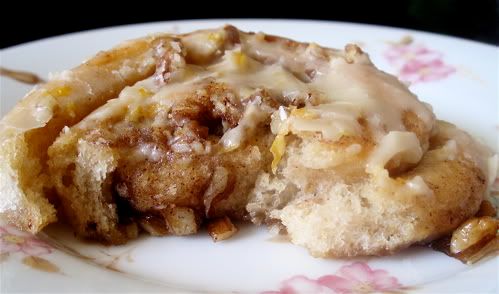
They aren't as light and fluffy as your typical cinnamon roll...but they are delicious. I brushed some butter on the rolls before baking so make them more moist and soft. This particular batch was made with the master whole wheat dough. It had your typical crushed nuts, cinnamon and brown sugar in the middle. But I added some orange zest to the glaze. mmmmm


I still have a bit of blueberry dough left. I think I just might do a similar thing. Maybe not cinnamon...just nuts and brown sugar....and a lovely lemon glaze over the top.

I wish I had time in the morning to bake those babies up!

One more thing....

Reminder!! I'm having a GIVEAWAY!! I'm giving away an $80 gift certificate to shop online at any of the many many many CSN Stores. Check on my Morels, Soup and A Giveaway post for details! You have until 7/6/10 to enter. (open to US and Canadian residents only)

Good Luck!!!