Yum Peaceful Cooking

Sunday, June 13, 2010

Cherry Black Pepper Focaccia, Steak and Eggs


Cherry Black Pepper Focaccia. The title didn't sing to me. It sounded a little off key. In my head, cherry is for dessert. Black pepper is for seasoning things that aren't dessert. I just couldn't wrap my head around the idea of combining the two. I didn't know which mental food compartment to file it away in.

This focaccia was one of the assignments from the HBin5 group that I participate in.


We've been playing with dough since the Healthy Bread in Five Minutes a Day book was published back in .....I think it was late October 2009. You are more than welcome to join us. This isn't a class. It's not like you've missed anything that would make you struggle with any of the upcoming assignments. And there's a whooole group of knowledgeable peeps who are more than happy to share what they know. In between our bi-monthly assignments everyone can keep in touch through Google Groups with bread only discussions.

Anyways....this was part of the assignment a couple of weeks ago. After reading the rave reviews about the flavor, I decided to go ahead of jump on the Cherry Black Pepper Focaccia band wagon.

In the cookbook it describes it as "....a great balance between sweet and savory." Ok...so now I can get "dessert" out of my head and move along. Whew....my mental dessert compartment can now calm down...everything is as it should be. No black pepper will end up in there any time soon.

Sweet and savory. Sweet from the cherries...which by the way get to take a little bath in some red wine, along with some onions, salt and pepper. This way the cherries plump up and don't get burned in the oven (although a couple of mine still did). Savory from the onions and pepper.

What I did (cuz the book told me to)....was to take a grapefruit sized handful of dough....shape it into a ball then flatten it out to about 1/2" or so. This was placed on a cookie sheet lined with parchment paper. I then had the pleasure of taking my fingers and poking the dough. It was kinda fun....poke, poke, poke....creating those cute little dimples that hold the olive oil...ya know? Then the focaccia was allowed to rest for about 20 minutes.

Thats when I sat here, trying to figure out what else I was going to make to go with this sweet and savory bread. Being that it was morning....I had eggs on the brain. I considered those cute little "eggs in a basket" where you cut a hole in the bread and bake your egg in that.

hmm...someday I'll do that but with a different bread.

Then I remembered that I had a steak that needed cooking. Oh....steak and eggs for breakfast! Now my heads all wrapped around this whole thing....and I'm looking forward to it.

Ok, so I'm all excited now and the focaccia is just about ready to go into the oven. I drained the wine off the cherries (figured they were drunk enough for this time of day) and sprinkled them across the dough (then pushing them in so they don't fall off) along with some of the onions which had turned red from the wine. Then I drizzled some olive oil on top and added freshly ground sea salt and black pepper.
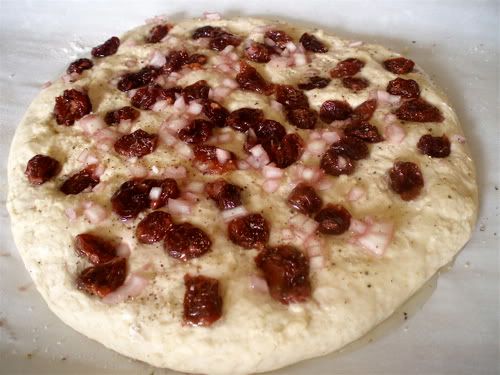

Plopped into a very hot 425'F oven for about 25 minutes....until golden brown but with unburned cherries......the focaccia enticed me the who baking time with it's wonderful aroma....full of taste bud pleasing promises.

While that was cooking away, I got started on my steak. I love balsamic vinegar. And with this sweet and savory bread, I thought the two dishes would compliment each other very nicely.

I mixed up a quick little marinade of garlic, pepper....then some olive oil


Then the balsamic vinegar
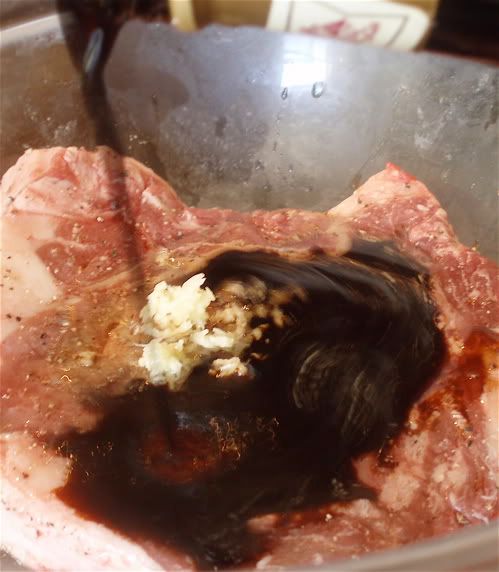

Mix it all up and let it sit for about 30 minutes.

Meanwhile the timer went off and it was time to remove this incredible smelling focaccia from the oven...


Heat up your grilling pan or what ever pan you're going to use to cook your steak. Do you know that for some reason, steak smells different in the morning. More pure and pungent or something. It's wonderful!

Asia seems to agree with me as she wakes up from her morning nap in the dining room


 Her little nose was all over the place!

Time to make yourself an egg and serve up some Sunday breakfast.


I have to just say...that steak there? It's not burned. It's not overly charred. It's just saturated with that deep dark rich balsamic vinegar flavor. And that egg.... you bet it was runny! Now the focaccia was lovely....sweet and savory just as promised! If you dont have a runny egg to dip it in, you can just get a little bowl of olive oil and black pepper and indulge your senses.

Friday, June 11, 2010

Elvie's Homemade Salad Dressing and Veggie Dip


Yes, that says Elvie (not Elvis. It's not a type-o). My grandmother's name is Elva and it seems that once one has grown up, it is customary in my family, for everyone (child, grandchild and all) to call grandmother Elvie.

Everyone except me.

I just won't can't change such a deep rooted habit. I will always call my mom, mom...never Lynn. Dad will forever be dad...not Pat. Nana is nana And grandmother will remain grandmother....and so on and so forth.

It just sounds weird coming out of my mouth any other way. There's a special meaning and feeling that accompanies those "titles"....and to one day start calling your parents and grandparents by their first names...just seems....I dunno....how do you explain it? It removes a certain sentiment. (I'm real big on keepsakes and sentimental things).

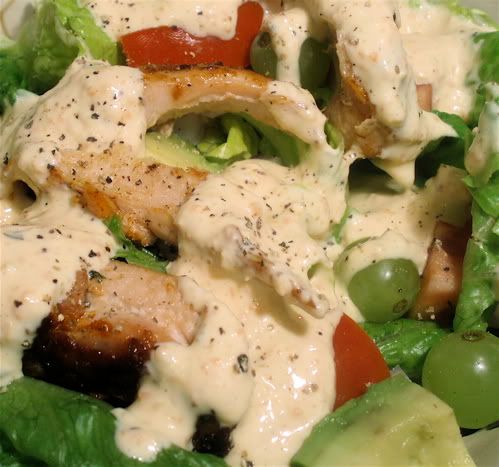
While my mom was here visiting a few weeks back, we shared recipes (one of my favorite things to do). Mom gave me grandmother's recipe for salad dressing. Which also makes a wonderful condiment on a crispy chicken wrap....veggie dip....secret sauce. What ever you can think of that is socially acceptable to use as a vehicle for transporting this dressing from the jar into your mouth. (a finger dip works nicely when no one's around to see)

I love it when I get recipes from the older generation in the family. It's like capturing a piece of your heritage.

You know what else? I didn't even know that grandmother had a special dressing. And now I have it. And now you can have it too.

Elvie's Homemade Salad Dressing
Printable Version

2 carrots, peeled
2 sticks of celery
1/2 white onion
1 teaspoon garlic powder
1 teaspoon lemon pepper
2 tablespoons sweet pickle relish
Dash of Worcestershire Sauce
Squirt of ketchup (for color)
1 quart of mayonnaise
A few shakes of Mrs. Dashes if  you have some

With your food processor, shred / grate the carrots, celery and onion. Then puree. Add the remaining ingredients and puree some more. There will be some texture still...and that's ok. It just adds to that "fresh" flavor thing.


Allow to sit in the refrigerator overnight, allowing the flavors to marry. You know....get all familiar with each other and mesh.

Kinda like a food honeymoon.

Then you can do what eeeeeever you want with it


I can't wait until we grill some cheeseburgers. McDonald's secret sauce has nothing on this stuff!

Monday, June 7, 2010

Luscious Lemon Squares and a Novice or Two


Novice: A person new to a field or activity. A beginner

I'm a novice when it comes to lemon bars / squares. I've never made them (and still haven't) and I've never eaten one. 

My youngest child is a novice to adulthood (she just graduated last week from high school) and in the kitchen for the most part.

Last night while I was trying to sleep, Jacquie was in the kitchen with the food processor and mixer, whipping up a batch of lemon squares to satisfy a craving she'd had for a few days. I would normally have jumped on the idea of making something new but I'm still not feeling all that great. 

She searched the internet for a recipe and found one that she liked over at Food Network.com: Luscious Lemon Squares and she went for it. She said they were surprisingly easy to make and less then 24 hours later, they are 3/4 gone. 

Since I have nothing to compare them to, I can't say how they stack up to other lemon bars. They taste good. They're gooey, tart and sweet. Do they need any other qualities? (I honestly don't know)

Apparently my little baby daughter has a thing for lemon. 

Since I was asleep, there are no pictures of the process. (I'm lucky I got a picture of a few of the bars before they disappeared). 

Luscious Lemon Squares

Crust:
2 cups all purpose flour
1/2 cup confectioners sugar
1 cup butter, cut into small cubes

Filling:
4 eggs
2 cups sugar
1/3 cup fresh lemon juice
1/4 cup all purpose flour
1/2 teaspoon baking powder
confectioners sugar for dusting

Preheat your oven to 350'F

Crust:
In a food processor, blend all the ingredients until they resemble course meal. (I think the process should be pulsed and not blended?). Press the mixture into the bottom of a 13x9 pan. Bake for about 20 minutes or until golden. Set aside to cool

Filling:
In a bowl, beat together the eggs, sugar and lemon juice. Add the flour and baking powder and blend until just incorporated. Pour the filling into the cooled crust and bake until set....about 25 minutes. Cool completely. Dust with confectioners sugar and cut into squares.


Saturday, June 5, 2010

Cinnamon Raisin Bagels


I've been wanting to try my hand at bagel making for quite some time. When I saw that it was part of the assignment this month in the HBin5 baking group, I was thrilled!!


Then I noticed that not only were we going to make bagels, but they were cinnamon raisin bagels!!! Now that really had me excited. There were a couple other breads on the assignment list that I haven't gotten around to yet. I'll let you know when I do.

Before I start...let me just say that these aren't whole wheat. I had some of the master dough from the Artisan Bread in Five Minutes A Day that had been in my fridge since last weekend so I decided to use that instead. If you'd like the recipe and instructions for the dough, you can check it out at the author's website: Artisan Bread in Five It really is a lovely no-knead bread that's simple to make and easy to work with.

Now that you have access to the recipe, I'm going to show you how to make bagels. Not that I'm an expert by any means. Especially since this was my first attempt. I just want to show you how easy they are. And if I can make them....so can you!

I had about 12 oz of dough, which made 4 bagels, each using 3 oz.

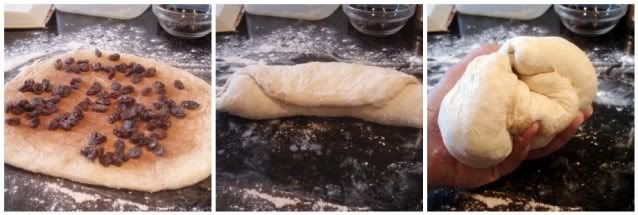
With my fingers and a rolling pin, I rolled the dough out and sprinkled it with cinnamon sugar and raisins. Then rolled the dough up as if I were going to make cinnamon rolls. But that wasn't the plan, now was it? So the dough got wadded up into a ball.


So far, not so difficult, right?

Now for the fun part!! Divide the dough into 3 oz wads. Dust the wad with a little flour and form each one into a ball by stretching the surface around to the bottom as you rotate the ball in your hand. (The peeps over at Artisan Bread in Five have a great demo on how this is done or you can watch this little video from YouTube of an interview about the basic dough with a quick little demo on how to form the ball)


Ok, so we have the ball formed....then stick your thumb through the middle and stretch it out with your fingers then place it on a flour dusted surface. Cover with plastic wrap and allow to rest at room temperature for about 20 minutes.

I have a pizza peel. Its not the most expensive or best one out there....but it works wonderfully. It's made of a light wood and I bought for about 10 bucks. Not bad. Especially since I use it constantly. I also have a baking stone. For the bagels, you don't have to use a baking stone if you don't have one. Use a greased cookie sheet.

While the bagels are resting, preheat your oven to 425' F. If you have a baking stone, preheat it in the oven on a middle rack. Also, place a tray on another rack. You will be pouring 1 cup of hot water in that tray when it comes time to bake your bagels.

Get out a large pot and bring about 8 quarts of water to a boil. Reduce heat to a simmer and add 1/4 cup of sugar and 1 teaspoon of baking soda to the water.

Drop each bagel into the simmering water and watch them sink like a stone! Don't worry, they'll float to surface in a couple of seconds. Don't over crowd the pot....they need their room to float around without getting in each others way. After 2 minutes, flip them over with a slotted spoon and allow to simmer for another minute. With the slotted spoon, remove each bagel and place on a clean kitchen towel that has been lightly dusted with flour. This will help to absorb the excess water.
Place the bagels on a peel that has been dusted with flour and slide the bagels onto the baking stone. Or place them on your greased cookie sheet. Pour a cup of hot tap water into the tray and quickly close the oven door to trap in all the steam. Bake for about 20 - 25 minutes, until nice and brown and firm. Now when I thought mine were done, I noticed that the centers on the bottom were still...on the soggy side. So I flipped them over and allowed them to cook for about 5 more minutes.


And here we have flesh, homemade, artisan style bagels. They're not perfect in shape but hey....they certainly are recognizable. Plus they smell incredible...


And how do they taste you're wondering? Fabulous! Because the dough I used was a week old, it had a bit of that sourdough flavor going on....and any bread with cinnamon and raisins is going to make me drool.

I had a blast making them. And the family likes them. I am absolutely thrilled with this whole bagel thing. I think my next batch will be jalapeno and cheddar bagels. Or onion and garlic. Or.....oh man...the possibilities are endless.

So...now that you've seen how easy it is, and I think you can probably use just about any bread dough after it's first rise......do you think you'll be giving it a try?

Wednesday, June 2, 2010

Lemon and Coriander Soup


This is a comfort food of a different kind. It's not thick and hearty. It didn't conjure up memories of years gone by. What it did do was comfort my sore throat and achy body. When I heard about Lemon and Coriander soup, my sick little self became intrigued. When I read the ingredients and saw that it was a basic broth soup....requiring minimal effort, I was hooked and determined. But not enough to go to the market for the needed cabbage.

Thank God for children who are of driving age and are out of school for the summer! (and who are still happy to run errands, just for the chance to get out of the house and behind the wheel).

But I still had to make it. Which is fine cuz honestly, this is one of the easiest soups I've ever made. And it hit spot. It had a surprisingly "hearty" flavor to it that was satisfying, followed by a tangy lemony freshness, and then last but not least.....it tickled your taste buds with the aromatic playful yumminess of coriander leaves (which is also known as japanese parsley or cilantro). With all that going on, it still maintained it's lightness.


Lemon and Coriander Soup


2 tablespoons fresh lemon juice (about 1/2 lemon)
2 tablespoons chopped fresh coriander leaves (cilantro), reserve the stems
2 tablespoons oil
1 medium onion, chopped
1 green onion, chopped
1 inch fresh ginger, chopped
5 garlic cloves, chopped
2 tablespoons flour
4 1/2 cups vegetable stock
1/4 of a head of cabbage, chopped
1 medium carrot, chopped
8 peppercorns, crushed
salt to taste

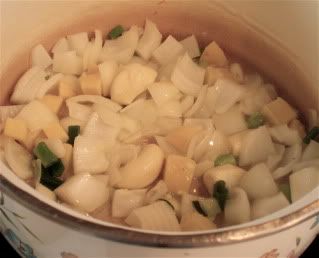
Heat oil in a pan. Add onion, green onion, ginger and garlic.


Saute until translucent. Add the flour and saute for another minute or two.

Add the vegetable stock, coriander stems, cabbage, and carrots and bring to a boil.


Stir in the peppercorn. Add 1/2 of the chopped coriander. Reduce heat and cook for five to ten minutes.

Strain the veggies out and set them aside (they've done their job....send them home). Return the broth to the pan and heat. Add lemon juice and salt to taste. Return to a boil. Garnish with the remaining coriander and serve.


If you're looking for a soothing soup or just something delightful to enjoy during the summer, you might want to give this one a try.

I'm going to share this recipe with Deb over at Kahakai Kitchen for Souper Sundays


She always has wonderful soups and sammies going on over there


I want to mention a few cool things about my new blog toy....it seems a few of you didn't know what I was talking about. There's a bar at the bottom of the screen (not the blog post...but the screen). Along that bar are some fun little things......

Search - you can search for stuff on my blog or in google
Translate - which will translate the page to another language 
Recent Posts - lists the most recent posts
Like - I think this is hooked up to facebook? Or not....but you can click on it to say you liked it. 
Join Chat - This is the coolest little thing....if we ever happened to be on at the same time, we can chat
Share - gives you the option to share the post with various site: blogger, stumbleupon, twitter, facebook
Facebook - which will connect you to the Peaceful Cooking Fan Page and you can make a comment
Twitter - connects you to twitter

There's no downloading on your part needed. no signing up....just a few fun, easy tools. If you have a blog, you can do it too....its simple, fast and free!!

Wednesday, May 26, 2010

Gluten Free...who woulda thunk it?


This isn't my first experience with gluten free bread.

This is:


Huge difference!! Not only in looks, but texture, crumb, flavor and recipe! A girlfriend and I had gotten together to give it a try a few months ago.

It was a lumpy, dense mix with an awful, AWFUL after taste!!!

It was my first experience with gluten free anything in any form. And I was grossed out. Thoroughly.

So when HBin5 had a gluten-free bread dough as the assignment back in April....


I passed. And you can go to Big Black Dog's Gluten Free Bread Braid and see what the rest of the crew did

It was a painful decision. I wanted to participate in everything that the group did but that first loaf...well, no pun intended, but it left a bad taste in my mouth.

Apparently the stars were lined up against me though.

The May Recipe Challenge in BakeSpace was to make something gluten free!

Seriously?

This gluten free stuff just wasn't gonna leave me alone.

So I did what any good blogger / foodie would do. I bit the bullet, gritted my teeth...and forged ahead.

And thank God...a wonderful person in BakeSpace participated in this months challenge who has to eat gluten free, and she really gave us some great tips. I have to say....I learned more from this challenge than I have in any of the other challenges I've participated in over the past couple of years.

I did use the HBin5 Gluten-Free Olive Oil Bread recipe, as assigned in April, with a couple of changes.

1. Instead of brown rice flour, I used white rice flour. Not on purpose, really. I bought the white rice flour a while back...so I decided to use it instead of buying more.

2. I know people who can't eat soy, so in order to avoid soy I used Oat Flour instead.

3. The thought of using SO much cornstarch (which I believe contributed hugely to the nasty flavor of the first bread I made) grated on my conscience and taste-buds. Therefore I used Potato Starch instead.

The dough is extremely lumpy


I was tempted to get in there and smash all those lumps with my fingers....but I refrained.

I let it sit on the counter for 2 hours...and was bummed when there was barely any rise at all. I then put it in the fridge for 24 hours as recommended.

I then divided the dough in half and formed two baguettes. In the BakeSpace Recipe Challenge thread, our gluten-free experienced member said that the dough should be smoothed out before baking. GREAT tip!!! It was kinda like playing with clay. The dough doesn't stretch like wheat dough does....it gets formed and molded with damp hands.


I didn't want to go too crazy with the smoothing out part cuz I didn't want the dough to get soggy.

I let those little guys rise for about 2 hours. Once again, I was bummed that there was very little rise. So with trepidation, I slid them into a hot 450' oven and baked them for 30 minutes. Actually, I think I ended up keeping them in there for 35 minutes cuz they weren't all that dark. I have a feeling that gluten-free bread just doesn't get very brown.

When I removed my baguettes, I was pleasantly surprised with how much they had popped in the oven


And how smooth the crust was....and how nice of a crumb it had. And for the big test....the taste. It barely had a bit of that "gluten-free" aftertaste. With a little butter, it was undetectable.

And made into a little mini smoked mozzarella grilled cheese sandwiches....


It was wonderful!

I'm so glad I went ahead and made this bread. Now I won't be afraid or turned off by the idea of participating the next time HBin5 has a gluten-free assignment. And there will be more. I mean, this bread baking thing will be going on well into 2011! :)

BLOG Note: I added something new to my blog....you see the bar at the bottom? (it can be collapsed by clicking the arrow on the far right side if you don't want to see it). Well....It has some fun little tools. I thought I'd give it a try and see if it turns out to be useful. One of the fun little gadgets is the "chat" option. I'm not sure if anyone will ever be in there at the same time as anyone else....but it would be fun to run into you once in a while...if for nothing else then to just say "Hi". Anyways....let me know what you think of my new "toy". If its a pain, I can easily remove it.

Monday, May 24, 2010

Grandmothers Southern Green Beans


As much as I love chicken and dumplings, beef stew, turkey sandwiches....for me there's nothing as comforting as good ole southern fare. It makes me feel connected to my family. To the basics of life and convictions of what's what. Some people call this "soul food". And for good reason. It's not just food that tastes wonderful....but it reaches into your soul and touches you in a deep way.

Now I grew up in California. I've never actually lived in the south but from the time I was a baby, I have spent a good share of summers and holidays there visiting family. Loving every minute and enjoying the food. I remember sitting with my grandmother in the living room after my bath, "poppin' peas" that we'd gathered from the garden that mornin. It wasn't fun....but it was something we did. It had to be done, after all, and someone had to do it. So grandmother and I (and who ever else happened to be by) would sit there in front of the TV and work them beans.

It was the time that we spent together that makes this memory special to me. There was meaning in our task. We were preparing food for freezing, canning, cooking. And we were just "chillin" together, in a way. An old fashioned, lost art sort of way.

So, the other night, Sir Sportsalot requested fried chicken and mashed potatoes for dinner. I decided to go all out and included these green beans on the menu.

When I cook, I enjoy having the TV on in the background. I was flippin' through the channels and what do I see on Comedy Network? Blue Collar TV....OMG....how perfect is that?!! I just love those guys!

So there I was....cooking my southern dinner, listening to them southern boys makin fun of themselves.
My idea of a perfect evening in the kitchen.


(Don't look too closely at this picture. I realized just as I was about to open the package of bacon that what I had was maple flavored bacon. damn it. I ended up getting the ham hocks out)

Southern Green Beans
Printable Version

1 lb green beans, washed
1 medium onion, diced
1/2 lb or so of some sort of cured pork: bacon, salt pork, ham hocks
Pepper to taste (lots!)

To prepare the beans, you want to remove the ends and break (or cut) the beans into about 1" lengths.

In a large pot, saute your pork for a few minutes to release some of the fat (don't need to fully cook it. It's there just for flavor. You're not gonna eat it)

Toss in the onions and saute until just tender. Add your beans, and cover with water. Lots of water cuz they're gonna simmer for a while. Sprinkle a good teaspoon of pepper in the pot and bring just to a boil


Reduce heat and simmer for about 30 - 45 minutes or until the beans are good and cooked. Not crisp tender....but soft! During the cooking time you may need to add another cup or two of water.

Remove pork and discard....(thanks for coming....you guys were wonderful)

Season as needed....most likely will not need much if any salt with all that salty, fatty pork.

Drain and serve


And there you have it....a wonderful bowl of green beans.

I know there's probably very little if any nutritional value left in them. I mean, the poor things are cooked to death. But they're good. For the soul.

I'm thinkin', once in a while, our soul needs food too.

Did I mention that this is one of those recipes where the amount is "just enough" and the cooking time is "'till it's done"?  It's a lost art I tell ya!