Yum Peaceful Cooking

Saturday, November 14, 2009

Poulet Saute aux Herbes de Provence


I'm so excited! I won a book from BakeSpace, but for some odd reason, I wasn't informed "what" book I had won.

hmmmm

Well, Saturday I found out......the ever coveted (on my part)

Mastering The Art of French Cooking

Ooooooh my Gaaaaaaaaaaawd!!!

Yes, I've been wanting this book for ages but couldn't really spend the money. I hunted through 2nd hand stores but of course there wasn't a single copy in any of them (and trust me, Burbank has it's fair share of 2nd hand stores). So you can imagine how thrilled I was when I received my prize!

Woooo Hoooo....dancin' for joy and singin' "I'm walking on sunshine....oooh oh"Photobucket

Do you know...this really is a cookbook that you can read! I've heard of people reading cookbooks. As much as I like to cook, a cookbook just is not my choice of reading material. Give me a trashy historical romance novel any day.

But honestly...this is a wonderful book. Not only is it full of incredible recipes, but the information! The explanation of techniques and food and equipment....it's amazing.

Babette.....Thank you so very much for the most wonderful cookbook I could ever hope to own!

Of course I had to make something from it, right? I mean I can't just sit here and read it. And of course the first recipe I used from it has to do with chicken. Cuz I'm that kind of gal and am known in some circles as the Chicken Queen.

Niiiice....my daughter is the Homecoming Queen


and I'm the Chicken Queen Photobucket

hmmm....lets move on. So, I made this fancy schmancy Poulet Saute aux Herbes de Provence, a.k.a. Chicken Sauteed with Herbs and Garlic, Egg Yolk and Butter Sauce.

Why? Because I had all of the ingredients. duh


What you'll need:

Chicken
1/4 lb butter
2 1/2 - 3 lbs chicken, cut up
1 tsp thyme or savory (I used savory)
1 tsp basil
1/4 tsp ground fennel
Salt and Pepper
3 cloves unpeeled garlic
2/3 cup dry white wine

Sauce
2 egg yolks
1 Tb lemon juice
1 TB dry white wine
2 - 3 TB softened butter

We're going to work on the chicken first....heat the butter in a 10" skillet until the butter foams, then add the chicken (you'll probably have to do this in batches. I used less chicken so I didn't have to worry about it). Cook the chicken for about 7 - 8 minutes, turning frequently and not letting them brown. You only want them to be a deep yellow color.


Do you know how hard that was for me to do? I mean, I'm all about the deep dark color....ya, lets brown that baby!! But nooooOOOOoooooo...Miss Julia wouldn't let me. Talk about chomping at the bit here.

If you are using a combo of white and dark meat, you will need to remove the white meat from your pan and season the dark meat with the herbs, salt and pepper (dont use all of the herbs cuz you want some for the white meat too), and add the garlic cloves with the skins to the pan.


Cover and cook over low heat for about 8 - 9 minutes. Then season your white meat and add them to the pan. Baste the chicken with the butter and cook for about 15 minutes, turning occasionally, and basting along the way until the chicken is tender and the juices run clear. Actually, this will probably take longer than 15 minutes...I think chicken parts are bigger these days than they were back then. (blame it on what ever you want...but you all know what I'm talking about).

Once your parts are cooked, remove to a platter and keep warm....

 ya like my snazzy warming platter?

Ok...now....you see these little guys?
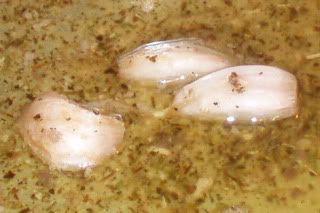

Smash 'em with the back of your spoon and watch that garlicky yumminess come slidin' right out. Mmmm.....now scoop out the skins....easy peasy.


Mash the garlic up....add your 2/3 cup of white wine and bring to a boil. De-glaze your pan and reduce the liquid by 1/2.

Now we're ready for the sauce. Let me preface this by stating that I was really scared of using the fennel. It has such a strong licorice aroma. But I was hoping that since the amount that was called for in the recipe was so small....that it wouldn't be an issue....cuz to be honest with you...I don't like licorice. At all.

Fear not...it was just fine! It was more than fine. It was awesome!!!

Beat your egg yolks in a small saucepan until they are thick and sticky. Hmmm....they kinda come out of the shell that way, don't they? Well...I beat them for a minute or so...and nothing changed and it was late so I went on to the next step...and that was to beat in the lemon juice and wine (1 Tb each). BTW...I really am embarrassed that I used bottled lemon juice but I didn't have any fresh lemons. If you can...please use the fresh stuff. It's much better. Really it is.

Now...take the liquid from the chicken...you know the one with the smashed garlic and reduced wine? And slooooooowly incorporate it into the egg yolk.....1/2 teaspoon at a time, beating as you go.


Yes...you heard me right....

1/2 teaspoon

at

a

time

You want your sauce to be thick and creamy. Think "hollandaise"

Then Miss Julia goes on to say that the sauce needs to be beaten over a very low heat for 4 - 5 seconds, to warm and thicken it. Remove from heat and add the 2 - 3 tablespoons of butter, 1 tablespoon at a time...beating as you go. If you'd like, add some minced fresh basil and or fresh fennel tops, or parsley. I didn't do it. The sauce had such an incredible flavor as it was, I didn't think it needed it. Well, in reality, I didn't have any of it. Which was fine cuz it didn't need it. honestly.

And now your sauce is ready to be spooned over your chicken and served.

Hmmm....I didn't think my sauce was thick enough
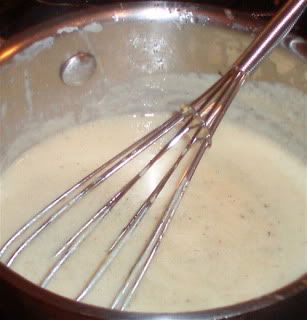

So I continued to heat and beat. and beat and heat. I stepped away for a few seconds, and....

HOLY CRAP!!!


I BROKE MY SAUCE!!! Photobucket

You can tell by my "caption" picture at the top....that it still tasted good and I did pour it over my chicken and served it.

But why did this happen? Thats what I wanted to know. I needed to find out so I could prevent this from happening again. (you see, I had it happen not that long ago when I was making a curry sauce.). I headed straight for my computer and looked it up (hmmm....there might be an explanation in my brand spankin new cookbook, but I didn't think of that until just now). I did a search for "Broken Sauce" and what I ended up finding was....

How to RESCUE IT!!! YEAH!!! Photobucket

Apparently this is something that can happen with egg based and mayonnaise based sauces (mayo is made with eggs, so there's that connection).

What I had to do was get another egg yolk and beat it with 1 TB of cold water then take that broken sauce, while it's still warm and slowly drizzle it into the new egg yolk, while beating the whole time. Heat the sauce over a double boiler until it thickens to your desired consistency.


Check that baby out!!!

And look how much better it is on my chicken...


All is safe and happy in my kitchen once again.

Whew

Friday, November 13, 2009

Pumpkin Pie Brioche and HBinFive


I'm going to apologize ahead of time...

I'm sorry but I'm not giving you the recipe for this lovely loaf.

But I know where to get it. And I'll let you know.....

Lemme 'splain. You see, I've been bread challenged and have had a fear of yeast for far to long. I've dabbled it the arts of bread making here and there...but not completely. And not to the point where I'm comfortable. So when I saw Michelle over at BigBlackDogs announce that she was creating an online bread club....I jumped right on that bread wagon. It's called HBinFive.


And it has a story.

Many of you may be familiar with a cookbook called Artisan Bread in Five Minutes a Day by Zoe Francois and Jeff Hertzberg MD. They have a very lovely website, with lots of recipes and video demos, called ArtisanBreadinFive. Well, Zoe and Jeff have come out with a new book called Healthy Bread in Five Minutes a Day. And HBinFive is going to work it's way through this new book. There are lots of members with various levels of bread experience and I plan on picking their brains and learning as much as I can. Btw...if you're interested, feel free to check it out and join in.

Anyways...in regards to the recipes, the members of HBinFive have been asked not to publish them. And as hard as that is for me as a food blogger, I will be a good girl. I'll grit my teeth...grumble and mumble a few words under my breath as I go along, but I'll do as I was asked. :D

What I will do is share the recipe link if the authors have published the recipe on their site. Sound like a deal?

Once or twice a month I will be making a different bread from the book Healthy Bread in Five Minutes a Day (which I still have to purchase or put on my wish list for Christmas). I'll share what I've learned and what I think.

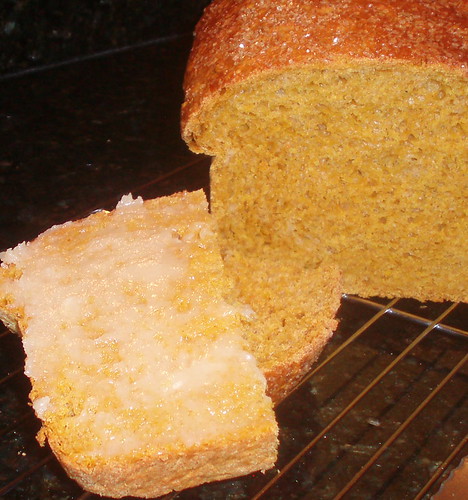
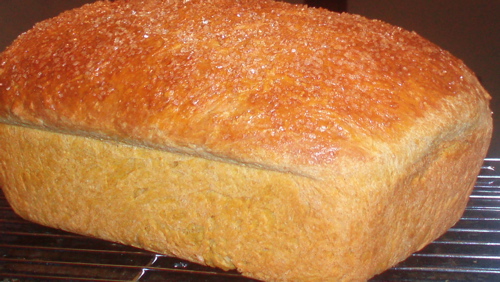
Pumpkin Pie Brioche is the first recipe we've done. It was easy to make and it smelled wonderful in the oven.

The flavor didn't pull through tho. I was so disappointed.

Until the next day. Which was a little better.

And then the next day....was even better.

I'm a white bread junky so it's a little more difficult for me to appreciate the whole wheat flavor that comes through in this bread. I guess I was expecting it to taste more like a pumpkin pie. I'm just not use to whole wheat, ya know? It does taste wonderful with some maple butter. Or even some cream cheese and a little spun honey. I even heard a few members used it for french toast.....mmmmm.


If you'd like to make this lovely loaf of Pumpkin Pie Brioche, you can find the recipe ---->HERE<----

I hope you all don't mind my sharing my bread making experiences with you. Let me know if you have questions or advice along the way...as always I love to hear 'em.

Oh...and one last thing....this is a "knead-less" bread. woooo hooo

Tuesday, November 10, 2009

Nopalitos con Trocitos de Puerco en Chili Verde


Nopalitos con Trocitos de Puerco en Chile Verde
"Platillo Zacatecano"

One of the gals at work brought "Cactus Soup" for lunch one day and asked if I wanted to try it. I had heard about people eating cactus but had never had the opportunity to taste it so of course I said yes! My main concern though, was....is the soup spicy? (I've said it once and I'll say it again...I'm a whimp!)

It was delicious!!!

When I asked for the recipe...little did I know that she would be giving me the old school version. From her mom! There aren't very many ingredients....and it is labor intensive at one point in particular. But well worth it!!!

Oh...are you wondering what cactus tastes like? Green beans! Imagine that!! I don't know what I expected but plain ole green beans wasn't it.

And where does one find this cactus besides someone's backyard? Most likely, a mexican market, in the produce section. I was able to buy it already scrubbed and de-clawed. They did have it with the thorns, but I'm not that brave. It's also sold in a jar...but I don't recommend it.


Pork Loin, chopped into bite sized chunks
Pork babyback spareribs, separated
1 bag of nopalitos
1/4 onion
handful of cilantro
5 jalapeno peppers
4 light green yellowish, mild peppers
2 big tomatoes
2 garlic cloves
2 potatoes
1 tsp or more of dried oregano
broth or water
salt to taste

my addition: 12 oz can of beer (I had a 24oz can of coors light and had used 1/2 of it in a drink mix...so I had to use it up, right? and well....it went into the soup)

Now...there are several steps...you don't have to do them in this order.....but I will give you the directions one by one. It all comes together in the end.

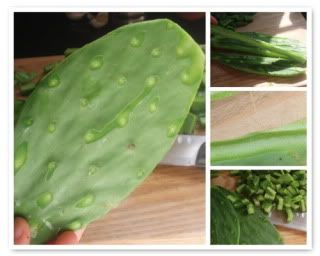
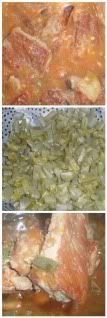
Slice and dice your nopalitos.


I don't know if you can see it....but the inside of these nopalitos are slimy. Reminds me of okra.

Cover them with water in a large pot along with the 1/4 onion, whole garlic clove, 1 whole jalapeno and a handful of cilantro. Boil for about 30 minutes.


Drain and rinse....this process gets rid of all that slime :). Discard the onion, garlic, jalapeno and cilantro. (I know....boo hooo. But thats what the lady said...so thats what I did)

Next phase....

Place your whole tomatoes and the rest of the peppers on the "comal to tatemalos" (read: indoor grill or  flat pan to toast).


Once the outer skin of the tomatoes and peppers is burned, remove from the burner and place them in a plastic bag to steam and soften. FYI, I didn't let the tomatoes toast enough. I had a hard time keeping them from rolling around

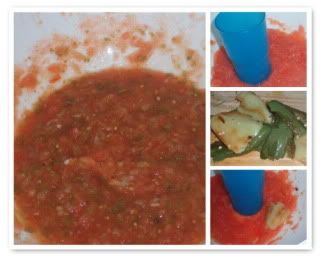
Ok...once those have steamed themselves silly, it's time to roll up your sleeve and get busy! Let them cool down and peel off the burned skin. (I also removed the core of the tomatoes and the stems and seeds from the peppers.) Place the tomatoes in a large plastic bowl, and using a plastic cup with a flat surfaced bottom....smash away. This is in place of using a tiny mortar and pestle. It would take ages and ages to pull that off. Don't use a food processor. You won't get the same results.

One by one, add the peppers and mash everything together until everything has dissolved into a fine "salsa".


I worked and smashed and the cup slipped and everything splattered (so glad I had a huge bowl!!!) and my arms got tired and it was getting hot....whew. Now thats old school!! But isn't it perty? We have now made chile verde. I think it should be a little greener? Maybe my tomatoes were too big? hmm

Ok, peel your potatoes, slice them in half length wise and then slice them...so they look like half moons. Fry them in a pan until golden brown.

Now, I didn't use the whole pork loin. I cut it in half and saved the rest for the next nights dinner. I don't have exact amounts for the meat....kinda play it by ear.

Pat your meat dry. In a separate large pot, brown the spareribs, remove from pan and then brown your pork loin.


I actually learned something from a movie. Remember Julie and Julia? Well, weren't we all told to pat the meat dry prior to browning? It works wonders!! Only takes a few minutes and is sooo worth it.

Ok...now we're ready for the home stretch. (I feel like I need to stand up and sing...."Take Me Out To The Ball Game" for the 7th inning stretch!!)


Put all the meat back into the pot, add your golden brown potatoes and oregano. Cook while stirring for a few seconds to release the flavors from the oregano. Then add the chile verde to the meat and deglaze the pan....cook and stir for a few minutes. Add your broth or water and maybe cerveza, enough to make it as thick or thin as you'd like. Salt to taste. Let simmer a bit until the meat is nice and tender. Towards the end, add the nopalitos to the soup and heat through.


Garnish with avocados, a dollop of sour cream and cilantro and enjoy the flavor of an authentic mexican soup.


Sunday, November 8, 2009

Breakfast Burrito with a Mexican Flair


I've had some Mexican Beef Chorizo in the fridge for a couple of weeks now (it's ok...the package says to use or freeze my Jan 11th, 2010. not sure if that's a good thing or a bad thing). I bought it with the intent of making it for breakfast. A while ago, one of the gals at work had told me how her mom does it and it sounded wonderful. It was so simple and easy.

When I went to finally make it this morning, I discovered that my memory is as bad as I suspected.

I couldn't remember what to do....for sure. And what I did remember....how would I know I'm remembering everything?!

Oh well...I had my mind set. I was going to make this even if it came out totally wrong. Which could only mean that it's right in a different way.

As long as it tastes good....thats all that matters

I started going through the fridge and the pantry and pulling everything out that sounded good...

1 potato sliced (could increase to 2)
1 sweet potato peeled and sliced
1/2 onion diced
6 oz mexican chorizo (its really soft...crumbles when you cook it) (might want to use only 4 oz)
1 can of beans heated and smashed
1 jalapeno chopped
5 eggs (or more or less)
flour tortillas
cilantro to garnish
Ranchero Queso Fresco, crumbled, to garnish


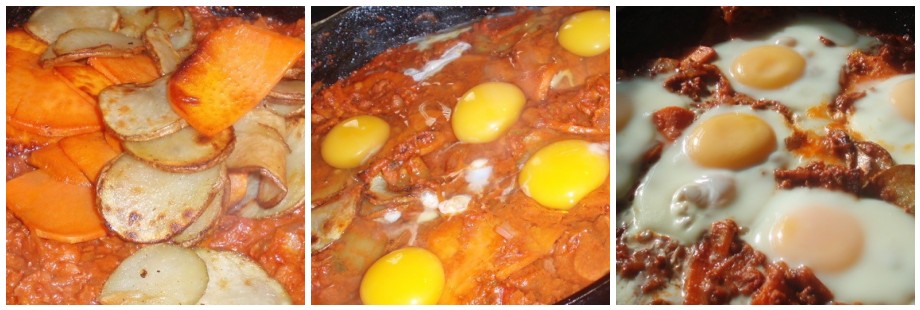
I browned the potato and sweet potato and removed from the pan. Add the onions and chorizo to the pan and cook until onions are soft and chorizo has released its oil and crumbled. Toss the beans, potatoes and jalapenos into the mix...stir it all up.

Crack open a few eggs - however many you need and that will "comfortably" fit into the pan. (as if the eggs comfort is of any concern)

Now...turn the heat down as looooooow as you can without the heat turning off....and cover the pan. Cook until the eggs are done to your specific tastes. It takes several minutes. Mine came out soft but not runny. I wish they had been a little runny...but it was still ok

Now...prepare a tortilla. I like to heat it over an open flame and spread butter all over it. Scoop up an egg along with all that chorizo and beans and stuff and place onto your tortilla. Garnish with cilantro and cheese. If I had tomatoes and avocado, I would've added those too but I ran out... it's Saturday and I haven't gone grocery shopping yet.


Anyways...roll that baby up and enjoy!!

It was a bit on the spicy side so you can omit the jalapeno if you'd like. I really like the sweet potato in it.

According to Sir Sportsalot, this isn't anything like what he's seen his mexican buddys from work eat. But could he give me any clue as to what it should look like? Noooooooo. He shut up when I told him that I had no idea what I made...I didn't have a recipe...and I just through it together. Just be quiet and eat your Big Mac. (have I ever mentioned that he's a fast food junkie?)

Friday, November 6, 2009

Pomegranate Freezer Jelly


Remember the Pom Wonderful Pomegranate Juice I received a couple of weeks ago? And I made that Persian recipe for an "interesting looking" yet very tasty Pomegranate Chicken Stew?

Well, you don't think I used all my Pom Wonderful Pomegranate Juice at once do you?

Oh haaaaaaaalle no.

I've got plans.

BIIIIIIIG plans. Well, considering the size of the little bottles....my plans are big.

And this happens to be Plan B. You see, the first recipe was Plan A.

And yes, there will also be a Plan C. (I'm keeping the family away from the juice within an inch of their lives. They've all  had it before and know what it tastes like and totally love it)

I've been dying to make Pomegranate Jelly ever since I saw Spryte make her Pomegranate Jelly. The first thing I saw was how beautiful it was!!! (although my version isn't as pretty but then again, it's a different recipe)

Then....DD had to go and make HER version of Pomegranate Jelly. Beautiful and wonderful stuff...and again, a different recipe.

Well....as soon as I knew I was getting some Pom Wonderful Pomegranate Juice...I knew, without a doubt that I was going to make Pomegranate Jelly.

So how is mine different? DD made the tried and true jelly that all our grandma's made....cooked, and sealed in the jar by boiling. Spryte made refrigerator jelly...that was also cooked but made to store in the fridge or freezer. Very similar to my recipe....

But...mine isn't cooked. I made freezer jelly. I just prefer the flavor of freezer jams and jellies (and my grandmother always made freezer jams). I would LOVE to be able to taste DD's and Spryte's version....just to see if there is much of a difference between all the versions, ya know?

Anyways...The only trouble was....I couldn't find a recipe for Pomegranate Freezer Jelly. I looked and searched and hunted. What I did find was Sure-Jells recipes for Apple Freezer Jelly and Grape Freezer Jelly. Both made with the juice rather than the fruit. Perfect!! Except the measurements of juice vs sugar was different in each recipe.

Crap....(sigh). Which one do I use? Eenie Meenie Miney Moe....I hmmmm'd and haaaaa'd and thought. Finally I took a sip of the pomegranate juice to see if the consistency was similar to apple juice or grape juice. You know how grape juice almost has a "thickness" to it...very different texture than apple juice. (or am I totally crazy?.....never mind.....don't answer that!!)

I decided it was more like the grape juice...so, here goes

Prepare your jars and lids (I just wash and then boil them so they're sterilized)....


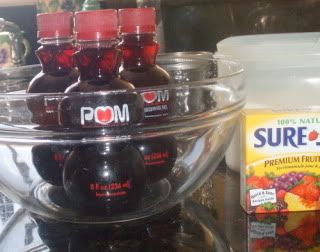
Get the ingredients together...


Not a whole of ingredients and not very difficult to make...at all. I promise.

3 cups Pom Wonderful Pomegranate Juice
5 1/4 cups Sugar
1 box of Sure Jell Premium Fruit Pectin (1.75 oz)
3/4 cup water

Combine the sugar and juice (make sure you use exact measurements) and stir well.


Let it sit for 10 minutes, stirring occasionally.

Then follow the Sure Jell packet instructions for preparing the pectin....which is to basically heat the pectin and water over high heat, stirring constantly....bringing to a boil and then letting it boil for a minute...while continuing to stir....then remove from heat

Stir the pectin mixture into the pomegranate mixture. Stir well, until sugar has dissolved...about 3 minutes.

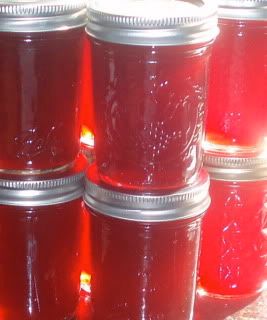
Then fill up your jars...


Leave some room at the top of the jar for "expansion" during freezing. Wipe the edges and any spills with a clean, damp cloth and put on the lids.

Let sit at room temperature for 24 hours. Then stick some in the freezer and at least one in your fridge...and maybe hand out a few for gifts.


This is a soft set. It did say that the grape version could take up to a week to set (I assume thats in the fridge after the 24 hrs). It's been almost a week and the jar I have in the fridge is still soft. Not runny...but not super firm.

Oh, and ya....while this was doing its 24 hr thang....I was making me some bread in anticipation


These are just mini No-Knead Breads...I divided the dough into thirds and just plopped it on my cooking stone and cut the cooking time down a little bit.


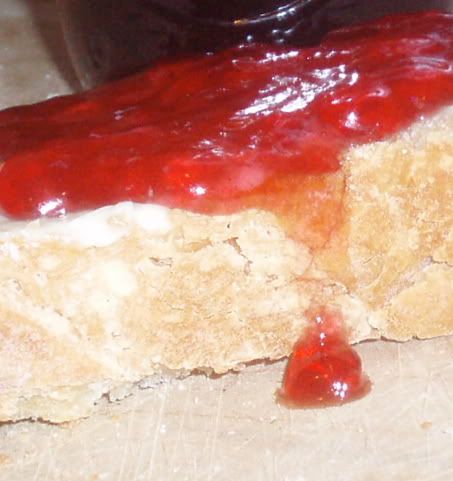
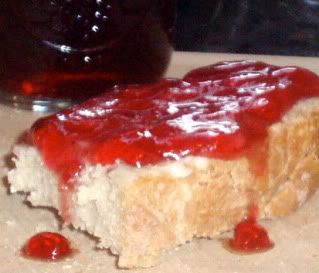
So...how was it? I'm loving the combo of the sweet and the tart of this jam.

and totally lovin my free Pom Wonderful Pomegranate Juice!!

Keep an eye out for Plan C

Tuesday, November 3, 2009

Grandma Sally's Marinated Mushrooms


There's actually a short story behind this recipe.

You see....the house we live in is the same house my husband grew up in.

The cute little old lady next door that goes grocery shopping with me every weekend, use to change my Sir Sportsalot's diapers (baaaaaaaaaahhhahahahahaaaa). I don't know why that cracks me up.

Anyways.....I got this recipe from my neighbor. Who happened to get it from the mother in-law that I never got to meet.

How cool is that?

And now I'm going to share it with you :)

It's so simple that even a newly married, not very experienced cook, young gal (like myself some 20 yrs ago) can make.

And it tastes really good! It makes a bunch. And if you let it sit in the fridge a day or two...why it just gets even better.


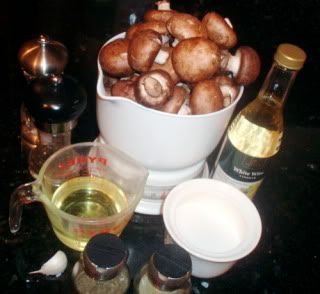
1 1/2 lbs. mushrooms (I used crimini)
3/4 cup oil
1/3 cup white wine vinegar
1 1/2 tsp. salt
3/4 tsp sugar
1/2 tsp basil
6 - 10 pepper corns
1 bay leaf
1 garlic clove

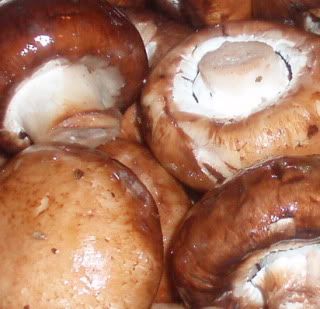
Gently wash your mushrooms and cut the dry ends off the...stub? stem? trunk? Whatever it is...cut it off!

In a good sized deep skillet or large sauce pan, combine everything except for the mushrooms. Simmer for about 10 mins


Loooook....they're making friends

Add your mushrooms and stir until nicely coated. You'll know when they're all coated cuz they get all shiny and pretty


Cover and cook. Now...depending on the size of your mushrooms, you'll want to cook them for about 5 - 10 minutes. The original recipe said 3 - 5 minutes but my mushrooms were pretty good sized and I ended up cooking them for 10 minutes. You don't want them soggy...wilted or soft. You want them....mmm...I dunno....kinda al dente.

Once they've cooked and cooled off, put them in a storage container and keep in the fridge until you're ready to eat.

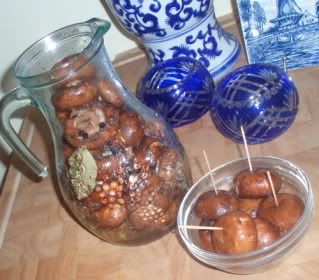
Of course I had to eat a few while they were still warm.....

Just to make sure they were ok. Ya...thats why.


I figure this would be a nice easy appetizer to serve at any of the parties or get togethers you'll be hosting or attending for the upcoming holidays. I hope you get a chance to enjoy them.


Sunday, November 1, 2009

Yummy Apple Coffee Cake


Not long ago I saw this wonderful coffee cake on Michele's blog, My Italian Grandmother, and I was intrigued. So much so that every weekend I'd buy apples and then get too busy to make it, someone would eat the apples during the week and the cycle would begin again the following weekend.

Finally I got down to business this morning. I even had time to wrap my head around this marvelous coffee cake and come up with a little alteration.

Bundt sounded good. And of course when I think of Bundt, I think of Monkey Bread...and that oowie gooowie pecan, brown sugar glaze....and a light bulb went off in my head. It didn't take long for the bulb to blow a fuse, but luckily it was in working order long enough for me to put this baby together.


Cake batter:
2 cooking apples, peeled, cored and chopped up (I used macintosh and jonathan)
1 3/4 cup a.p. flour
3/4 tsp. baking powder
1/2 tsp baking soda
1/4 tsp salt
1/2 cup butter
1 cup sugar
1 tsp vanilla (I probably spilled....oops, gee darn, a tad bit more in the dish)
2 eggs
1 cup ricotta cheese

Streusel:
1/3 cup brown sugar
1/4 cup a.p. flour
1/4 cup oats
1/4 tsp cinnamon
1/8 tsp salt
1/4 cup pecan pieces
3 tbsp butter, diced

Glaze:
1/2 cup pecans, chopped
1/2 cup brown sugar
1/2 cup butter
1/4 tsp cinnamon

Preheat your oven to 340' F (nope...not 350....340). Spray your Bundt pan with some cooking spray...


Combine all of the streusel ingredients, except for the butter, in a food processor. Then add the butter, pulse a few times (maybe 10?) and then process for about 5 - 10 seconds until there are no butter lumps.


Set aside

Combine the dry ingredients for the cake batter (flour, baking powder, baking soda and salt), in a medium sized bowl.

In a larger bowl, beat together the butter, sugar and vanilla until fluffy. Add the eggs one at a time, beating well.

Then....add the flour and ricotta cheese, alternating between the two, mixing until well combined


Now...this next step is what I did, but probably not what I'll do next time.

In a small sauce pan, combine the glaze ingredients, and heat until bubbly and all the butter has melted and sugar has dissolved...stirring constantly. Pour into the bundt pan


Theeeeeen....spoon 1/2 of the cake batter onto the glaze, carefully. I think its easiest to use small amounts and dab it around....and kinda pushing it to spread. You'll see what I'm talking about. Next sprinkle the streusel over the batter. Now (this is when I peeled and chopped my apple so it wouldn't discolor) it's time to scatter the apple chunks over the streusel and last but not least.....carefully spread the remaining cake batter over the apples....


Pop that baby into the oven and bake for about 45 minutes.

Being that this was an experiment (with the glaze and all) I wasn't sure what to expect. I removed the pan from the over and tried to gently run a knife around the edges....just in case (may have not been a real good idea). I put an upside down plate over the top of the cake and flipped it over....and veeeeeeeeeery carefully removed the pan....

ooooooh....crap.

Some of that glaze was left in the pan. Thank God it's sticky stuff. I scooped it out of the pan and slapped it back onto that baby.....Voila!!!


Not bad. 


Could've been worse, right?


I think next time, I'll put the glaze over the cake after it's already cooked. 


But I do like the Bundt look :)


And it tastes incredibly good.


So good that I must take this to work with me.


The whole thing


Otherwise I'll eat it.


All!

(ya, it's that good!)