Yum Peaceful Cooking

Saturday, October 17, 2009

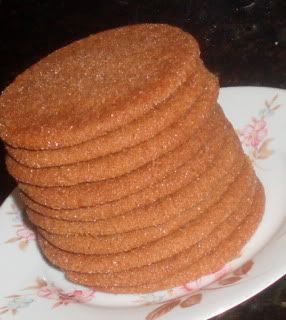
Ginger Cookies - Oooooooh Snap!!


Nooo, they aren't Ginger Snaps. I just couldn't resist saying that. I knoooow...I'm a total geek. (Do they even say geek anymore?)

Have you ever felt like making something but you didn't know what? You knew that it had be something you had all the ingredients for. Something that didn't require tons of time (cuz it's late)...and preferably something sweet.

Well, that narrows it down.

Thats when I tackled the cookbooks. I did find lots of stuff I would like to make someday.

But what about noooooooooooow?

I was beginning to think I'd either have to succumb to sheer boredom (heaven forbid I start cleaning or doing laundry, right?) or I'd have to make that dreaded trip to the grocery store.

When low and behold, what have I found?!

Ginger Cookies and I have all the ingredients. (well, except for margarine, but that doesn't count.)

The recipe was found in a book that belongs to one of my daughters friends mother? The girls went through a cooking phase last year and somehow this huge, heavy (who wants to carry this home???) cookbook has been visiting ever since.

It's called
Cookies, Pies, Breads & Tarts
(although when I look inside the book, it refers to itself as The Practical Encyclopedia of Baking)

Funny thing here....above the title it reads: "Over 400 step-by-step recipes for tempting home baking" (is it just me or is that an awkward sentence?)

My warped brain replaces the word "tempting" with "attempting" cuz to me...that makes way more sense!

Before I get started...I just want to clarify that these are not ginger snaps. They're not hard or crispy. They're just a good cookie when a nice spicy, ginger flavor. So if that's whatcha want...then lets get 'er done.

Yields 36 cookies (unless you start poppin bits of cookie dough in your mouth...then you're guess is as good as mine)

1 cup granulated sugar (divided)
1/2 cup light brown sugar, firmly packed (I think I used dark brown cuz thats what I had)
1/2 cup butter, room temperature
1/2 cup margarine shortening
1 egg
1/3 cup molasses
2 1/4 cups flour
1/2 teaspoon salt
2 teaspoons baking soda
2 teaspoons ground ginger
1/2 teaspoon grated nutmeg
1 teaspoon ground cinnamon

With your electric mixer, cream together 1/2 cup granulated sugar, brown sugar, butter and shortening until light and fluffy. Add in the egg and continue beating until blended...theeeeen add the molasses.

Sift together the dry ingredients....3 times! Then stir the dry ingredients into the butter mixture. I'd do a portion at a time...it just seems to be easier that way.


Cover and refrigerate for 30 minutes.

At this point I decided to be a good girl and started putting stuff away. And I came across the salt shaker.

CRAP!!! Did I or didn't I????

Damn...I'm 95% sure I forgot the salt.

So I took the dough out of the fridge and stirred in the salt...
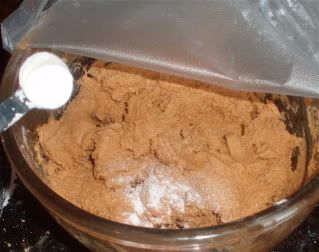


and stirred some more...and then some more to make sure it was evenly distributing since it missed the benefit of all that sifting.

Ok...back in the fridge.

Mean while, preheat your oven to 325' F and cover a cookie sheet or two with parchment paper.
  
Once the 30 minutes is up, place the remaining 1/2 cup of sugar in a shallow dish. Roll a tablespoon of dough into a ball, then roll it around in the sugar to coat.
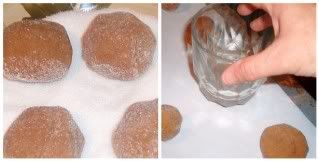


Place the balls about 2" apart (they spread so do as your told) onto the parchment paper and then flatten slightly. I used a tumbler to flatten them.


Now just so you know...I flattened them quite a bit the first time. The second time I barely flattened (as shown above)....and it made NO difference whatsoever to the flatness or thickness of the end result.

Bake until golden around the edges (huh? the color never changes so I'm not sure how that works) but the middle is soft, which takes about 12 - 15 minutes. Let them set on the cookie sheet for about 5 minutes then remove them to a cooling rack.


If you want to make Gingerbread men, the book says to add an additional 1/4 cup of flour. I haven't tried that so I can't tell ya how it works. I'm just the messenger.
Thursday, October 15, 2009

Cauliflower Casserole


I really debated about whether or not to post this.

If it hadn't tasted so damn good, I surely wouldn't.

But it did.

It was sorta one of those times...."I have lots of ________ , what should I do with it?". I could've made cauliflower soup or mashed em up like potatoes...but I decided to search around and see what I could find.

I'm not sure what led me to Paula Deens website (other than I loooove her). But thats where I ended up. I didn't find a Cauliflower Casserole there either.

I found a Broccoli Casserole.

Well, heck.....why not?

And thats where I started. I don't have step by step pictures. Besides, it's not that difficult. I promise, you won't have any difficulty making this. If you do....don't call me. It's much more serious than what I can handle. 

So here goes...

a large head (about 20 oz) of cauliflower, steamed (is that what it's called? a head? or is it a bunch?)
1 cup mayonnaise
1 cup cheddar cheese, grated....or more....like...lots more. bring it ON
1 10 3/4 oz can of condensed cream of mushroom soup
2 eggs, lightly beaten
2 cups crushed crackers (club house or ritz is just fine)
2 tablespoons melted butter .....JUST KIDDING!! right? I mean, that does nothing! I at least doubled that

Preheat your oven to 350'. Spray a 13 x 9 casserole dish with cooking spray

In a large bowl, mix together your cauliflower, mayo, cheese, soup and eggs.

Pour into your casserole dish.

Top with crushed crackers and pour the melted butter over the crackers. OR...what I'll do the next time is toss the cracker crumbs and butter together to evenly coat and then top the casserole with the buttered crackers.

Bake for about 35 minutes, until set and nicely browned.

If you like cauliflower, you will really enjoy this! You get the full flavor of cauliflower which is some how enhanced with all the cheese and stuff. I dunno...it surprised me in a very pleasant way.


Tuesday, October 13, 2009

Pot Roast Wishing for Rain


I've done a Pot Roast and Veggies post before (that one included Yorkshire Pudding...YUM!!) but that was a crock pot recipe. This time it's from the oven :)

It started to cool off a little over the weekend. Nope...not gonna say what "cool off" means in California cuz I know you all will just laugh at me. So let me rephrase that....for US Californians, it started to cool off a bit (read: got below 75 during the day....and thats all I'm sayin).

I was in the mood for a nice juicy, tender Pot Roast with those yummy veggies. Oh man how I was wishin for rain.

Sooo...I had a rather large roast. Not unusually large but we never even come close to eating 3+ lbs of meat. For the first time ever, I cut that Chuck Roast in half and for just us, it was perfect. Sir Sportsalot was gone for the weekend doing sports stuff....softball tournament with his work or something like that. I stayed home. I'm not dumb enough to leave two teenage daughters at home for the weekend without an adult.

Right?

I took 1/2 of the roast, made a few little wholes in it on both sides and shoved some garlic in there. Seasoned with some salt and pepper.


Got out some sort of roasting pan. Which by the way is on the small side. If I use a whole roast I have to shove the roast in there to fit. I have a larger roaster. But its kinda on the huge side. So this little 1/2 roast was perfect.

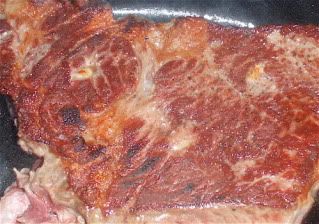
I melted some shortening in the pan and seared all the sides of my roast....


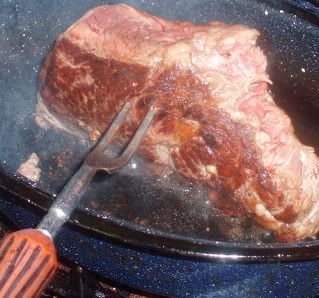
I even seared the edges. I stabbed the meat with a fork and rested it on the side of the pan to help balance it while it browned....works great!


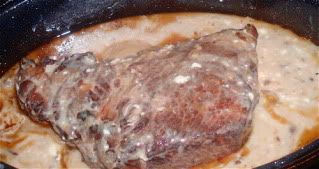
Once that was all nice and brown....(btw, don't you wish you could smell it?) I poured in 1 can of French Onion Soup Concentrate, 1 can of Cream of Mushroom Soup, and 1/2 cup beef broth.


I heated it to a boil, covered it and stuck it in a preheated 325' F oven for about 2 hours.

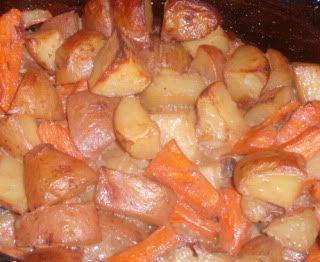
I sliced up a few potatoes and carrots. I usually add onions to the mix but with the French Onion Soup in there, I figured it was already full of flavor.  Add the veggies to the pan....


I kinda gently tossed them around so they were all coated and everything. Covered again and cooked for an additional hour.

Once the veggies were tender, I took the pot out of the oven, removed the meat from the pot (be careful cuz it just might fall off the fork), placed it in a good sized bowl....poured the "gravy" over the meat, covered and set it aside.

I cranked up the oven heat to 425'F and put the veggies on the top rack, uncovered, back into the oven for a few minutes to crispify. (I think it was about 15 minutes. Just keep an eye on it.)


Well, I have a confession. This is the first time I used these soups in my roast. I usually use broth, water, or canned tomatoes....etc. But let me tell you......instant gravy that is wonderful, and the meat!

Tender!!

There's enough chewing to do so you know you're eating a good piece of meat but at the same time, it just melts in your mouth like butter!

I totally forgot about the garlic that I had shoved in there until I got a wonderfully roasted garlic enhanced bite. mmmmm

Now here's irony.

I made this meal a few nights ago... pining for rain. Guess what its doing today while I write about it?

It's raining.

And what did I have for dinner tonight?

Del Taco Beef Burrito and Fries

(I ain't right)

Monday, October 12, 2009

Chicken Marsala Salubrious Sunday Style


I think I've made Chicken Marsala once in my life. Not because I don't like it. Not because it's not easy....I just forgot about it.

Blondes

When I came across this recipe in one of my Cooking Light cookbooks...it looked really good. But one of my daughters said "I don't like Chicken Marsala."

Huh??? I don't get it. Whats not to like?

Well....I kinda ignored her

And made it anyways....and didn't tell her what she was having for dinner.....

(cue evil laugh)....muuaaaaah hahaha hahhaaaaha

Us moms knew how to be sneaky waaaaaaay before these teens ever saw the light of day 


4 tablespoons butter, divided
Cooking Spray
8 oz sliced fresh mushrooms
2 tablespoons finely chopped shallots (didn't have em, so I went with green onions)
4 skinless, boneless chicken breast halves (I used 2 and butterflied them into 4)
Salt and Pepper to taste
3 tablespoons all-purpose flour
3/4 cup fat-free, less-sodium chicken broth
1/2 cup dry Marsala wine
1/2 cup green peas (kid seriously HATES peas, so I threw in a tablespoon or 2 of capers. I know they aren't anything alike, but I'm really glad I did it)
2 tablespoons half and half (was forced to use milk)
4 cups hot cooked fettuccine

Melt 3 tablespoons of the butter. Skim off the foam from the surface and discard....


Then pour the melted butter through a fine sieve over a small bowl, discarding the milk solids. Guess what?

You now have clarified butter


(That was a first for me. Was it as good for you?)

Ok ok, I'll get on with it.....set the clarified butter aside. (don't you just love the sound of that? clarified butter....makes me feel like a grown up cook or something)

Heat a large nonstick skillet over medium-high heat. Coat with cooking spray and saute the mushrooms, shallots and garlic for about 3 minutes or until moisture evaporates. Remove from pan and set aside.

Maybe you should put them next to the clarified butter

Oh..I have to tell you something about my mushrooms. I keep them in a shallow bowl in the fridge, covered with a paper towel. I had read somewhere that it helps to keep them from getting all slimy. Well, when I went to get my mushrooms, a few of them were starting to dry out...they had that wrinkled look. And I thought to myself....bummer.....they're all dehydrated.

Dehydrated.

Ya...like those ones they sell in the store.

The ones you're instructed to soak in water to "pump" back up.

Major light bulb moment!!! Let me tell you!

So I stuck those babies in a bowl of water and lo and behold!! They were saved!!!

Now...if you are using full sized chicken breasts (instead of butterflying them like I did) then you will need to pound 'em down to 1/4 thin. Before doing that, stick them between some plastic wrap so you don't have chicken stuff and juice flying all over the chicken. Makes a yucky mess.

Sprinkle both sides of the chicken with salt and pepper and dredge in the flour.

(giggles.....I get to say it again)
Add the clarified butter to the pan and place over medium- high heat. Add the chicken and cook for about 3 minutes on each side until lightly browned.


Remove chicken from the pan. Pour the mushroom mixture in along with the broth and Marsala. Scrape the goodies off the bottom of the pan.


Bring to a boil, reduce heat and simmer 5 minutes until liquid is reduced to a cup. Stir in your peas (or capers), cook for a minute. Add the remaining tablespoon of butter, season with a bit of salt and pepper, stir in your half and half...and continue stirring until the butter is melted.

Return the chicken to the pan and cook until thoroughly heated and chicken is done...


Serve it over pasta and oh man....I dare you not to enjoy it.

Which reminds me.

The anti-Chicken Marsala child? Well, she liked it. (amaaaaaazing) So much so that she had it for lunch the following day.

Now...this recipe yields 4 servings. If cooked according to the book, it has 585 calories (24% from fat). I'm hoping that since I didn't use half and half and I served each of us 1/2 the meat...does that help? This doesn't really seem "light" but then again I haven't checked the stats on the honest to goodness real Chicken Marsala. As for the rest...Fat 15.3g (sat. 8.4g, mono 4.1g, poly 1g); Protein 51.4g; Carb 55g

And....just so I can say it some more....here's a tip from Cooking Light:

"Clarified butter (butter without the milk solids) is ideal for searing meats because it can be heated to a high temperature without burning. Although you can purchase (you ready?) clarified butter, we detail how to make it in the first step of the recipe for Chicken Marsala.  (aaaand one....more....time....) Clarified butter can be prepared, chilled, and reheated when ready for use, or it can be frozen up to two months."

Saturday, October 10, 2009

The Galette Triplets


I've been thinking about Galettes (Rustic Tarts, Open-Faced Pies....what ever you want to call them)...The bottom line is, they've been on my mind. Every time I see one I think "Oh YA!!! I wanted to make one of those".

But I couldn't decide what flavor. And what if I chose one fruit and then wasn't happy with it...and I'd be stuck with this pie sized rustic tart thing.

Am I over thinking it? Probably. But in my defense .... I was really nervous. Being my first time and all. Plus...I have a confession...

I'm not a pie fan. It's the crust.

We'll blame it on those frozen pie crusts cuz to be honest, they don't really taste  all that good to me.

But since I've overcome my fear of learned how to make pie crust dough....oh man, huge difference.

Well...anyway...in the end, I decided not to choose a fruit. I got 3 different fruits, divided the dough into thirds and made 3 mini galettes.

For the pie crust, use your favorite recipe. I wont give you the one I used...it's nothing special, really other than the fact that it uses both butter and shortening. I had to add a few more tablespoons of water to get the dough to come together. But it was good. If you don't have a favorite dough and you're interested in the recipe I used, just let me know and I'll send it to you. It's not a secret....just redundant for those who bake and make their own.

Now...on to the making of my galette triplets.


Strawberry Filling:
1 lb sliced strawberries (could probably use another 1/2 lb)
2 tablespoons sugar
2 teaspoons balsamic vinegar
(might want to add a tablespoon or so of cornstarch. I didn't but wish I had thought of it)

Peach Filling:
1 lb peeled, sliced peaches
juice from 1/2 lemon
1/4 cup sugar
1 1/2 tablespoons cornstarch
1/8 teaspoon nutmeg
1/4 teaspoon cinnamon
1 tablespoon cointreau

Apple Filling:
1 lb. peeled, sliced apples
2 tablespoons sugar
1 teaspoon cinnamon
juice and zest from 1/2 lemon

Combine the ingredients for each filling in separate bowls.

Tip: Before you attempt to peel and slice the peaches, bring a pot of water to a boil, and pouch the peaches for 20 seconds. Remove from boiling water and submerge them in a bowl of cold water. Once the cool off, you can easily peal the skins right off. 


Preheat your oven to 400' F and insert a baking sheet on the middle rack, to heat up.


Take your divided dough out of the fridge...


On a lightly floured surface, roll out your dough...I dunno, maybe 8" diameter or something like that.


Now...an awful lot of liquid formed in the bottom of those little bowls, so I used a slotted spoon (I didn't want a soggy mess)...and I also sprinkled some cornstarch onto the dough before putting the filling on there.

Pile the filling in the middle, leaving about 1 1/2" around the edge clear of fruit. Fold in the edges and loosely crimp. It kinda reminds me of a duffle bag with a drawstring. Dot the tops of the fruit with some diced butter. Hmmm...I could've sworn I took a picture of the filling or crimping...but I guess I got caught up in the process.

Carefully transfer the galettes to the baking sheet. I used a pastry cutter and a spatula to support the bottom while I did the transferring.


Bake for about 45 minutes, until the pastry is golden brown and the fruit is tender. When there was about 5 or 10 minutes left in the baking, I brushed the pastry with melted butter.

In a small sauce pan, heat up a few tablespoons of honey and brush it over the fruit and pastry to glaze.

They say you can eat these hot or at room temperature. I recommend that you let them cool off a bit so the centers have a chance to firm up a bit.


I am thrilled with the results! They are so easy and taste great. I just love the rustic-ness of these little guys.

Sooo...what flavor would you have chosen? Maybe something I didn't think of? (btw...raspberries and blueberries did cross my mind for a split second then I remembered how expensive those berries are.)

I'd love to make a savory version or 2 or 3. Maybe a cross between pizza and a quiche? Oh, I wish I had thought of this before. I'm making Chicken Marsala for dinner tonight. How fun would it be to make a galette version of that?!

Wednesday, October 7, 2009

Chicken Scampi

Photobucket

When you make something that is so simple, so quick and so damn good....

I feel like that dog in that really old cartoon that use to float through the air when someone gave him a biscuit. He'd get all happy and hug himself and go "mmmmmm" and all sorts of stuff that my old mind wont let me remember. Does anyone remember him? And what the hell was his name!?

Anyways...

This is one of those "you gotta love garlic" recipes. I happen to be one of those people.

In a BIG way!

First I took a bunch of broccoli and several crimini mushrooms that were sliced and sauteed them in some EVOO. Removed those from the pan.

Then I took a couple of chicken breasts, sliced those up and seasoned with Salt and Pepper. Next I Minced several...I dunno...maybe 6? garlic cloves. Then I melted some butter and more EVOO in the pan. Sauteed the chicken with the garlic. I think I even added more butter to the pan and let the chicken saute some more until it was cooked through.

Photobucket

Now...there is a purpose for all that butter and garlic. Cuz I tossed the broccoli and mushrooms back in...and then served it all over some pasta. And you know what else? I took a spoon and scooped up that buttery, garlicy juice and poured it over everything. 

Enjoy....

the.....BREATH!! 

Oh ya...and the dog? His name is Snuffles!!!


Tuesday, October 6, 2009

The Extreme Comfort of Shepherds Pie

Photobucket

You know...it's unfortunate that I didn't grow up on this incredibly tasty dish. I had heard "of" it but had no idea what it was really all about. I'm not even sure exactly what caused me to look into it, but I did.

And I'm glad!

It must've been about 5 years ago or more. I searched the web and found several recipes. I did print one recipe out and made so many changes and side notes that I re-wrote the whole recipe on the bottom half of the paper.

It's been a huge hit and a family favorite ever since. You should hear the phones ringing when word gets out that Shepherds Pie is on the menu! It's amazing how many teens I adopt on those nights. LOL

It can be a bit of a long process but it's very easy....and sooooo worth it!

Start off by making a big batch of mashed potatoes....any way you like them. Use about 8 decent sized potatoes.

Photobucket

If you look reeeeeal close, you'll notice that I tossed in a few cloves of garlic in there.

Add your favorite stuff....milk and / or cream, butter, salt and pepper etc., mash 'em up, set them aside and keep 'em warm.

Photobucket

For the rest...you'll need....

Photobucket

3 cloves of garlic, minced or chopped
1 1/2 lbs ground beef
2 tablspoons butter
2 celery sticks, sliced
1 large onion diced (about a cup or to taste)
Salt and pepper to taste
1 tablespoon tomato paste
1 teaspoon sugar
3/4 cup beef broth
1 teaspoon worcestershire sauce
a few dashes of Maggi Seasoning or Bouquet Sauce
1 teaspoon dried parsley flakes
1/2 teaspoon marjoram
1/2 teaspoon ground coriander
3 cups mixed veggies, cooked
4 oz shredded cheddar cheese (or to taste)

Saute the onions, celery and garlic until tender

Photobucket

Meanwhile, get your veggies cooking

Photobucket

Add the ground beef to the onion mixture and cook until brown

Photobucket

Theeeeeeen.....add your tomato paste, sugar, worcestershire sauce, beef broth, salt and pepper, and the rest of the seasonings....

Photobucket

Mix all that together real good and then toss in your veggies...

Photobucket

Ok...we're almost done....:)

Mix everything really well, then cover and cook for about 15 - 20 minutes over low heat. Remove the lid and continue cooking until liquid reduces. You don't want it to be soupy at all.

You'll probably want to preheat your oven to 350' F while this is going on.

Put the meat mixture into a 13 x 9 casserole dish. Now it's time to get out those mashed potatoes you mixed up earlier. Top the meat mixture with the potatoes. Just blob it on with a spoon in various parts and gently distribute.

Photobucket

You can't really "spread" the potatoes around cuz the meat mixture will start pulling around with the potatoes and get....I dunno....ugly?

Now take all that cheese you shredded and sprinkle that, liberally, over the potatoes.

Photobucket

Cook for 25 - 30 minutes. You might want to put a cookie sheet under it in case some grease over flows....depending on the fat content of your beef and also from the cheese.

Photobucket

When you take it out of the oven, if there is fat floating around the edges a little, you can absorb it carefully with some paper towel (careful not to let the melted cheese attach itself to the paper towels LOL...been there, done that). Or you can gently tilt the dish and let it drain off.

Let it cool for about 10 minutes and then serve!!

Photobucket

Don't you just love the Scottish?