Yum Peaceful Cooking: March 2011

Thursday, March 24, 2011

TOH Saucy Garlic Chicken


 I'm so excited that it's almost April. 

What does that mean? Why? What's so special about April? 

Well....it's not really the month itself that matters (although it's one of my sisters birthday in April...so I'd have to say it's special for that reason. Actually...with my family, every month is special if you're going to take into account everyones birthdays)...but what I'm excited about is that I should be getting the next issue of Taste of Home soon. Yes....I love that magazine. 

Although I have a feeling it won't be doing much for my waistline. 

Oy

This is the second recipe I've tried from my first TOH issue...and it was delicious! Not to mention easy and with ingredients that are easily obtained if you don't already have them. What really caught my attention was the garlic. I love garlic! And this recipe contains a ton of garlic....which probably cinched it for me.
I only made on little adjustment.....they suggested parsley as a garnish. One of my girls doesn't like parsley so I substituted fresh basil. Lemme just say....even if my daughter decided to all of a sudden like parsley, I'd still use the basil for this dish.

Saucy Garlic Chicken

4 whole garlic bulbs
2 tablespoons olive oil, divided
9 oz fresh baby spinach
3/4 teaspoon salt, divided
1/2 teaspoon ground pepper
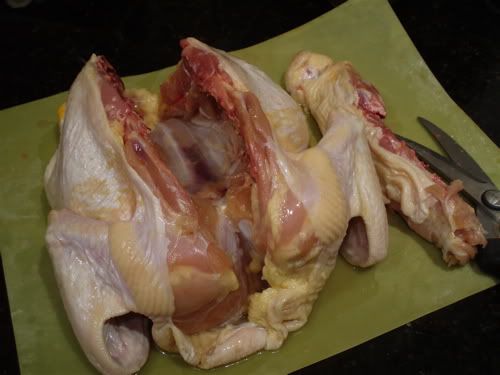
4 - 6 boneless, skinless chicken breasts
6 tablespoons butter, cubed
6 tablespoons all purpose flour
3 cups milk
2 1/2 cups Parmesan cheese
1/8 teaspoon nutmeg
Cooked pasta
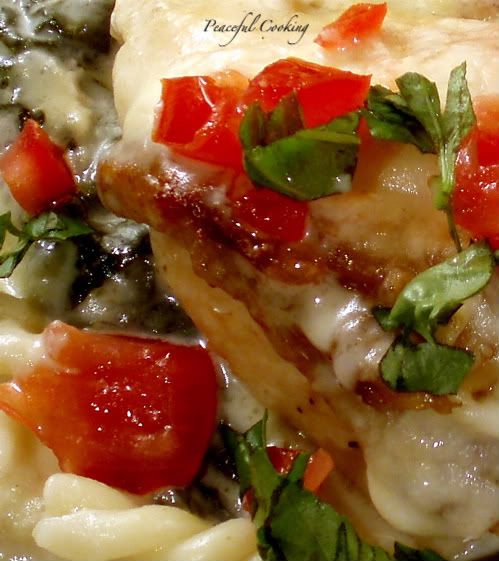
Chopped tomatoes and basil to garnish (the garnish totally makes the meal...trust me)

Preheat oven to 425'

Leaving the garlic bulbs whole, remove the outer "paper", cut off the tops and drizzle 1 tablespoon of olive oil over them. Wrap them up separately in tin foil. Bake for about 30 - 35 minutes or until soft. Allow to cool for about 15 minutes.

While the garlic is roasting, get out your 13 x 9 casserole dish and spray it with non-stick cooking spray or grease it. Pour the spinach leaves in, sprinkle with 1/4 teaspoon of salt and pepper. Set aside.

Heat up the remaining tablespoon of olive oil in a large skillet. Brown the chicken on both sides and arrange over the spinach.

Melt the butter in a large sauce pan over low heat. Stir in the flour. Cook and stir for about a minute (this will help get rid of the "flour" flavor). Gradually stir in the milk and bring to a boil. Cook and stir for about 1 - 2 minutes or until the sauce thickens. Stir in 2 cups of cheese, the nutmeg and the remaining salt and pepper. Remove from heat.

Get out your blender and squeeze the roasted garlic into the blender. Pour in the sauce and process until smooth. Pour the sauce over the chicken and spinach.

Cover and bake for 30 - 35 minutes or maybe a bit longer. You want the chicken to be done...which means that a meat thermometer will read 160'. Uncover....sprinkle with remaining cheese (yaaaaaa baby!!!) and bake for another 5 minutes.

Serve over hot pasta and garnish with chopped tomatoes and basil


I love the color! I love the garlic (no brainer).....but let me just tell ya....the garnish added more than just making it look all pretty and all....it added a freshness and flavor that took this dish from something average to something wow!

Speaking of tomatoes.....I've been playing around in a little class. And well, our last assignment was to take a picture of a vegetable. Didn't matter if it was cooked or raw. After some serious thought and incredible input from some friends, I decided to go with tomatoes.

Ya, I know...they're not a vegetable but we use them like a vegetable, right? How many desserts include tomatoes? Get my point? Anyways....this is what I decided to do


 Life isn't always a bowl full of cherries.

Monday, March 14, 2011

Strawberry Bread with Lemon Honey Butter


Guess what?!

Strawberry season (at least in SoCal) is officially upon me us! Do you know what that means? It means that I have access to my most favoritest fruit ever.....FRESH STRAWBERRIES!!!

Just last week a buddy of mine who happens to have a strawberry field in the family, brought me a flat of some big fat juicy ones....


Just so ya know....those aren't even the big ones (the big ones were consumed waaaaaay before they even made it home)
Well....with a whole flat of strawberries...you bet your patootie that I have some serious strawberry plans. 

Hey...did you know that there's such a  thing as strawberry bread? As in....quick bread? You know, like banana bread. I had Nooooooo idea. All these years of having a sensuous, titillating, prominently organic (I'm not a fan of anything strawberry "flavored") love affair with these tarty sweet fleshy fruits....and I had never in my life heard of strawberry bread. I feel....betrayed in a sense. Why the secret? What's the big deal? It's only bread...it's not like a whole cake...or ice cream.....or anything of that magnitude. I thought I knew my strawberry! What else haven't I been told? Oh no, I don't think so. A strawberry margarita isn't gonna make up for it this time, my little berry babe (although it won't hurt).

But thats ok, don't worry....I'm a forgiving person. Especially after experiencing this lovely "new" quick bread (ooooh, if only I knew then....the things I know now...the places I could've gone with this. Believe me it won't stop here).


Oops...forgot to include the buttermilk in that picture....(which by the way is my alteration. 
The original recipe I was working with had oil)

Strawberry Quick Bread (adapted from King Arthur Flour Cookbook)

1/2 cup chopped pecans
1 1/2 cups (6 1/4 oz) all purpose flour
1 cup (7 oz) sugar
1/2 tsp baking soda
14 tsp salt
1/4 tsp nutmeg
1 TB lemon zest
2 large eggs
1 1/4 cups (10 oz) mashed strawberries
1/4 cup buttermilk

Preheat your oven to 350' F
Grease and flour 9x5 loaf pan

One thing before I continue. Not long ago I decided to invest in a digital food scale.


This thing is sooo worth it's weight in gold. I can add an ingredient to a bowl....hit a button and it takes the measurement back to zero and then I get to weigh the next ingredient.

LOVE IT!!

Ok....Here's how it works....

In a medium bowl, combine the flour, sugar, baking soda, salt nutmeg, and nuts.

In another bowl, whisk together the egg, lemon zest, strawberries, and buttermilk. Pour into dry ingredients and stir until just combined.

Pour into prepared loaf pan.


Bake for 55 - 60 minutes or until toothpick

Allow to cool in the pan for 15 minutes. Remove from pan and allow to cool completely.


It's ready to eat! I have to say...it's dense...but how many quick breads out there aren't? Although I might see what I can do about it a bit. If you wrap it up in plastic wrap and let it chill in the fridge overnight, the flavors come out more...and it's easier to cut.

So...after smelling and tasting my sweet little strawberry bread..I knew it needed something special. I love butter just as much as (and probably more than) the next guy. But we're talking about strawberries here people. And they deserve something gentle and sweet and something a bit coaxing....

Lemon Honey Butter!!! 
1/2 cup softened butter
2 tablespoons honey
1 tsp lemon zest

Combine and roll up in plastic wrap. Refrigerate until firm


Sweet harmony makes for a happy pallet....and I love to see my strawberries sing.

This is my entry this week for Hearth and Soul

hearthandsoulhop

Saturday, March 12, 2011

Confetti Fiesta Bread


I have a lot of recipes that I've collected over the years with the greatest intentions of trying them out. I have these recipes in all forms....cookbooks, magazines, internet tagged, scraps of paper, notebooks, folders....etc etc etc.....etcccccetera.

I've hardly made a dent in my intentions. 

So why on earth would I subscribe to yet another source of even more recipes?

Because my name is Danielle, and I'm a recipe-holic. Without shame. Without guilt. There's even a hint of pride in that statement. And a whole lot of joy. I imagine that's why most of us do what we do....it's why we're here......right?

So you'll totally understand why I did what I did. I subscribed to Taste of Home. For the first time ever.  I recently received my very first issue.....the February & March 2011 issue. As I thumbed through it, I was captivated by this braided bread recipe....loaded...I mean seriously loaded with "fiesta" type ingredients...you know the kind, bell peppers, jalapenos, cheese....the list goes on. We're talking bread. We're talking mexican-ish.....we're talking.....directly to ME. The editor might as well have written this recipe and article specifically to me. It should've read...'Danielle, we know that you will enjoy this bread. Not only because of the fabulous flavors, the hint of heat.....the amazing aroma, but we know you will have enormous fun making it.'

And they would've been right.

Then and there I knew I had to bake this bread. Immediately, if not sooner.

I came home with my arms full of grocery bags, some of which included a few ingredients I didn't  have on hand....canned corn, buttermilk and fresh bell peppers. Is I began to put the groceries away, Sir Sportsalot informed me that he had turned the water off. He had chosen that particular afternoon to repair the leaky faucet in the shower. The very same afternoon I had planned to bake Confetti Fiesta Bread.

Are you serious?! And you know when they say it's only gonna take an few minutes....it translates into a few hours.

Over 3 hours to be closer to exact. No water. (not even for the toilet) for over 3 hours. This had turned into an different kind of adventure.

Let's back up for a minute....I came home from the grocery store around 2:00. I wanted (and when I 'want'...it can be very difficult to detour me) this bread for dinner that night. It was getting on the late side and if was going to have the dinner I'd planned, I needed to get started on this bread. NOW. Which meant I needed to get creative.

I need to let the Laura Ingalls in me come out. Yes, I was that determined!

Thank God for bottled water. We keep lots of it on hand (L.A. water is not fit for drinking). I filled a big ole pot up with bottled water....rinsed the veggies and then used it to wash my hands as needed.

And so my little adventure began.....

Confetti Fiesta Braids
makes 2 loaves
Printable Version

5 1/2 - 6 1/2 cups of all purpose flour
1 cup cornmeal
4 1/2 tsps active dry yeast (2 pks or 1 tablespoons plus 1 1/2 teaspoons)
1 tablespoon sugar
2 teaspoons salt
1 cup buttermilk
1/2 cup butter, cubed
1/2 cup finely chopped onions
2 eggs, lightly beaten
1 1/2 cups (6 oz) shredded cheddar cheese
1 - 8 1/4 oz can cream style corn
1/2 cup finely chopped bell pepper (I used orange and red)
1/4 cup chopped jalapeno peppers (I used 1 - 4 oz can of diced jalapenos)
1/4 cup butter, melted

Combine 4 cups of the all purpose flour, cornmeal, yeast, sugar and salt in a large bowl.

In a small saucepan, heat the buttermilk, 1/2 cup of cubed butter and chopped onion to about 120' F (if it goes over 130' F, let it cool down before proceeding to the next step....you do not want to kill the yeast). Add to the dry ingredients. Stir in the eggs until well combined.

Add the cheese, corn and peppers, stirring until combined. Add enough of the remaining all purpose flour until you have a stiff dough.

Flour your surface and turn the dough onto it. Knead until smooth and elastic....which should take about 8 minutes.

Place your dough in a very large greased bowl. Turn the dough to grease all sides. Cover with plastic wrap or a dusted towel and let rise for about an hour, or until doubled in size

I think I should have used a larger bowl

Punch the dough down and turn onto a lightly floured surface. Divide in half, placing one half back into the bowl while you work on your first loaf.

Taking the half of dough that you're working on, cut off 1/3 of it and set that aside. With the larger 2/3 section, divide that into thirds and form the thirds into long ropes.....about 16" in length. Braid the ropes together.

When I braid bread, I start in the middle and braid to the end. I turn the dough around and over and braid the other side. (if you don't turn it over, the braid will not be uniform...the over and under pattern will be messed up.). Or....just make sure you braid backwards....instead of taking the right and left sides and placing them over each other, you will place them under each other. I hope that makes sense. If not, there are tons of demo videos out there.

Place on a lightly greased baking sheet and pinch the ends together then tuck them under.

Now take the smaller 1/3 of dough, divide it into thirds and make smaller ropes of about 10" in length and braid them as you braided the larger ropes.

Take the smaller braided bread....turn it over (I found it was easiest to just cradle it in my hand and up my arm a bit)....brush the bottom with water and place it in the middle of the larger loaf.


Cover and let rise for about 45 minutes or until doubled.

Now do it all again with the other half of the dough that you had set aside.....


About 30 minutes before the estimated time your bread will be ready to bake, preheat your oven to 350' F.

You can test your bread to see if it's ready to bake by poking it with 2 fingers. If it bounces back instantly....you'll want to let it rise a bit more. If it doesn't bounce back all that quickly....it's ready to go into the oven. Bake for 25-35 minutes or until golden brown. Brush with melted butter and allow to cool on a wire rack before eating.

If you time the final rise right, your second loaf will be ready to go into the oven just as your first loaf is coming out.


I love the texture that the cornmeal added to this bread. I love the little hint of heat that the jalapenos added. I love the aroma of all those peppers. This is an all around wonderful and fun loaf of bread to make and eat. You'll enjoy it by itself with a bit of butter smeared all over your slice. Or...you can have some fun with it like I did. Slice it, toast the slices in the oven and top the slices with your favorite fajita makings for a fun fiesta style bruschetta.


Friday, March 4, 2011

Things in life that are fine....especially with brine


I love wine
I love a good margarita
I love cheese
I love fresh bread
I love chocolate
I love Girl Scout Cookies
I love that rotisserie chicken you can buy at the market
And I love getting free stuff

Please note: this is not a complete list by any means. There are lots more in this life that I love, such as my family and friends and things. And there are lots of other things in life that I would love...such as new office furniture for my little corner of this room where I sit and talk with you all about food. I mean....I have this really old big and ugly gray desk thing. Now I'm not complaining (much)....something is better than nothing. But it sure would look a lot better in my back den if I had something a bit more....I dunno....pretty.

Anyways, I got off the subject. Now I have to remember where I was going with all this. Aaaaaah....several places actually. Let's address my love of bread. The picture above is a four rope braid of a combination of 2 ropes of Rye Bread and 2 ropes of Pumpernickel Bread. This was our assignment from the HBin5 online bread group. It was loads of fun to make.....but I'm not real happy with how the pumpernickel turned out. It tastes like whole wheat bread. Which seems to be a common issue with several of the recipes in the Healthy Bread in Five Minutes a Day book. Don't get me wrong...I love the book....but Whole Wheat Flour is very strong in flavor.

The other "I love" item I'd like to talk about is that rotisserie chicken you buy at the store. That stuff is soooo damn good! Tender....juicy and omg...the flavor just doesn't stop.  You know what I mean? I've roasted I don't know how many chickens in my lifetime...and never once has it ever been as good. The other day a gal at work was telling me about her adventure in making a brine for her chicken and then she said the magic words.....'that's how they make those rotisserie chickens taste so good'. My ears and interest peaked 10 fold! She told me how incredible her chicken came out (this was her first time playing with brine) and how easy it was and free form. Wait...what? Free form? You mean....there's room to experiment and play? Now you REALLY have my attention!

Over the weekend, I played. I experimented. And I fell in love. With. A chicken. That has been soaked in brine.

The results were amazing! The process was easy (all you have to do is plan ahead). And the possibilities are endless. Basically.....whatever combination of seasonings you like....you can use. The only vague rule is that you be careful when using citrus as it will turn your chicken to mush.

Are you ready to play with some brine?!

I used a roasting chicken....about 5 lbs. Don't stress over the size. Size is not an issue. Size does not matter. We're talking quality here people.

(damn...this drink is beginning to really kick my butt)

Then I grabbed a bunch of seasonings from the cupboard. Poultry, lemon pepper, garlic, creole, bay leaf....etc etc.

In a big old deep pot, pour in a gallon of water. Take about 4 cups of that water out and pour it into a medium sized sauce pan. (For the time being, just place that pot with the rest of the water in the fridge so that it can get nice and cold.) Bring the sauce pan water to a boil. Pour in 3/4 cup of salt and 3/4 cup of sugar into the boiling water. Stir until dissolved. Remove from heat.

Now you need to make sure that water has cooled off...a lot.....before adding it back into the big pot. What I did to speed up this process was to take a large ziplock baggy...fill it up with a bunch of ice and place it into the hot water. In no time that stuff was good and cold. Get the pot out of the fridge, add the salt and sugar water to the pot.

Btw....the salt is important to the process since it's what's gonna do the tenderizing. The sugar will offset the flavor of the salt so you don't end up with a salt lick on bones. The seasonings that you choose are for added flavor. All this put together will be absorbed into the meat of your bird. So choose something you want to taste in every bite....not just on the skin. Choose flavors that you love and will go with the rest of the theme for your dinner. Are you going Asian? Throw in some ginger and soy. Are you in the mood for Mexican? Try some heat....cayenne pepper, cumin, jalapenos. You get the idea....now through in your seasonings of choice into that big old pot of salt water.

Last but not least....submerge the bird. Make sure it is fully covered with water.


If it won't stay down...cover it with plate. Then cover the whole thing with a lid....stick it in the fridge and let it sit.

Up to 12 hours.

See what I mean? You really need to plan ahead. But trust me. It is sooooo worth it.

When you're ready to start dinner...take the bird out of the water...and rinse it

TWICE!

This will remove the excess salt.

Now...the night I cooked the chicken, I didn't have a whole lot of time. In order to speed up the cooking process, I butterflied the bird. Which means I cut out the back bone


and flattened it out. Placed it on a foil lined baking sheet then rubbed it down with oil and seasoned the skin. I used the same seasonings I had used in the brine.


Now that is one sexy bird! Hmmmm....now that I look at her, is it me or does she look like she's trying to plump up her cleavage?

The little hussy.

Toss her in a hot oven...about 375' F for about 45 minutes or until juices run clear.

Allow her to rest a couple of minutes before ripping into her....allowing the juices to redistribute throughout the meat...assuring that every single bite has reached its fullest juicy potential.


I prefer the thigh....the leg just happened to come with it. What part do you prefer?


Well...it don't really matter....no matter what part you like....it will be uber tender and juicy and the most amazing chicken you have ever made.