Yum Peaceful Cooking: October 2011

Sunday, October 30, 2011

Chuckies Cookies and Tate's Bake Shop Giveaway


Cookies. There are so many kinds out there and several textures....soft, fluffy, thin, chewy, crispy. We all have our favorites. Some of us are picky....some of us aren't. Me? A cookie is a cookie. I love 'em all.

October is National Cookie Month and I'm barely getting there...by the skin of my teeth. It's finally cooling off a bit and I wasn't frowned upon for turning on the oven. Do you know how happy I was when the mercury dropped below 90'? And I got to make a beautiful batch of thin, chewy cookies from a recipe in Tate's Bake Shop Cookbook called Chuckies? Woo hooo!!! I have made a few recipes from this cookbook (which, by the way, is one of my all time favorite dessert cookbooks) in the past and have loved every one of them:

Chocolate Jumbles
Anadama Bread
Cappuccino Shortbread

And there are several more that I want to must try!

A few weeks ago, Tate's Bake Shop sent me 3 bags of their new award winning cookies, Whole Wheat Dark Chocolate All Natural Cookies


They almost vanished before my eyes...a bag left the house that night to a "kick-back" with one of my daughters. The next day, another bag disappeared at my office and the last bag disappeared somewhere in between. I think I got to eat 2 cookies. They were delicious! Thin, crispy yet the chocolate chips were soft (one of the first things my youngest, chocolate-loving daughter noticed with approval). I'm not a "whole wheat" fan. I just don't care for that earthy flavor but to be honest...I couldn't even tell that these cookies were whole wheat. Which is a huge plus in my book.

With all that said.....I have the pleasure of GIVING AWAY 3 bags of these fabulous Whole Wheat Dark Chocolate All Natural Cookies....AND a copy of the Tate's Bake Shop Cookbook,


autographed by Kathleen King, the owner and baker at Tate's Bake Shop in Southhampton, New York. If you're not familiar with them...I highly recommend checking them out... 

On their website
TatesBakeShop.com
or on FaceBook
Facebook.com/TatesBakeShop 
or.... on Twitter
Twitter.com/#!/TatesBakeShop

And now....for the cookies I baked for National Cookie Month....Chuckies. I made only 1 change. And it was out of necessity on my part rather then with the intent to alter or improve. You see, I thought I had bittersweet chocolate at home so I didn't buy any. But I didn't. Therefore, instead of having chunks of chocolate in this amazing cookie, I had a Mexican chocolate flavored dough. Which was wonderful. But I still wanna bake these again the way they are intended in the cookbook. You see...I had just bought some Mexican Chocolate (had no idea what for at the time....but I figured these cookies would be a great way to put the chocolate to the text). Only I didn't know that the kind of Mexican chocolate I purchased is intended for hot chocolate and it is not that great to eat...as in chunks...in cookies. Apparently, the chocolate is a bit grainy. But this was the chocolate I had at home (I seriously did not want to go to the store again). Soooo, with a little help from my wonderful baking buddies....whom I can go to with all sorts of questions and someone will have an answer....I was informed that I could stick the Mexican chocolate in a food processor, grind it up and use it that way (Thank you Lee...you're the bestest!!!). Which I did. With delicious results.


Chuckies with Mexican Chocolate
Printable Version

2 1/4 cups all purpose flour
1 tsp baking soda
3/4 tsp salt
1 cup butter, at room temperature
1 cup firmly packed brown sugar (dark or light...whatever you have)
1 cup sugar
2 TB corn syrup
2 tsp vanilla extract
2 lg eggs
1 1/2 cups bittersweet chocolate chunks (or 6.2 oz of Mexican chocolate)
1 1/2 cups macadamia nuts, lightly toasted and chopped
2 cups coconut, lightly toasted

Preheat the oven to 350' F. Cover 2 cookie sheets with parchment paper (or grease them)

To toast the nuts and coconut, spread on a cookie sheet and bake at 350' for about 10 minutes or more. Shake the pan part way through to ensure you get an even toast.


In a large bowl, combine your flour, ground Mexican chocolate if thats the route you're taking, baking soda and salt.

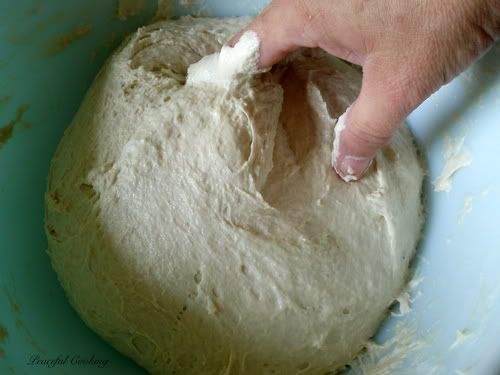
And while you're at it, get in touch with the child in you and play with your food


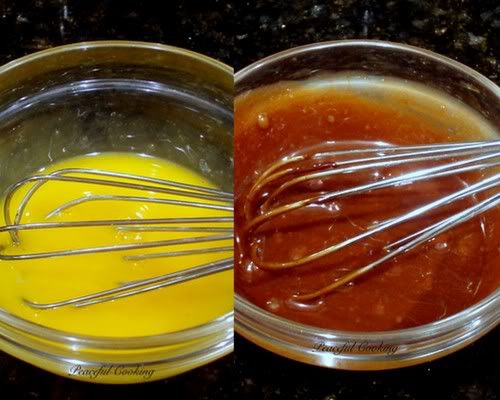
In another bowl, cream together the butter and sugars. Add in the corn syrup and vanilla . Mix until just combined. Add the eggs and mix them lightly.

Then add the flour mixture to the creamed butter mixture until just combined. In other words...don't over mix.

Stir in the nuts and coconut and chocolate chunks (if that's the route you're going).

Using a small ice cream scoop, or 2 tablespoons, scoop and drop the dough onto your prepared cookie sheets. Leave at least 2 inches...if not more (don't skimp on the space.....you will need it!!) and bake them for about 18 minutes or until the edges start to brown.

Allow to cool for 10 minutes before removing from the cookie sheet. Be warned...they may not even last that long!


Place on a cooling rack and let them cool completely.


If by chance you over bake this cookie and you find yourself with a rather hard, crunchy cookie (ya...I did that with a few of them). Don't worry. Don't fret. Don't beat yourself up over it.

There's a cure.

Place the cooled, hard cookies in a sealed container or baggy along with a slice of bread. Leave it for several hours or overnight. The cookies will absorb the moisture from the bread and become nice and moist again!

And now for the Giveaway! Are you ready?

To enter to win 3 bags of Tate's Whole Wheat Dark Chocolate All Natural Cookies....AND a copy of the Tate's Bake Shop Cookbook, autographed by Kathleen King....

Leave a comment (please note that if your comment doesn't link to your blog or email address and I have no way of contacting you....you will forfeit your winnings :( Make sure I have a way to contact you!!)
"Like" me on Facebook.com/pages/Peaceful-Cooking
"Like" Tate's Bake Shop on  Facebook.com/TatesBakeShop
"Follow" me on Twitter.com/#!/ImStuffed
"Follow" Tate's Bake Shop on Twitter.com/#!/TatesBakeShop

All entries must be made by 11:59 p.m. pst, Sunday, November 6, 2011

I will announce the winner in about a week or so! Good luck and enjoy!

Sunday, October 16, 2011

Ciabatta Bread


I've been playing with my sourdough starter since last April. I've made dozens of loaves of sourdough bread. (to find out how to make your own starter click here --->Sourdough Starter<---). This is the second ciabatta bread I've made and I think it's the best bread I've ever made. 

Before I continue, let me say...today, October 16th, is World Bread Day (ya i know...it's just about over..and by the time you see it, it will be yesterday...but hey...it's here). I discovered this quite by accident just a couple of hours ago and it just so happened that I had this ciabatta baking in the oven at the very same time. So I thought I'd better participate. 

Bake Bread for World Bread Day 2011

The purpose of World Bread Day is to stir up awareness of those who are not as fortunate as others. Those who do not have enough food to eat. Not that baking this loaf of bread will do anything for the world hunger problem, but maybe it will remind you to donate food to your local shelter or food bank. 

So, are you wondering what made this particular ciabatta loaf so special or different than anything I've made in the past? It's due to the "mother dough". Something about mother dough that makes a loaf of bread......better. The crust, the crumb....the flavor. It's almost like the bread is more...I dunno...mature? It has a particular depth to it that I have not experienced in any of my breads in the past. A mother dough is basically like a biga, only it's for sourdough breads. It's a cold pre-ferment and is made with wild yeast (a.k.a. sourdough starter) and has anywhere from 50 - 80% hydration. My standard sourdough starter is at 166% hydration (1 cup of existing starter with 1 cup of flour and 1 cup of water added). Btw, the recipe is from an e-book called Discovering Sourdough (NorthwestSourdough.com)

Making a mother dough is not difficult....

Motherdough @ 80% hydration
4.5 oz of 166% hydration sourdough starter
5 oz water
8 oz bread flour

In a good sized container (at least double the size of the amount of ingredients) combine the ingredients well and let it sit at room temperature for 4 hours. Cover loosely and let sit in the fridge for 2 or 3 days. Thats it. No fuss, no muss. If it goes beyond 5 days....well, you'll need to start over. So I highly recommend that you begin this process on Wednesday or Thursday. Actually, if you're going to bake the bread of Sunday, you can start this as late as Friday.

When you're ready to bake your ciabatta (you need to start your this in the morning), take your mother dough out of the fridge. You will see a nicely developed gooey dough


Get out your ciabatta ingredients:

Ciabatta (makes 2 loaves)


All of the mother dough that you made
1 cup water, room temperature, divided
1/2 cup canned milk
1 TB vegetable oil
4 cups bread flour
2 1/2 tsp salt

Pour the mother dough into a large bowl or into the bowl of your dough mixer


Add 6 oz of water (setting 2 oz aside), the canned milk, vegetable oil and the flour. Mix on low speed for about 3 minutes. Or, if you're like me and you don't have a dough mixer, stir with a heavy duty spoon for a bit then get your hands in there and mix, and twist and turn until everything is incorporated...this can be done in about 3 minutes and will look something like this:


Cover it up with plastic wrap and let it rest for 20 minutes.

Then....add the salt and mix the dough for 5 minutes (using the lowest speed if you're using a mixer). Toward the end, slowly add the remaining 2 oz of water.


Place the dough into a folding trough (or large casserole dish) and let it sit for 4 hours, lightly covered, at room temperature. Every hour, fold or stir the dough. For more in depth instructions on folding the dough, please click --->HERE<---

Once the 4 hours are up, pour the dough onto a very well floured surface. Divide the dough in half (about 1.5 lbs each). Now you will have two big thick blobs of sticky dough. Take one of the blobs and fold it over on itself (just as you did in the "folding trough") and place it on a well floured baking sheet. Do the same to the other blob.

Cover and let rest for about 1 to 1 1/2 hrs.

Preheat the oven to 450' F.

Using your finger tips, make dimples in the dough, then gently stretch the dough to make the loaves a big longer.

Place the baking sheet into the oven along with a small oven proof dish with water in it (I used a ramekin). Bake for 15 minutes. Turn the loaves around, reduce the heat to 425' F and bake for another 15 - 20 minutes or until a deep golden redish brown.


Allow the loaves to cool thoroughly before slicing.


Then watch them disappear. If you can manage to save a slice for yourself, which I hope you do since you put all that work into such a wonderful loaf of bread, slather it with butter and drizzle a bit of honey on it. Crumble up some of your favorite cheese and pour yourself a glass of wine.


Sit outside, watch the sunset and know that its been a glorious day. Count your blessings and make plans to share with those who are less fortunate than you are. There are countless ways to do this...whether you give money, donate canned goods or drop off lightly used items to a thrift store that provides for a shelter. It's the least we can do.


Saturday, October 15, 2011

Kahlua Mousse


This is one of those recipes that is sooo good that no matter how bad the pictures are, you just HAVE to share it.

It took me a while to work through that. I mean...I made this over a month ago. I was really irritated that I just couldn't get a good pic. Timing was horrible.... I was rushed. Then there wasn't anything left to photograph. The mousse was aaaaall gone.

I hate that.

But you know what? This mousse is too dang good not to share with you all.

It all started when I discovered an amazing book at the bookstore! If you love chocolate, then you NEED this book....

The Golden Book of Chocolate. There are over 650 (closer to 700) pages of mouth watering, delicious, dream inducing recipes that will make you wish, more than ever, that chocolate desserts were diet and figure friendly. You'll have a difficult time deciding which recipe to try first...I mean this book has everything....cookies, brownies, pies, cakes, candies, muffins...and savory dishes. Even the introduction is seductive..it's called "Introduction to The Sublime". (yes! please, introduce me to the sublime...) Oh!! And did I mention drinks? Ya....pages and pages of beverages...all with chocolate! (and some with alcohol...can't wait to try a Chocolate Monkey). This is like the bible of chocolate! It's so big, thick and heavy and the page edges are gold. (no this is not a review...I was not given this book. I bought it myself and have fallen in love with it. It was a bit of a splurge but so very worth it!)

Now, the Kahlua flavor in this mousse isn't strong or intense. The mousse is thick and creamy, not too sweet....and so very chocolaty. And the whipped cream....no vanilla in that baby. Kahlua was used instead. Simply wonderful.

Kahlua Mousse
Printable Version
Makes 8 servings

1 lb bittersweet chocolate, chopped
3 oz butter
3 large eggs, separated
1/3 cup confectioner's sugar (powdered sugar)
1/4 cup Kahlua (coffee liqueur) (gotta figure out a way to increase that amount)
1 tsp instant coffee granules
2 cups heavy cream

In a double boiler (or a sauce pan and a bowl as I do since I don't own a double boiler and have discovered I don't really need to buy one) melt the chocolate, butter and egg yolks. Wait!!!...those instructions scared me. I mean..I had a lot of chocolate in that bowl and the idea that the egg yolks could quite possibly "scramble" which would ruin my chocolate....well....I did it a bit differently.

Let's start over.....

In a double boiler, melt the chocolate and butter over a low heated simmer. Once melted, remove from heat


In a small bowl, beat the egg yolks. While beating, gradually add about 1/4 cup of the melted chocolate.


By doing this, you are tempering the egg....bringing the temperature up slowly while mixing in the chocolate....so that the egg doesn't scramble.

Slowly beat the tempered egg mixture into the chocolate mixture


In a large bowl, combine the confectioners sugar, Kahlua and coffee granules. Stir the chocolate mixture into the Kahlua mixture.

In yet another bowl (ya....you're gonna be using a lot of bowls) whip the cream until you have stiff peaks (being careful not to turn it into butter). Fold the whipped cream into the Kahlua and chocolate mixture. Beat the egg whites until stiff (once again, do not over beat) and fold into the mixture.


Spoon into serving bowls and chill for at least 4 hours before serving.


Top with additional whipped cream and cocoa powder. But instead of adding vanilla to the whipped cream....try a little Kahlua. You might possibly never go back to vanilla in a whipped cream again! (unless you're serving it to kids of course).


Now treat yourself to a little bit of sublimity.

Sunday, October 2, 2011

Light Wheat Sandwich Bread


I'm not a big fan of the flavor of whole wheat. I know, I know...white flour is so bad for you. I can't help it. I've tried. I've especially put forth a strong effort these past 2 years as I baked with the HBin5 bread baking group. If you look along the right side of my blog, scrolling down to the "Labels" section, you will see HBin5 where I have linked all the bread posts I baked with the group (over 30 posts). Not all are whole wheat. But there's a whole heck of a lot of them. (BTW...HBin5 is short of Healthy Bread in Five Minutes a Day).

But I still don't enjoy the taste of whole wheat bread. 

This does not mean that I didn't gain anything from this cozy little HBin5 adventure. In fact...I learned more than I can express in this one little post. I met fantastic people whom I will never forget. I gained an enormous amount of knowledge and 'yeast confidence'.  And I have grown to love baking bread. I've stepped way beyond my comfort zone and discovered that it's comfortable out there as well.

Somewhere along the line, it became a goal of mine to find a whole wheat sandwich bread that Sir Sportsalot would like. He's a Roman Meal kinda guy and it would make my day if I could trump the store bought stuff.


This recipe is probably as close as I've been able to come, so far. It's not an HBin5 recipe. It's not even a no-knead recipe. It's just a good recipe that I found over at SmittenKitchen
 
With minor alterations.

I do know one thing....without HBin5, I would not have attempted to make this loaf of bread.

The crust is firm without being "crusty" or chewy.  The crumb is soft and airy with just the right amount of firmness. Its not going to fall apart on you from the weight of the tiniest amounts of sandwich makings. It's substantial without being dense. It has that wheat-ie flavor but it's light enough (and gentlemanly enough) to step aside and allow the others to shine. You want to be able to taste the meat. You want to experience the full bodied flavor of your freshly sliced tomato straight out your garden. This bread knows its not the center of attention....but more of a supporting cast, and does it's job with grace.


Light Wheat Sandwich Bread
Printable Version

2 1/2 cups unbleached bread flour
1 1/2 cups white whole wheat flour
1 1/2 TB sugar
1 1/2 tsp salt
3 TB powdered milk
1 1/2 tsp yeast
2 tsp barley malt syrup
1 1/4 cups lukewarm water
2 TB shortening

In a large bowl, combine the flours, sugar, salt, powdered milk and yeast. Dissolve the barley malt syrup in the water. Add the water mixture and the shortening to the flour mixture. Stir until thoroughly combined and the dough forms into a ball. (I started off using a spatula or spoon and ended up just using my hands).

If by chance after you've tried working it all together with your hands, you still cannot incorporate all of the flour in the bowl, add a little more water. (tsp at a time). You want the dough to be soft and supple but not a shaggy mess.

Sprinkle your counter with flour and turn the dough out. Knead away, adding a little flour if needed. Knead for at least 10 minutes (by hand). I kneaded for 15 minutes. The dough will be ready when you can gently stretch it without it tearing apart.

I learned something yesterday as I watched one of those cooking shows out there. It is very unlikely that you'd over knead your dough if kneading by hand. (If you're using a machine...then yes....it can happen. Make sure you obey the time frames specified in a recipe) So....knead away. Fold, push, pull, rotate....repeat. Or whatever way you find yourself kneading. Some say that all you have to do is fold and flatten, rotate. No muscle work involved at all. Your main goal, however you achieve it,  is to get the gluten working.

I wish I had known that a long time ago. It would've really alleviated a lot of my yeast based fears.

Lightly oil a large bowl. Put your dough into the bowl, rotating so that the surface gets coated with the oil. Cover the bowl with plastic wrap and allow to rise for 1 1/2 to 2 hrs. The dough should be doubled in size (which is difficult to gauge exactly. Don't stress. You'll notice it has gotten really big.)

Remove the dough from the bowl and shape it into a 6" x 10"rectangle by pressing it with your hand on the counter.

Starting at the short end, roll the dough up the length a little at a time. With each "roll" pinch the crease with your fingers to secure the dough in place and strengthen the tension. Once you get to the end, pinch the final seam closed (using your hand or the thumbs...you don't really want "pinch" marks on your bread).

Lightly oil an 8.5 x 4.5" bread pan. Place the dough into the pan. The ends of the loaf should reach ends of the pan. This will aid in an even rise.

Mist the top of the dough with cooking spray and cover with plastic wrap. Allow to rise, at room temperature for about 90 minutes. Could be shorter. Could be longer. You'll know it's ready when you poke the dough with your finger and it does not spring back at you very quickly (or at all).

Preheat your oven to 350' F. Make sure your rack is in the middle of the oven.

Bake for 30 minutes. Rotate 180' and continue baking for another 20 - 30 minutes. If you have an instant read thermometer, the inside temperature should be about 190' F. The top and sides will be a nice golden brown.

Immediately remove the loaf from the pan and allow to cool on a rack for at least an hour (or more). This is VERY important. I know...it's hard. You can smell that warm bread and it's begging to be smothered in butter. But...

NO!

You have to wait. The dough is going to continue to do its thing for a bit. You don't want all the inside steam to escape. Just let it be. Let it settle. Allow the crumb to come into it's own. That's the only way you will achieve that light, airy crumb. Otherwise, it'll be a bit doughy and almost sticky. You'll know immediately you've done wrong. The bread will leave a smear mark along the knife. A tale-tale sign that the bread wasn't allowed to fully cool. So do yourself a favor. Just walk away.

I promise, it will be worth the wait. And then you can do anything you want. Slice, dice, rip, break....toast, butter, grilled cheese. It's all good.


I will have more HBin5 and ABin5 recipe posts in the future. (one coming up pretty soon in fact). It doesn't seem like it's been 2 yrs already but the HBin5 Bread Braid is officially done. I have a feeling that we'll all stay in touch and it will seem as if it's still in progress. I can't imagine not sharing my bread with the group...or reading what they have to share. I can't imagine the group not being there to support each other as we work through our bread issues and questions. Thank you all in the HBin5 Bread Braid group!! It's been a wonderful adventure. Sooooo.....whats next?

I want to take a minute to give a special thank you and hug to {{{{Michelle}}}} over at BigBlackDogs.net  You are an amazing woman. I will never make bread without thinking of you, your courage and your strength. This is not good-bye by any means...but a segue to the next stage.