Yum Peaceful Cooking: October 2010

Thursday, October 28, 2010

Spicy Chai Latte Cakes


 This isn't want I intended to make. At all. I didn't want cake. I didn't want cupcakes. I wanted a pretty holiday roll. But sometimes things don't work out the way you planned. Then you have to think on your feet and figure something else out. Figure out a plan B. (man, it's hard enough to think of a plan A let alone a plan B) Especially when the results are as wonderfully flavorful as these Spicy Chai Latte Cakes. 

It all started a few months back when a gal at work asked if I could make a chai tea cake for her. I said sure....but had no idea what I was going to do since I'd never had one. Another gal at work gave me a box of chai tea to help me out. But I still wasn't quite sure what I was going to do. Then another gal at work pulled out a tub of a powder mix from Trader Joes called Spicy Chai Latte that gets mixed with some hot water and apparently makes a wonderful drink. It didn't take me long to head over to Trader Joes to purchase some of this mix since an idea was blooming in my head. 

The result, although the presentation wasn't as planned, was....a moist, simple, delicious dessert that's not too sweet yet waaaay satisfying. 

When I got home and opened the tub of Spicy Chai Latte mix.....I took a whiff and WOW!!! It was like autumn....all the flavors and scents that mean fall is here and winter is just around the corner. Holidays with family and friends, sharing and enjoying good company, good food and good times. 

All this from one little tub. Ya, it's that good!!


Spicy Chai Latte Mini Cakes (or make it into cupcakes or a full blown cake)
Printable Version

1 box yellow cake mix (I used a butter recipe yellow mix)
1 1/4 cups hot water
1 stick butter, room temperature
3 eggs
1/2 cup instant spicy chai latter mix

Spicy Chai Latte Frosting
Printable Version

8oz cream cheese, room temperature
4 tablespoons butter, room temperature
1 cup powdered sugar
1/2 teaspoon vanilla extract
3 tablespoons instant spicy chai latte mix
Cinnamon for garnish


Don't you wish you could smell this? There's a combo of cinnamon, clove, cardamon, anise, ginger. Heaven, I'm tellin' you.

Preheat the oven to 350'. Prepare your cake pan or cupcake stuff. Me? Since I was planning on making this into a roll....I greased a jelly roll pan and covered it with a sheet of parchment paper.

Mix together the hot water and spicy chai latte mix. Beat together the cake mix, latte/water mixture and butter. Add the eggs and beat on low speed for 30 seconds than turn the speed up to medium and continue beating for an additional 2 minutes. Pour into you pan or cupcake tin and bake as directed on the box:

2 - 8" rounds: 33-38 minutes
2 - 9" rounds: 28-33 minutes
24 cupcakes: 20-25 minutes
bundt pan: 47-52 minutes

I baked mine for about 20-25 minutes in the jelly roll pan


Poke it in the middle with a toothpick...if it comes out clean, it's done.

`While it's cooling, make your icing. Cream together the cream cheese and butter until smooth. Add the powdered sugar, vanilla and spicy chai latte mix and stir until well combined and smooth. Set aside to let the flavors get all comfy and personal with each other.

Once the cake is completely cooled, you can start with the icing. Umm....just an FYI: this is so nice and moist that if you place your hand on the cake to test for coolness.....


You just might end up with a little something to lick off your hand

Once I removed my cake from my jelly roll pan, I realized something wasn't right. It was just a bit too thick for rolling


It was too wide for a sheet cake and too good to scrap. That's when got out my cookie cutter and went to town

Although it left a bit of "waste"...which I will use for a triffle :)

I turned these little round cakes into double layered mini cakes.

Perfect in size and fun to eat


Monday, October 25, 2010

Gigi's Creamy Tomato Soup and HBin5 Garlic Baguette


Fall is here! Even in SoCal! Yep....it's been cold (for our standards) and rainy and just plain wonderful. I love weather. Probably because we hardly ever get any other than hot and hotter. When it rains, it lifts my spirits. When we have a good downpour or thunderstorm, I'm as giddy as a school girl (not sure what that means). And I love all the yummy comfort foods that come with cold weather. Roasts, stews, soups, hearty casseroles. It's all good. Top any of that with a homemade loaf of bread and it's heaven! Especially when paired with a fabulous bowl of creamy tomato soup.

As a child, tomato soup was one of my favorites. Even though it was canned....it was still wonderful to my little kid palette. I'd get my bowl of hot soup, grab a stack of saltine crackers and go to town. Dipping some of the crackers and crumbling the others right into the soup. Good stuff, let me tell ya.

Now that I've grown up (for the most part....well, kinda) the canned stuff doesn't appeal to me anymore. I don't remember my mom or grandmother ever making homemade tomato soup, so when I had heard about Karen's recipe....I was all over it. Karen is just one of the nicest, giving ladies I've met....at Bakespace.com.  I've made a few of her recipes and have loved them all. (this is like deja vu....have I said this before?). All us BS'ers (bakespacers) a.k.a. beeps (bakespace peeps....ya, we're all for the corny stuff) know Karen as Gigi. Hmm...not sure where Gigi comes from...but anyways.....this is her recipe and I have to say, it is fabulous! Its quick. It's easy and the flavor is amazing. You take a bite and taste the rotation of ingredients make their way across your palette.... just sit back as your tongue goes through the emotions...ooh, ahh....Wow....YUM!

Karen's Creamy Tomato Soup
Printable Version (I would've given a link to the recipe in Karen's BakeSpace kitchen, but I couldn't find the recipe there...so this is a link to mine. If I find hers, I'll fix it)

Prep time: 10 minutes
Cook time: 50 minutes
Servings: 4


2 tablespoons olive oil
1 medium onion, finely chopped
1 medium leek (white part only) finely chopped (I didn't have any so I added 1/2 yellow bell pepper instead...not that its the same or close, but it worked)
2 cloves of garlic, minced (my addition)
1 medium carrot, peeled and finely chopped
1 medium celery stalk, finely chopped
2 tablespoons fresh basil
2 cups fresh tomatoes, diced or 2 - 16 oz cans diced tomatoes (I used the cans)
3 tablespoons tomato paste
2 tablespoons all purpose flour
2 1/2 cups vegetable stock (I used a homemade stock that I had in the freezer)
1/2 cup light cream (I had Mexican crema on hand, so I used it)
salt and pepper to taste

Heat the oil in a medium to large saucepan and saute the onions, leeks (and / or bell pepper), carrot, and celery until the onion is transparent. Toss in the garlic and saute for another minute

Add the tomatoes and tomato paste and cook, stirring occasionally for about 5 minutes.

Stir in the flour until incorporated and then add the stock and basil. Bring to a boil. Reduce heat and simmer, covered for about 20 minutes. Remove from heat.

In a blender or with an immersion blender, puree the mixture until smooth. If you use a blender, you will need to do this in batches or else you will have tomato soup splattered all over your kitchen.


Return to the pan and bring to a boil again. Reduce heat and simmer for a couple of minutes...3 - 4. Turn off the heat, stir in the cream and season with salt and pepper to taste.


If you happen to have some dough lying around, form it into a baguette (mine always turn out too big and fat, but it's still good)....let it rise its final rise, brush the top with an egg wash, then take the handle of a wooden spoon and make an indent along the top. Take a few cloves of garlic, sliced in half and press them securely into the indent...


I used the Healthy Bread in Five Minutes a day recipe for Whole Wheat Bread, only I halved the wheat flour and subbed in more all purpose flour (as is my typical way of doing it), I used whey left over from cheese making instead of plain water and I added 1/2 teaspoon of barley malt syrup for each cup of flour. I really love this combination. This was the assignment for October 15th for the HBin5 bread braid


Michelle over at BigBlackDogs.net is our fearless leader, mentor and organizer. Without her and the group and all that I've learned this year, there's no way I would've ever attempted anything like this. It's not bakery perfect in looks, but it's wonderful in flavor....


Get a little slice with some butter and serve with your fresh, homemade Creamy Tomato soup that you've garnished with cream, sour cream or yogurt and some fresh basil


Feel the comfort, feel the love and enjoy a grown-up version of a childhood favorite.
This is my submission this week for the Hearth and Soul Blog Hop. Click on the badge below to begin a tour of some fabulous foods.

hearthandsoulgirlichef

Later that week: I loved this bread so much that I made a second loaf. Only this time I remembered a trick I had seen another member of the HBin5 group do...and I thought I'd give it a try. You see, the HBin5 doughs tend to spread....so I built a make-shift retainer along each side of the dough for the second rise to hold it in place:


I wish I had a couple of 2x4's instead...but the dishes worked wonderfully....as you can see from the result below. It still did a bit of spreading in the oven, but not bad


Apparently I didn't press the garlic in deep enough this time cuz they sorta wanted to (and did) pop off but at least it looked a bit more like a baguette :). I'm sorry I don't remember who gave the group this tip (and I know I saw it on your blog)....but if you read this and you know who you are....THANK YOU!!! 


Saturday, October 23, 2010

Pace Picante Sauce and Huevos Rancheros


Whenever I receive something for free, it's like getting a present. And I love getting presents! (who doesn't?!) My most recent present was through the Tastemakers program with Foodbuzz. I was sent 2 bottles of All Natural Pace Original Picante Sauce (medium heat).


In case you haven't noticed....I'm all over Mexican food in a big way. Of course I enjoy making stuff from scratch but if I'm short on time (or just feeling lazy), Pace has  been the brand I grab off the store shelf more often than not. (that old Pace commercial keeps running through my head...."New York CITY!?"). It happens to be a brand I know and trust and have used for years.

Salsa isn't just for dips (errr.....no, I'm not calling ya'll a bunch of dips), it livens up a whole bunch of stuff besides chips, tacos and burritos. It was really good in my Southwestern Lasagna for example. Wanna see how good it is with my homemade Beef Chorizo and eggs and stuff for breakfast?


Huevos Rancheros

Now....this isn't so much a recipe with measurements as it is a putting together of ingredients. Quantities are going to depend on tastes and levels of hunger. You know? I mean....unless you're working in a restaurant, no ones telling you how much of what stuff to put in your burrito. You just do it the way you like it. That's how this is. But I will give you a list of stuff to use to get you started...you take it from here and run.... do it the way that'll make you and yours happy.

Mexican chorizo (this is not a cured chorizo like the Spanish and Puerto Rican chorizos are. Once you remove it from the casing (or when home made, the plastic bag) it's a lovely mass of fine crumbly meet and spices)
Eggs
Refried Beans
Garlic
Pace Picante Sauce
Corn tortillas
Mexican Crema (or sour cream)
Cheese (queso fresco, jack, mexican blend...whatever floats your boat) shredded or crumbled
Green Onions, chopped
Tomato, diced
Avocado, sliced
Cilantro, roughly chopped

Cook your chozio in a medium-hot skillet. It doesn't take long.


In a small sauce pan over low heat, heat up your refried beans with some garlic added. I say about 3 cloves of garlic per can of beans. It just adds a nice little sumpin sumpin....you know? I got this idea from a pal over at BakeSpace.com


In another little saucepan (yes....you're going to be usin' up a lot of pots and pans LOL) heat up your salsa over medium low heat.

In yet another sauce pan (this part is optional) heat up some oil and fry your tortillas. Drain the tortillas on a paper towel lined plate, then dip them in the warmed salsa


Fry up your eggs and start layering, baby.....


Start with the garlicy beans and chorizo


And top that with your choice of the other googies you've laid out including more salsa


And there you have a filling, flavorful, wonderfully delicious breakfast that's sure to please each and every member of your family or guests


Who's mouth isn't going to water when presented with a dish like this?


Thank you Pace for my jars of Picante Sauce!

Wednesday, October 20, 2010

Beef Chorizo and A Winner!


Where do I begin.

It's been one of "those" weeks. And it started when I killed my computer. I won't tell ya how.....just confessing to the crime is enough. (can you say.....I NEED A MARG!!!)

Guilty as charged.

It turned into a growing experience though. I now know how to change an internal hard drive in a MacBook and I have all the proper tools if I ever have to do it again. (please God...don't let me have to do that again). Good news....my little laptop has a new brain....bigger, faster and clean.

Which brings me to another point. Some of you may have noticed that in the "leaving comments on your blog" arena I've just about dropped off the radar. There's a reason for that. My computer would freeze constantly or my browser would flat out crash. I'd open a blog and the curser would never stop spinning. I'd walk away, do the dishes or fold a load of laundry...come back and theres the little rainbow wheel of a curser just spinning away. Sooooo frustrating. (this very well may have been the cause and affect that lead to the death of my laptop but that's all I'm saying). It would sometimes take an hour just to view 2 or 3 blog posts.

I just couldn't deal with that level of frustration.

Good news....It's no longer an issue. You will see me leaving my "mark" all over the place once again.

And boy does it feel good!

Ooook....I'm going to share a recipe with you that I got from Heather over at Girlichef.com

If I can make something from scratch that I'd normally buy at the grocery store, I'm all for it. At least once. Then I decide if it's worth it. Just so you know....this is totally worth it! And it's really easy. I think the most challenging part for some people will be finding the peppers.


Left to right: Pasilla Chiles, California Chiles, Chiles de Arbol

I'm also going to announce the winner of my $75.00 CSNstores.com Gift Certificate Giveaway. I had originally planned on making the announcement on Tuesday but with my computer issues...well, let's just say it was not possible. I apologize for being late folks. But in most instances, better late than never.

And with that said....here's Heather's Chorizo recipe with a few minor adjustments....which is what I love about this recipe. At allows for your personal touch and tastes.

Beef Chorizo (Heather's is pork but I have a child who decided she won't eat pork)
Printable Version

3 chilies de arbol
7 pasilla chiles 4 pasilla chiles and 3 California chiles (I didn't have enough pasillas so I subbed the california ones)
1/2 cup chopped onion
3 cloves chopped garlic
1 bay leaf (actually I totally forgot to add this to mine)
1/2 cup white vinegar
1 tablespoon salt
2 teaspoons ground cumin
2 teaspoons dried oregano (preferably Mexican oregano)
1 teaspoon black pepper
1 pound ground beef, 80% lean (you need the fat...sorry folks)

Combine the chiles, onion, garlic, bay leaf and vinegar


You can combine them in a glass bowl if you'd like (not metal) but I found that the vinegar didn't do it's thing with everything cuz it was in the bottom of the bowl, so I put it all in a zip lock baggy and turned it every so often for about an hour at room temperature.


If you remembered to add the bay leaf, remove it.

If your chilies have stems


....and you didn't think about removing them before hand...now is the time. Easiest way....snip 'em off with a pair of scissors.


Place the chile mix in a blender. Process until you have rough paste. If it gets too thick to blend, just add a tablespoon of water at a time until it moves around all free and happy like.

Pour this lovely rich paste into a medium bowl


Add the salt, cumin, oregano and pepper. Stir well to combine then add in the beef. Mix well so that everything is evenly distributed. I tried doing it with a spatula, then a spoon...and said "screw it" and dug in full force with the best mixer of all.....My hands!


I got all down and dirty with the stuff. I'm not embarrassed to say that it felt good. I felt like I was in touch with my...umm....chorizo.

Now transfer this hunk of meat to an airtight container or zip lock bag and store it in the fridge for at least 12 hours before using.....allowing the meat and chilies and spices to get all close and personal and happy with each other.


And that's it. Use however you want. Whatever you're not going to use within a few days, just freeze it for later.

My next post will show you what I did with mine.

And now.....for the moment we've all been waiting for!!

The lucky WINNER for the $75.00 CSNstores.com Gift Certificate. Just in time for your holiday shopping if you so choose to do so.

Normally I write everyones name down on a piece of paper and draw a name out of the hat margarita glass. This time there were so many entries (yay!!! Thank you all for participating. This was my most successful giveaway yet!) I decided to enlist Sir Sportsalots assistance. And he didn't even know it. I walked up to him and said....pick a number.

And he did....25! His lucky number and apparently it is now Christy's (Frugality and Crunchiness with Christy) lucky number as well.

YAY!!! Congrats Christy!! I'll be contacting you (or you can contact me at peacefulcooking @gmail dot com) with the gift certificate code.

Have a fantastical day (or night...whichever applies) everyone!


Sunday, October 17, 2010

HBin5 Whole Wheat Groissini


This is just a quickie. Yesterday was World Bread Day so I baked bread. It was also the HBin5 groups 21st Bread Braid post.


I don't really have a recipe to share here. I used the basic while wheat bread recipe from Healthy Bread in Five Minutes a Day, with a few adjustments. I halved the whole wheat flour and replaced it with unbleached all purpose flour (the bleached kind hinders the rise). The reason I do this is because I'm not a huge fan of whole wheat (I'm trying, honest I am....but it's a process. And I figure a little is better than none) and this mellows out the flavor a bit. I also used liquid whey instead of water and I added 1/2 teaspoon of barley malt syrup for each cup of flour.

Preheat your oven to 400' F and line a cookie sheet with parchment paper.

You can use just about any dough to make these (you can even use that pre-made store stuff if you'd like). They're fairly quick and pretty darn easy. Just take a handful of dough (about the size of an orange) and roll it out to form a 12x8 rectangle. I used a pastry scraper to cut my dough into strips.


They're suppose to 1/8" but I'm not that meticulous and have no idea really, how wide mine came out....but I do know that weren't as thin as they were suppose be. No biggy....I just baked them a few minutes longer.

Place them on a parchment paper lined sheet. Somehow as I was transferring the dough strips to the sheet, they stretched and I got some pretty long bread sticks.

Brush them generously with olive oil or do like I did and use an olive oil spray (so much quicker and easier)...sprinkle with salt, chopped fresh rosemary and some shredded parmesan cheese (I couldn't resist added the cheese to the recipe. I'm kinda wishing I had added some garlic too).


Bake for about 10 - 16 minutes or until golden brown and firm. (or even longer if you're are as wide as mine). They will firm up and get crispy as they cool

They are tasty and fun to eat. With in a little bowl of garlic infused olive oil next to the bread sticks and you'll find me next to that bread basket for the night.

Friday, October 15, 2010

Greek Zucchini Cakes


Is it too late in the season for this recipe? I s'pose that depends on where you live on whether or not you can still get fresh zucchini. Well, even if it's not farm fresh but you can get your hands on some, these little gems are worth making. If you have kids who aren't all that fond of zucchini, they just might like these. There's so much flavor going on that the zucchini is almost upstaged by it all. Although there's no denying that yummy foundation.

I know this recipe has a few specialty items that maybe not everyone keeps on hand. Just remember that you can always substitute, adjust and make it happen your way. Seasonings, cheeses....all interchangeable. Nuts, onions, adjustable and optional. I look at ingredients sometimes the same way one would look at a color wheel. Some things go together and some things don't, it's a matter of taste. There are food schemes just like there are color schemes. Warm, cool, spicy, sweet, bold, accents...etc. It's all in how much you use, where you use it and what you want the outcome to be. In the end, its your plate that's the palette.

And right now, my palate wants a nice cold glass of Chardonnay. It's the end of the week, the beginning of the weekend and time to relax. Right?

Phhhfffft...are you laughing as hard as I am? Are there really people out there who get to relax on the weekends? (I mean people who don't have servants and lots of money and who work 40 hrs a week). My weekends are spent cooking (cuz I love it), cleaning (cuz I have to even though I hate it), laundry (cuz it would be gross not to) and grocery shopping (cuz it's easier to justify spending money on food than it is spending it on other stuff). And here I am....spending my down time yacking with you all.

(I don't even want to begin to analyze that last sentence)

But hey...I have my Chardonnay


Greek Zucchini Cakes
Printable Version

1 lb grated zucchini (takes about 3 medium)
1 teaspoon salt
3/4 cup crumbled feta cheese (I prefer the garlic herd flavored)
1 egg, lightly beaten
3 green onions, thinly sliced or 1/4 cup white onion chopped
3 tablespoons flour
1/4 cup chopped pine nuts (I like them toasted)
1 tablespoon fresh dill, chopped (or 1/2 teaspoon dried)
1 1/2 teaspoons fresh oregano leaves (or 1/2 teaspoon dried)
1 garlic clove, finely chopped
1/4 teaspoon pepper
Olive Oil

Combine the grated zucchini and the salt and set aside for 5 minutes and 5 minutes ONLY. Unless of course your goal is to have zucchini mush, but I don't think that's the case. So...5 minutes is it. Rinse in cold water and squeeze dry or press in a strainer until dry.


I know I've said this before, but I'm always amazed at how much water comes out. And each time I see...I'm just reminded of how important this step is. Without it your "cakes" would probably have a pretty hard time getting crispy. Hmm.....which has me thinking. What's the difference between a zucchini cake and a zucchini fritter? Or is it a zucchini pancake? Maybe it just depends on where you're from.


In a large bowl, combine the cheese, egg, onion, flour, nuts, dill, oregano, garlic and pepper (basically the rest of the ingredients except for the oil).


There's a lot of good stuff goin' on in that bowl, let me tell you!

Heat oil in a large skillet over medium to medium low heat.

Fold in the zucchini. Form into about 24 small cakes. They say each cake is made with 2 tablespoons of the mixture but to be honest with you....it's not going to make that many. But does it really matter?

Saute in olive oil, turning once until nice and brown. 3 minutes on each side is the going rate but mine never last that long before they start burning. I get nervous if I turn the heat down too low cuz I don't want them to absorb more oil. Basically, if they're fully cooked, it's all good.


Place on a paper towel lined plate to allow the oil to drain off. I served mine with a bit of sour cream. I'm sure there has to be something better out there. Maybe even a dill and onion seasoned sour cream mixture.

Now.....should I feel guilty for making a bunch of fresh, healthy zucchini into something that makes your arteries cry in hopeless despair?

Shhhhh...I don't wanna know. (fingers in ears.....) LALALALALALA I can't HEAR you!

Oh....

One more VERY important thing....if you haven't already....there's still time

to

enter

my

GIVEAWAY!!

Yes, that's right.....$75 Gift Certificate from CSNstores.com

To enter, just click --------------> HERE <-------------- and follow the directions (it's super duper easy peasy)

Have I told y'all how awesome ya'll are? (it's not the Chardonnay talking, I swear)

Monday, October 11, 2010

Chicken and Spinach Casserole and a GIVEAWAY!


Sometimes its the quick and simple things that are closest to my heart and soul. Especially when it's been a long day or week....or I'm just flat out tired (and maybe crabby)! One of the reasons why this recipe made it to my hearth was the fact that not only is it quick and simple but it doesn't include a single can of cream of something soup. I'm not sayin' that I never use the stuff....but I think they're overly used when it comes to casseroles. Once you see how simple it is to not use a cream soup as the base for a casserole, maybe....just maybe you'll choose the better other choice. If you're concerned about fat....use milk instead of the half and half. If you're concerned about flavor...just add your favorites. Just don't add the MSG.

You know...casseroles bring back a lot of memories. They're sorta nostalgic for me. I think (I could be wrong)...but I think casseroles peaked in the 60's, and even continued with a bit of momentum in the early 70's. I remember eating them quite a bit. More often at friends houses than my own. One of the most famous casseroles from my generation is the dreaded tuna casserole. Sir Sportsalot still enjoys it. I don't have a favorite. But I do have a love for them when time is of the essence. Especially with this one because the baking time is so minimal.

Now all I need to really bring the memories flooding back a drop leaf table. My brother and I use to eat on one of those for every meal until we moved into a bigger house after my first sister was born. At breakfast time, the leaf was down (you don't need a lot of room to eat when you only have a bowl of oatmeal or cereal), and we'd get yelled at for playing with it....I mean, come on...when you're a kid, if something could move....it became a toy of sorts, right?

Speaking of "toys"....how would you like to win a nice Gift Certificate to buy yourself something fun? Yes, you heard me right. I'm hosting a Giveaway for CSNstores.com and they have a ton of stuff to choose from. Not just kitchen stuff (although you know that's where you'd find me) but stuff for your home, kids, garden, pets, office...etc etc. Yep, you can even find a drop leaf table over there.

Here's how it works.....US and Canada Residents (sorry for leaving the rest of you out)

Prize: $75.00 Gift Certificate for any CSNstore (they have hundreds). Shipping and handling charges are not covered with the gift certificate. But you know what? They have a ton of stuff that ships free.

Leave a comment -  Make sure that there's a way for me to get in touch with you. If I can't find you, I can't give you your prize and I'll have to give it to someone else. That would be such a bummer (well, for you, but not for the replacement winner haha). If you don't want to participate in the giveaway, but you want to leave a comment, just specify that in the comment.

It's always nice to have new followers but it's not necessary. But hey, if you don't already follow me, and you decide you'd like to....sure I'll give you an extra entry. Just leave a separate comment stating so.

I have a Peaceful Cooking Facebook Fan Page....if you wanna follow me there, sure...I'll give you another entry. Just leave a separate comment stating so.

Stumble this page and you'll get an extra 2 entries. Just leave a separate comment stating so

There are other hoops you can jump through if you'd like...the old...Twitter, Facebook Share..etc etc. Whatever you want to do, go for it. Just leave a separate comment stating what you did.

Contest ends: Sunday, October 17, 2010 at 11:59 p.m. PST. The winner will be announced 10/19/10

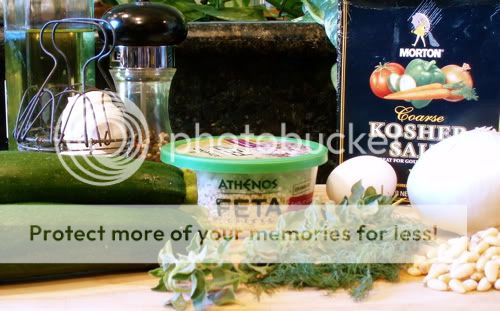
And now....let me introduce you to a new fun casserole dish. I found this recipe in my Everyday Food mini magazine. I've been finding a lot of recipes in there lately, but hey...I subscribe to the darned thing so I figure I'd better get some use of them, right?

Chicken and Spinach Casserole
Printable Version

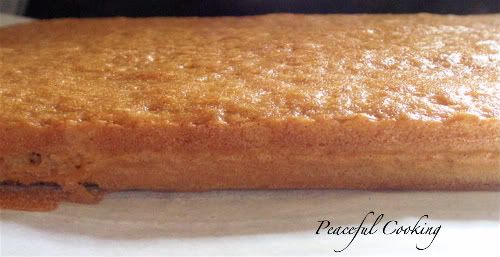
(I wish I could say that I baked that bread, but I'd be lying)


2 cups torn bread
1 tablespoon olive oil
Salt and Pepper
Oil (whatever you like to use for sauteing)
4 cups packed spinach
1 medium onion, finely chopped
1 garlic clove (or 2 or 3) minced
1/4 cup white wine (or chicken broth)
2 tablespoons all purpose flour
1 1/2 cups half and half
1/2 teaspoon lemon juice
1 cup shredded or chopped pre-cooked chicken

Preheat oven to 450' F Lightly spray or grease a 2 quart casserole dish

In a medium bowl, drizzle the bread with 1 tablespoon of olive oil. Season with a bit of salt and set aside.


In a medium sized skillet, heat 1 1/2 teaspoons of oil over medium high heat. Add the spinach, season with a bit of salt


Cook, while stirring until it's all wilted (and it looks like you hardly have anything left). Drain the spinach in a colander until it's cool enough to touch. Squeeze all the water out. Trust me...lots of water comes out of a little spinach. It always surprises me


Then give what's left of your spinach a rough chop.


Ya, that's all that's left. Doesn't look like much does it?

Clean out the pan you used for cooking the spinach and saute the onions and garlic until tender. (Actually, you can do this while the spinach is cooling off in the colander.) Add the white wine (or chicken stock) to the onions and continue cooking until almost all of it has evaporated. This will take about 5 minutes. Add the flour to the onion mixture and cook while stirring for 30 seconds.

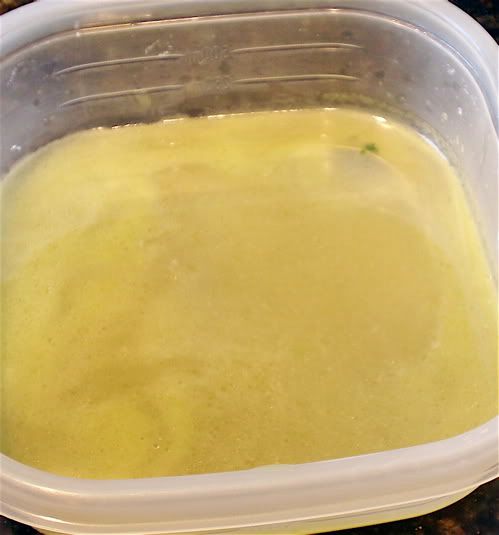
Gradually whisk in the half and half (or milk if you're slimming things down). Squeeze in a bit of fresh lemon juice (it says 1/2 teaspoon...but honesly....it can handle a bit more than that....maybe a teaspoon or two). Bring the mixture to a boil.


Remove from heat and stir in your chopped spinach and chicken.

Let me say something about the chicken. The more flavor your cooked chicken has, the more flavor your casserole will have. Roasted or rotisserie chicken is best. Of course you can use boiled or baked....but it just won't be as flavorful. That's all.

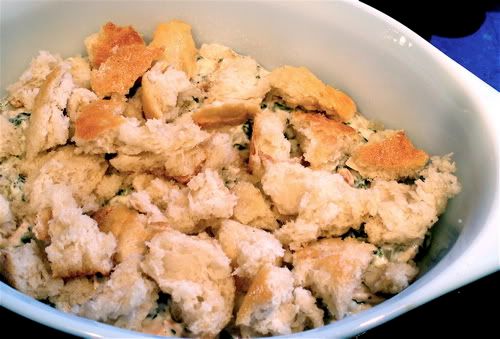
Season with salt and pepper. Pour into your prepared casserole dish. Top with the bread crumbs that you set aside earlier.


They just look so rustic, don't they? Oh...and check this casserole dish out....


Isn't that just the coolest? It was my mother in-laws. I bet she got it way back when casseroles were the rave! Back when just about every dinner table had a casserole on it at least once a week. I imagine Sally (my mother in-law) coming home after volunteering for PTA and throwing together her ingredients and within an hour, this baby graced the table and fed 2 adults and 3 kids. (of course Sir Sportsalot doesn't ever remember seeing this dish before. (men!)).

Bake until the bread is golden brown and the mixture is nice and bubble....about 10 minutes or so.


I really enjoyed this dish. It was like eating croutons on your meat and veggies (who doesn't like croutons?). I think next time I'll add a few mushrooms. Not too many because I don't want to throw off the sauce to meat / veggy ratio and end up with a dry casserole. Hmmm...then again, I could increase the sauce by half and really go to town on more stuff in this thing. See? That's what's so cool about casseroles. They are so versatile. Just change up a few things and make it your own....to represent your families tastes.

This is my entry this week for The Hearth and Soul Blog Hop.

H‘nSgirlichef

If you haven't checked it out, I highly recommend it. You are bound to find lots delicious recipes you're gonna wanna make. And maybe you'll have one you'd like to share with the hop too. How fun would that be?